

YOUR CART IS CURRENTLY EMPTY
In-store food sampling: what makes a campaign convert
Quick answer
A food sampling campaign converts when five things line up: a clear objective with one number to measure, the right position in or outside the store, a portion that shows the product as it is sold, well-briefed staff, and equipment that keeps product safe and close to hand. Decide the objective first, because it sets where you stand, how many samples you need and how you judge success. Then record the same figures every shift so you can compare stores and days.
Start with the objective and the one number you will measure
Know what drives purchase for your brand and how shoppers normally buy it. A new product usually needs trial first: people have to taste it before they will consider it. An established product with a price offer needs sales on the day.
Pick one headline measure and set it before the campaign starts:
- Trial campaigns: samples handed out to the target shopper.
- Sales campaigns: units sold during and after the session.
- Conversion to purchase: sales divided by samples. If 100 people try the product and 20 buy it, conversion is 20 ÷ 100 = 20%.
Conversion on its own can mislead. A position with fewer passers-by can show a higher conversion rate and still produce fewer new buyers. Total new buyers equals samples handed out multiplied by conversion, so judge each position on both figures.
Store sampling positions: entrance, aisle or roaming
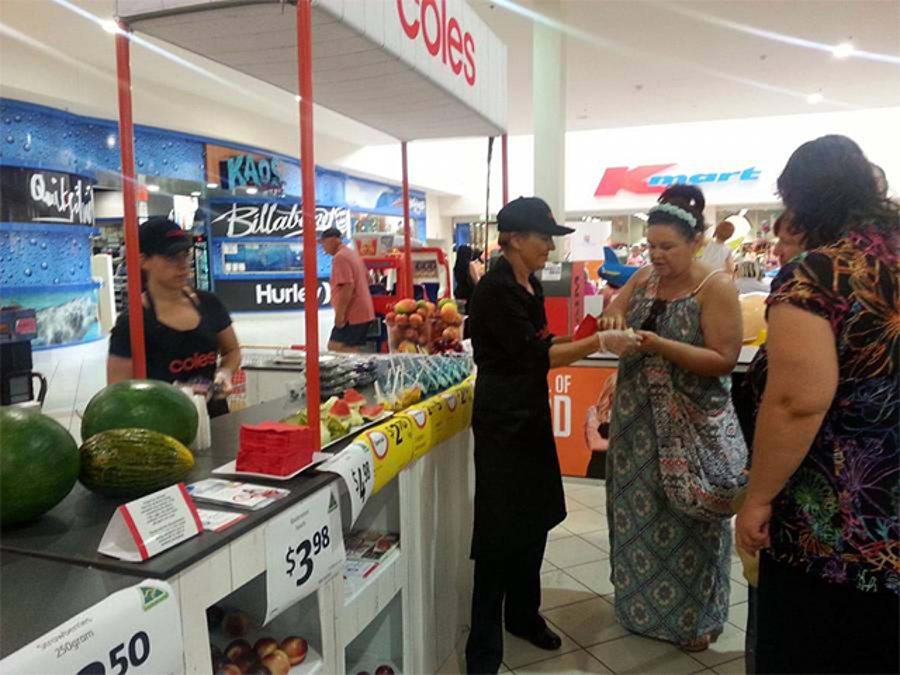
Where you stand decides who you reach. Shoppers who never walk down your aisle never see an aisle station, while an entrance position reaches everyone coming in that day.
| Position | Who you reach | Link to purchase | Watch for |
|---|---|---|---|
| Store entrance or just outside | Most of the day's shoppers | Further from the shelf, so tell people which aisle | Centre approval if you are outside the store line |
| In the aisle, at the fixture | Only shoppers in that aisle | Product within arm's reach | Lower sample volume |
| Front of store or end of aisle | Shoppers passing the main route | Good if stock is displayed beside you | Competition for promotional space |
| Roaming through the store | Shoppers you choose to approach | Staff can walk people to the shelf | Not every store allows it |
If the product sits in more than one aisle, an entrance or front-of-store position avoids tying the brand to one category. Where you can, run both positions on different days in comparable stores and compare new buyers, not conversion alone.
Book the space: position, footprint and power
The position you ask the store manager for may not be the one you get, so be specific. State the exact spot, the footprint of your station, whether you need power, and the hours you will be there. A station that runs without power has far more positions available to it.
For shopping centre concourses, transport hubs and events, approval comes from centre management, the venue operator or the event organiser, not the store. Ask each one what paperwork they need and how far ahead to book, and get the approved position in writing. If you plan to roam, confirm it is allowed before you build the plan around it.
Product and portion: what to sample and how much
- Sample the product as it is sold. Use the same variant and flavour that is on the shelf that day, and keep a pack on the station so shoppers can see what to look for.
- Keep portions small and consistent. One bite or one sip is enough to judge the taste, and it stretches stock across the whole session.
- Forecast quantities. Estimate samples per hour from a previous session or a test day, multiply by the hours booked, and add a buffer. Running out mid-session wastes the staff time you have paid for.
- Have ingredient information ready. Staff should be able to show the ingredient and allergen panel on the pack when asked. If a shopper asks about an allergy, staff should show the pack rather than answer from memory.
Food safety at a sampling station
Handle samples with the same care as any food business, and check the rules that apply with the local council or state food authority where you are sampling. Food Standards Australia New Zealand (FSANZ), the national food regulator, says potentially hazardous food "should be displayed at 5°C or below or 60°C or above". Its 2-hour/4-hour rule counts the total time food spends between 5°C and 60°C. After more than 4 hours, the food "can’t be sold and must be thrown away".
FSANZ also lists practical controls for displayed food, including protecting it with containers or wrapping, separating ready-to-eat foods from raw foods, and avoiding "topping up dishes to prevent cross contamination between batches". For temporary food premises such as stalls at events, it says that before you start "you must notify your local council". If your team hands out unpackaged, ready-to-eat, potentially hazardous food, FSANZ notes that Standard 3.2.2A (Food Safety Management Tools) may also apply.
Food sampling station kit: what to pack
The station has to be fit for purpose, look the part and satisfy the store's safety requirements, while staying easy for staff to work from. Match the equipment to how the sampling moves:
| How you sample | Equipment | Key details from our product pages |
|---|---|---|
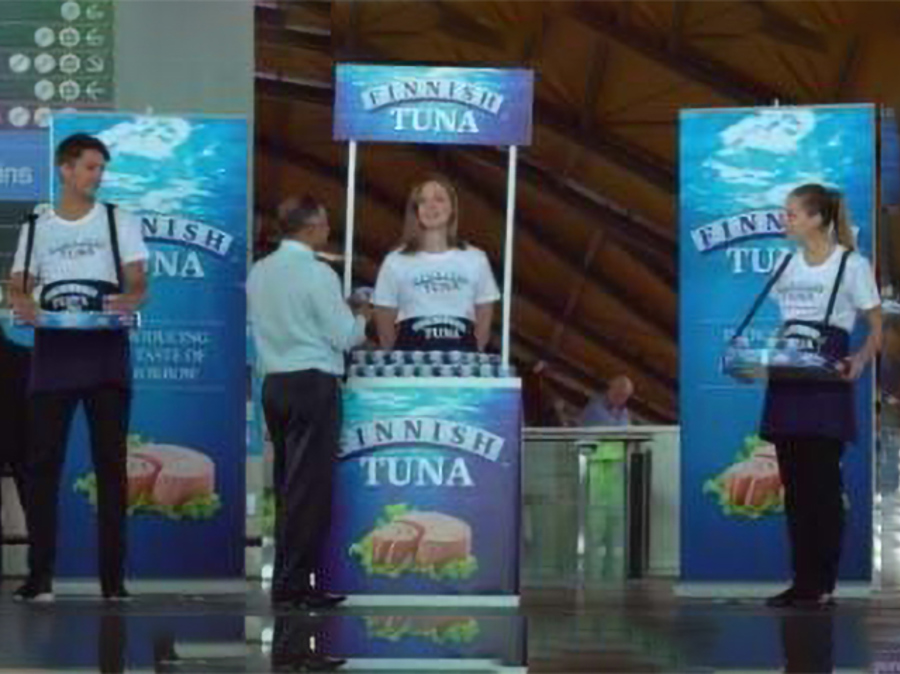
| Roaming on foot | Vendor trays | 520mm wide x 400mm front to back, 58mm-deep tray, padded shoulder straps, optional drop-in inserts made to fit the product. Tray surface suitable for direct food contact. From $136 + GST for an unprinted tray. |
| Moving across smooth floors in stores, centres and malls | Wheeled sampling bins | Insulated or non-insulated, two sizes, 910mm high, castors suited to supermarkets and shopping centres. From $919 + GST. |
| Outdoors on grass, sand or kerbs | Outdoor sampling trolley | Gel-filled puncture-proof tyres, 70-litre food-grade bin, optional clear lid and drainage tap. From $979 + GST. |
All three have a standard production lead time of 1.5 weeks from order and print-ready artwork, plus delivery time. Prices exclude GST and freight. Each can take changeable graphics, so one unit can carry the next campaign. For a fixed position, use one of our demonstration tables or counters with a branded front.
Whatever the format, pack:
- Serving cups, spoons or picks, and napkins
- Gloves, hand cleaning supplies and a thermometer for chilled or hot product
- A lidded bin for used cups and picks
- Signage with the product name, the offer and where to find it in store
- Back-up stock close by, so roaming staff can restock without leaving their area for long
Staffing: brief, script and quality checks
Staff can make or break a campaign. Brief them on the objective, the product and the exact location, and give them one line to say that names the product, the main benefit and where to find it.
- Cover the breaks so the station is never left unattended.
- Give roaming staff a restock point close to their route.
- Agree the terms with your sampling agency before day one: how many no-shows are acceptable, how sessions are checked, and how many poor checks trigger action.
- Mystery shop the sessions from time to time. A poor session can damage the brand, and the agency should share the risk.
Timing: days and hours that suit the product
Ask each store manager for its busiest trading periods and book sessions inside them. Match the product to the shopping occasion: a meal ingredient suits the hours when people shop for dinner, while a snack or drink suits steady daytime traffic. Keep the days, hours and positions consistent across stores where you can, so the results are comparable.
Turning a taste into a purchase
- Give a reason to buy today: a price offer, a bonus or a recipe card.
- Make the shelf easy to find: stand beside the stock, display stock on the station, or tell people the aisle number.
- Capture details only with consent, and only if you have a plan to use them.
What to record each shift
Record the same figures for every session so you can compare stores, positions and days:
| Measure | How to record it |
|---|---|
| Samples handed out | Count cups or portions used, or stock used divided by portion size |
| Sales during the session | Store sales data for the product, or a tally where staff can see purchases |
| Conversion to purchase | Sales ÷ samples |
| Position and hours | Exact spot, start and finish times, breaks |
| Stock issues | Time any product ran out, on the station or the shelf |
| Shopper feedback | Short notes from staff on questions, objections and reactions |
Where you can get store-level sales data, compare the weeks before and after the campaign as well as the day itself. Staff notes help explain why one session did better than another.
Next step
See our sampling and demonstrating work for the equipment we keep and build to brief, and our product sampling campaign guide for planning across formats. To talk about trays, bins or trolleys for your next campaign, call 1300 240 250.
About the author
Displays 2 Go