

YOUR CART IS CURRENTLY EMPTY
How do I assemble a pop-up counter and fit its graphic?
What is a pop-up counter?
A pop-up counter (also called a portable display counter) is a curved table base with a high-gloss, kidney-shaped top and a printed graphic wrap around the front and sides. Our Pop-Up Table is made of just five component pieces, with no spider frame or magnetic bars to fit together.
The base is 5mm hollow-core polypropylene, so it is light and easy to handle, and the whole counter weighs 12kg. It folds down into a flat pack, and the optional carry bag measures 800 x 900 x 110mm.
| Part | Size or detail |
|---|---|
| Top | 1300mm wide x 480mm deep, 18mm thick MDF with a gloss urethane finish and rounded bull-nose edge, in two pieces |
| Base | 900mm high (custom heights available) |
| Weight | 12kg |
| Carry bag (optional) | 800 x 900 x 110mm |
| Optional add-ons | Cable entry cap, extra shelf, carry bag |
How long does it take?
There is no frame to build. Unfold the base, insert the shelf and rigidity former, then put the two-piece top in place. Follow the steps below and one person can fully assemble a counter with its graphic wrap in less than three minutes.
Use the following steps to assemble a pop-up counter
1. Take the components out of their carton or bag and lay them out on a clean floor: the folded base, the shelf, the rigidity former and the two halves of the top.
2. Stand the base up and unfold it into its curved shape.
3. Insert the shelf and the rigidity former into the base.
4. Put the two-piece top in place. Locate each piece over the table base, then check the two halves meet evenly in the middle.
Note: The top can support 15kg. Keep heavier stock and equipment off it.
Use the following steps to fit the graphic wrap
1. Unroll or unfold the graphic wrap. It is printed on hard-wearing banner vinyl and covers the front and both sides of the base.
2. Find the industrial-strength velcro on the back of the wrap and the matching velcro on the base.
3. Starting at one side, line the top edge of the wrap up with the top edge of the base and press the velcro together. Work around the front to the other side, smoothing the wrap as you go so it sits taut with no wrinkles.
IMPORTANT: Keep the wrap level as you go. If it starts to run uphill, peel it back to the last straight point and press it on again.
4. Finally, step back and check the wrap is level, the top sits square, and nothing is lifting at the edges. That's it, you're done!
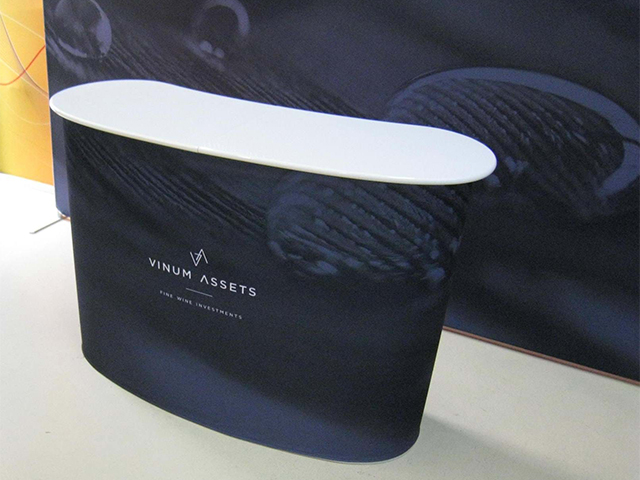
Note: Swapping campaigns? The wrap is interchangeable, so a new wrap goes on the same way. If you're sending artwork for a new wrap, check our artwork specifications first. Branding can also go on the optional header board that sits above the counter. If a vinyl wrap isn't right for the job, other branding options include permanent graphics, logo stickers or labels, and fabric graphic wraps.
Use the following steps to pack a pop-up counter away
1. Peel the graphic wrap off the base and set it aside.
2. Lift off both halves of the top.
3. Take out the rigidity former and the shelf.
4. Fold the base flat. If it is marked, wipe it with a damp cloth.
5. Finally, pack the base, top, shelf, former and wrap into the carton or the carry bag, and you're done!
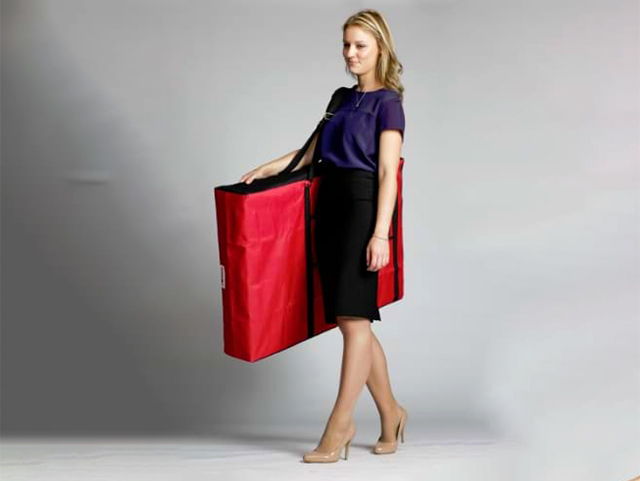
Need some help?
We're here for you
If you're needing some advice or just a helping hand, please get in touch with our team, by clicking this button. Complete the enquiry form and one of our specialists will call you back as soon as we can.