

YOUR CART IS CURRENTLY EMPTY
How do I attach graphics to shell scheme walls without breaking venue rules?
What can I use on shell scheme walls?
A shell scheme stand arrives as blank white walls, so most exhibitors want to cover them with their own graphics. The catch is that nothing you bring can damage the venue. Venues publish their rules in their exhibitor manuals, and they are firm about it:
- Perth Convention and Exhibition Centre: "Items cannot be affixed to the floors, walls, or any other part of The Centre, using nails, screws or glue. Any damage caused to The Centre will be charged directly back to the exhibitor."
- Melbourne Showgrounds (Exhibitor Services Guide): "Adhesives, glues, unapproved tapes, nails, screws, staples, and other fixing materials are strictly prohibited and must not be used on any part of the venue". Any tape that isn't on its approved list must be submitted for approval at least 7 days before your tenancy starts.
- Brisbane Convention & Exhibition Centre: "Adhesive stickers, signs, graphics, posters or other items may not be used on BCEC floor surfaces, walls or glazing."
The shell scheme walls themselves are part of your stand package, and your show's exhibitor manual sets out what you may fix to them. Rules differ from venue to venue and show to show, so read it before you print anything. Even hook-and-loop isn't allowed everywhere: one 2026 show allows Velcro on its shell scheme walls, while another bans it.
Why use hook-and-loop backed graphics?
On a carpeted shell scheme wall, hook-and-loop fastening needs no nails, screws, glue or tape on the wall. The hook side on the back of the graphic grips the carpeted finish, so the graphic presses on and peels off again.
Our Graphics 2 Go wall graphics work this way. Industrial-strength hook-and-loop adhesive is applied to the back of each panel for carpeted exhibition walls. For smooth walls, they come with mounting blocks that have adhesive on one side and hook-and-loop fastener on the other. You can choose one-piece fabric with no seams, or folding laminated panels in 1m wide sections.
Use the following steps to attach graphics to shell scheme walls
1. Check your exhibitor manual. Find out whether your walls have a carpeted or smooth finish, and what fixings the show allows on them, including whether hook-and-loop is allowed.
IMPORTANT: If your walls are smooth, check that the manual allows adhesive on the panels before you use mounting blocks. If it doesn't, ask the organiser what they approve.
2. Order your graphics to fit the walls. Unless you specify otherwise, Graphics 2 Go are finished at 2.35m high to suit 2.4m high Australian exhibition walls. Wall heights vary between shows, so give us the height from your manual if it's different. Panel sizes can be customised to fit almost any stand.
Note: Check where the 1m panel joins and fold cuts fall before you place logos and text. See our artwork specifications.
3. Take the graphics out of their carton or carry bag and unfold them.
4. Line up the first panel with the end of the wall and press it onto the carpeted wall.
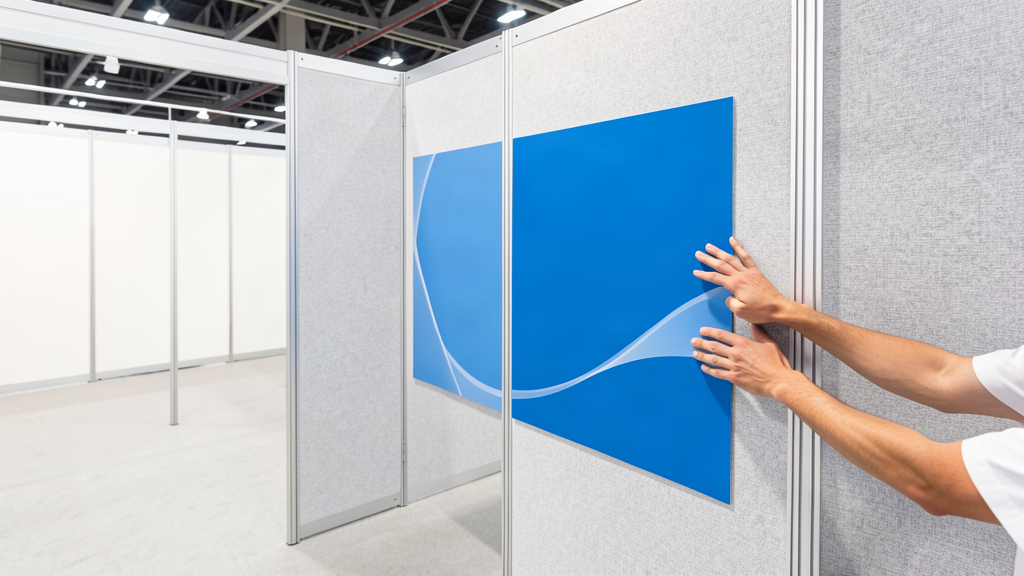
5. For smooth walls, fix the mounting blocks to the wall first, adhesive side to the wall. Then press the graphic onto the blocks.
6. Fit the next panels the same way, adjusting each one so the design lines up correctly across the joins.
7. Finally, step back and check the graphics are level and the design runs cleanly across the wall. One person should take no more than 20 minutes to fit a 3m stand with carpeted walls. You're done!
Use the following steps to take graphics down
1. Peel each panel away from the wall, starting at a top corner.
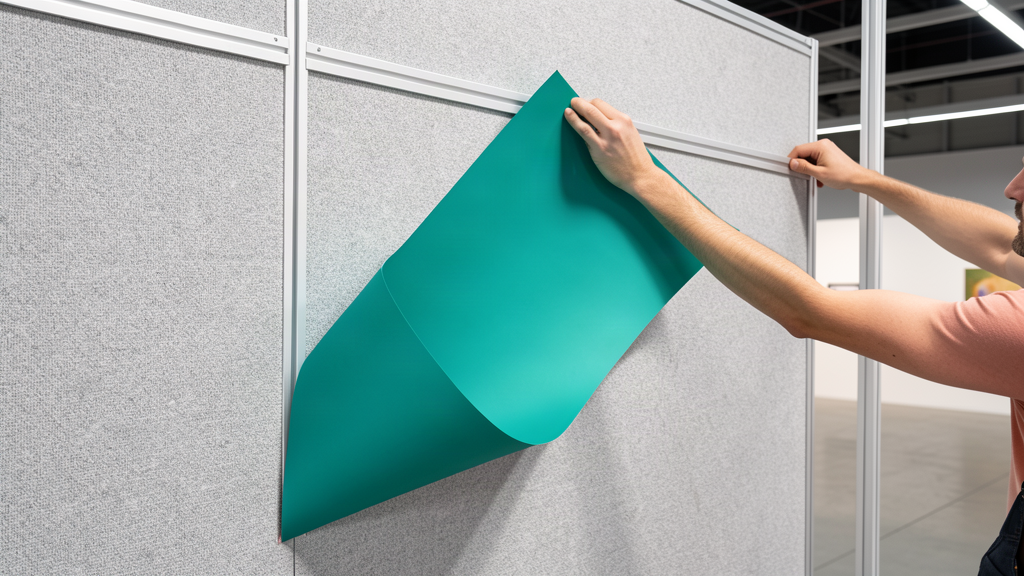
2. Fold the laminated panels in half along their slit cuts, or fold the fabric.
3. Finally, pack everything into the carry bags. A full set for a 6m x 3m stand fits in just 2 carry bags, and one set can be used over multiple shows. You're done!
If your show's walls can't be relied on, bring your own free-standing wall instead. A SuperWall can stand in front of a shell wall, so you don't depend on what the venue provides.
Need some help?
We're here for you
If you're needing some advice or just a helping hand, please get in touch with our team, by clicking this button. Complete the enquiry form and one of our specialists will call you back as soon as we can.