

YOUR CART IS CURRENTLY EMPTY
How do I make an approval mock-up of my stand artwork?
What is an approval mock-up?
An approval mock-up is a picture of your artwork shown on the stand or display it's going on, so the people signing it off can see how it will look in real life. A flat print file on a template is hard to judge. The same artwork wrapped onto a photo of the wall, counter or banner makes it obvious if the logo is too small, the message is lost on a curve, or the colours clash with the stand next door.
A mock-up is for sign-off only. It's never the file we print from.
What do I need?
You need three things: the finished artwork set up on the product's template, a clear photo of the same stand or display, and Photoshop.
Why make a mock-up before you send artwork?
In most major campaigns, several people need to approve the final output, and it's far cheaper to change a picture than a printed graphic. Production lead times start once your order is confirmed and print-ready artwork is with us, so the sooner artwork is signed off, the sooner it's on its way.
For a custom stand, our graphics and 3D design team can produce photo realistic CAD drawings, so you can see the project before any materials are ordered. For off-the-shelf displays, the steps below give you a quick mock-up in Photoshop.
Steps to make a mock-up in Photoshop
1. Finish your artwork on our template first. Templates are listed on the product pages, or ask us for the one that suits your product. Then export a flattened JPEG copy of the artwork for the mock-up, cropped to the finished (trim) size with no bleed, and keep your print file untouched.
2. Open a photo of the same stand or display, taken as square-on as you can. In the main menu, go to File > Open.
Note: Use a photo of the same product and size. A 3m wall artwork on a photo of a 2m wall will mislead your approvers.
3. Place your artwork. In the main menu, go to File > Place Embedded, select your exported artwork and click Place, then press Enter (Windows) or Return (macOS) to commit it. Photoshop places it as a Smart Object on its own layer.
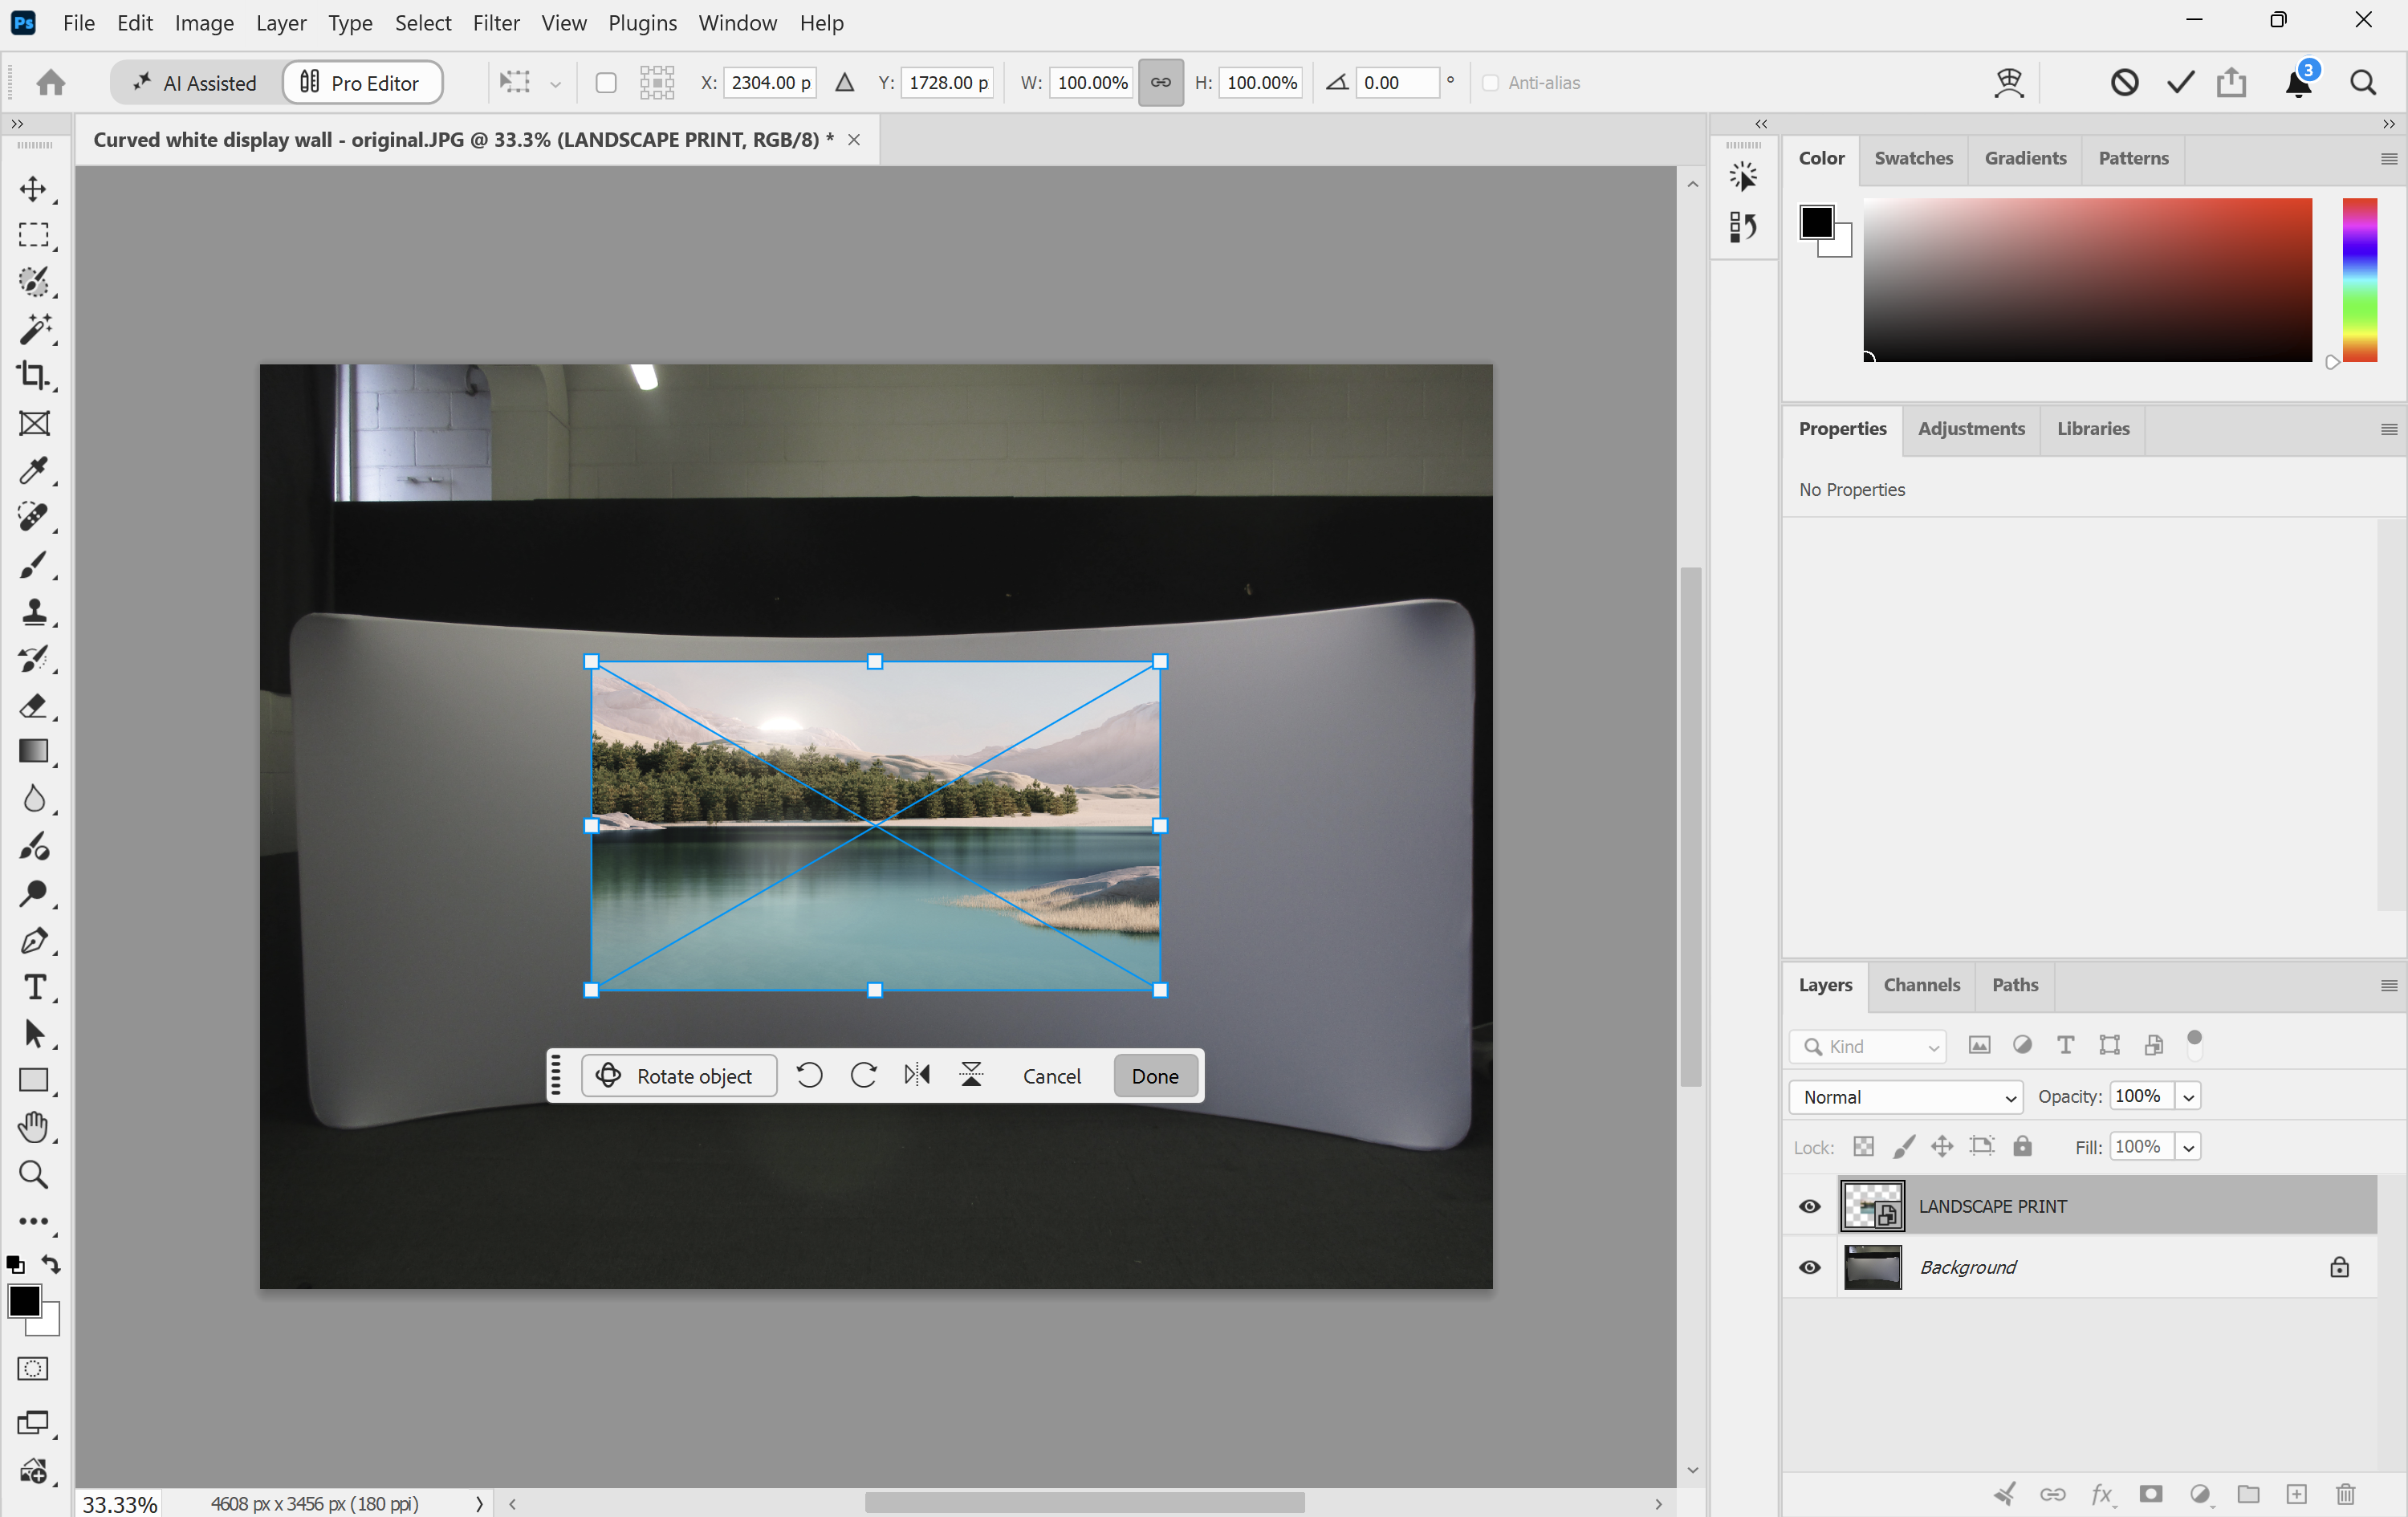
4. Fit the artwork to the graphic area. In the main menu, go to Edit > Transform > Distort, then drag each corner handle onto the matching corner of the graphic in the photo. Press Enter (Windows) or Return (macOS) to commit.
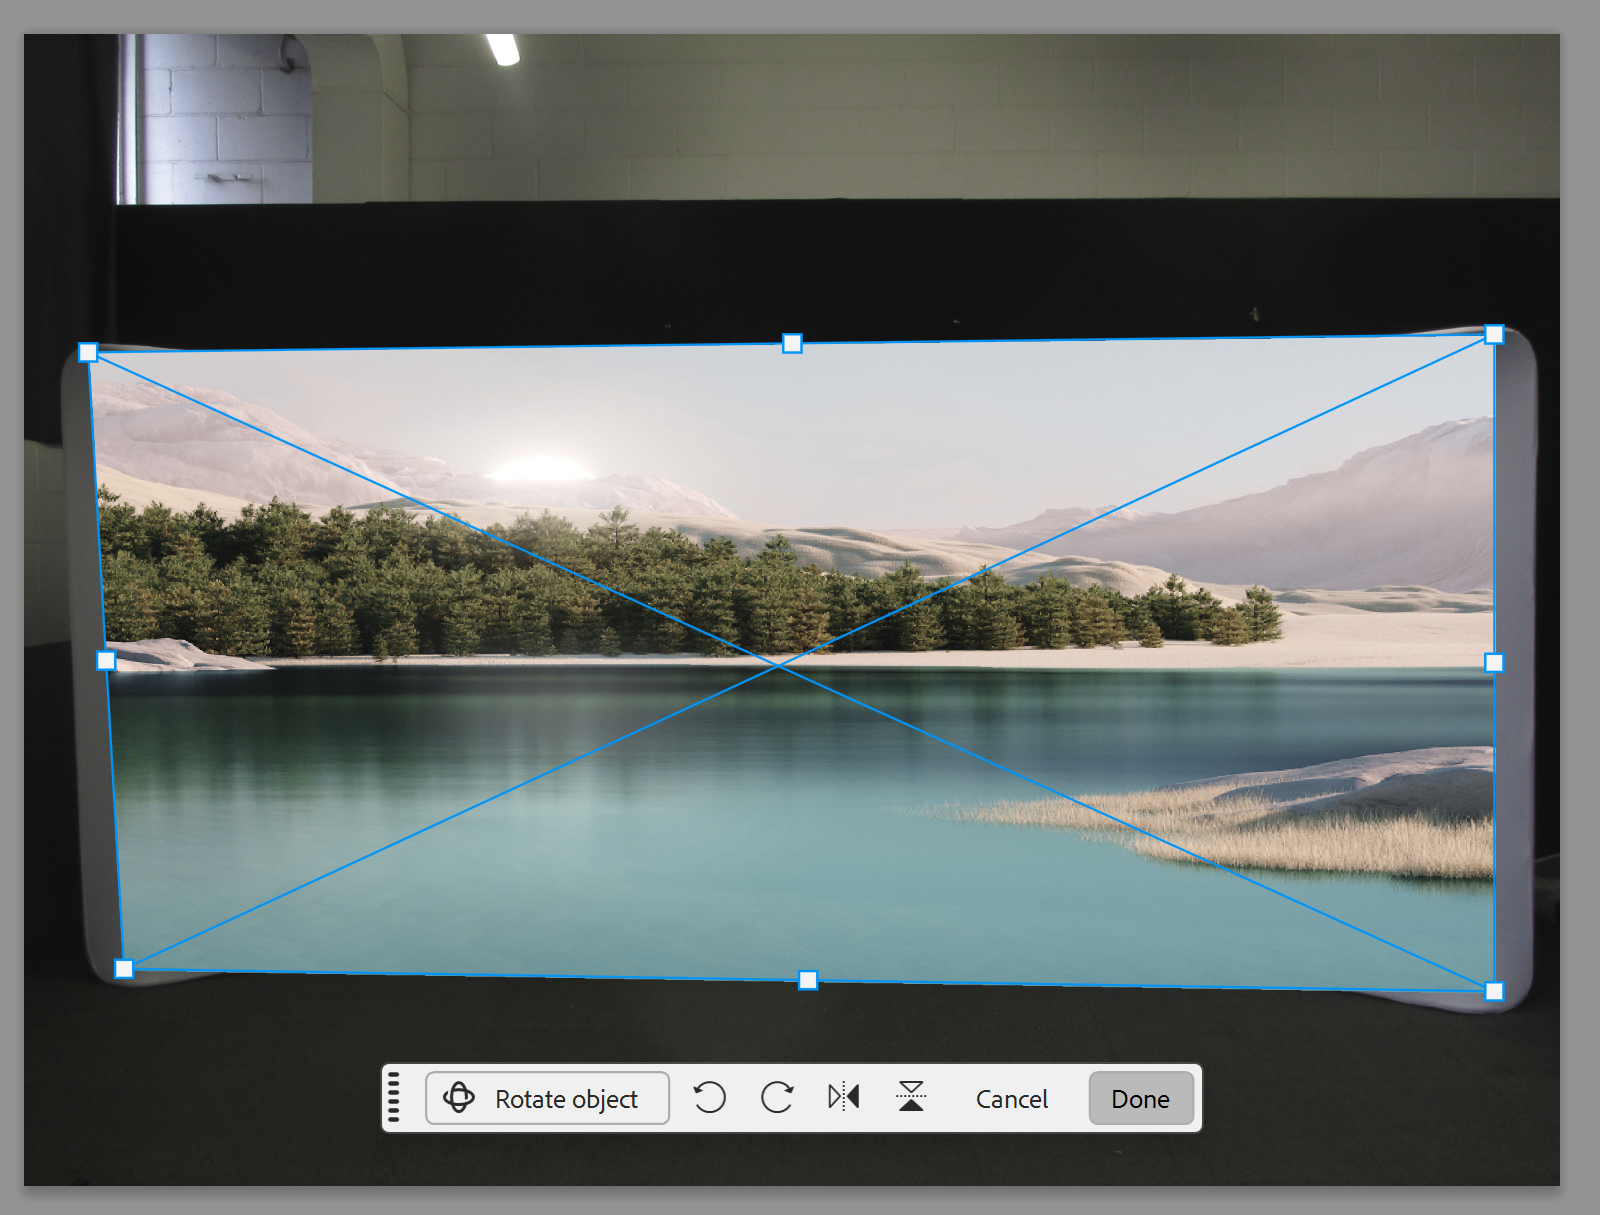
Note: On a curved wall or a counter wrap, Distort can't follow the curve. Use Edit > Transform > Warp and drag the grid to bend the artwork to the shape.
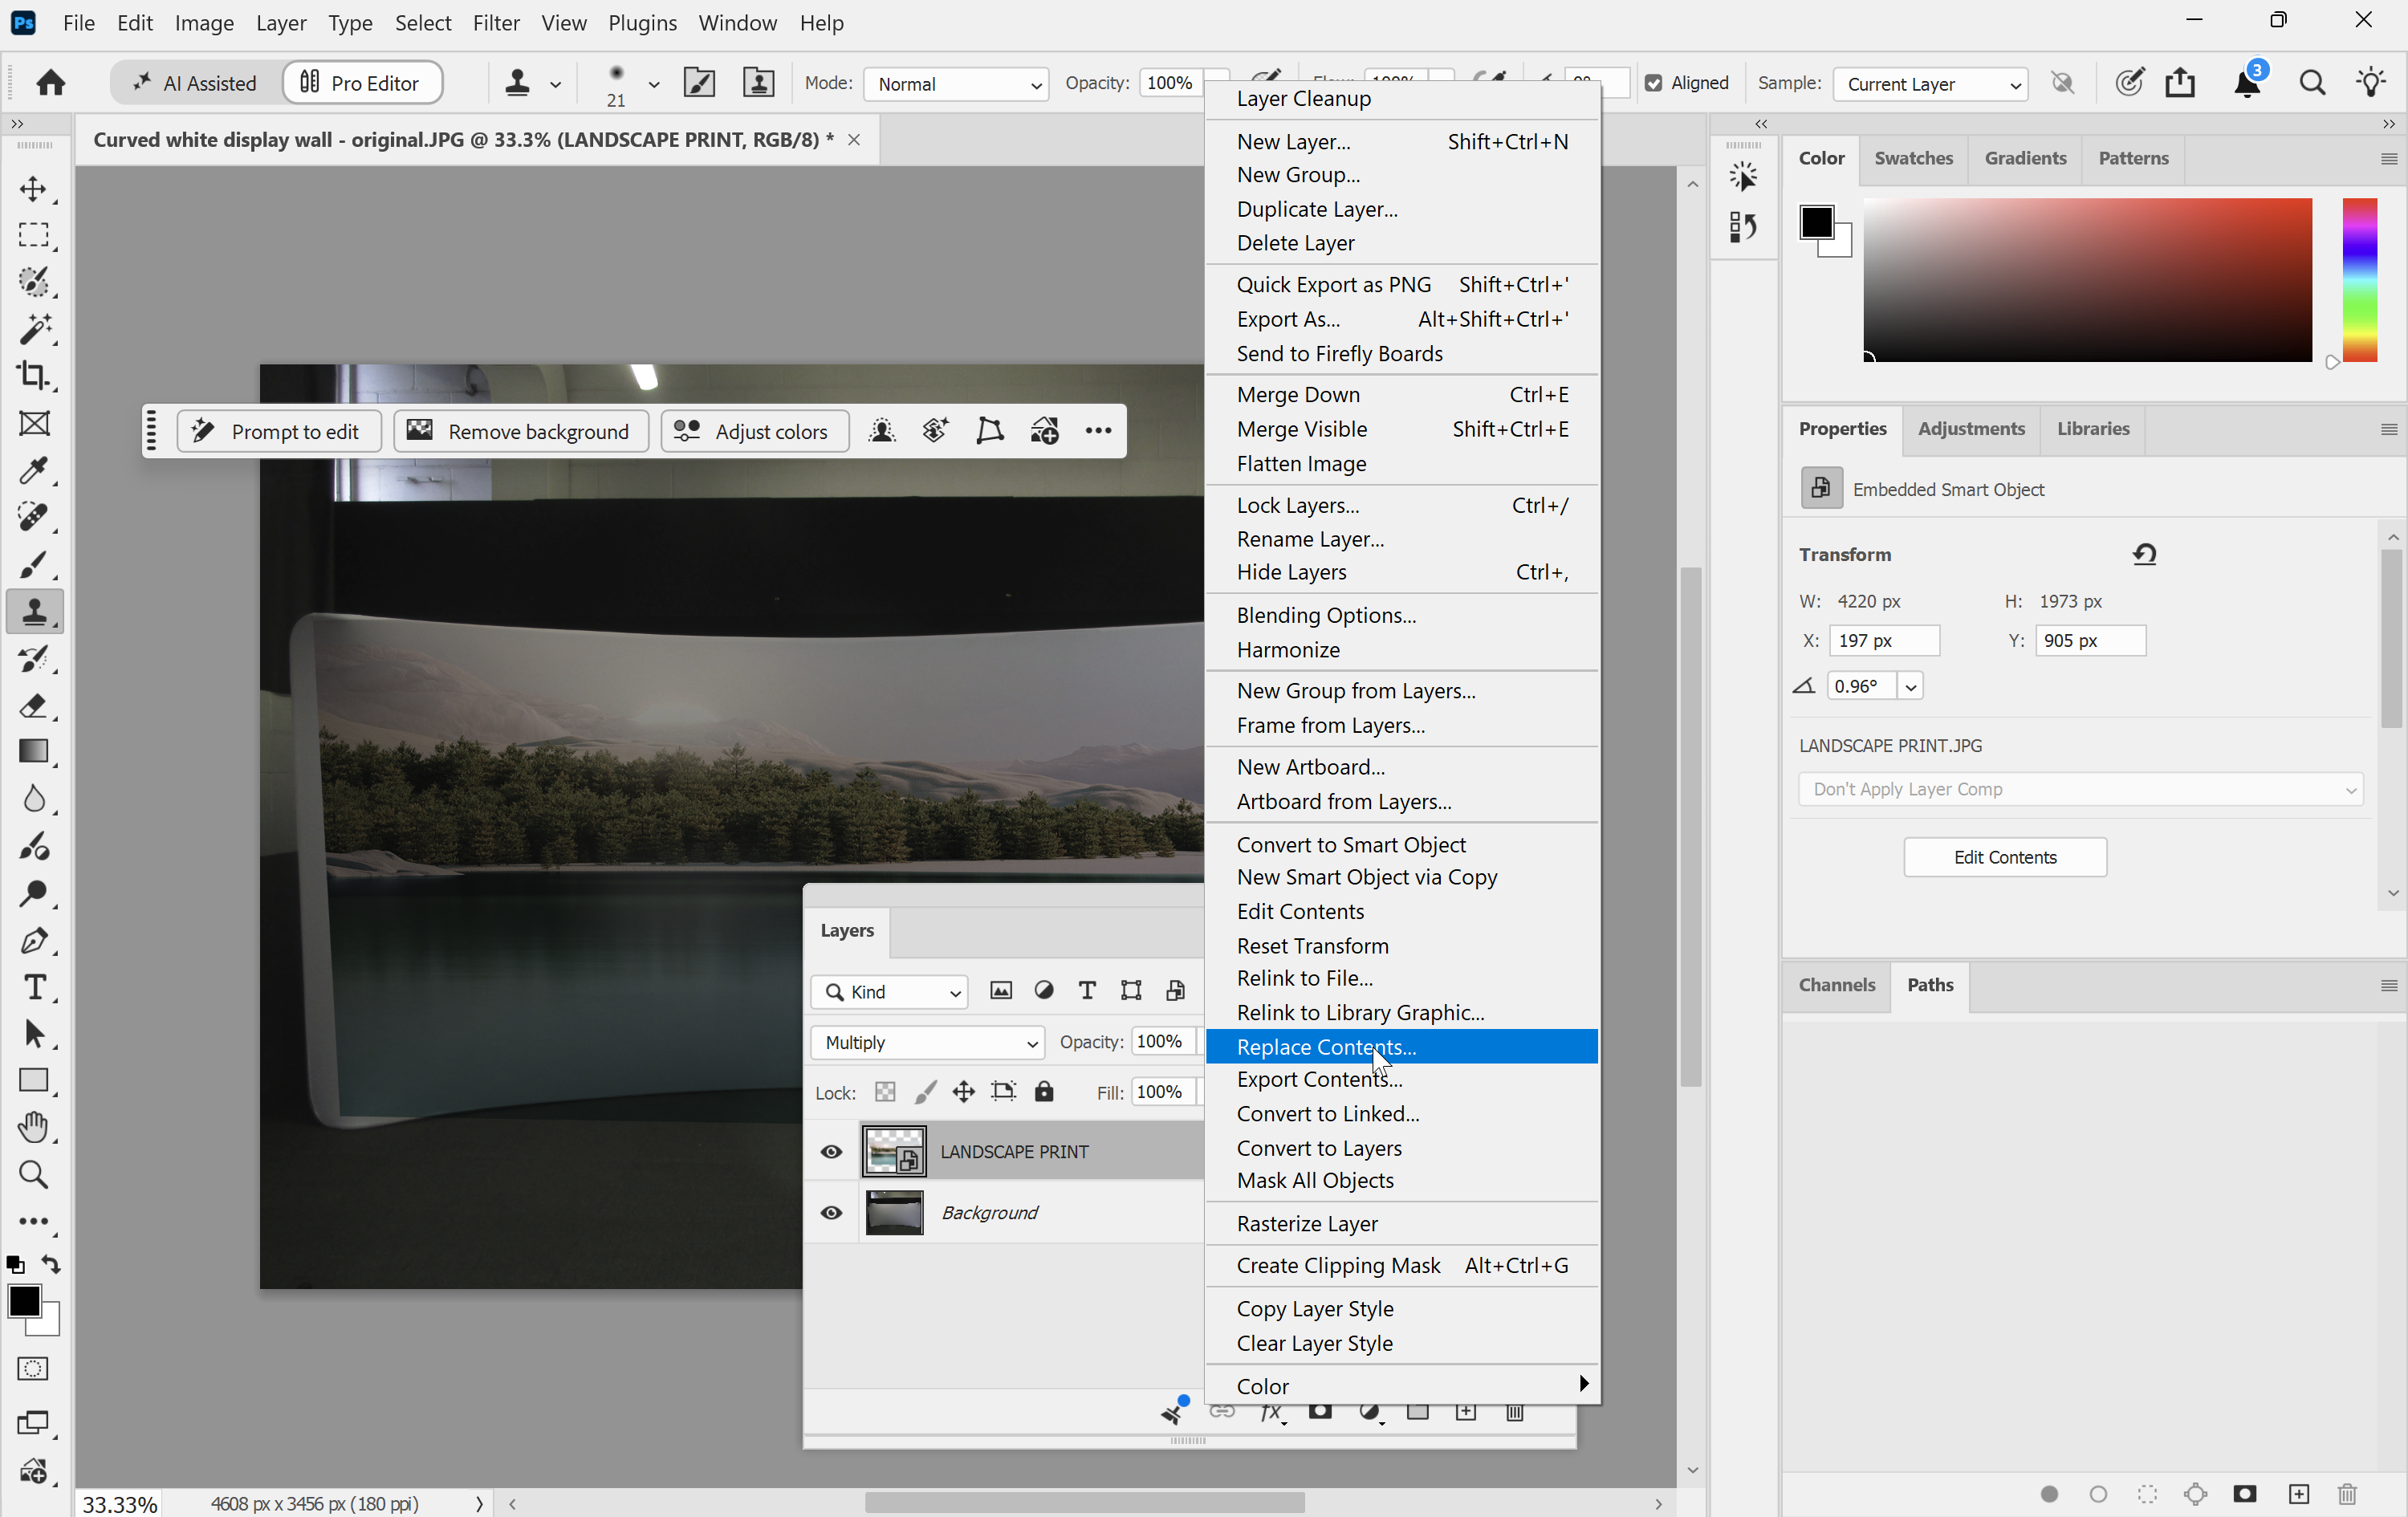
5. Let the photo's light show through. Select the artwork layer, then in the Layers panel choose Multiply from the Blend Mode pop-up menu. Multiply combines the artwork with the photo underneath, so the shadows and folds of the real graphic show through and the artwork looks printed on the surface rather than pasted on top.
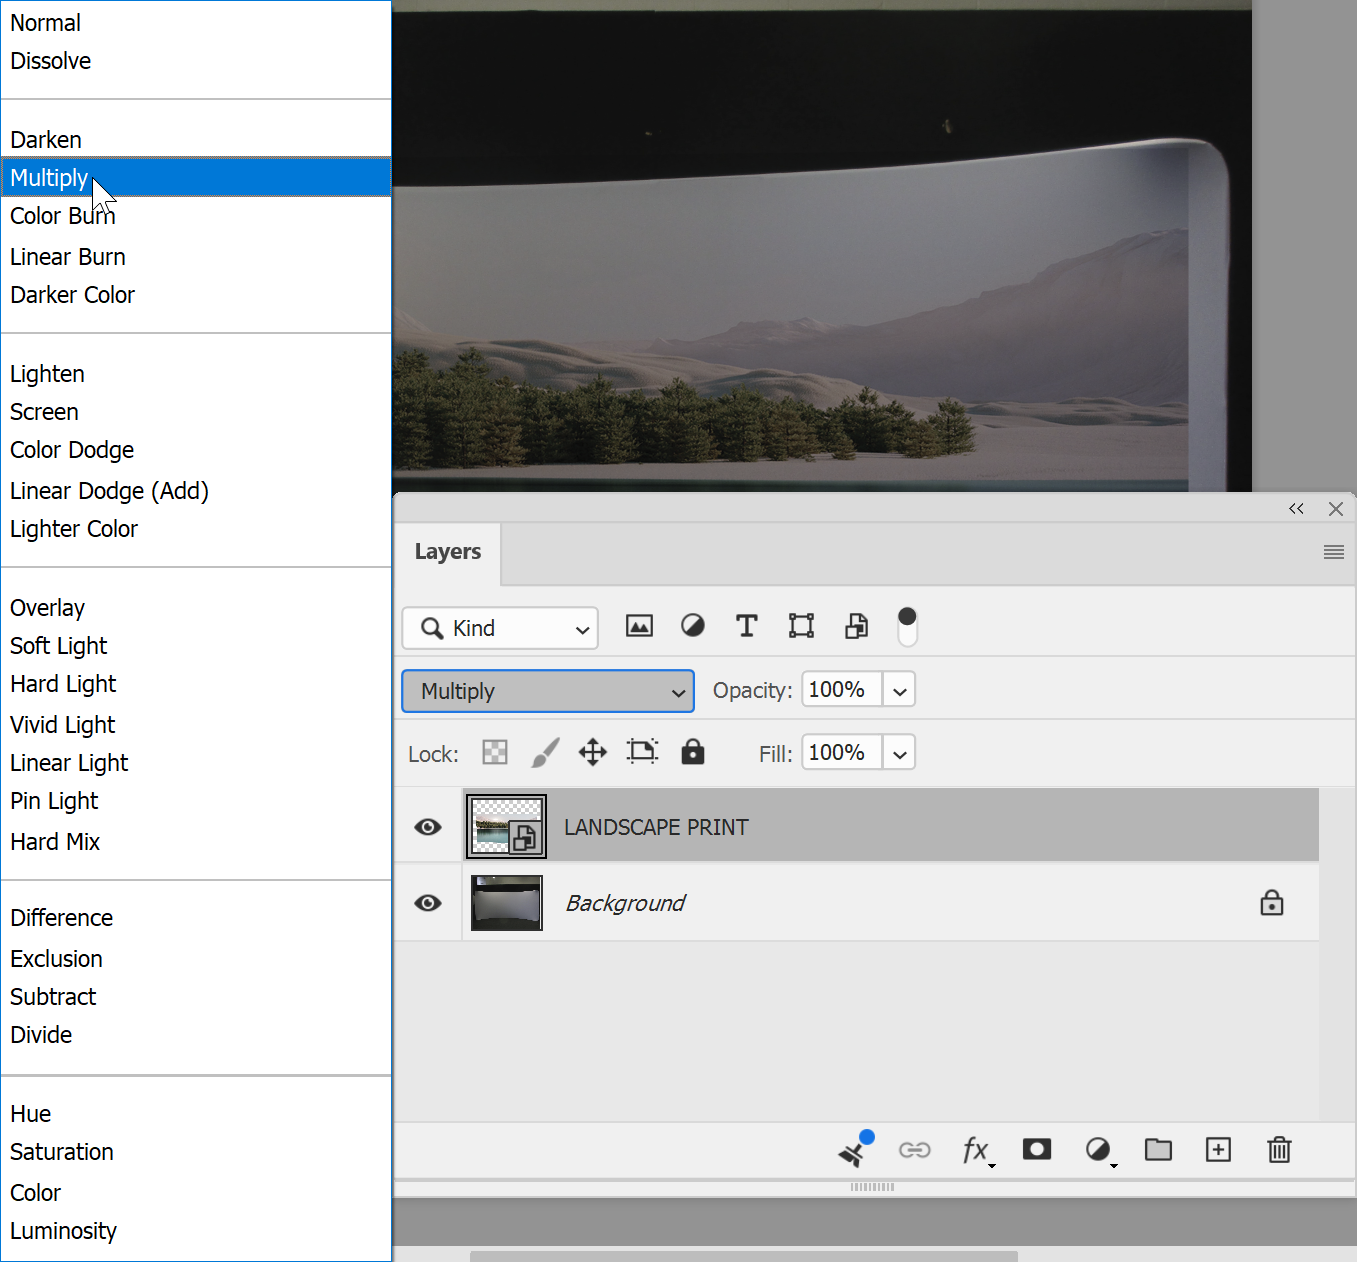
Note: Multiply always gives a darker result, so it works best on a photo of a plain white or light graphic. Lower the layer's Opacity in the Layers panel slightly if it looks heavy. A mock-up shows size and placement, not exact print colour: for brand colours, ask for a printed proof (see below).
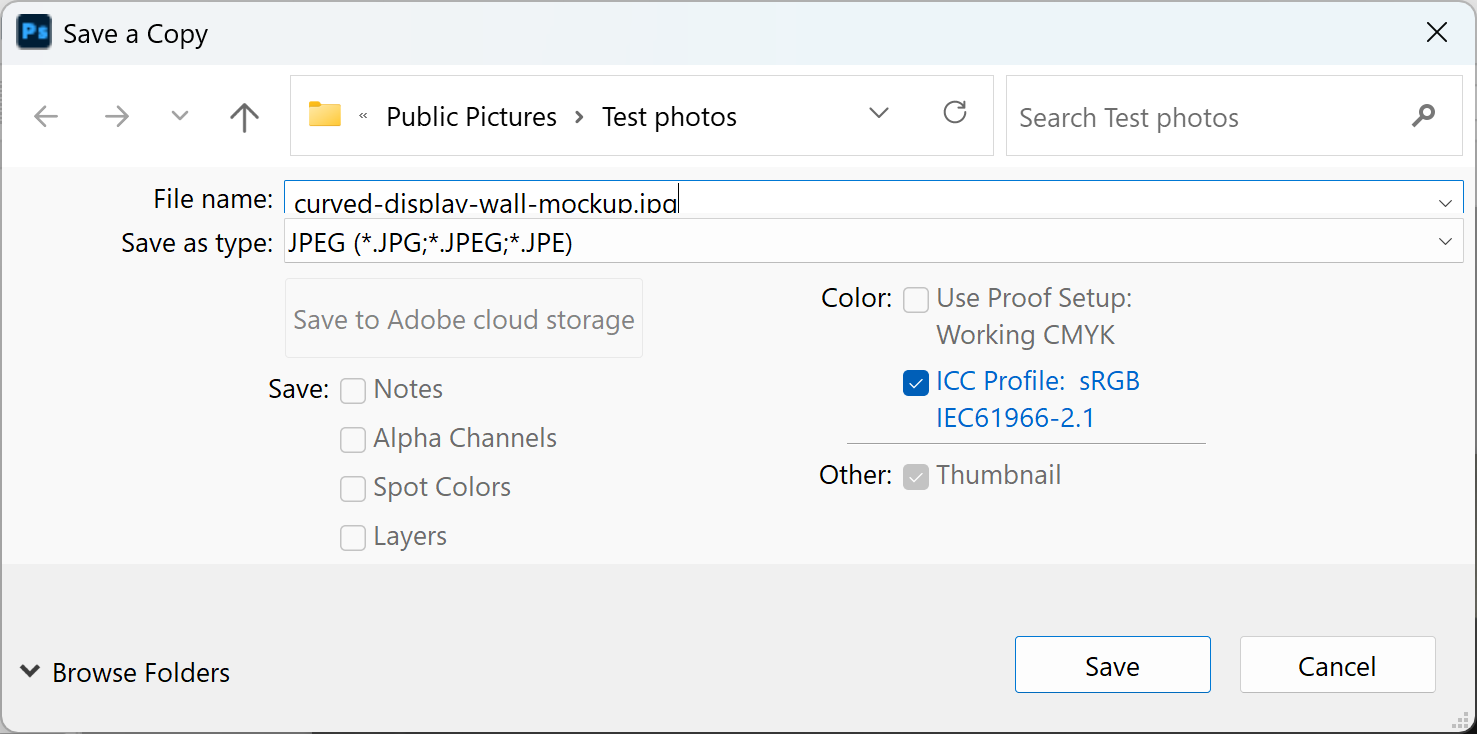
6. Save the mock-up. In the main menu, go to File > Save a Copy. In the Save a Copy dialog box, enter a file name, choose JPEG as the format and click Save. Your layered file stays open and unchanged.
7. Got a new version of the artwork? In the Layers panel, right-click the artwork layer and choose Replace Contents, then pick the new file. The new artwork drops in with the same distortion, as long as you export it at the same pixel size and resolution as the first version.
8. Finally, send the mock-up JPEG for sign-off, marked clearly as a visual only. Once it's approved, send us the print-ready PDF made from your template, and you're done!
Before you send the print file, check it against our artwork specifications. Digital proofs are available on request when you order, and printed A3 proofs are $45 ex-GST each, which is worth it for brand colours and photography.
Need some help?
We're here for you
If you're needing some advice or just a helping hand, please get in touch with our team, by clicking this button. Complete the enquiry form and one of our specialists will call you back as soon as we can.