

YOUR CART IS CURRENTLY EMPTY
How do I set up artwork for a pop-up stand?
How is pop-up stand artwork different?
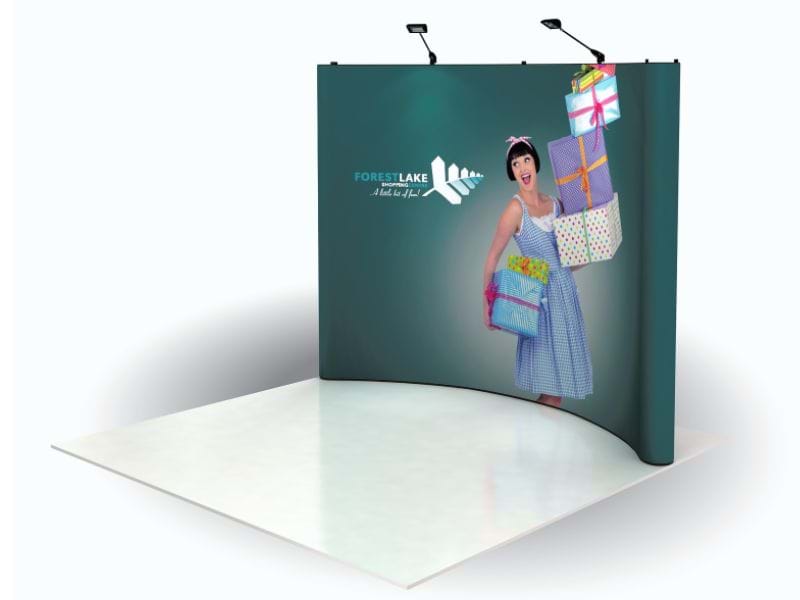
A pop-up stand graphic isn't one big print. On our Executive Pop-Up Exhibition Stand, the graphic is a set of roll-up panels that attach to the frame with magnets, and the two outside panels are the curved end caps. So your artwork is one continuous design that is printed in strips.
That means three things to plan for:
- Panel joins. Each panel meets the next at a fixed place, so text or a face that crosses a join can look broken.
- End caps. Most of each end panel wraps around the side of the stand, out of sight from the front.
- Size. The artwork is wider than the stand, because it includes the end caps.
Which size fits a 3 x 3m stand?
The Executive stand is 2.5m high. Its curved frame comes in 1.85m (4-panel), 2.5m (5-panel) and 3.2m (6-panel) widths, and the straight frame in 2m, 2.7m, 3.4m and 4.2m. On a 3m-wide stand space, the 5-panel curved (2.5m) or 5-panel straight (2.7m) fits across the back wall. Check the organiser's height limit before ordering.
The steps below use our artwork guide for the 5-panel curved wall, listed on the product page as "Executive pop-up, curved, 2.5m wide option (artwork guide titled 2.6m W x 2.25m H)". Those figures name the artwork guide, not the stand's physical height or width. Use the measurements inside the guide to prepare your print and confirm the size of the stand you're ordering with us. For any other size, ask us for the template.
What's on the template?
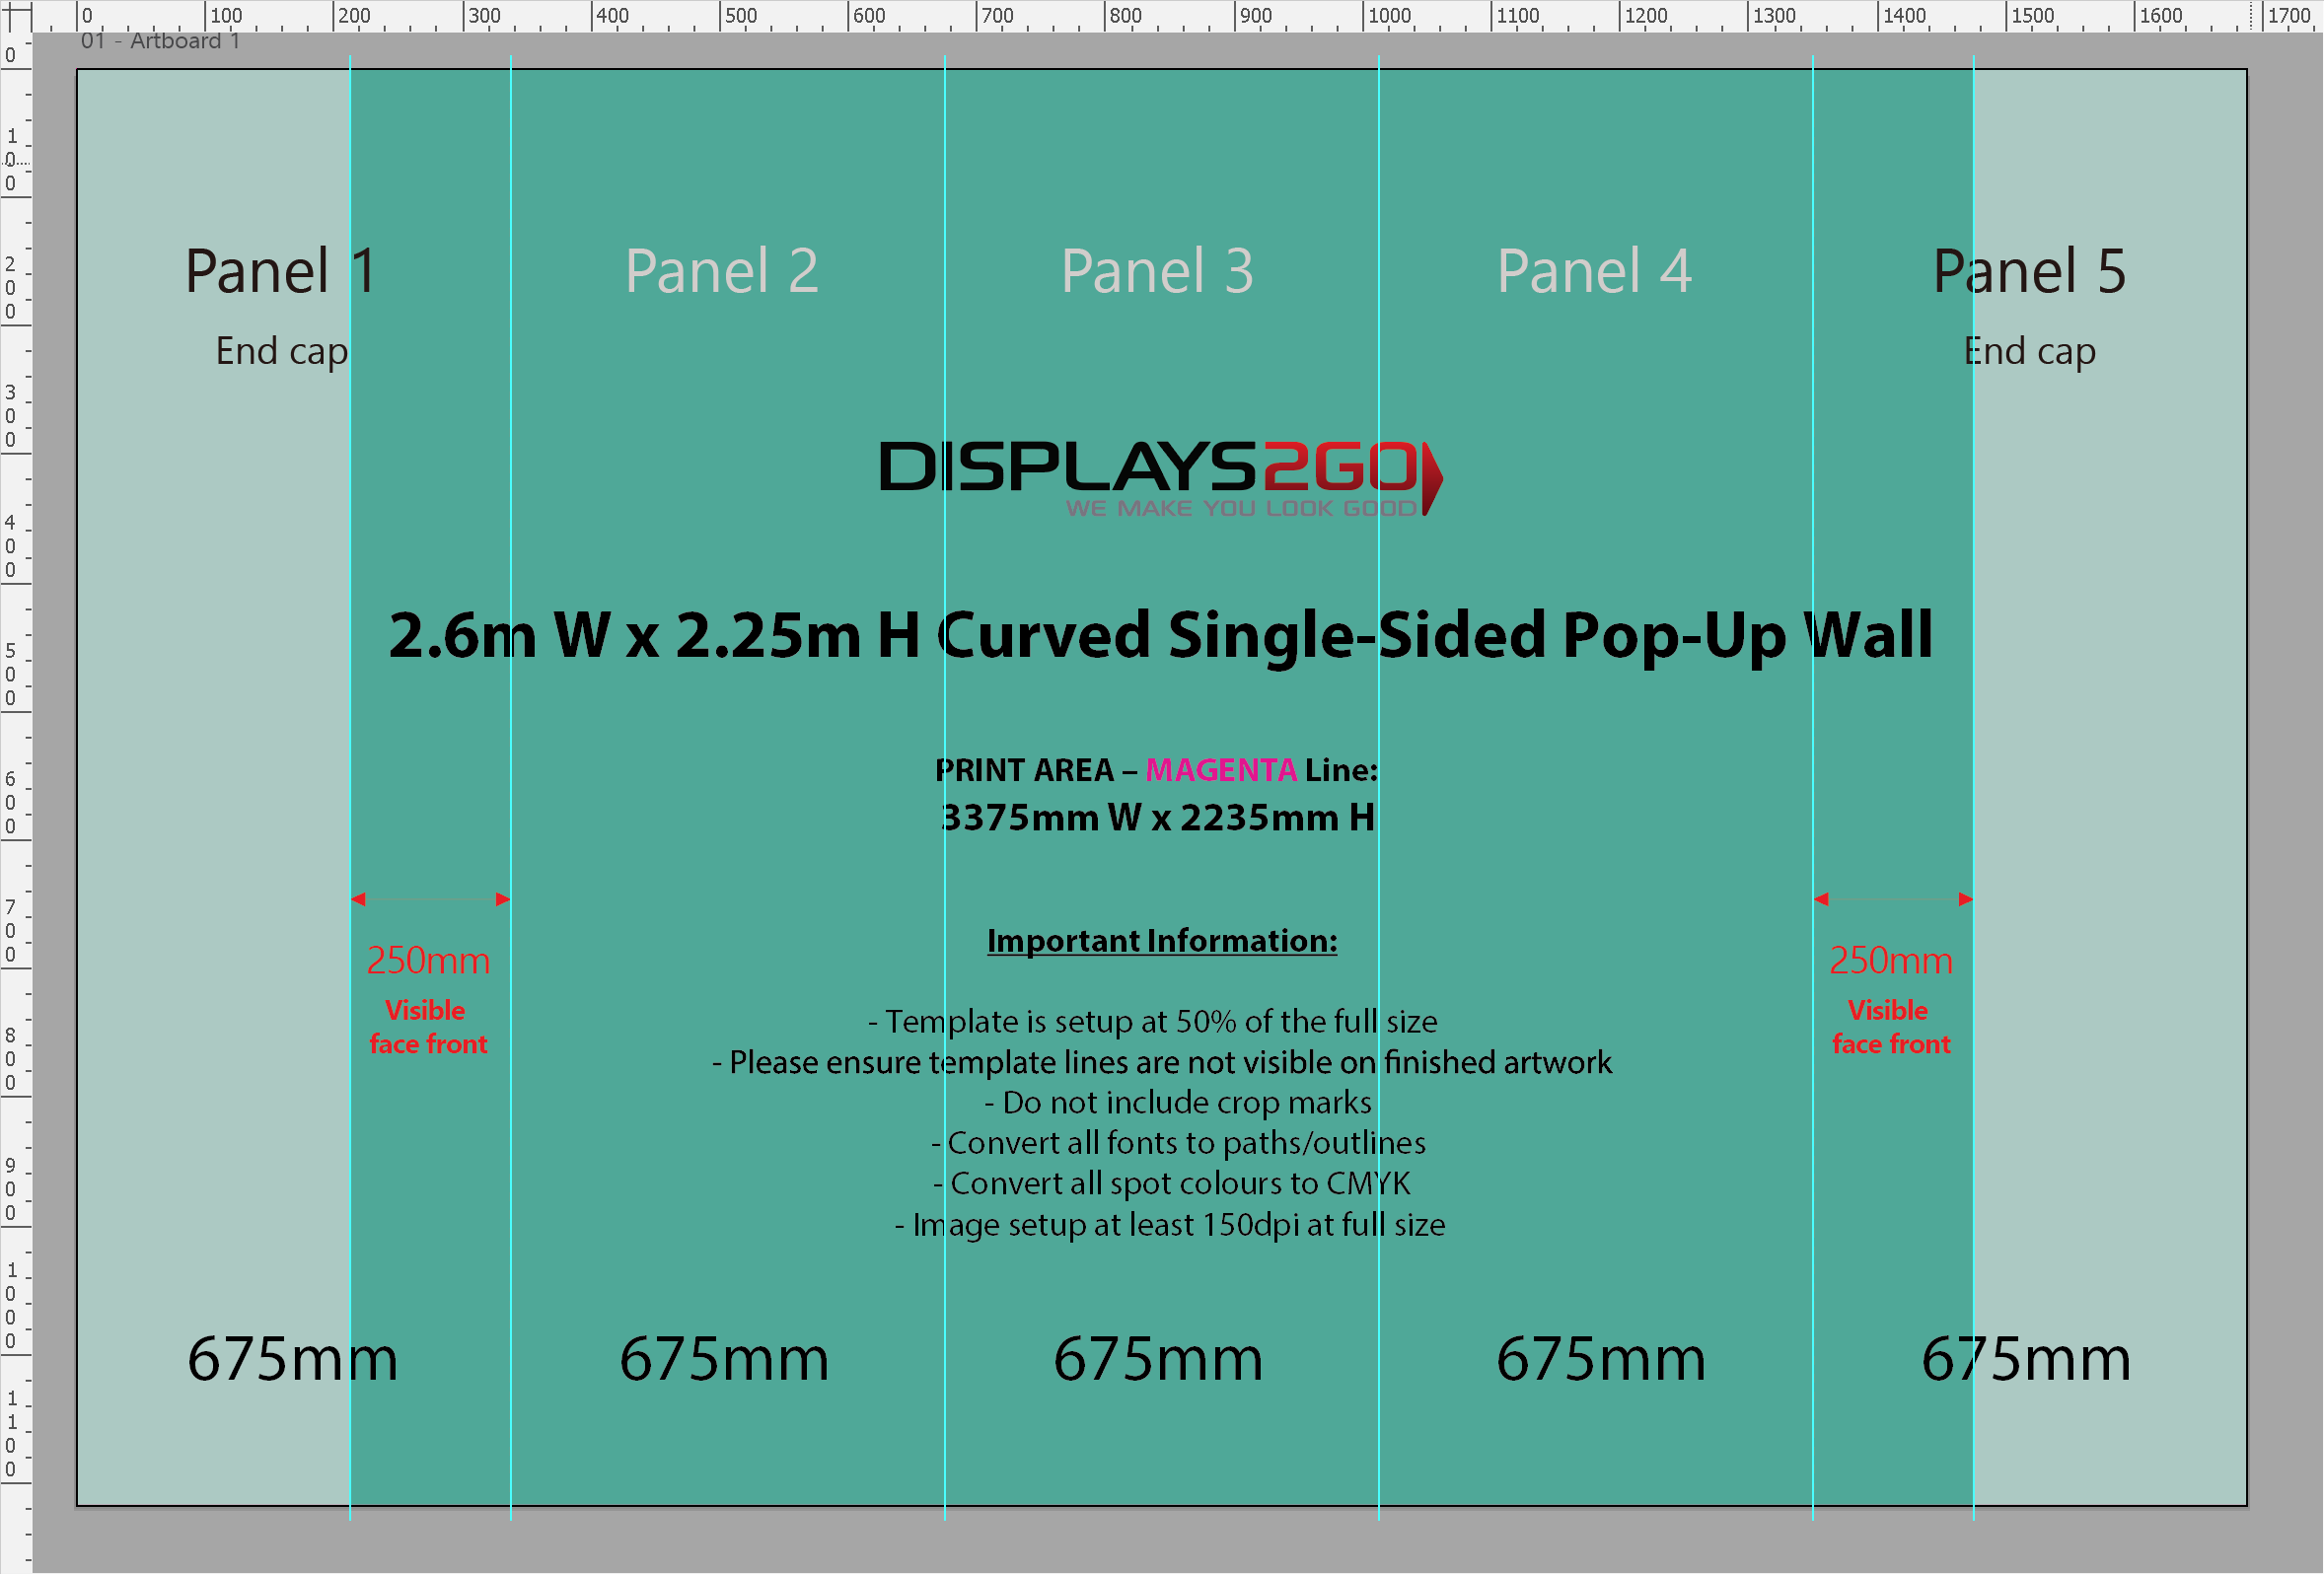
The second page of the guide is the template. It's set up at 50% of full size, and the measurements on it are full size:
- Print area (magenta line): 3375mm wide x 2235mm high.
- Five panels, each 675mm wide. Panels 1 and 5 are the end caps.
- On each end cap, only the 250mm next to the front panels is the visible face front. The outer 425mm wraps around the end of the stand.
Steps to set up pop-up stand artwork in Illustrator
1. Download the artwork guide from the product page.
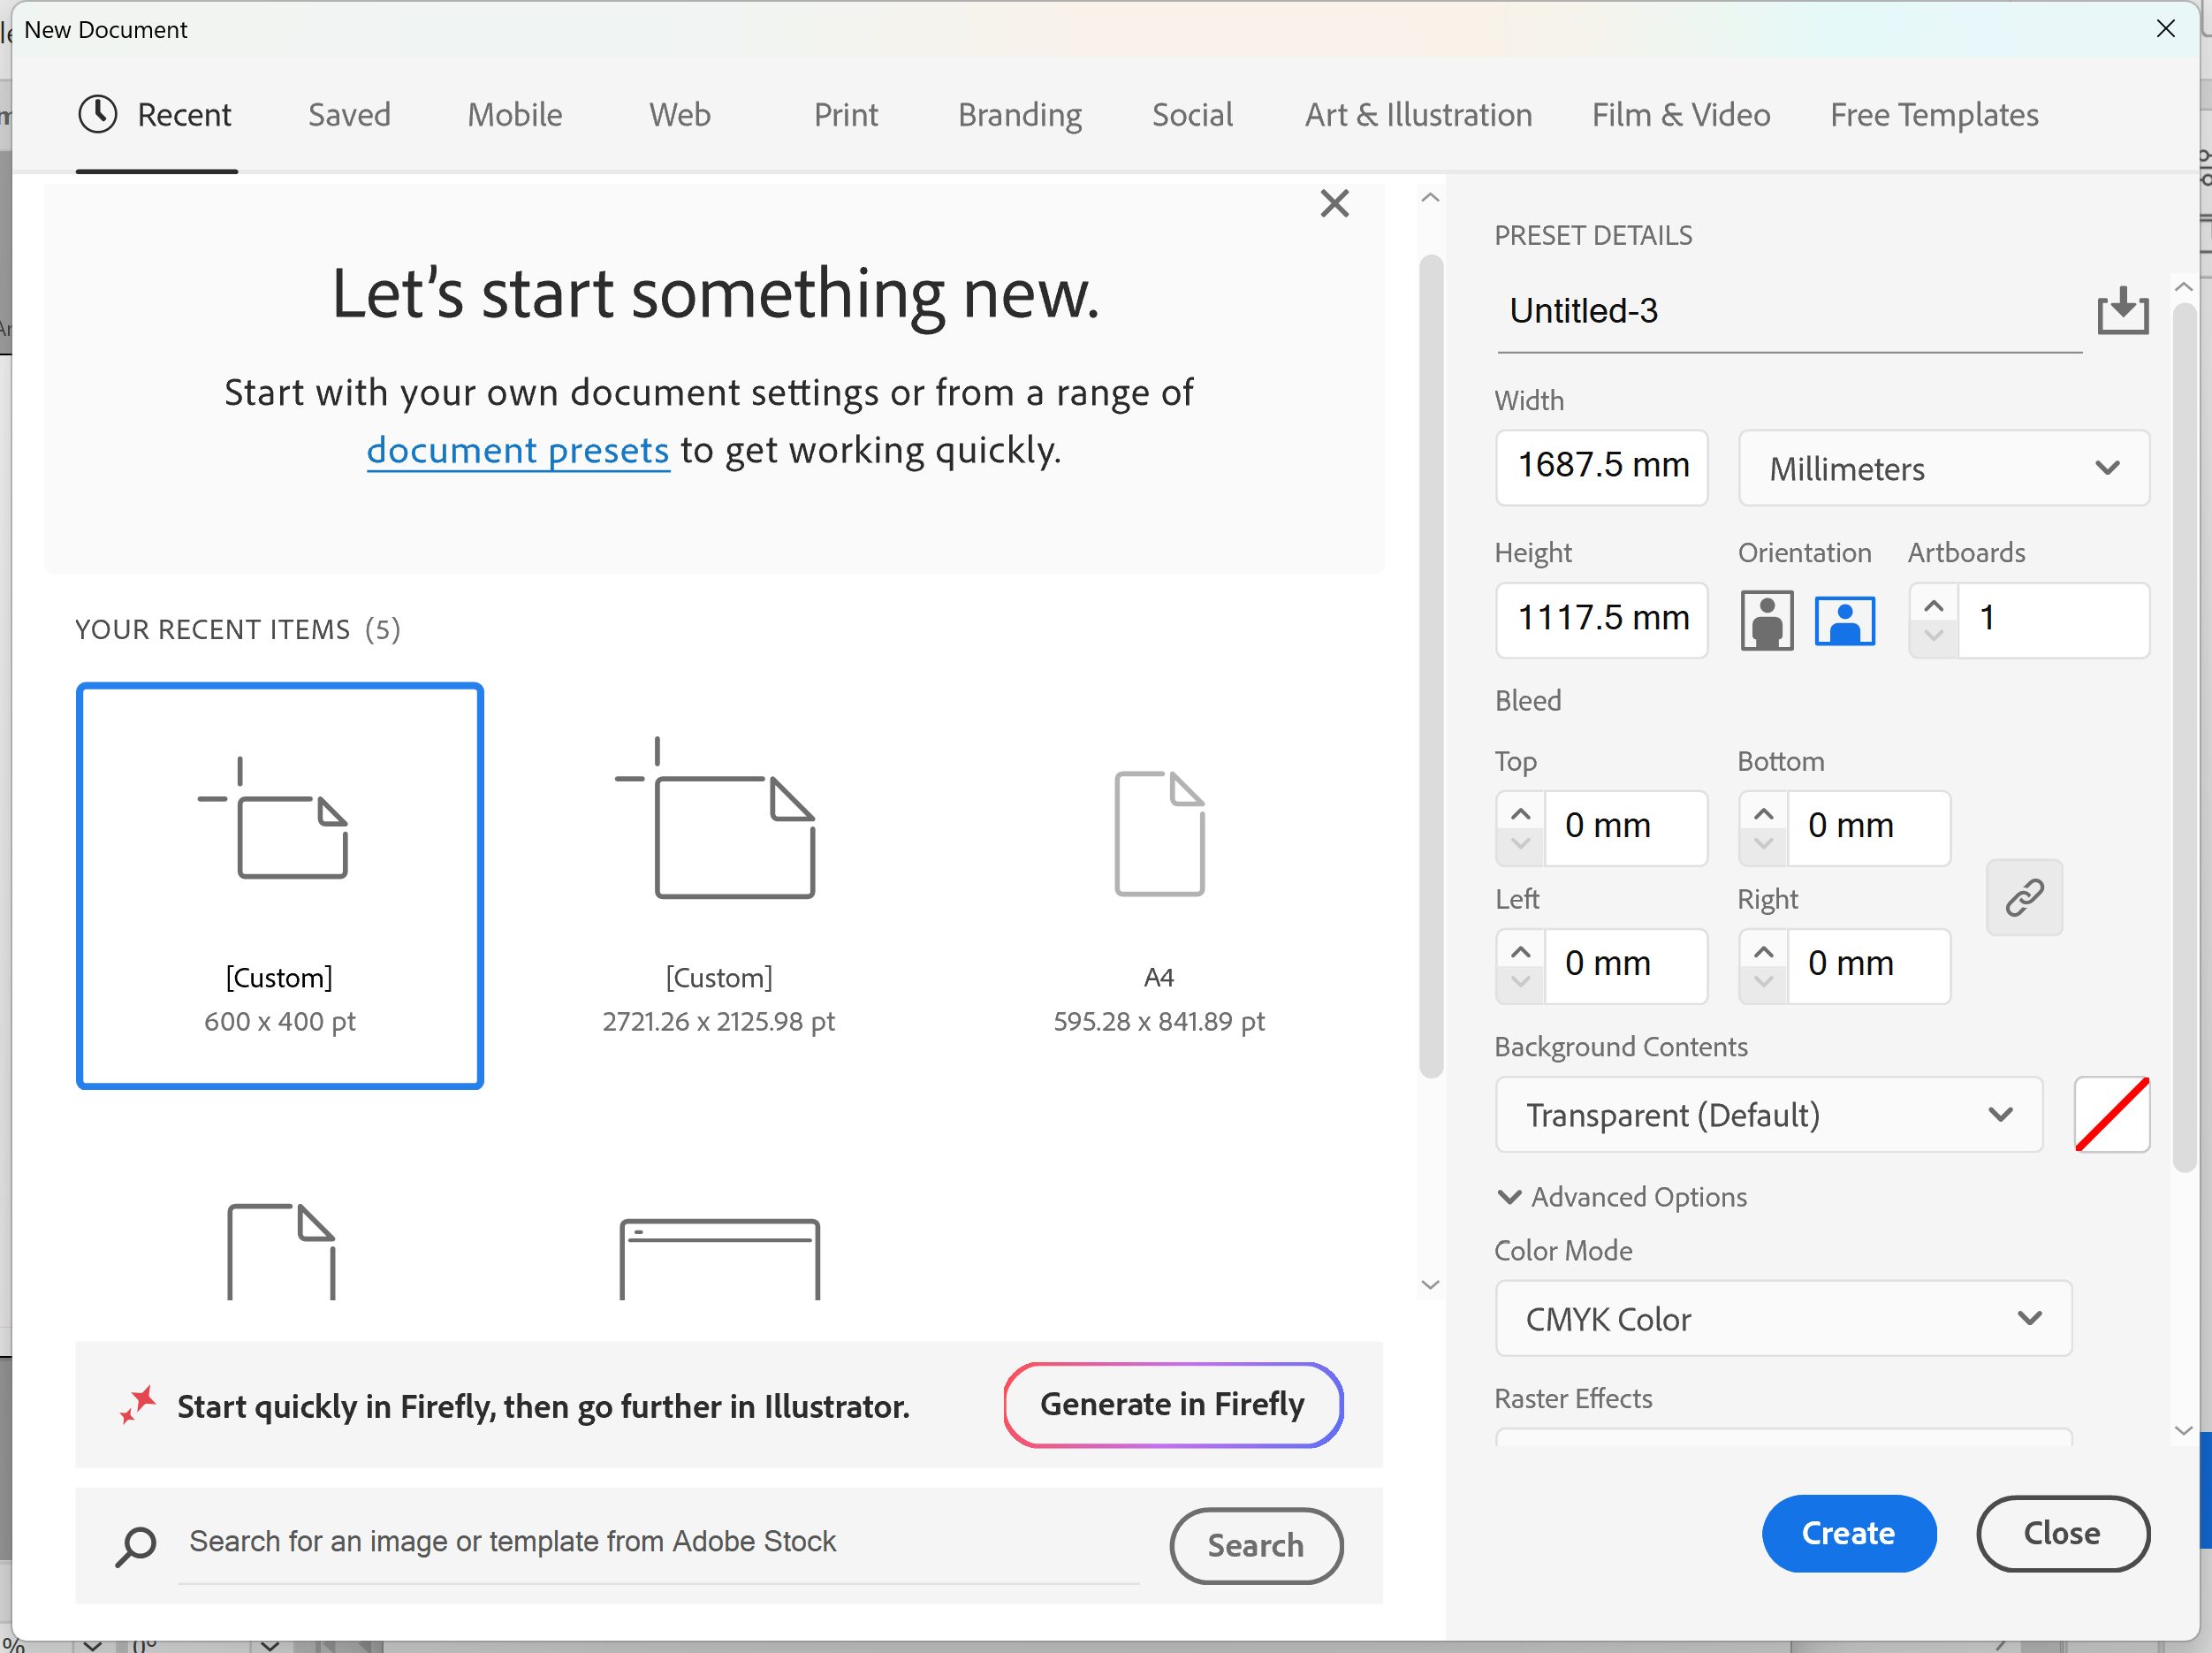
2. Create a new document at 50% of the print area. In the main menu, go to File > New. In the Preset Details pane, enter a Width of 1687.5mm and a Height of 1117.5mm, set Bleed to 0mm and, under Advanced Options, set Color Mode to CMYK Color, then click Create.
Note: No extra bleed is needed, because the template's page is the full print area.
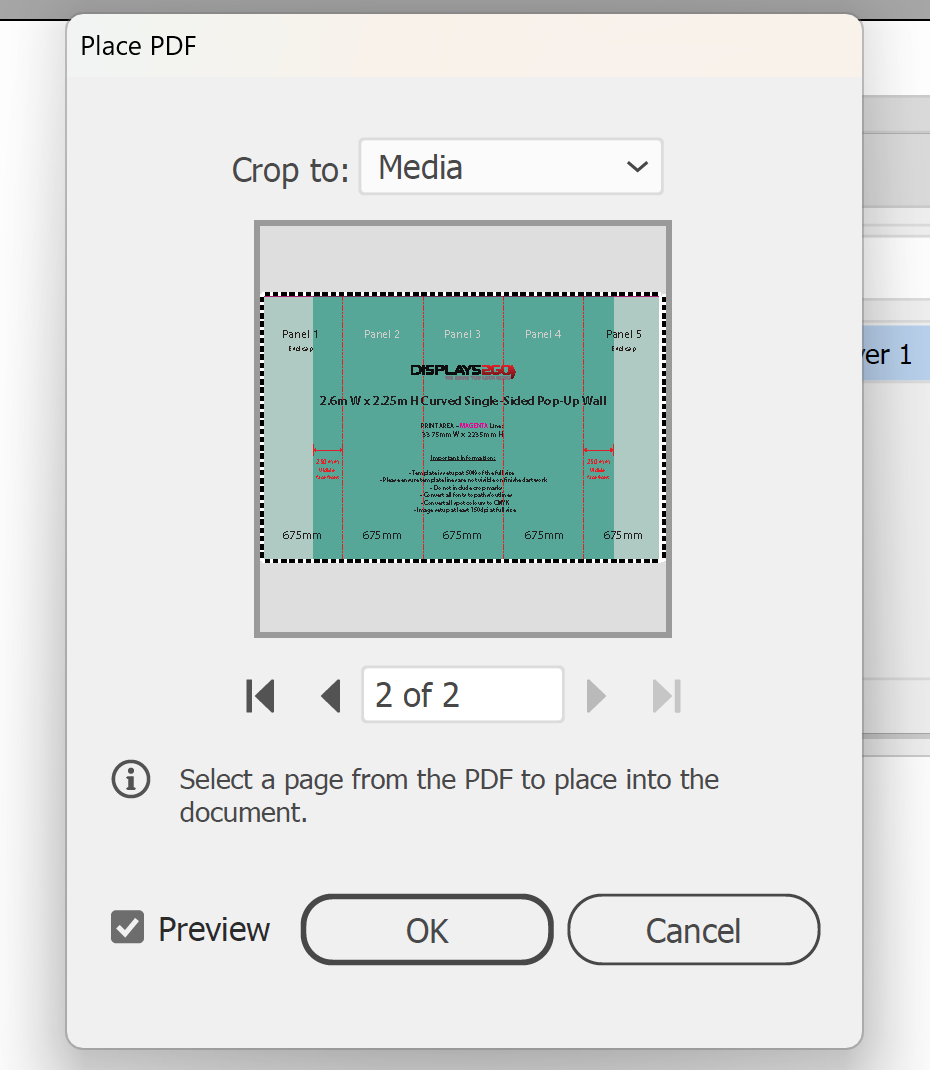
3. Place page 2 of the guide. In the main menu, go to File > Place, select Show Import Options, choose the guide and click Place. In the Place PDF dialog box, go to page 2, then click OK, click once on the artboard, and line the template up with the edges of the artboard (it's exactly the artboard size, so Align To Artboard with Horizontal and Vertical Align Center does this precisely).
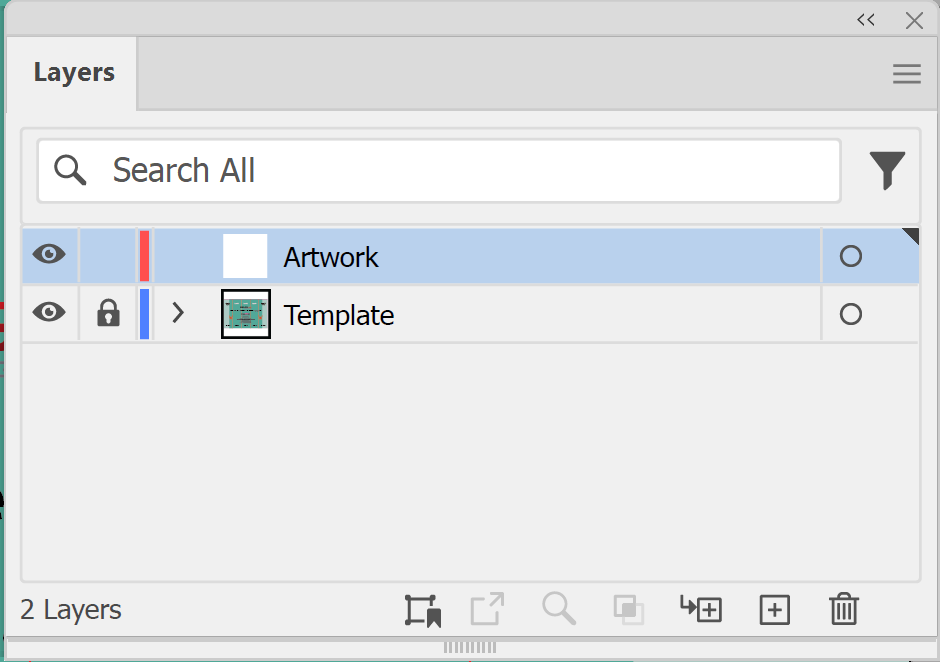
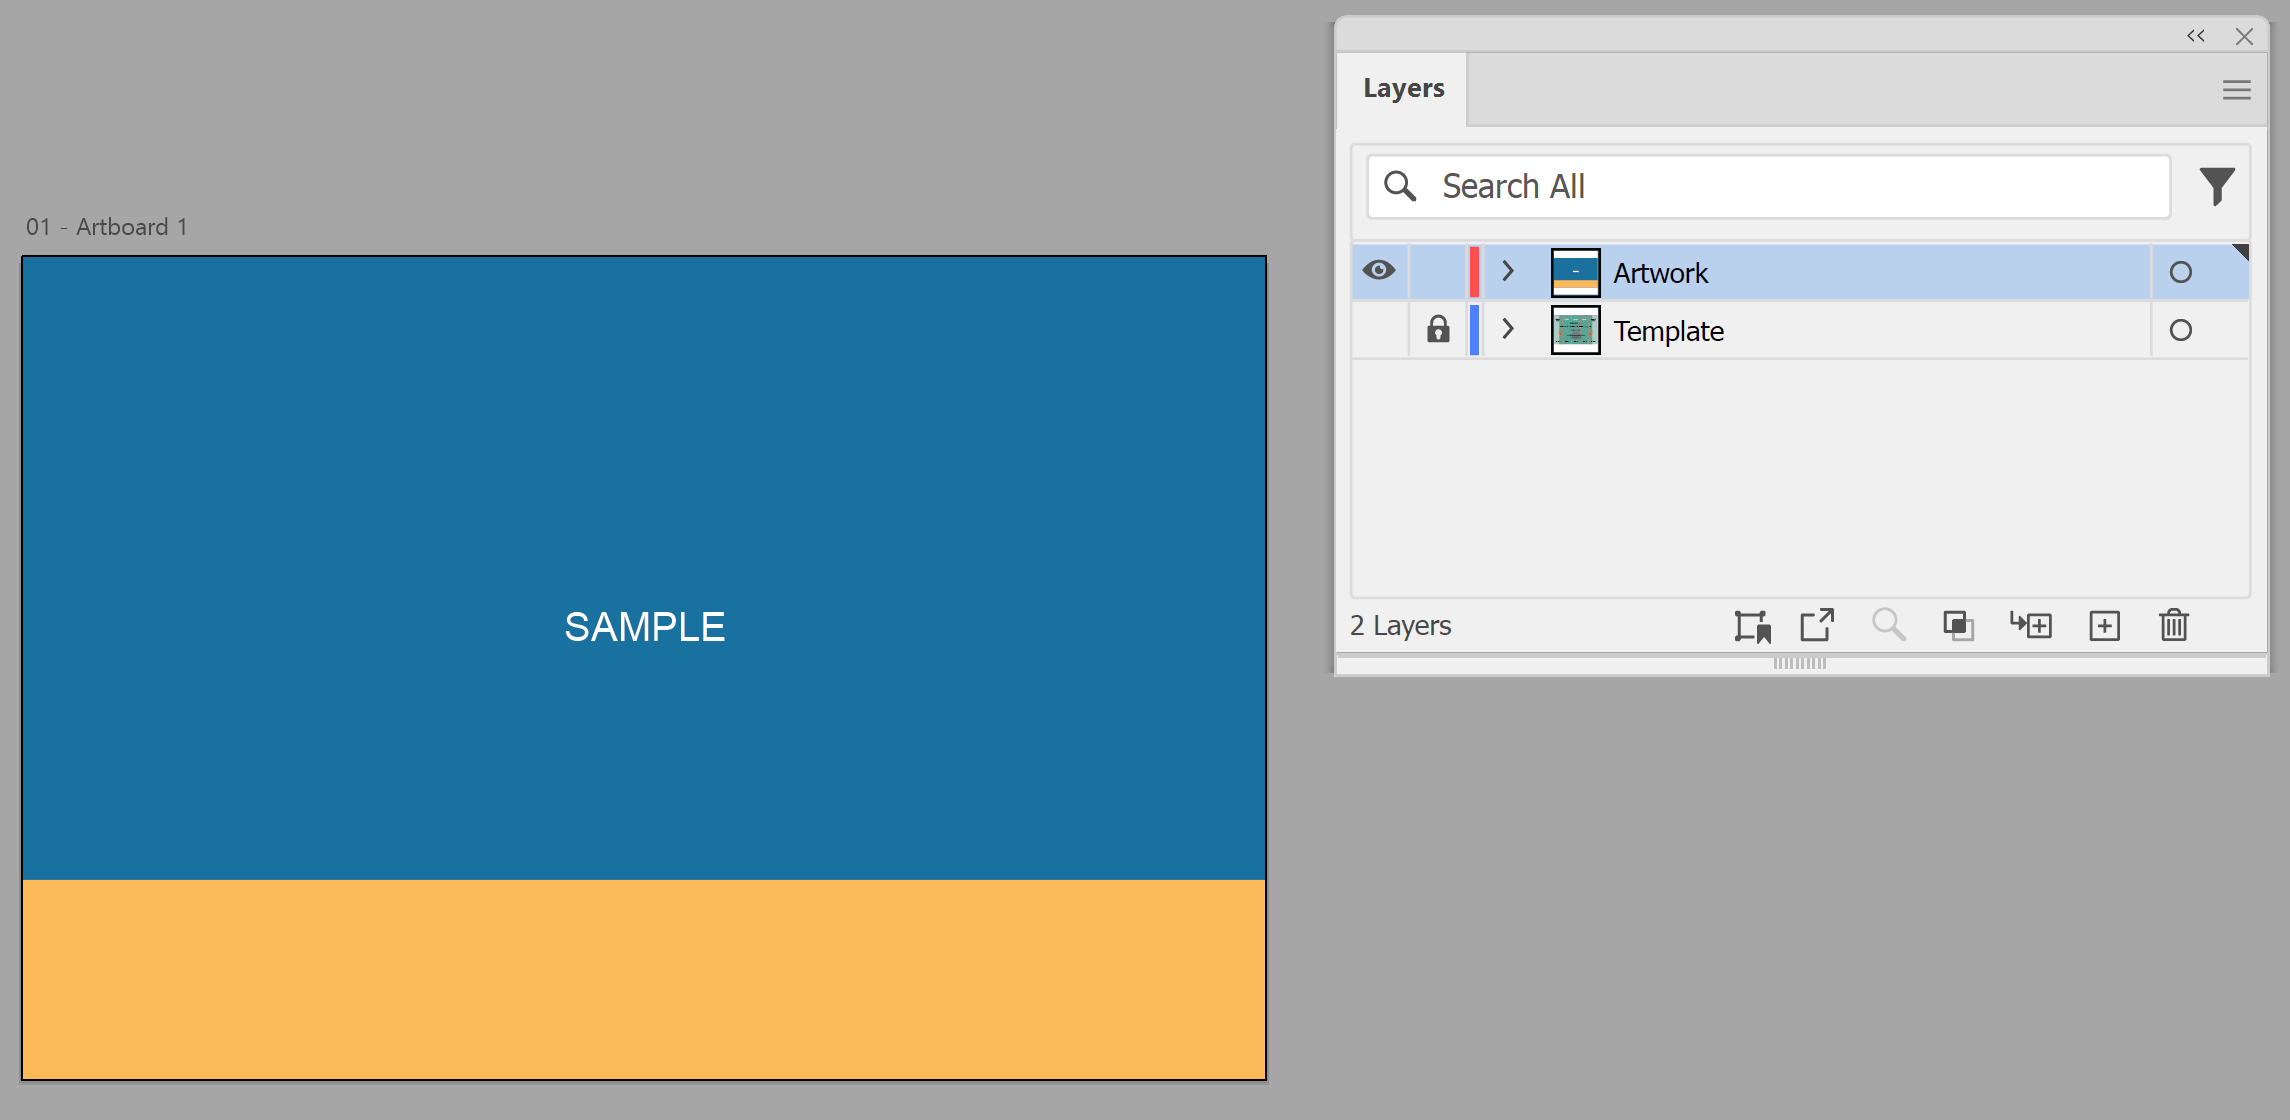
4. Lock the template and add a layer for your artwork. In the main menu, go to Window > Layers. Rename the layer holding the template "Template" and click the empty Toggles Lock area next to its name. Then click Create New Layer to add a layer above it, and name it "Artwork".
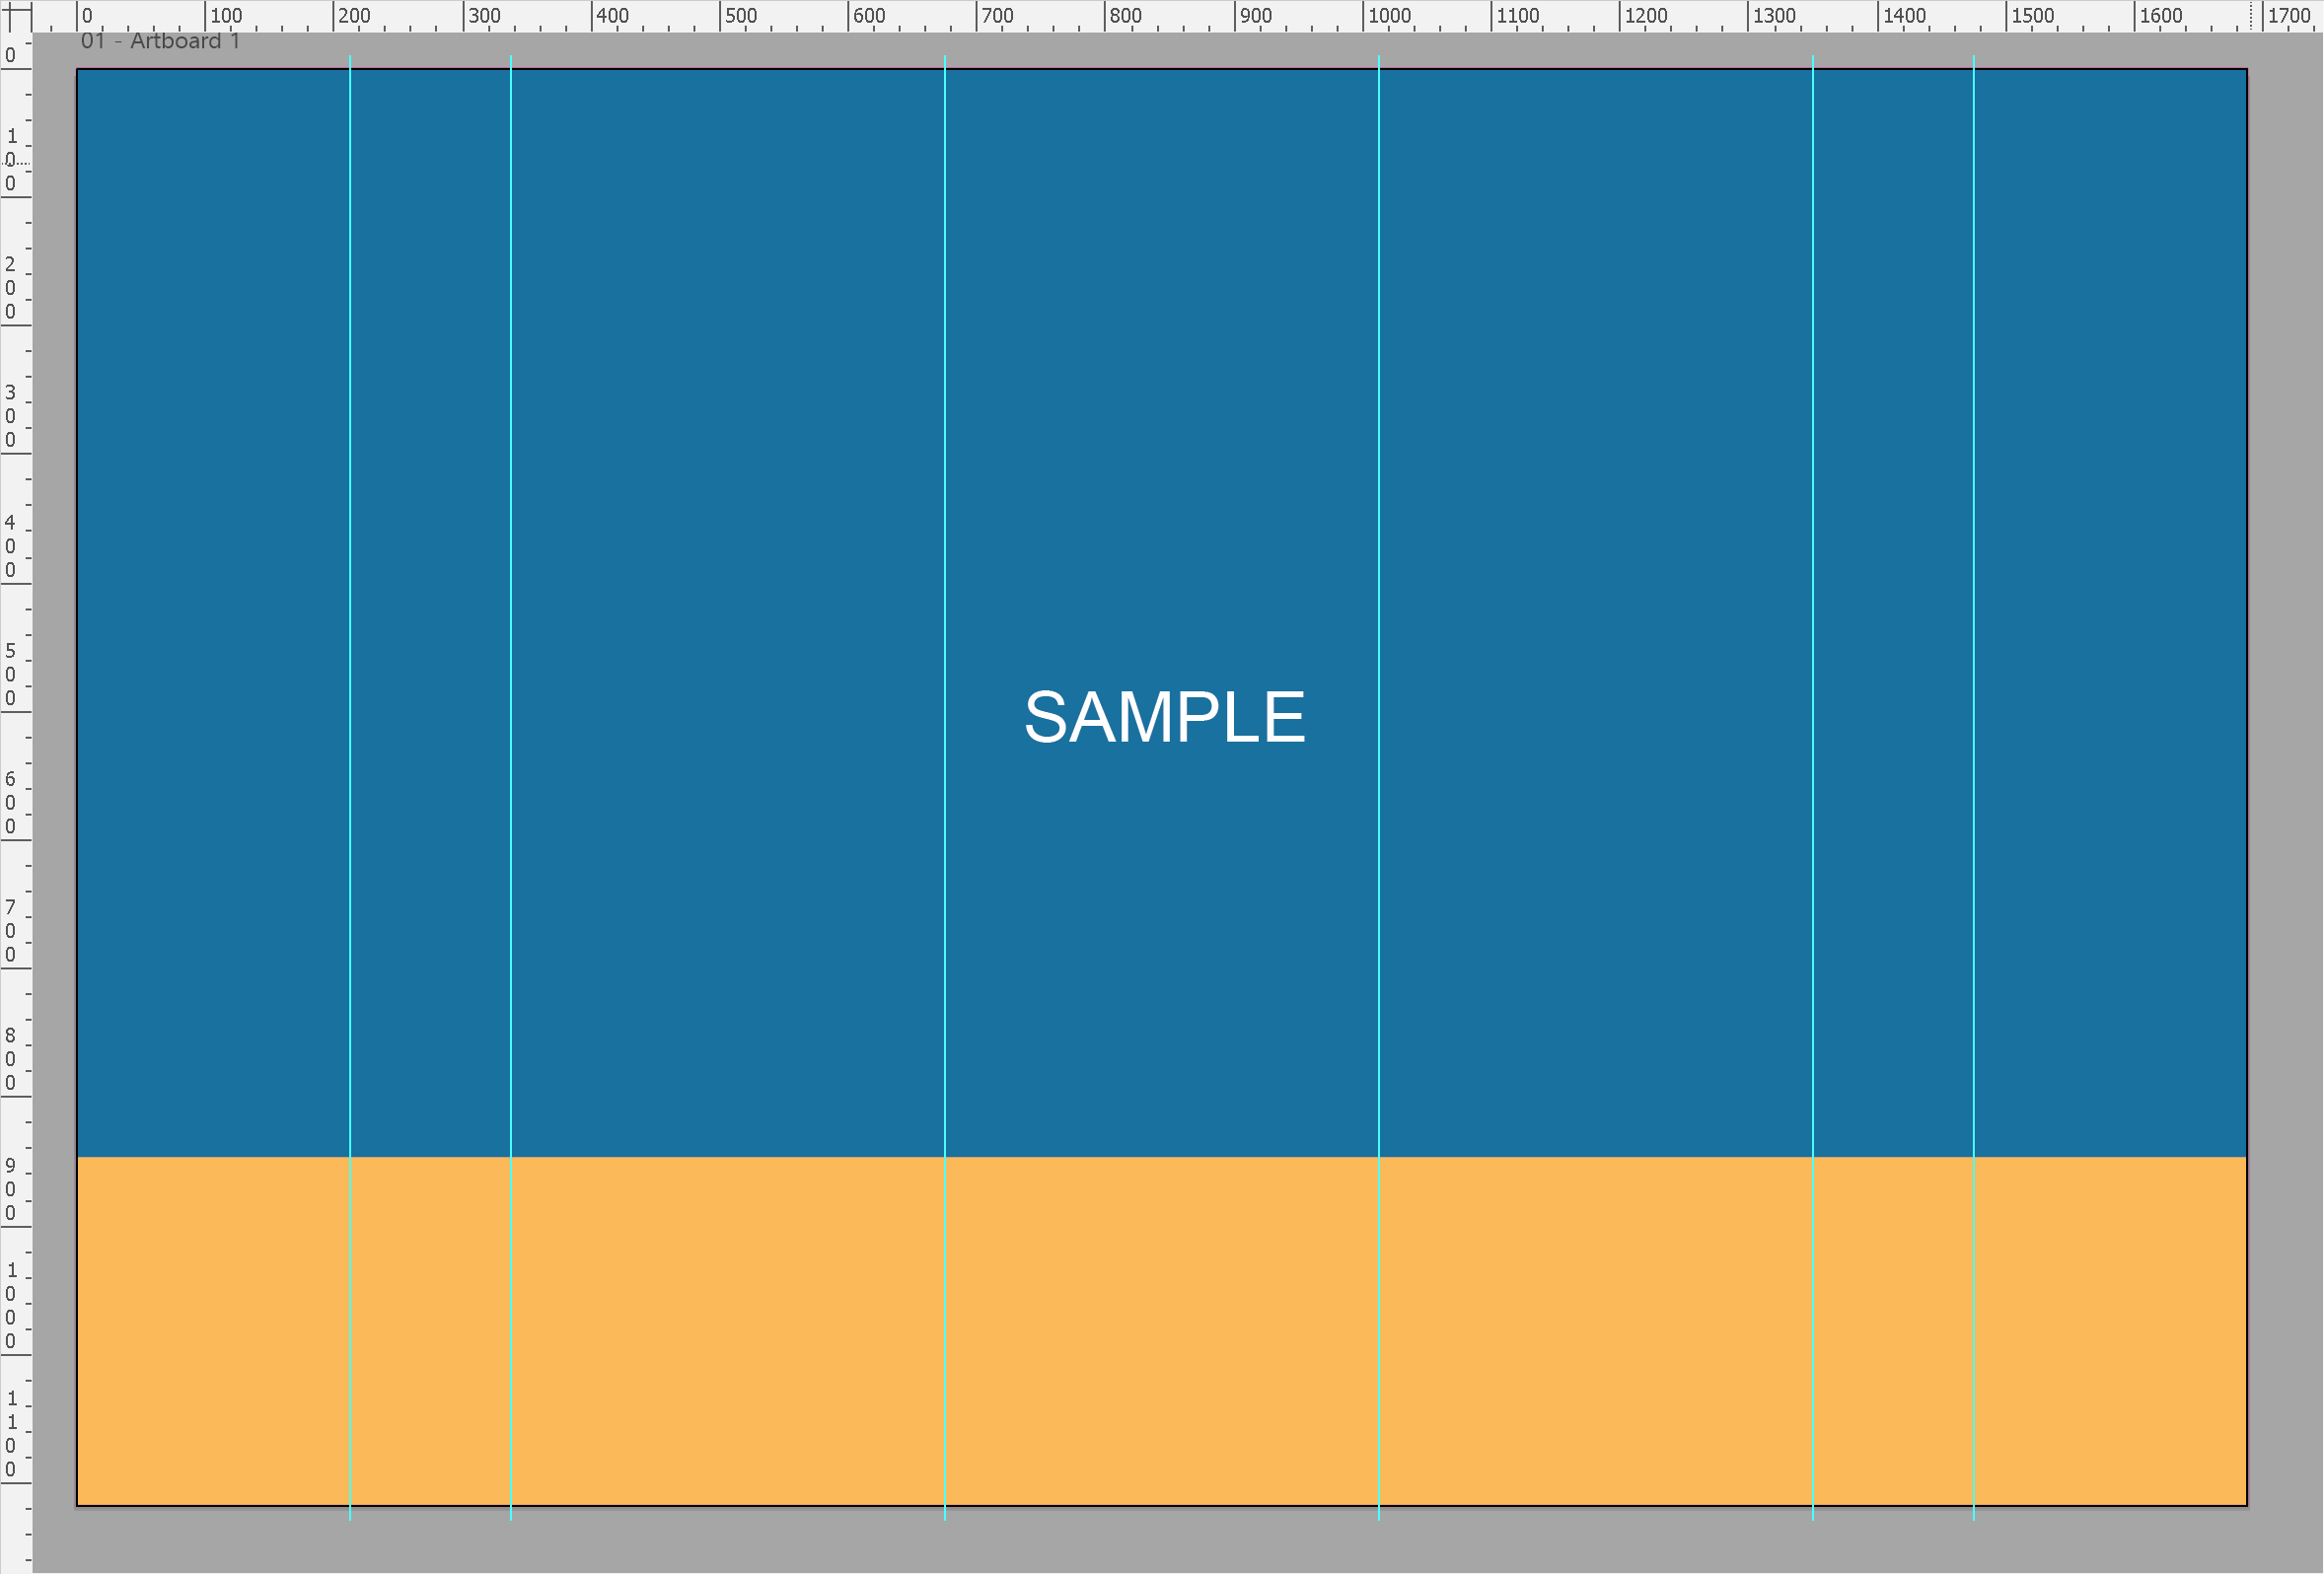
5. Add guides at the panel joins and the front-face edges. In the main menu, go to View > Rulers > Show Rulers, then drag vertical guides from the left ruler. At 50%, they sit at 337.5, 675, 1012.5 and 1350mm across (the panel joins), and at 212.5 and 1475mm (where the end caps turn the corner).
6. Run your background across the whole width, end caps included, so the colour wraps cleanly around the sides.
IMPORTANT: Keep logos, headlines and faces between the two front-face guides, and keep small text clear of the panel joins.
7. Check your images. The template is at 50%, so an image needs at least 300ppi in your file to reach the template's minimum of 150ppi at full size. Convert any spot colours to CMYK and convert all fonts to outlines.
8. Hide the Template layer by clicking its eye icon in the Layers panel, so no template lines show on the finished artwork.
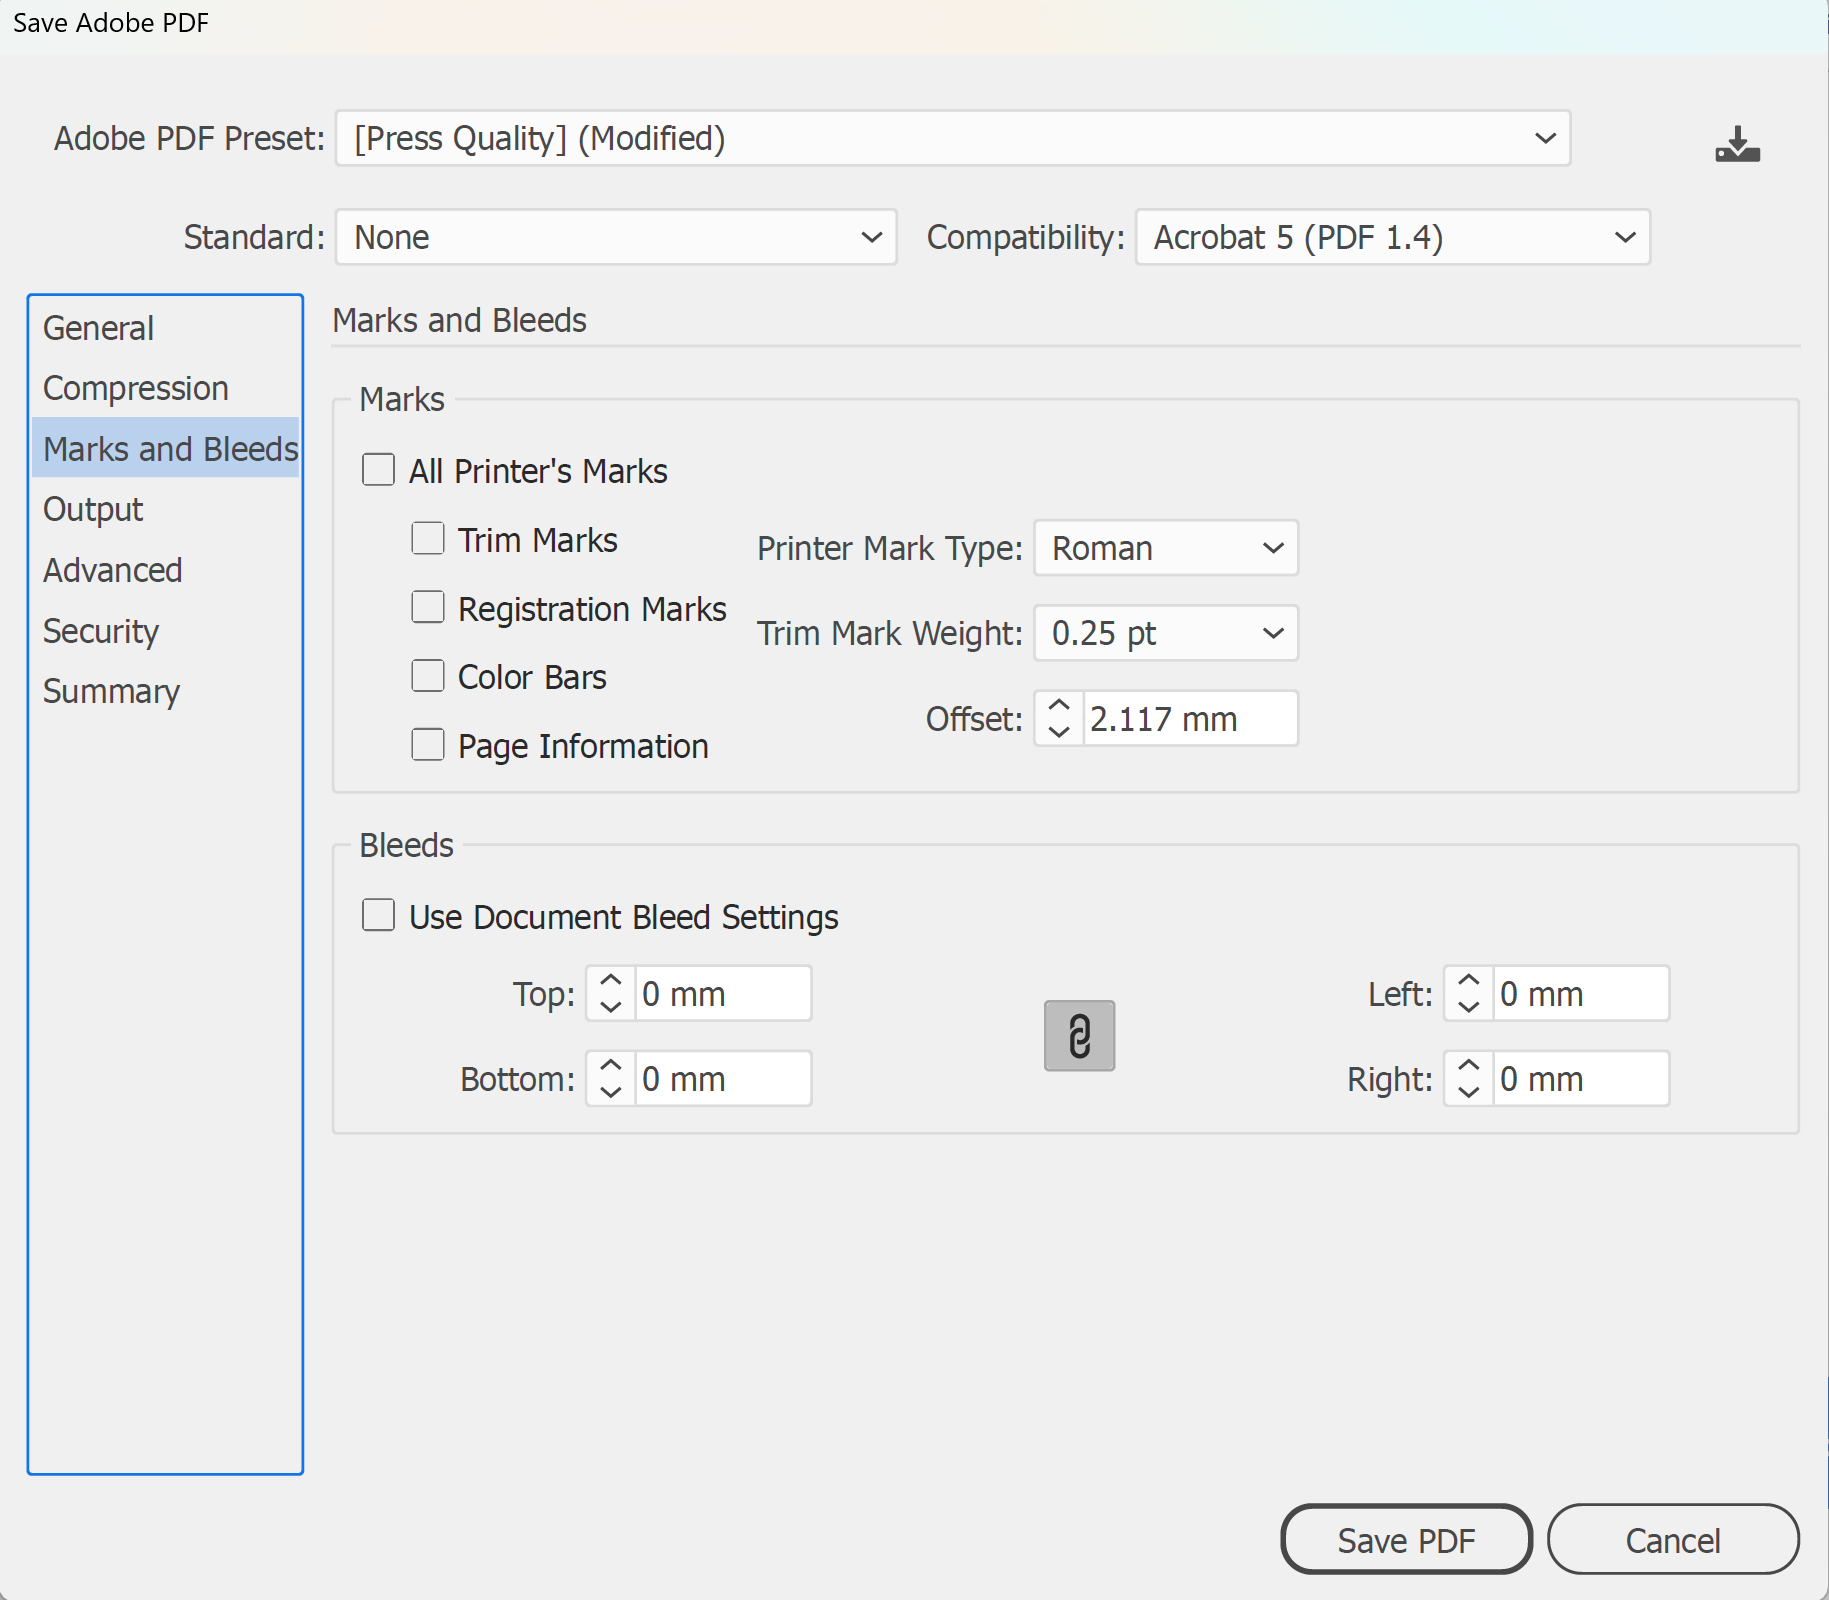
9. Save a print PDF. In the main menu, go to File > Save As, choose Adobe PDF (*.PDF) and click Save. In the Save Adobe PDF dialog box, choose [Press Quality] from the Adobe PDF Preset menu. Leave crop marks off, then click Save PDF.
Note: In the General panel, untick Preserve Illustrator Editing Capabilities. That can cut the file size significantly, and the preset then shows as [Press Quality] (Modified).
10. Finally, check the file against our artwork specifications and email it to sales@displays2go.com.au, and you're done!
Note: Working in InDesign? Go to File > New > Document for step 2 and File > Place with Show Import Options for step 3. For step 9, go to File > Export and choose Adobe PDF (Print), then the [Press Quality] preset.
Want a second pair of eyes? Our artwork preflighting service checks your file against the template and sends digital proofs before anything prints. It costs $45 ex-GST per job.
Need some help?
We're here for you
If you're needing some advice or just a helping hand, please get in touch with our team, by clicking this button. Complete the enquiry form and one of our specialists will call you back as soon as we can.