

YOUR CART IS CURRENTLY EMPTY
Immersive tunnels and reactive rooms: when a big build pays off
Published
Quick answer
An immersive brand activation, such as a walk-through tunnel, a themed set or a room that reacts to visitors, pays off when people will stay for minutes rather than seconds, when the photos and video they take matter to the campaign, when the audience is big enough to fill it, and when the build can tour. If people are only passing by, or the event runs for one day at one site, a well-designed counter, game or sampling station usually does more for the budget. The main costs are content, AV and sensors, the structure, staff and the venue.
What counts as an immersive brand experience?
Brand experience once meant handing out branded lollies or giving a quick pitch. Audiences now expect more than a handout: they will give a brand their time if they get an experience in return.
Print, TV and online are two-dimensional. An immersive experience puts the visitor inside the brand's world, and what happens next depends on what they do. Immersive activations usually take one of three forms:
| Format | What it is | Where it works |
|---|---|---|
| Walk-through tunnel | A corridor of printed, lit or screen-lined panels that people move through in sequence, with each section telling part of the story | Shopping centre atriums, festival sites, launch events |
| Reactive room | An enclosed space where light, sound or screen content changes when visitors move, touch or speak | Launches, flagship pop-ups, conferences |
| Themed set | A recreated place, such as a cabin, kitchen or shop, with the product at the centre | Trade shows, sampling, retail |
Virtual and augmented reality can add another layer. Plan for the fact that a headset serves one person at a time, which limits how many visitors the space can handle.
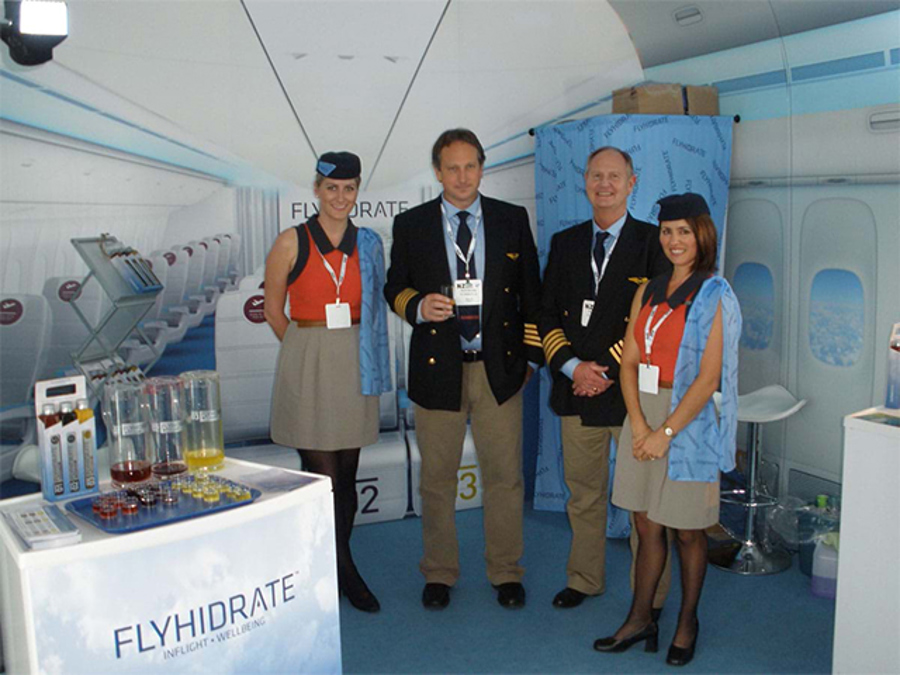
Immersive doesn't have to mean high-tech. One tasting stand in our gallery is dressed as an aircraft cabin: printed wall panels show windows and rows of seats, a tasting counter sits in front, and the team wears pilot and cabin-crew uniforms. It creates a strong sense of place on a modest floor area. Whatever the format, keep the product at the heart of the experience. A beautiful room that leaves people unsure what was being sold has missed the point.
When does a bigger immersive build pay off?
Test the idea against four questions before you commit.
| Test | Points to a bigger build | Points to a simpler activation |
|---|---|---|
| Dwell time | The story needs several minutes and people have time to give | People are on their way somewhere and stop for seconds |
| Content capture | Photos, video and shares are a main campaign goal | The goal is a sample, a sale or a registration |
| Audience size | Enough traffic to keep the space full all day | Traffic too thin to fill a timed experience |
| Tour length | The build can run at several sites or events | One day at one site |
If three or four tests favour a bigger build, the investment is easier to justify. If one or none do, put the budget into a simpler activation and spend more on staff, stock and follow-up.
When a simpler activation does the job
An immersive build is the wrong tool in these situations:
- The action is quick. If you want people to taste, register or buy, a sampling station or branded counter gets them there faster than a room they have to queue for.
- The site restricts structures. Every shopping centre has its own rules, and the major centres cap structure height. Check with each centre's management: an enclosed room may not be allowed, or may need extra approvals.
- Time is short. A custom brand activation build typically takes about 5 weeks, longer than catalogue display products need.
- The audience is small or specialist. At a B2B event, a qualified conversation is worth more than a spectacle.
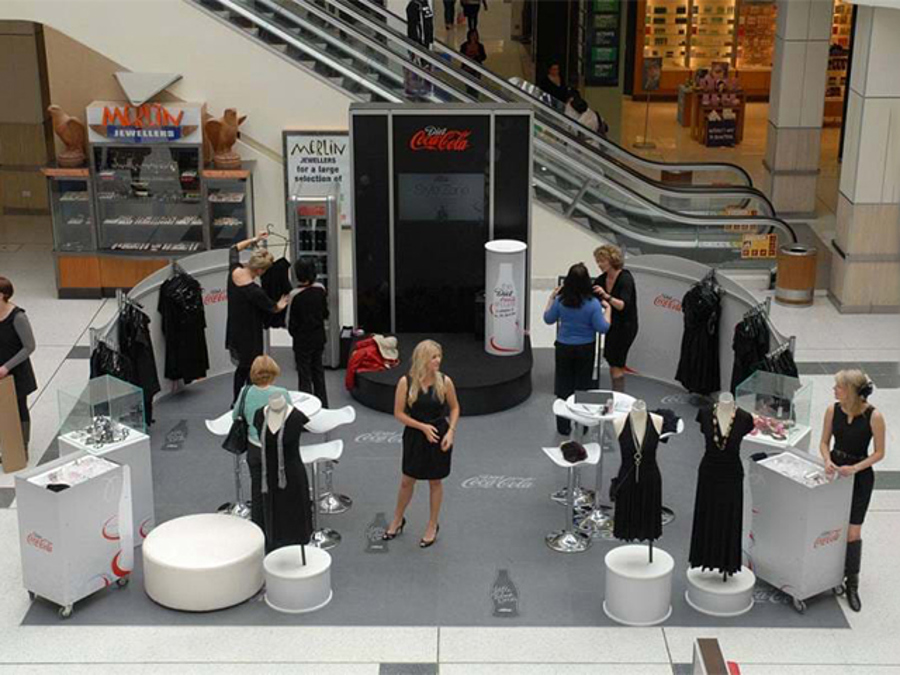
There is a middle ground. A themed set, a graphic floor or one stand-out element, such as an LED wall or photo point, can give a sense of place without enclosing the space. Our brand activation planning guide compares the seven common activation types and the kit each one needs.
What drives the cost of an immersive activation?
Five things set the budget. We quote custom builds from your brief, so the clearer the brief on each point, the more accurate the quote.
| Cost driver | What pushes it up | How to contain it |
|---|---|---|
| Content production | Original film, animation or soundscapes made for one campaign | Build from existing brand video and artwork, and design content in modules you can swap |
| Sensors and AV | Custom triggers, multiple screens, projection, sound zones | Use one main screen surface, and hire screens rather than buy for a short run |
| Structure | Enclosed rooms, ceilings, curved walls, rigging | Use modular frames and fabric skins that pack down and rebuild the same way |
| Staffing | Hosts at the entry and exit, a technician, queue management, long hours | Design a self-guided route so a small team can run it |
| Venue | Space rental, power, overnight security, approvals, bump-in windows | Confirm power and access before design, not after |
In a reactive room, screens can be a large share of the budget. Our digital and multimedia displays cover LED walls, overhead screens and interactive flat panels. You can hire them for one event or buy them for repeat use, and we load and test the content before the screens go to site. Custom structures are designed and made by our design and build team in Sydney, using materials such as aluminium, plastics, stretch fabric, lighting and inflatables.
Reuse: touring and redeploying the build
The surest way to make a big build pay is to use it more than once. A tunnel that runs at six sites spreads its design and build cost across six audiences, while one that runs for a single weekend carries the whole cost alone. To compare it with a simpler option, divide the build cost by the number of stops and add each stop's freight, install and venue costs.
Design for the tour from day one:
- Measure the biggest packed piece and check it fits every door, lift, loading dock, vehicle and storage space on the tour, as well as the floor.
- Keep the structure modular so it can be rebuilt smaller for a tighter site.
- Label the cases and photograph the kit packed, and send a short setup sequence with it so any crew can rebuild it.
- Check graphics, fixings and cables at every pack-down, and reprint anything damaged before the next stop.
- Plan a content refresh. Swapping graphics or screen content for a new campaign extends the life of the structure.
We can store screens and hardware between events. If the content repeats across stops, we keep the files ready too, so each stop is a repeat install, not a fresh project. For shopping centre tours, see how we handle working in shopping malls, including the logistics of centre approvals and installation.
How to measure an immersive activation
Judge an activation by what visitors did, not only by how many saw it. Agree the measures before the build is designed, because some of them have to be built in.
| Measure | How to capture it | What it tells you |
|---|---|---|
| Throughput | Count entries at the door, by clicker or sensor | Whether the space handled the crowd |
| Dwell time | Time-stamp entry and exit for a sample of visitors | Whether the story held attention |
| Content shares | A photo point with a campaign hashtag, then count posts and views | Reach beyond the people on site |
| Data captured | Registrations at entry or exit, with consent obtained at capture | Leads you can follow up |
| Sales | Product sales at the site against a normal week | The business result |
Check throughput on paper first. A room that takes 8 people per 4-minute cycle can handle at most 120 people an hour, or 720 over a 6-hour day. If you expect more traffic than that, shorten the cycle, enlarge the room or plan the queue. Queues can become part of the experience, and they work best when people can see what they are waiting for.
Planning timeline for an immersive build
Tell us your live date at the briefing stage and we'll confirm what can be done in that time. The work runs in this order:
- Brief. Audience, the one action you want, the measure, the sites and the dates.
- Site checks and approvals. Floor plans, power, access, height limits and venue or centre approval. If the site is a public space, ask the council or landowner early whether you need approval.
- Concept and storyboard. The route through the space, what happens at each point and where the product appears.
- Design sign-off. Confirm the physical specification before graphics are approved.
- Production. Structure, graphics, AV and content are made in parallel.
- Test build. Assemble and run everything, end to end, before opening day.
- Staff briefing. Scripts, roles, queue plan and who handles problems.
- Bump-in, live days and bump-out, then the report against the agreed measures.
Our project management team gives you one point of contact across design, production, freight, installation and dismantling. On live days, we can give on-site or after-hours help with the equipment we supplied.
Next step
Ask us to scope an immersive build and a lighter alternative side by side, so you can compare cost, reach and effort before you commit. See our brand activation work, then send us your audience, sites, dates and the one thing you want visitors to do, or call 1300 240 250. For the wider picture, read our introduction to experiential marketing.