

YOUR CART IS CURRENTLY EMPTY
Shipping POS displays nationally: packing, kitting and freight
Published
Quick answer
Most POS freight damage is decided before the cartons are taped. Design the display to travel flat where you can, check carton sizes against the carrier's limits, and work out cubic weight before you quote freight. Pack for conveyor belts, kit and label by store rather than by part, and put an assembly sheet in every box. If the units go through a retailer's distribution centre, get its packing and labelling rules from your buyer first.
Why the freight decides the roll-out
A national POS roll-out succeeds or fails in the freight. A unit that arrives crushed, short a shelf or a week late is wasted spend. Most of those problems are set long before the cartons are taped: in how the display is designed to travel, how each store's kit is picked and labelled, and how the store team knows what to do with it.
Here's our checklist for getting POS to stores in one piece, from the first drawing to the day it's built on the shop floor. Carrier rules quoted below come from Australia Post's own guides and are examples only, so check your own carrier's rules before you book.
Design the display to travel
Freight is part of the brief, not an afterthought. Before artwork starts, decide how each unit will reach the store and whether it travels flat or built. Our branded retail dump bins page puts it as a question to answer up front: how the bins will get to their destinations decides how they are packed and whether they go flat-packed or pre-assembled.
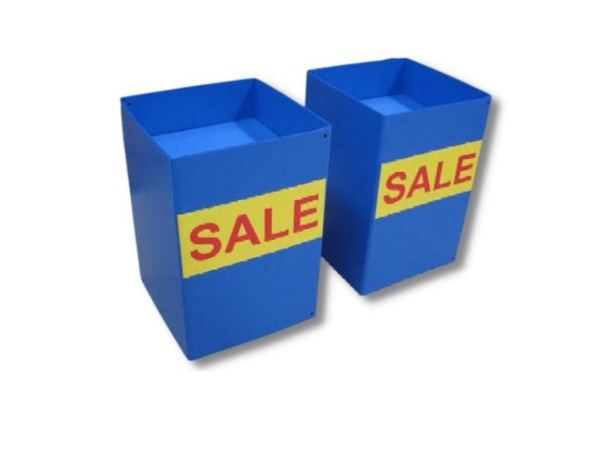
- Flat-pack where you can. A built unit ships mostly air. Our three-tier long-life bins, for example, have three shelves that stack inside each other to save space in transit.
- Pick the material for the trip as well as the store. Cardboard is the cheapest material, while polypropylene, timber, acrylic or steel cost more but last longer. Our long-life bins use 1,000gsm hollow-core polypropylene, which is washable and stands up to oils and liquids.
- Keep headers and loose parts separate. A header, shelf strip or wobbler packed loose in a carton is the part most likely to arrive bent.
- Check the size against the carrier's limits. Australia Post caps a domestic parcel at 22kg, 105cm on any side and 0.25 cubic metres. StarTrack Road Express's standard limits are 20kg, 117cm long, and 60cm wide and high, and bigger or heavier items can cost extra. Larger or heavier consignments generally go as freight, often on pallets.
If the display is a die-cut cardboard unit, our guide to reading a POS display dieline shows how the flat sheet becomes the built unit.
Work out cubic weight before you quote freight
Carriers charge for the space a carton takes up, not only its weight. Australia Post calculates cubic weight by multiplying a parcel's length, width and height in metres by 250, and typically charges on whichever is greater, the cubic weight or the actual weight.
Take a carton the size of one of our built square cardboard dump bins, 450mm square and 700mm high:
- 0.45m x 0.45m x 0.7m = 0.142 cubic metres
- 0.142 x 250 = 35.5kg cubic weight
On a cubic-weight rate you pay for about 35kg per carton, however light the bin inside is. Multiply it across a few hundred stores and the case for flat-packing makes itself.
Pack for conveyors, not for the showroom
Parcel networks run on conveyor belts. Australia Post asks for packaging durable enough to withstand travelling on conveyor belts and the occasional knock from other parcels, and it doesn't offer a fragile service, except for wine and alcohol. Australia Post and StarTrack generally won't pay for loss or damage unless you buy transit cover, so the packing is your protection.
- Fill the empty space. Australia Post warns that underfilled boxes often collapse, and that overfilling can split the packaging.
- Box in a box for anything fragile. Wrap each item, pack it so it can't move, then put that box inside a sturdier outer carton with cushioning between.
- Protect corners and printed faces. Printed panels scuff against each other in transit, so separate them.
- Mark heavy cartons. Australia Post and StarTrack both ask for a heavy label on anything over 16kg, and StarTrack asks for items over 32kg to be secured to a pallet or skid.
- Build pallets to the rules. Australia Post's pallet guidelines accept standard CHEP and Loscam pallets, 116.5cm square. Loads must stay within the pallet's edges, be shrink-wrapped at least three times, and stand no more than 160cm high including the pallet. StarTrack sets its own pallet limits, so check the service you book.
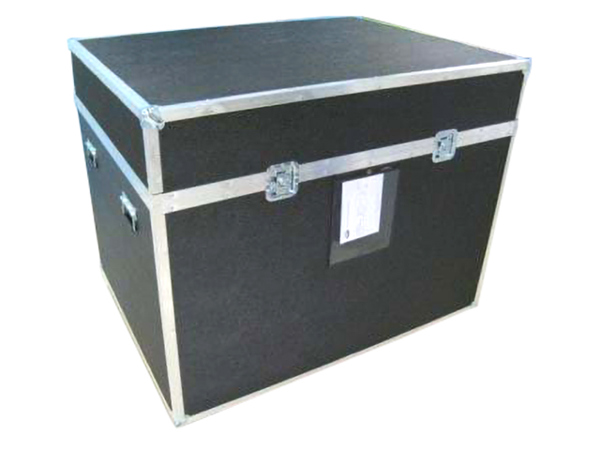
Acrylic, illuminated or electronic POS often needs more than a carton. A fitted road case costs more up front, but it can be used again for the next campaign if the cases come back.
Kit by store, not by part
A pallet of shelves and a pallet of headers turns every store into an assembly puzzle. Pack each store's kit as one complete set:
- One kit per store, with every part that store needs in the same carton or set of cartons.
- A contents list on the outside and inside, with a part count for each item.
- Numbered cartons, such as 1 of 3, 2 of 3 and 3 of 3, so a store knows when something is missing.
- Different versions kept apart. If store formats get different units or artwork, pick and pack them in separate runs and label each version clearly.
We do this packing for our clients' roll-outs, so each store's kit leaves us ready for the carrier.
Label every carton so the store can act on it
POS cartons often arrive with the regular stock deliveries, so they need to stand out. Each one needs:
- the store name and store code
- the campaign name and the in-store date
- the carton number and the total cartons in the kit
- "POS: do not discard" or similar, so the carton isn't flattened with the stock packaging.
Put the carrier label on the largest, flattest surface of the carton, where it won't wrap around an edge or sit over a flap, fold or seam. Australia Post asks for exactly that.
Put the assembly sheet in the box
The person building the unit may never have seen it. Include a one-page assembly sheet in every kit:
- a photo of the finished unit
- numbered steps with simple drawings
- where each header, shelf and price strip goes
- how many units of stock each shelf holds.
Ask stores for a photo of the finished display. It shows whether the unit went up, and whether it went up correctly.
Store direct or through the retailer's distribution centre?
Going direct to stores gives you control of timing. Going through a retailer's distribution centre (DC) means the retailer's own rules apply. Coles' off-location display guide, for example, sets a 16kg limit per pre-packed or flat-packed unit, one unit per outer carton, CHEP or Loscam pallets and its own DC labelling. Our page on getting POS displays approved by Australian supermarkets covers those rules. Get the current DC requirements from your buyer before the packing is designed, not after.
Plan for regional stores and spares
- Ask for published transit times. Get the carrier's transit time for each route, especially regional stores and WA and NT, and work back from the in-store date.
- Hold spares centrally. Keep a stock of the parts most likely to be damaged or lost, such as headers and shelf strips, so a replacement can go out as soon as a store reports a problem.
- Have someone check deliveries. Don't assume freight is insured: even our own deliveries policy says products we deliver to you are generally not insured in transit. For store deliveries, check your carrier's terms, and brief stores to check cartons on arrival and report damage straight away, with photos.
Pre-dispatch checklist
- Unit designed and tested for the way it will travel, flat or built.
- Carton sizes and weights checked against the carrier's limits.
- Cubic weight worked out for the freight quote.
- Each store's kit picked complete, counted and numbered.
- Contents list, assembly sheet and finished-unit photo in every kit.
- Store, campaign and carton details on every carton.
- Pallets built to the carrier's or retailer's rules.
- Transit times confirmed and spares held centrally.
Next step
We can pack your roll-out into one kit per store, and if you need somewhere to keep your display kit between campaigns, our logistics and storage management service stores event and marketing assets in our warehouses, checks each item in and manages booking and despatch requests. To talk through your next POS display, use the enquiry form or call 1300 240 250.