

YOUR CART IS CURRENTLY EMPTY
How to read a dieline for a POS display
A dieline is the flat map of a display before it is cut and folded: it shows where the board will be cut, where it will fold and where it will be glued. Your artwork sits on top of it. You place artwork to suit the dieline, but you never move, resize or redraw the dieline itself.
If you're designing artwork for a cardboard display such as a dump bin, the dieline normally comes with the artwork template from whoever makes the unit. Reading it properly is the difference between a unit that looks right on the shop floor and one with a logo folded round a corner or a header printed upside down. Here's what the lines mean and how to work with them.
If you need to draw a dieline from scratch, that's a different job: see our guide on how to create a dieline in Illustrator, InDesign or Photoshop.
What the lines on a dieline mean
Dielines aren't drawn the same way everywhere, so start with the legend or the layer names in the file. We prefer the dieline on its own named layers, in spot colours so it doesn't print with the artwork, with the stroke set to overprint, the full cut line in one colour and the fold line in another.
Cut line
The outer edge of the finished piece, plus any holes, slots or windows cut through it. Anything outside the cut line is trimmed away. A cut-out such as a hand hole or a header slot will have no board behind it, so don't put copy there.
Fold line
Also called a crease or score line. The board is pressed rather than cut here, so it bends cleanly. Most fold lines mark an edge of the finished unit, which makes them the most useful lines for working out which panel is which.
Glue flap
A tab that tucks behind another panel and is glued in place, so nobody sees it once the unit is made up. It needs no artwork. If the template marks it as an area to keep clear, leave it unprinted.
Perforation
A broken cut line for a part that is meant to tear away. Treat it like a cut line: keep text and logos clear of it.
Bleed line
The outer limit for artwork. Backgrounds run out to here so there's no white edge after cutting. Unless the template says otherwise, allow 10mm. The template always wins.
Safe area
The inner boundary for anything that must be read: logos, product names, prices, legal copy. Keep these well inside the cut line and away from fold lines, because a fold can swallow the edge of a word.
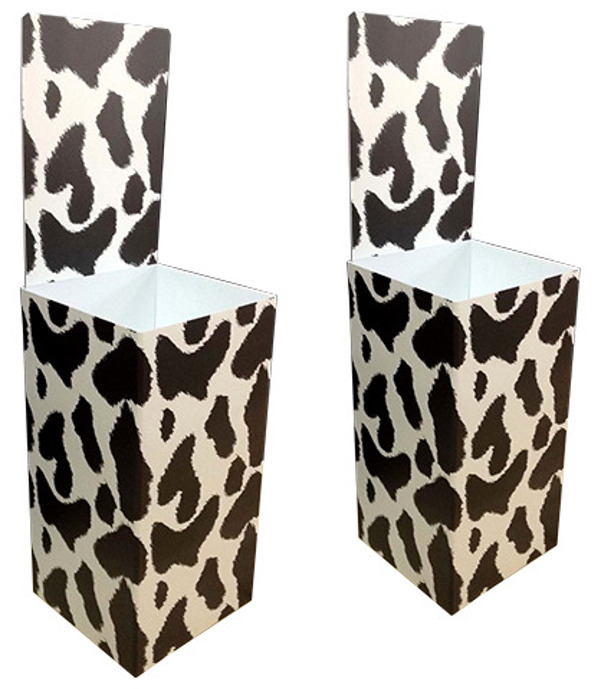
How to read a flat template as a 3D unit
A flat dieline can be hard to picture. These steps help.
#1 - Find the front panel first
The front is the panel the shopper sees, so it carries the main brand message. On a dump bin it's usually one of the large rectangles in the middle of the layout. Once you know the front, the sides, back and base fall into place around it.
#2 - Follow the folds to see which way is up
Panels that fold over or back, such as a header that sits up from the back of a bin, often appear upside down or sideways on the flat. Work out which edge ends up at the top of each panel before you place type on it. An upside-down header is one of the easiest mistakes to make and one of the most expensive to fix.
#3 - Check which panels are seen and which are hidden
Bases, glue flaps, inner walls and the back of a header may never be seen in store. Spend the design effort on the faces a shopper will actually look at.
#4 - Think about how the unit stands in the store
A bin placed against a wall shows two or three faces, while an island bin is seen from every side. Our branded retail dump bins can carry your print on one face or several, so decide which faces need it before you design. Remember to ask whether the unit arrives flat-packed or pre-assembled, too.
#5 - Make a paper mock-up
Print the dieline with your artwork at a reduced scale, cut it out and fold it up. A quick fold-up will show an upside-down panel or a logo across a fold faster than any screen.
How to place artwork without moving the dieline
- Lock the dieline layer and build your artwork on separate layers underneath it.
- Run backgrounds to the bleed line, not just to the cut line.
- Keep words and logos in the safe area, clear of folds, perforations and cut-outs.
- Don't stretch the template to fit your artwork. If the artwork doesn't fit, change the artwork. A dieline that has been scaled or nudged no longer matches the cutting die.
- Leave the dieline in the file as a spot colour. It's the one spot colour that should stay when everything else is converted to CMYK.
- Keep the usual specs: CMYK colour, images at least 150 ppi at finished size, fonts outlined or embedded, and transparencies flattened. All of it is on our artwork specifications page.
Checks before your artwork goes to print
- Document size. Does it match the template exactly? A document size that doesn't match is one of the most common issues we find in preflighting.
- Orientation. Is every panel the right way up once folded?
- Glue flaps. Are they printed only as the template allows?
- Folds and cut-outs. Is anything you need to read sitting across a fold, a perforation or a hole?
- Bleed. Do backgrounds reach the bleed line on every outside edge?
- Dieline layer. Is it still there, untouched, named and set to a spot colour?
- Proof. Ask for a digital proof when you order. Where brand colours matter, a printed A3 proof costs $45 ex-GST.
Common dieline mistakes
- Artwork that stops at the cut line, which leaves a white edge when the cut is a fraction out.
- A header or side panel upside down, because nobody checked how it folds.
- Text running across a fold, so part of a word disappears into the crease.
- Artwork on a glue flap that the template marks to keep clear.
- A template that was rescaled to fit the artwork, so the print no longer lines up with the die.
- The dieline layer deleted, flattened or converted to CMYK, so it either prints or goes missing.
Standard production for our dump bins is 1.5 weeks, counted from your order and print-ready artwork. Every one of these mistakes means a fix, a new proof and a later delivery. Designers who know our templates and finished products check your files in our artwork preflighting service, at $45 ex-GST per job, with digital proofs sent back to you for approval. Wide-format printing and hand finishing are handled by our in-house printing and production team.
If you're not sure how a template folds up, send it to sales@displays2go.com.au or give us a call and we'll talk you through it.