

YOUR CART IS CURRENTLY EMPTY
How do I check the resolution of an image before I send it to print?
What is image resolution?
Resolution is the number of pixels packed into each inch of the image when it prints, measured in pixels per inch (ppi). The pixel count of a photo is fixed. Print it bigger and the same pixels are spread further apart, so the resolution drops and the image gets softer.
That's why a photo that looks sharp on screen can still print blurry on a banner. What matters is the effective resolution: the ppi the image has at the size it will actually print.
What resolution do I need?
For best results, images should be at least 150ppi at 100% of the finished size. The lowest we can accept is 75ppi at 100% of the finished size. Below that, an image can't be printed well, whatever we do at our end.
If you work at a proportional scale, multiply the resolution to match. At 10% scale, an image needs 1,500ppi in the file to print at 150ppi at full size.
Note: Graphics read at arm's length, such as a counter front, show every soft edge, so aim above the minimum. Header graphics seen from across a hall are more forgiving, but still need 75ppi.
Steps to check resolution in Photoshop
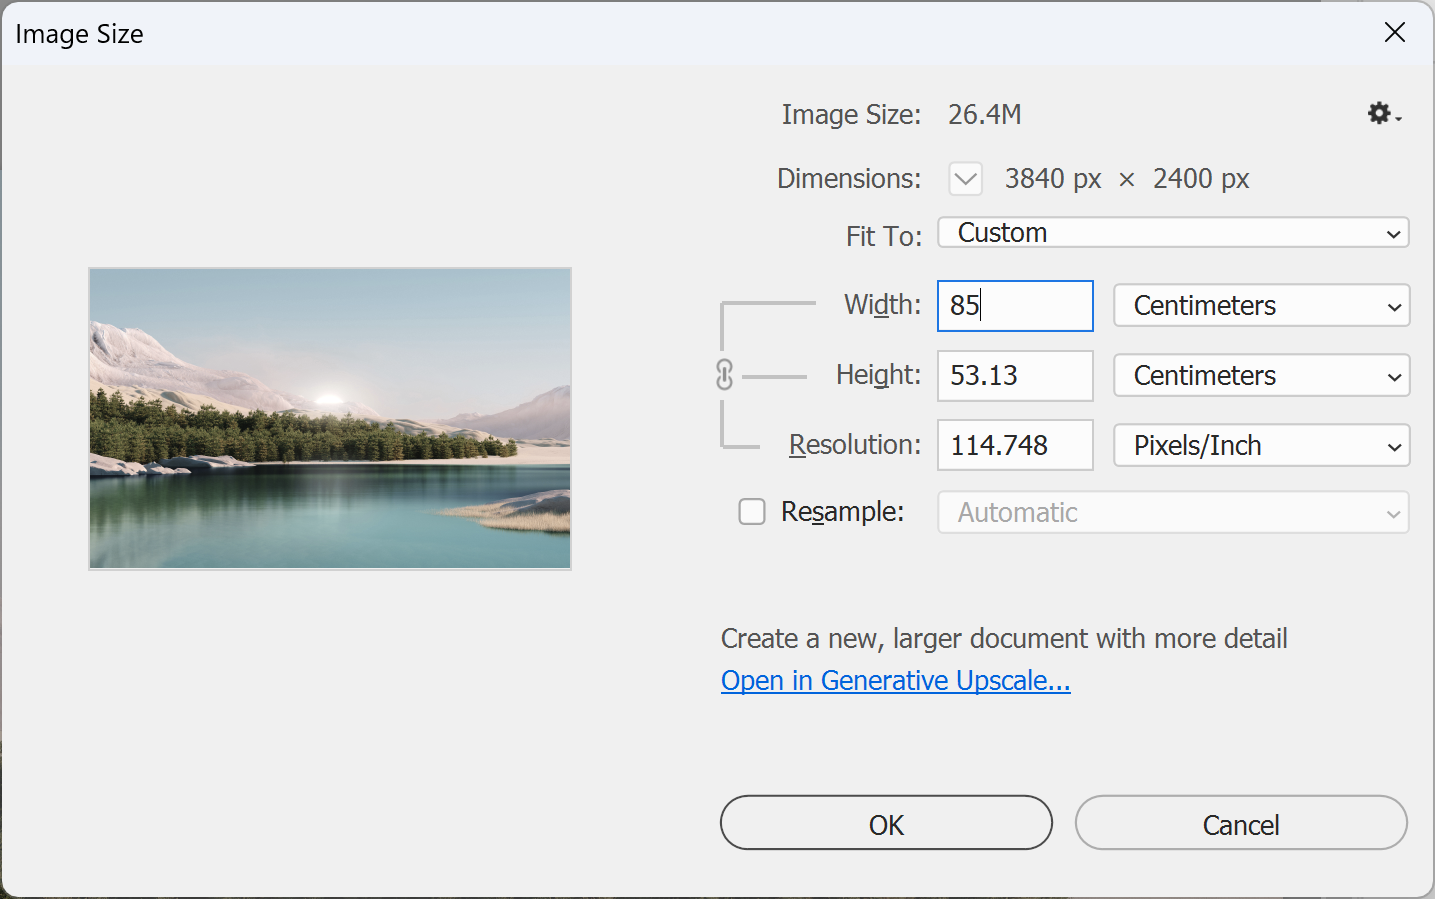
1. Open the image. In the main menu, go to Image > Image Size.
2. Untick Resample, so Photoshop keeps the pixels you have and doesn't add or remove any.
3. Change the unit next to Width to Centimeters, then type in the image's finished printed width (for example, 85 if it fills an 850mm banner). The Resolution field now shows the ppi your image will have at that size. Under 150 is below our recommended resolution, and under 75 is too low for us to print well.
IMPORTANT: Click Cancel when you're done. This is only a check, and you don't want to save a changed file by accident.
Steps to check resolution in InDesign
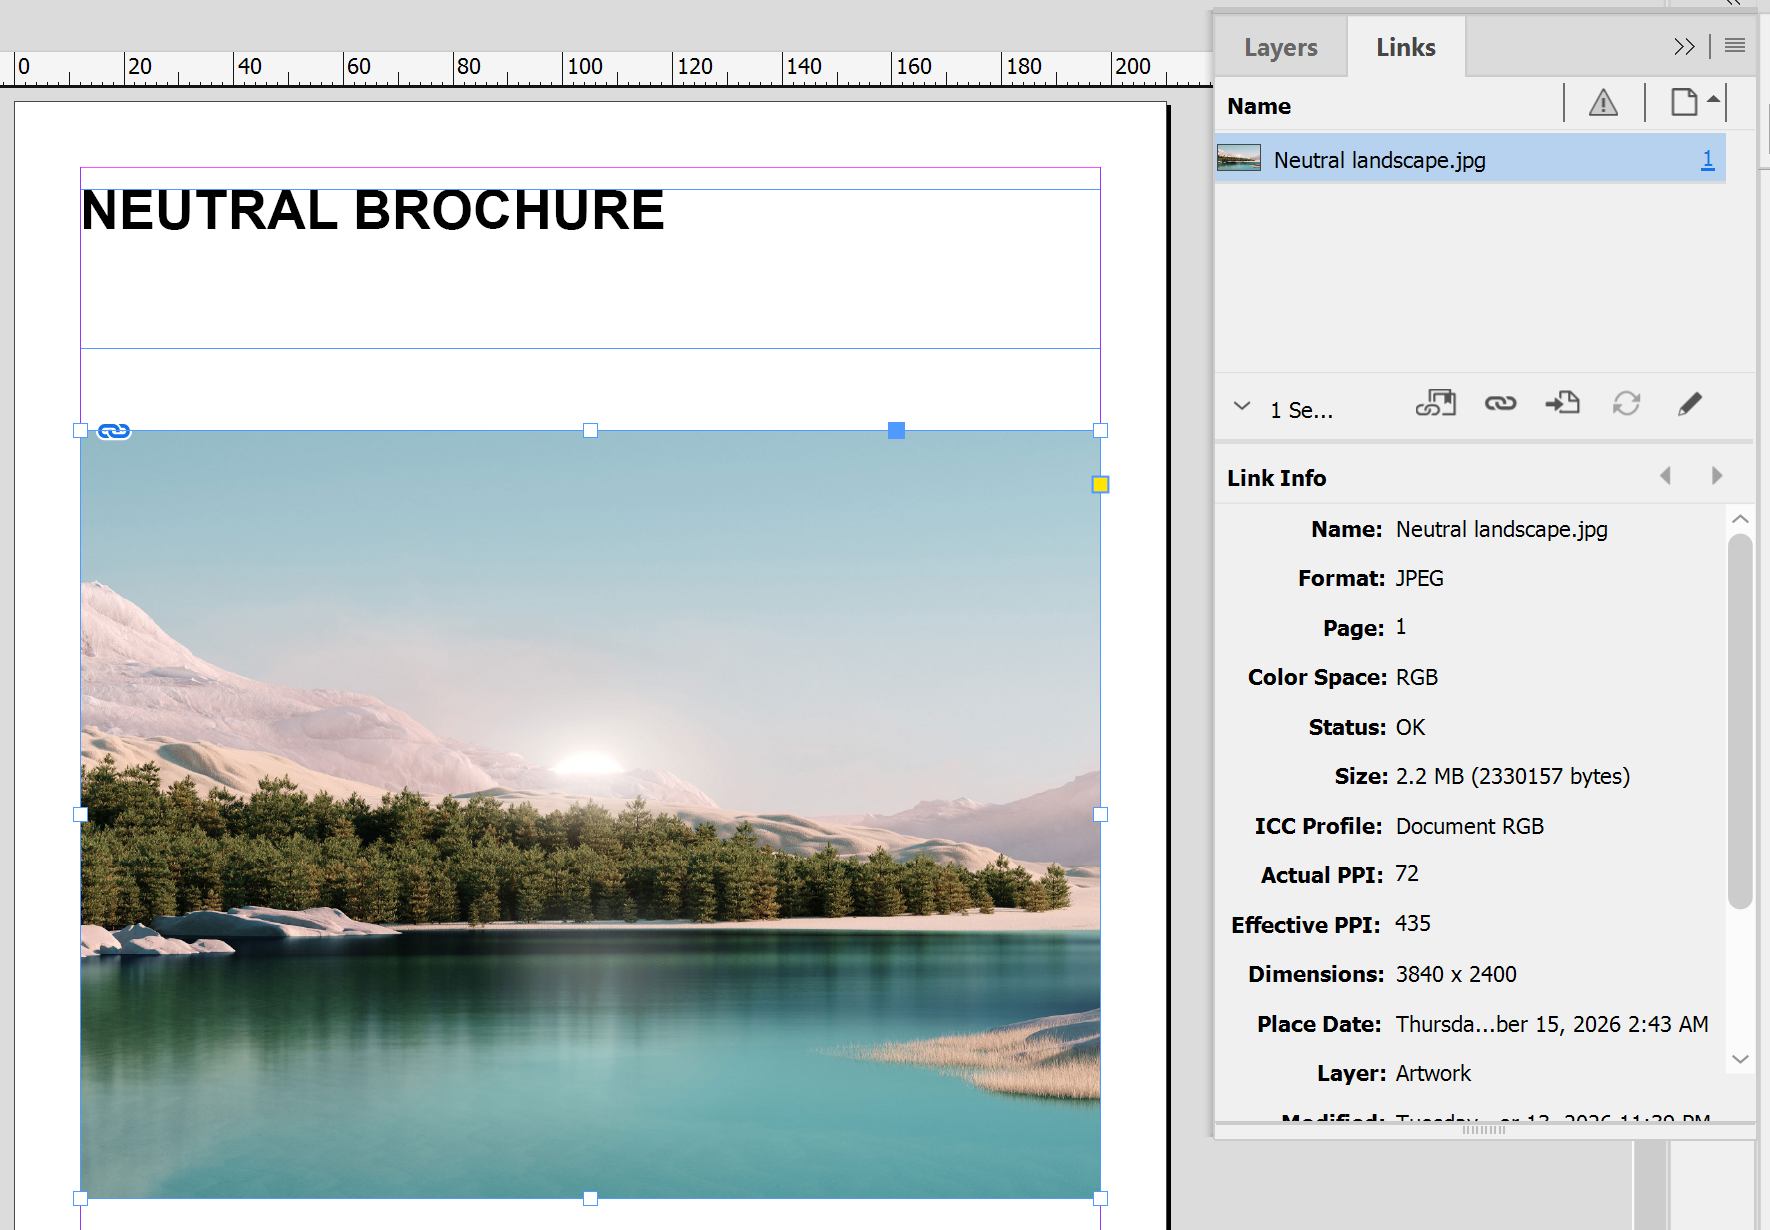
1. Place the image with File > Place, not copy and paste. A pasted image may contain only low-resolution preview data rather than the original file.
2. Select the image frame with the Selection tool (V).
3. In the main menu, go to Window > Links. Look at Effective PPI in the Link Info section of the panel. This is the resolution at the size the image is placed in your layout, so it already allows for any scaling.
Note: Effective PPI is only the real print resolution if the document is set up at 100% of the finished size. If you work at 10% scale, you need ten times our figures.
Steps to check resolution in Illustrator
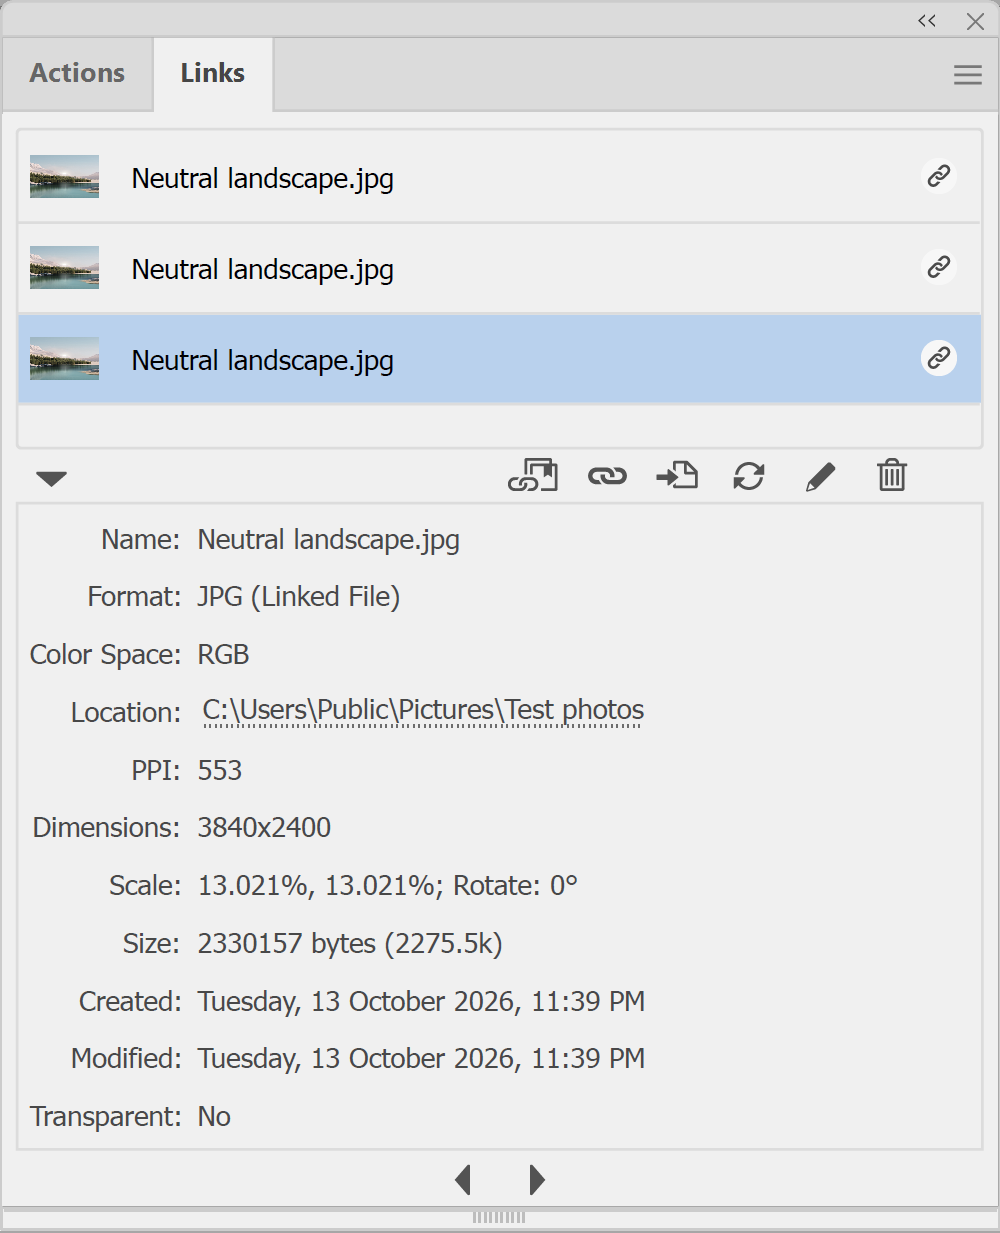
1. In the main menu, go to Window > Links.
2. Select the image in the Links panel, then click the Show Link Info button. You can also double-click the link.
3. Read the PPI row. It displays the effective pixels per inch of the image as it's placed on the artboard.
Steps to check resolution in a finished PDF (Acrobat Pro)
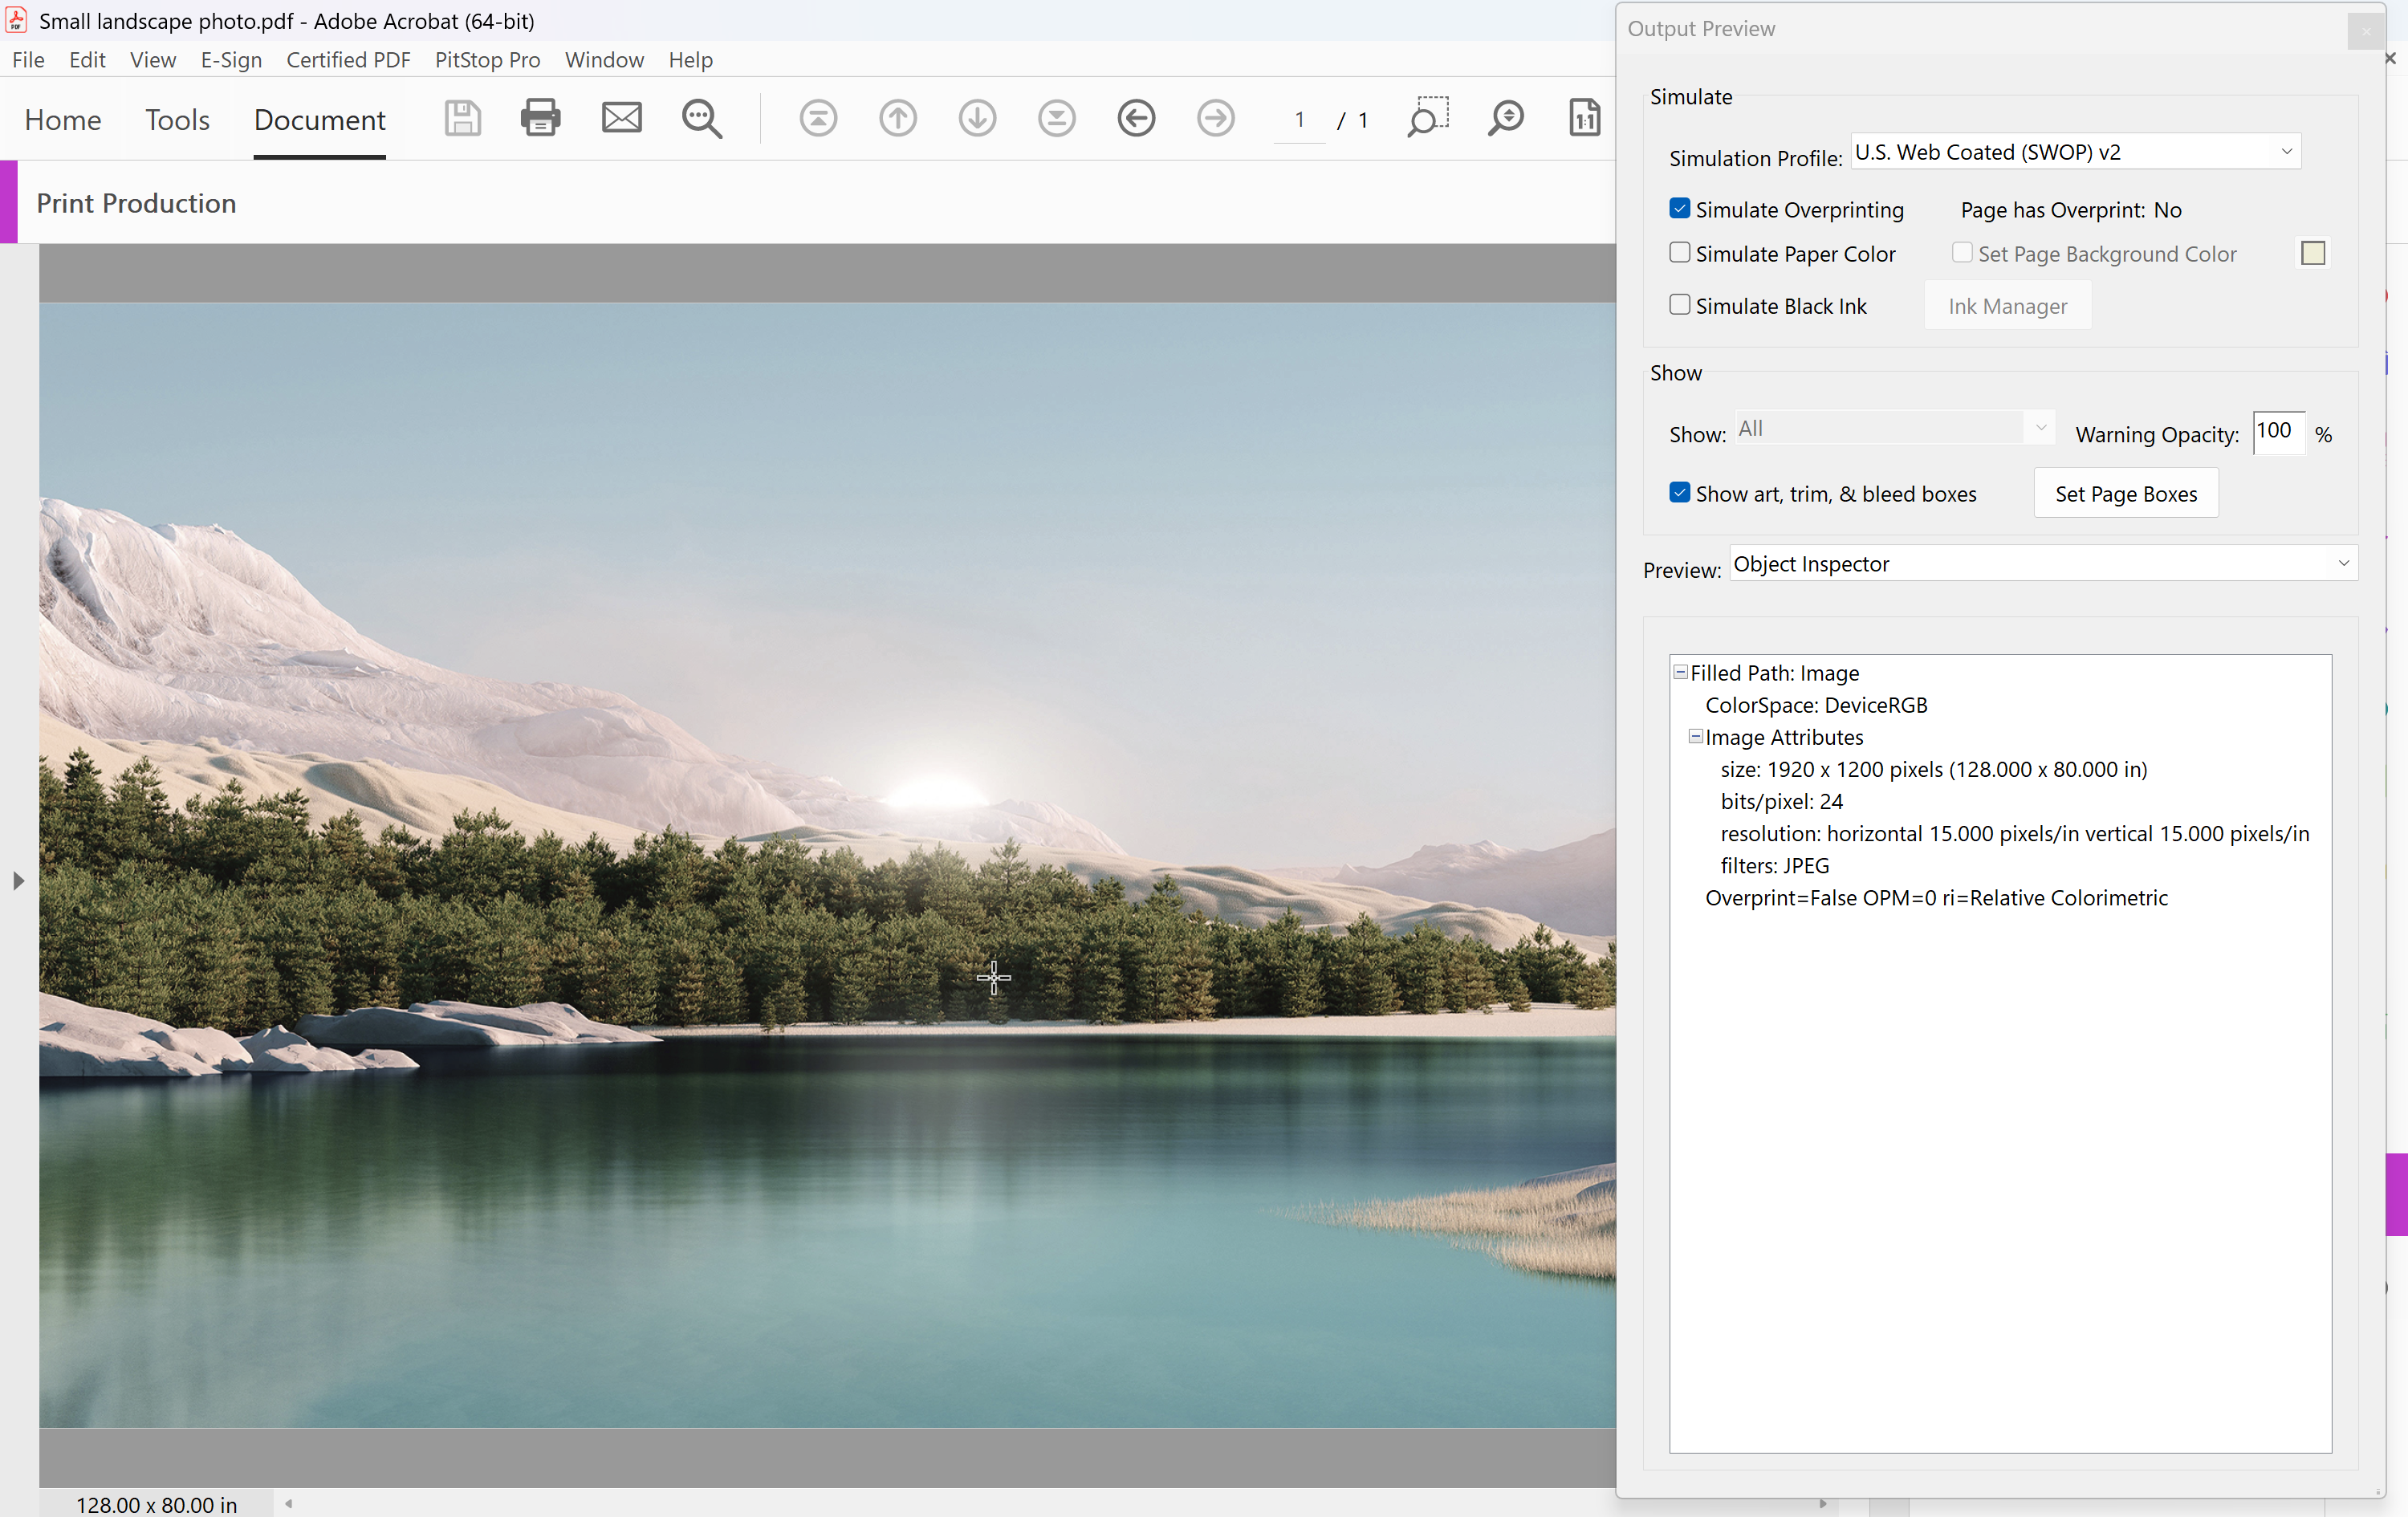
1. Open the PDF in Acrobat Pro and open Output Preview from the Print Production tools. In the new layout, choose All tools > Use print production > Output preview.
2. In the Preview section of the Output preview dialog box, choose Object Inspector.
3. Finally, click directly on each image in the document window. The Object Inspector shows that image's resolution and colour mode. Check every photo, and you're done!
What if my image is too low resolution?
The safest fix is a bigger original: go back to the source file or the photographer, or choose a different image. With Resample ticked, Photoshop will add pixels to reach a higher Resolution figure, but a bigger number in the dialog isn't the same as a sharper print, so check the result closely before you use it.
If you'd rather we checked your artwork before it prints, our artwork preflighting service covers insufficient image resolution, one of the most common issues we find. Full details are on our artwork specifications page, and when your files are ready, see sending artwork.
Need some help?
We're here for you
If you're needing some advice or just a helping hand, please get in touch with our team, by clicking this button. Complete the enquiry form and one of our specialists will call you back as soon as we can.