

YOUR CART IS CURRENTLY EMPTY
How do I fix overprint problems in Illustrator and InDesign?
What is overprinting?
By default, when two colours overlap, the top colour knocks out the area underneath, so only the top ink prints there. Overprinting does the opposite: the top ink prints over the ink below it, and the two mix. A 100% magenta shape overprinting 100% cyan prints violet, not magenta.
Used on purpose, overprinting helps small black text sit cleanly on a coloured background. Used by accident, it changes your artwork.
Why does overprinting cause problems in print?
Overprint settings don't show on screen in the normal view. Adobe notes that unintended overprint only becomes apparent with Overprint Preview or separations turned on, so it's easy to miss. Three common problems are:
- White text or shapes that disappear. White isn't printed as an ink on a CMYK job, so when a white object is set to overprint, the colours underneath print straight through it.
- Large black areas where the colours underneath show through, because 100% black ink overprinting other colours may not be opaque enough to hide them.
- Colours that shift, where a logo or panel has overprint switched on and mixes with whatever sits below it.
A setting can also follow you around: in Illustrator, a new object can pick up the overprint setting of the object you had selected before.
Transparency matters too. Overprints and transparency interact, and our specifications ask you to flatten any transparency before you export. Our guide How do I flatten a transparency? shows how.
Steps to fix overprint problems in Illustrator
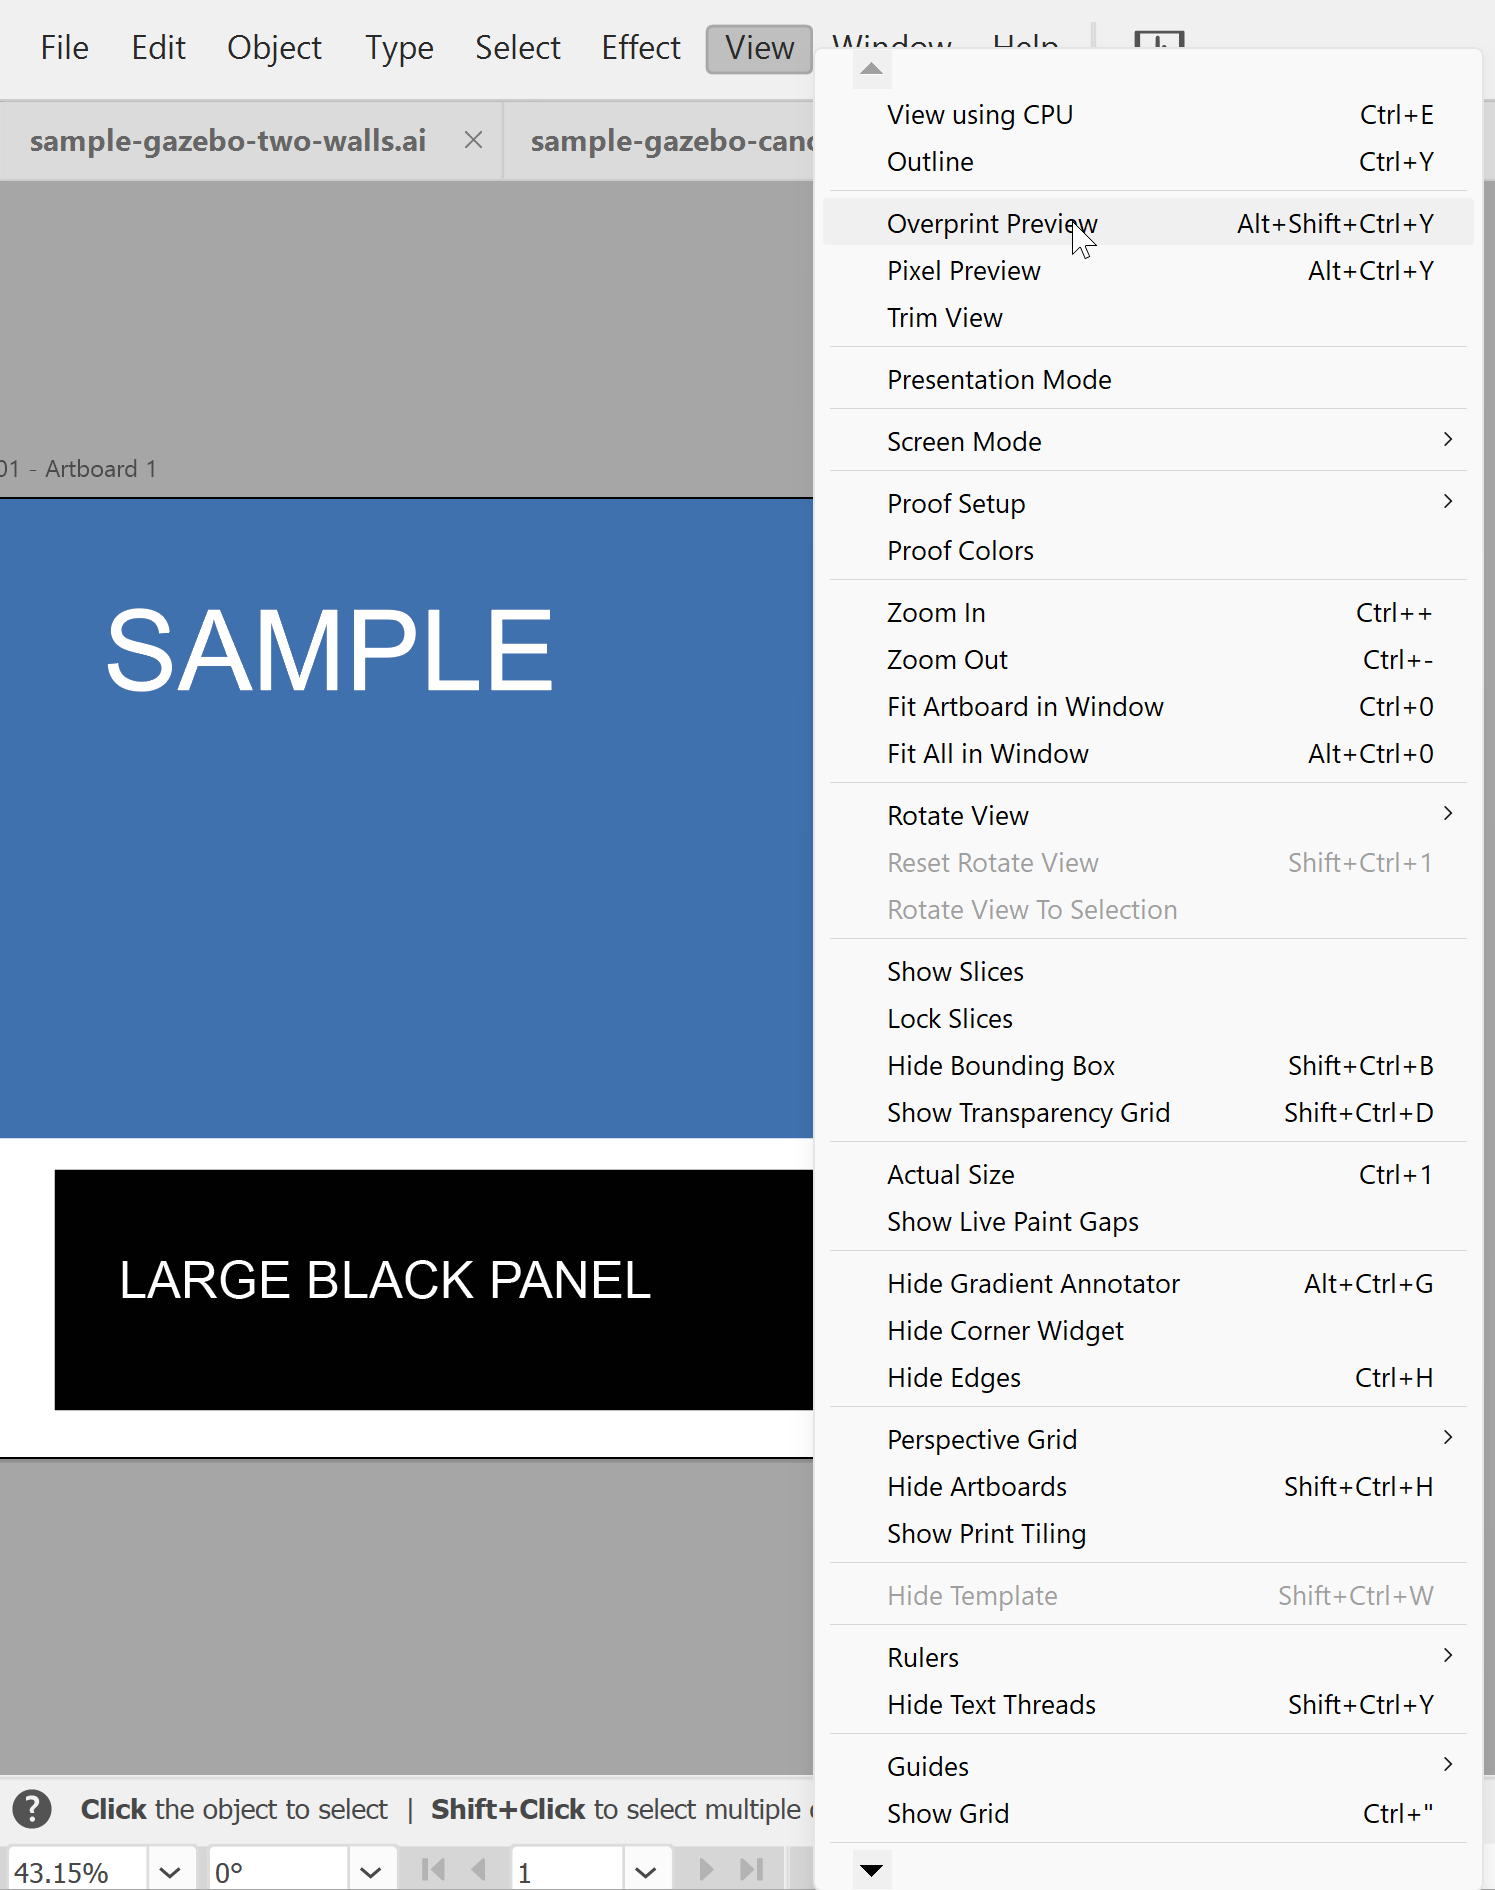
1. Turn on Overprint Preview to see how the colours will really print. In the main menu, go to View > Overprint Preview.
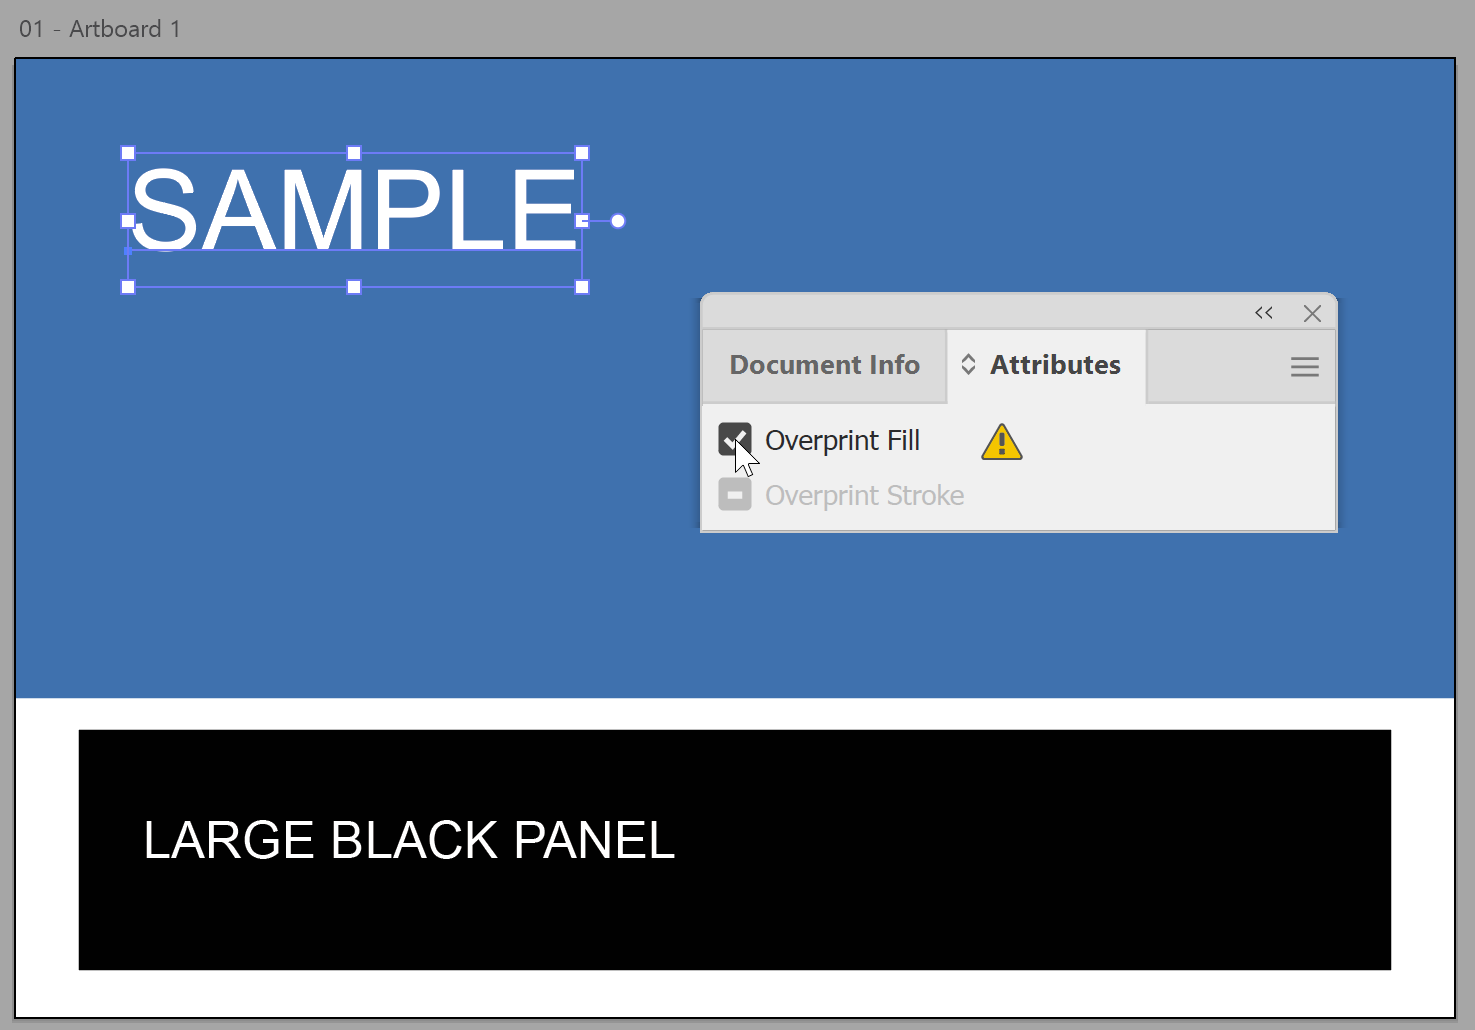
2. Find the overprinting objects. Select an object that looks wrong, then in the main menu go to Window > Attributes. If Overprint Fill or Overprint Stroke is ticked, untick it.
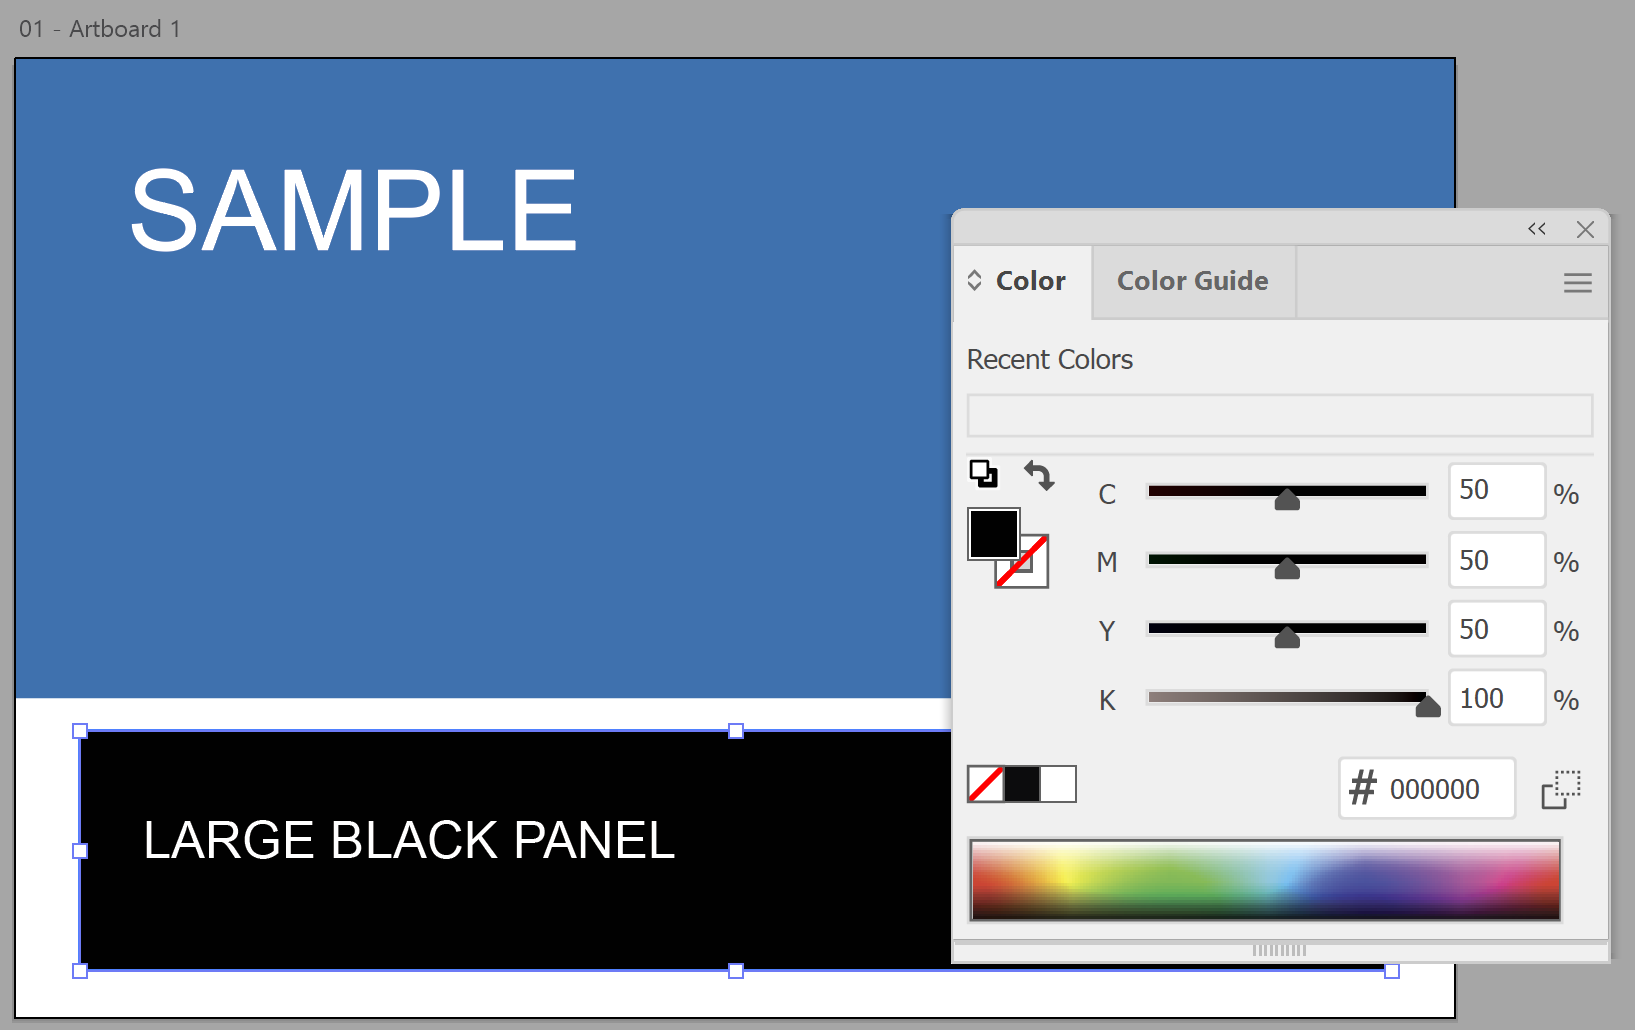
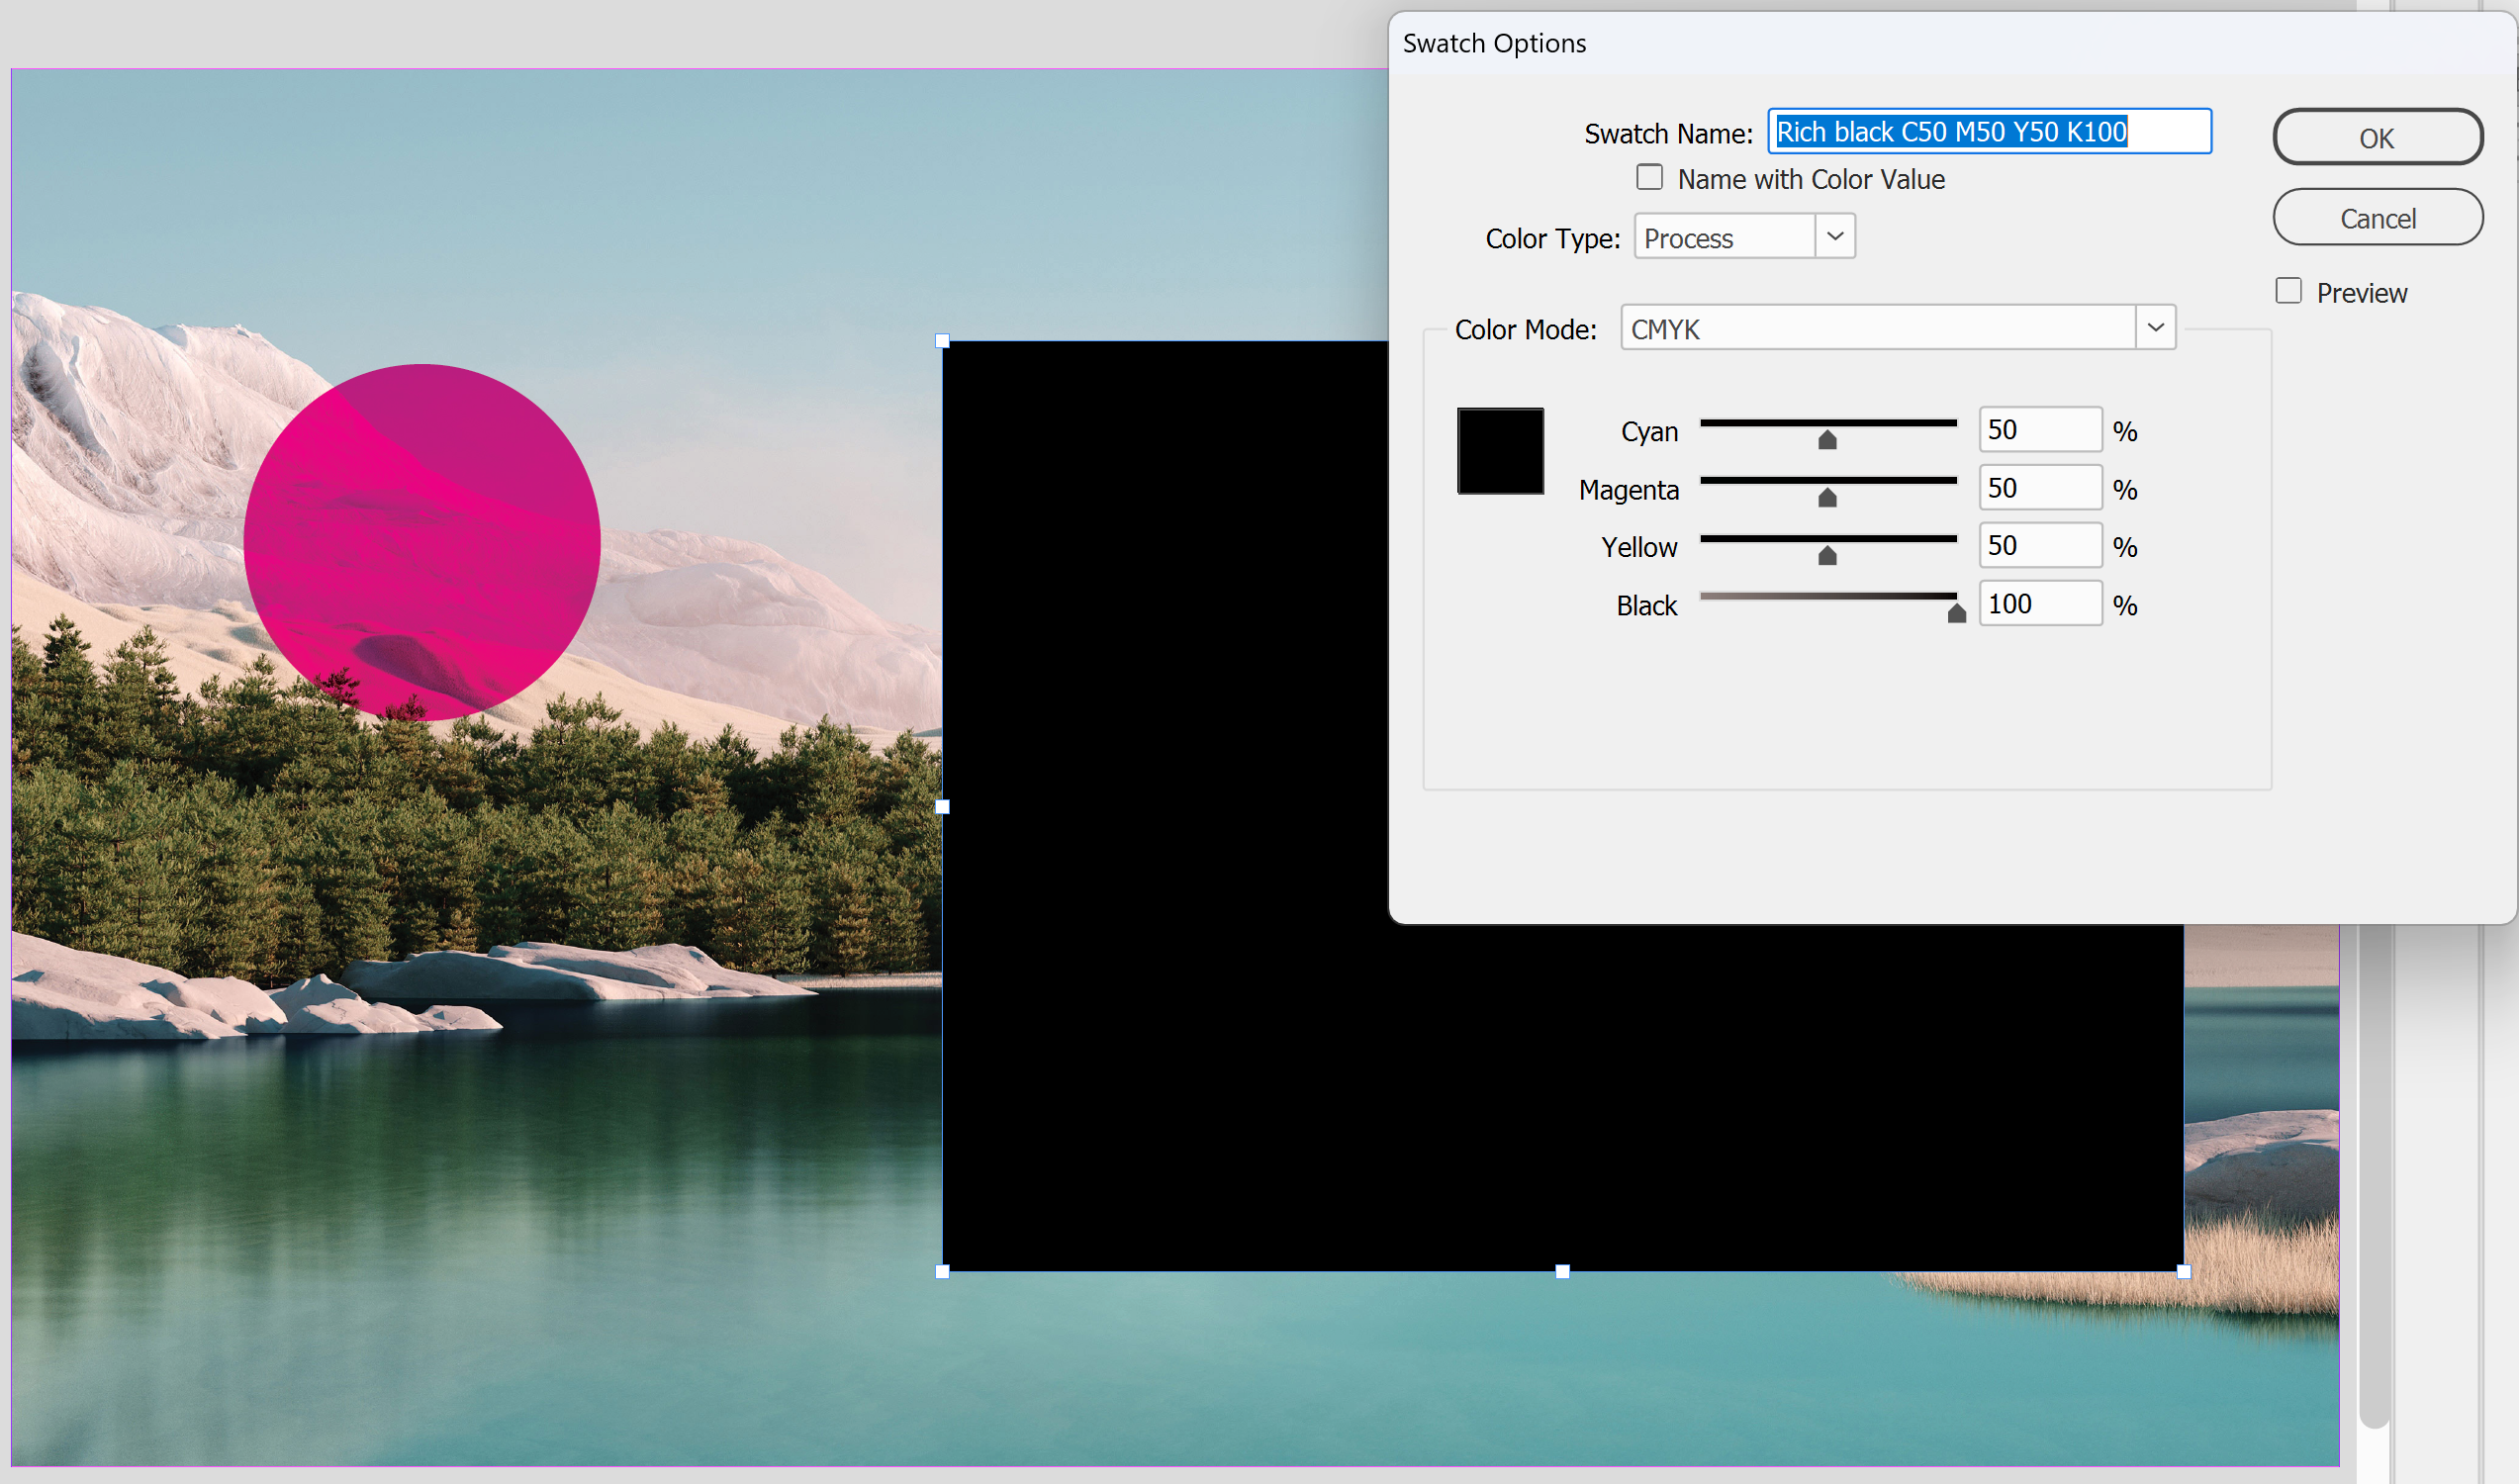
3. Check your large black areas. Overprinting a 100% black fill can let the colours underneath show through. For big black backgrounds and large black type, use a rich black instead. Our artwork specifications use C 50, M 50, Y 50, K 100.
4. Check the white overprint setting. In the main menu, go to File > Document Setup and make sure Discard White Overprint in Output is ticked. It removes overprint from white objects when you save a PDF, and it's on by default.
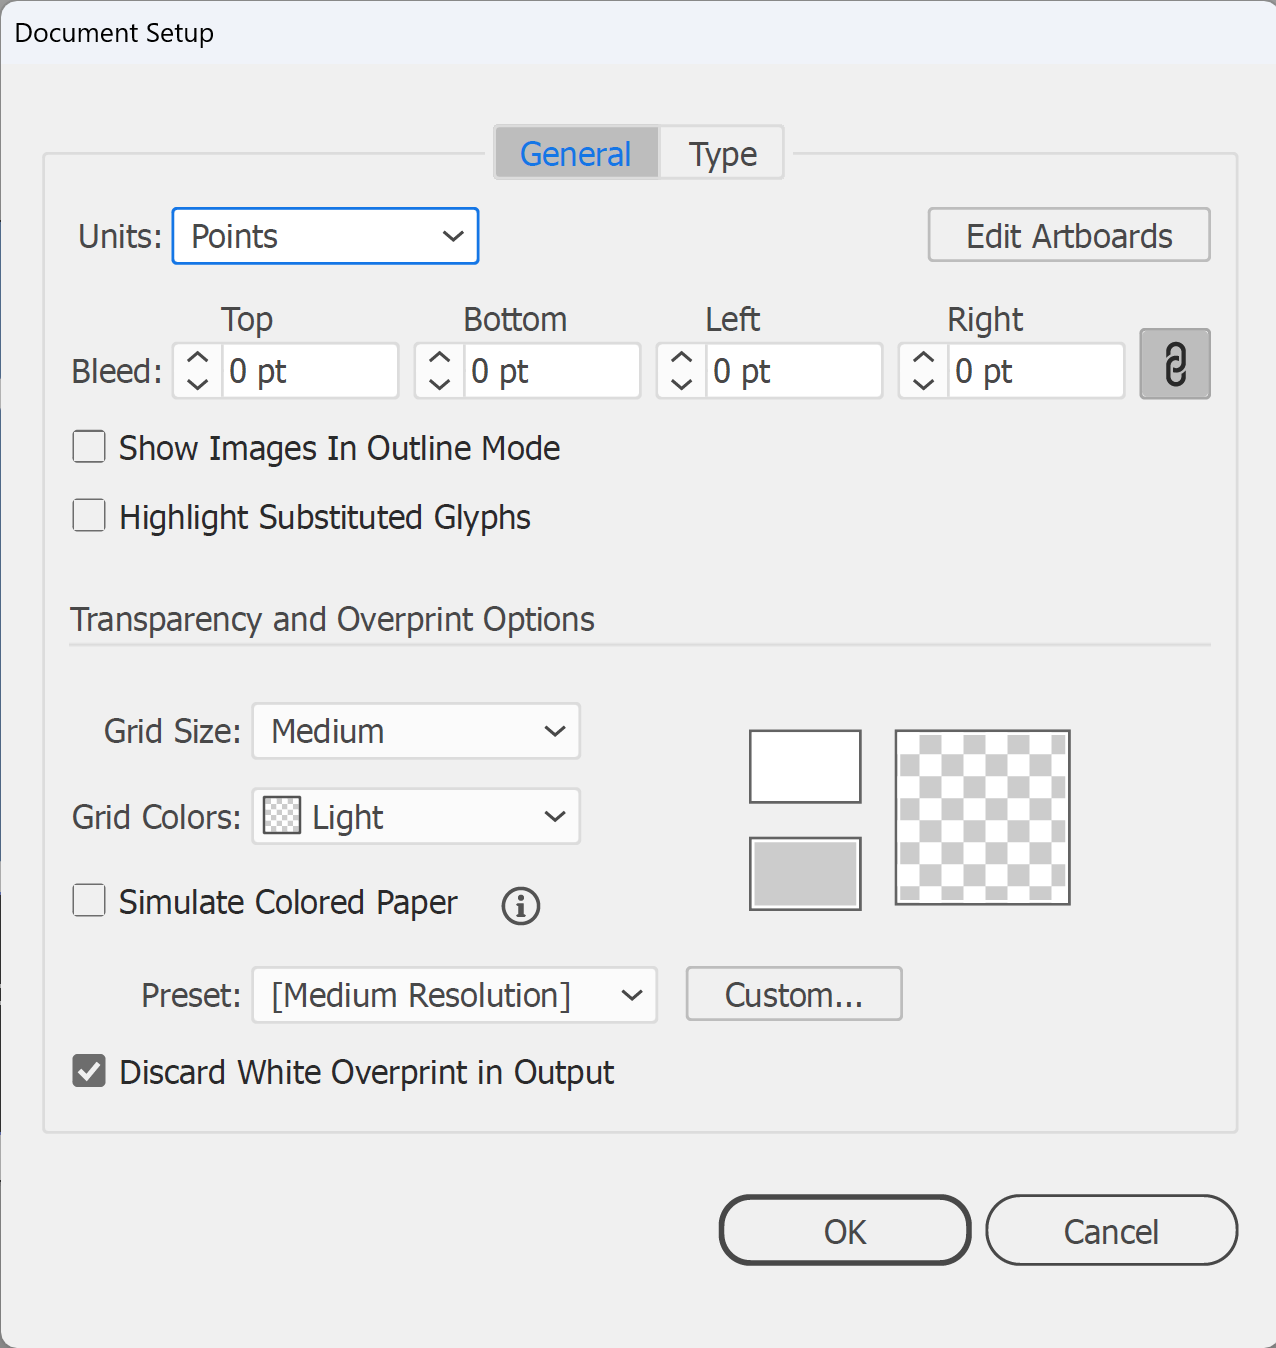
Note: Discard White Overprint in Output doesn't affect spot white objects, so check those by hand.
5. Finally, save your PDF, check it against our artwork specifications and email it to sales@displays2go.com.au, and you're done!
Steps to fix overprint problems in InDesign
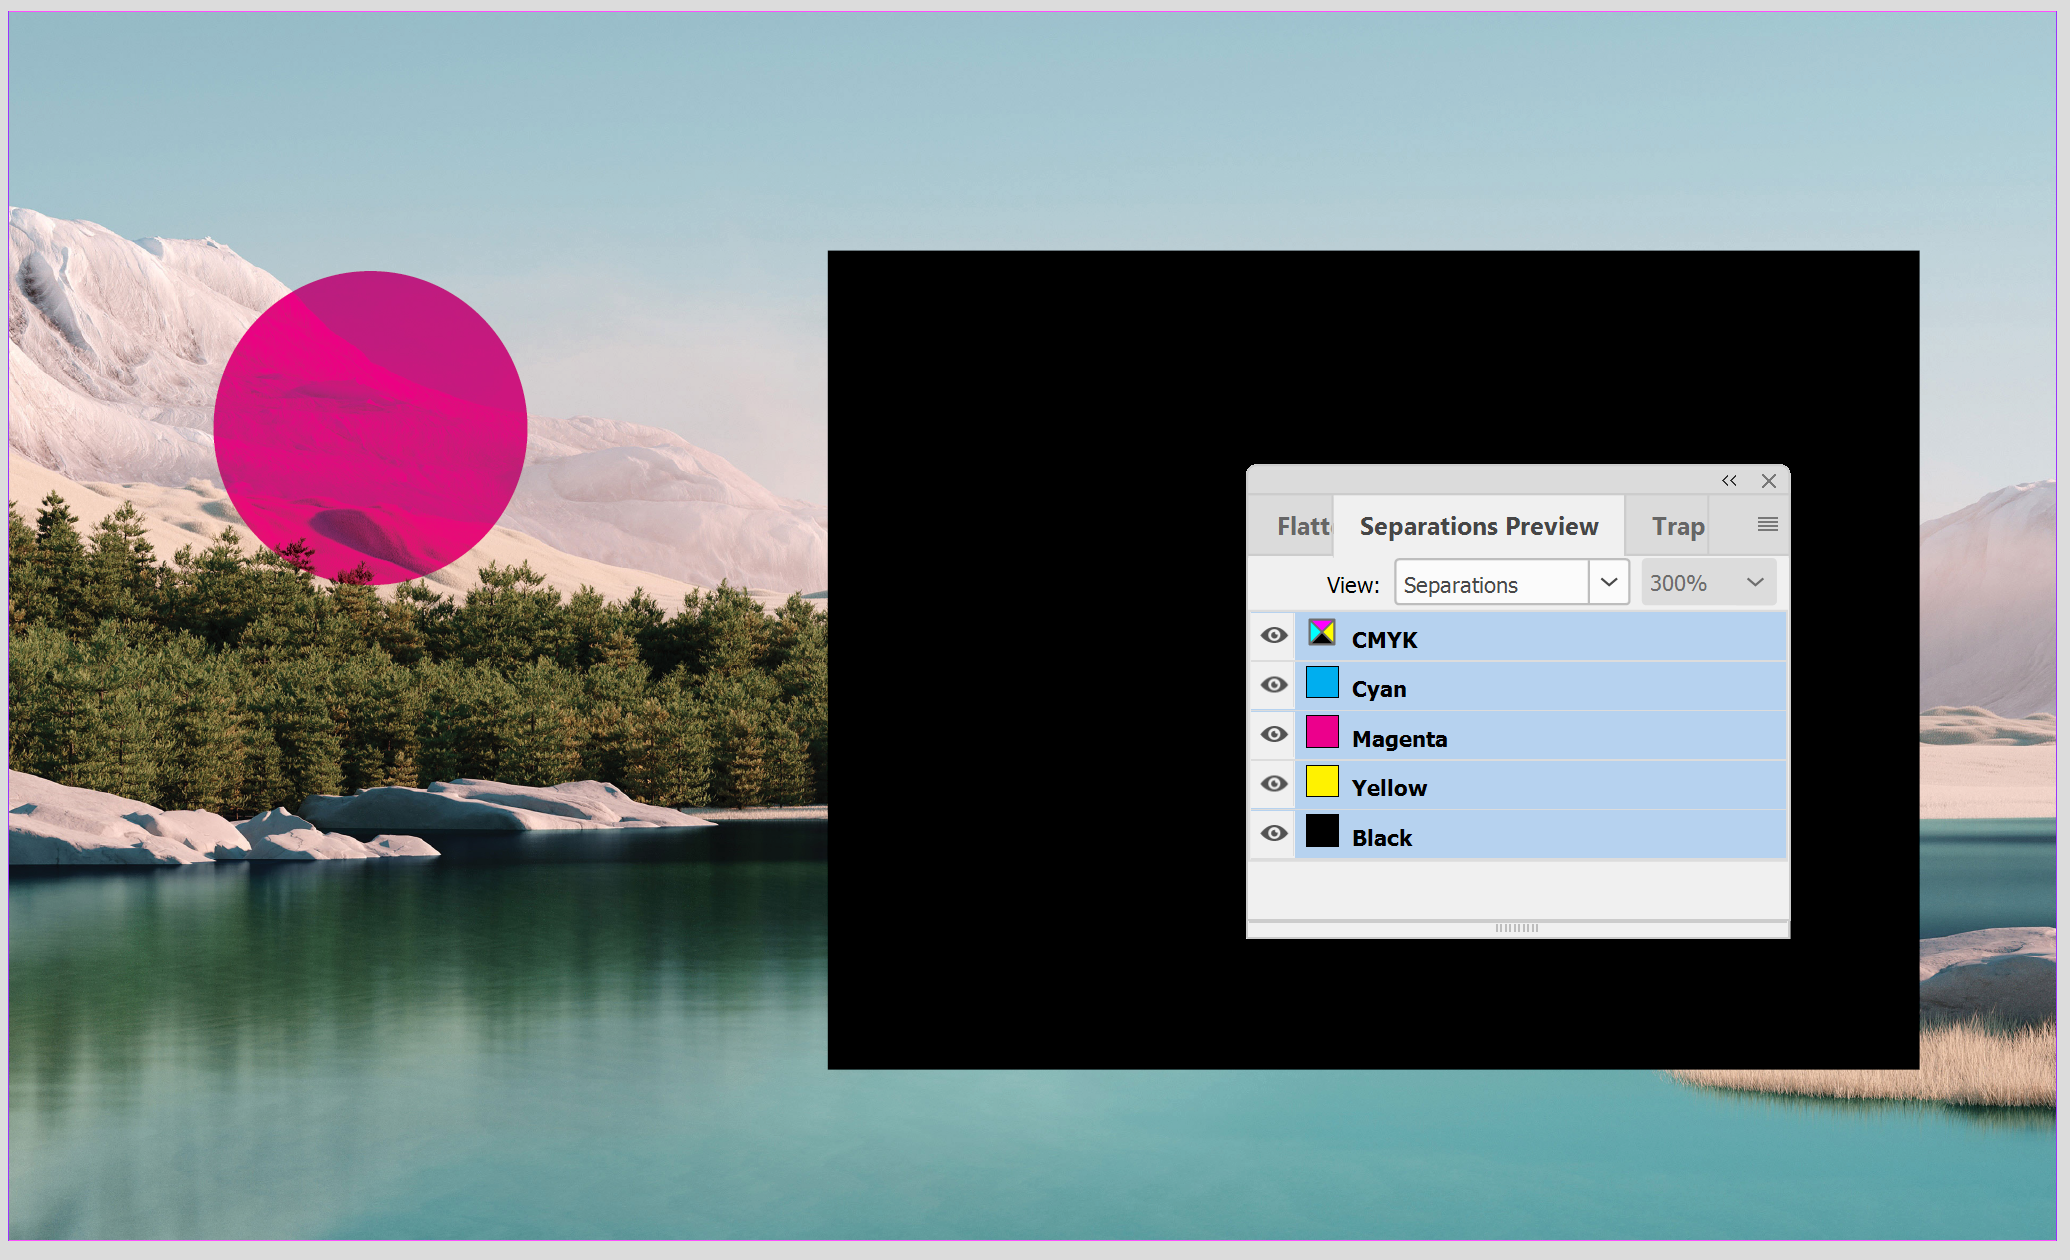
1. Turn on the preview. In the main menu, go to View > Overprint Preview. To check each ink, open Window > Output > Separations Preview and set View to Separations. Switch the inks on and off with the eye icons to see which ones print in each area.
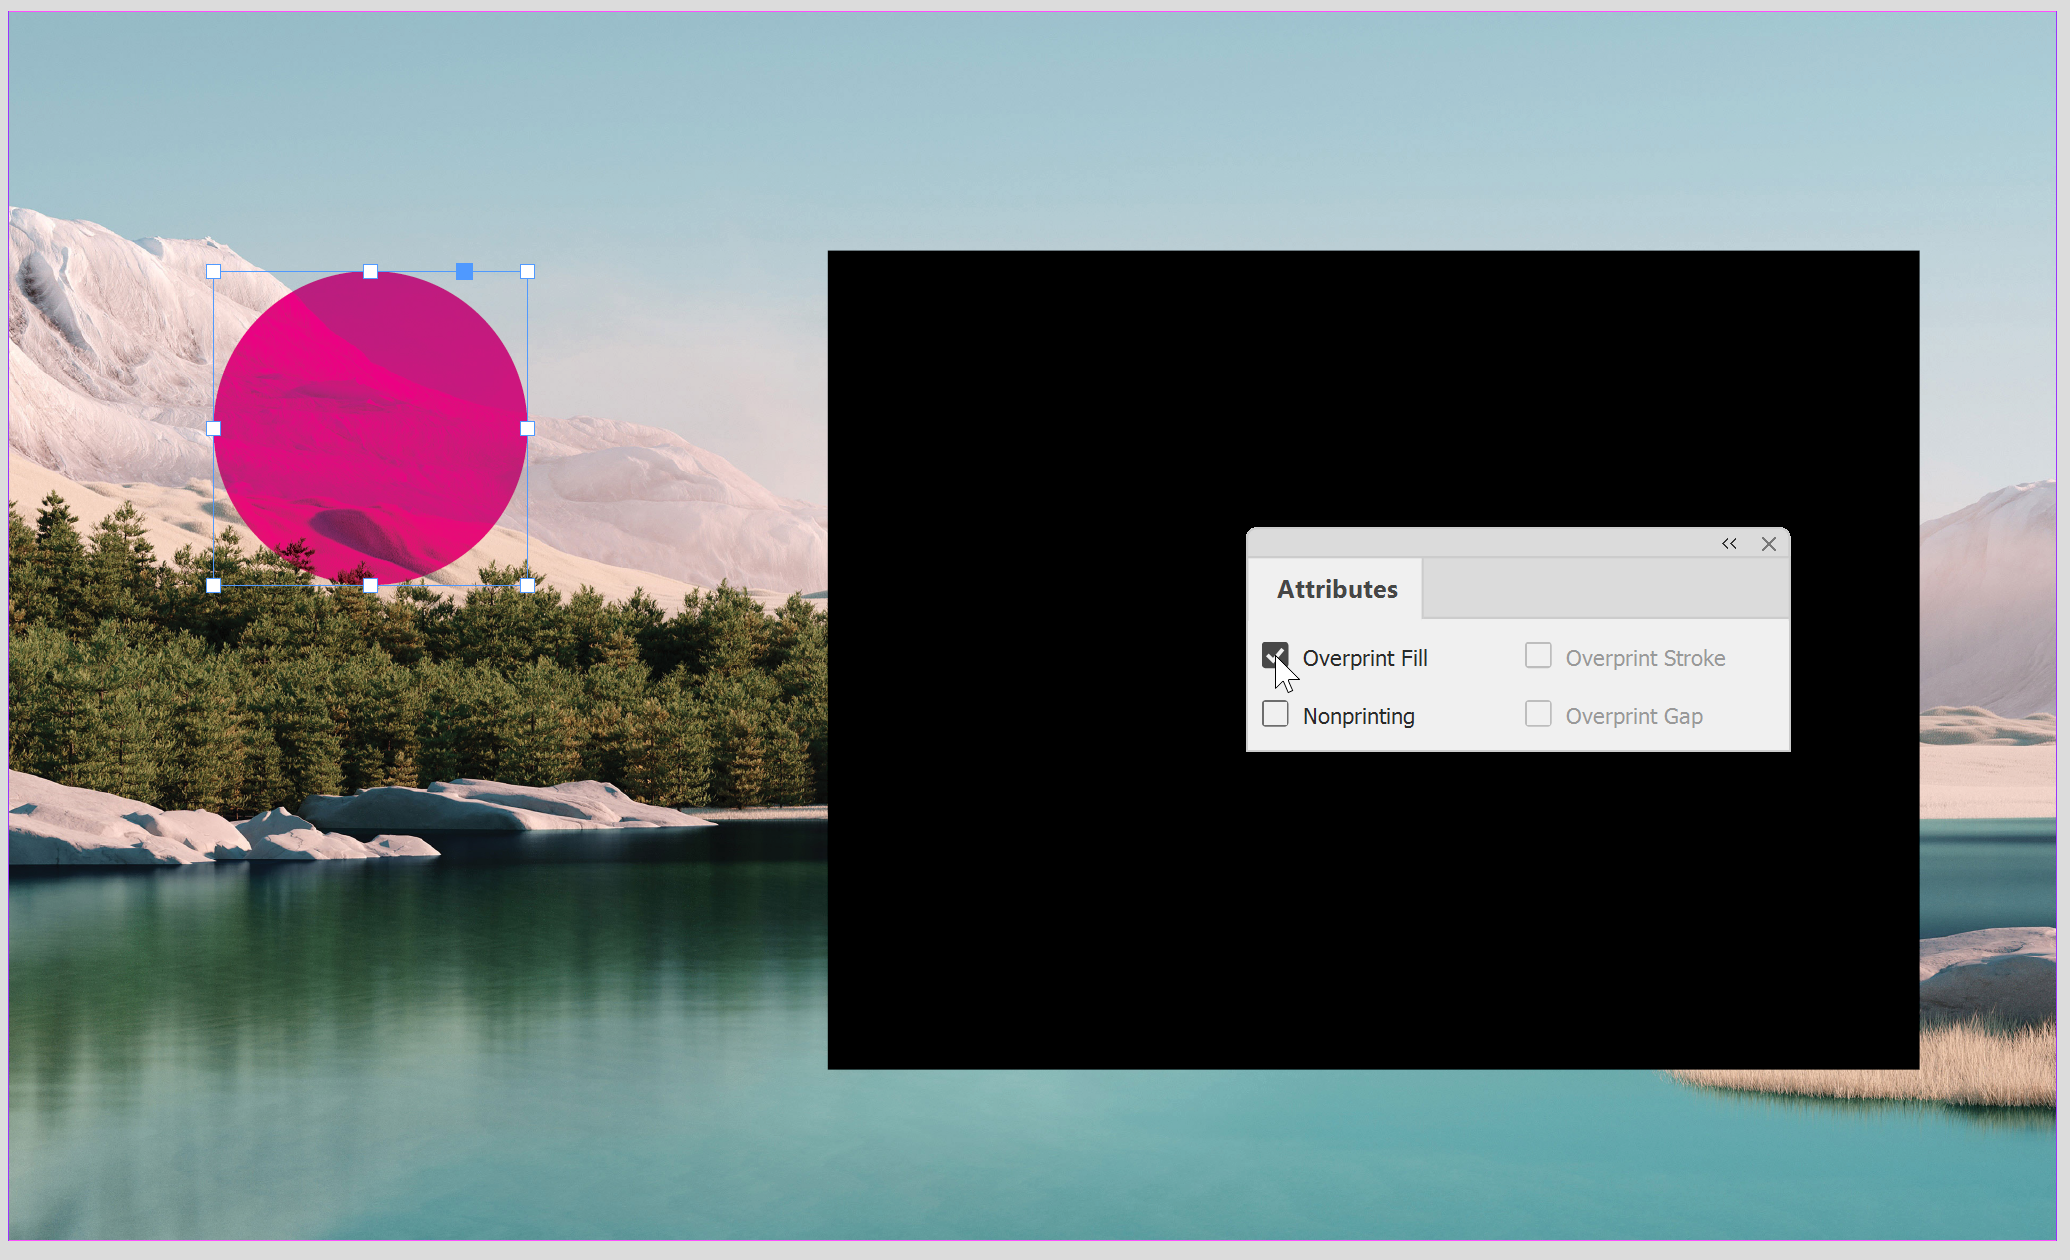
2. Select the problem object, then in the main menu go to Window > Output > Attributes. Untick Overprint Fill and Overprint Stroke.
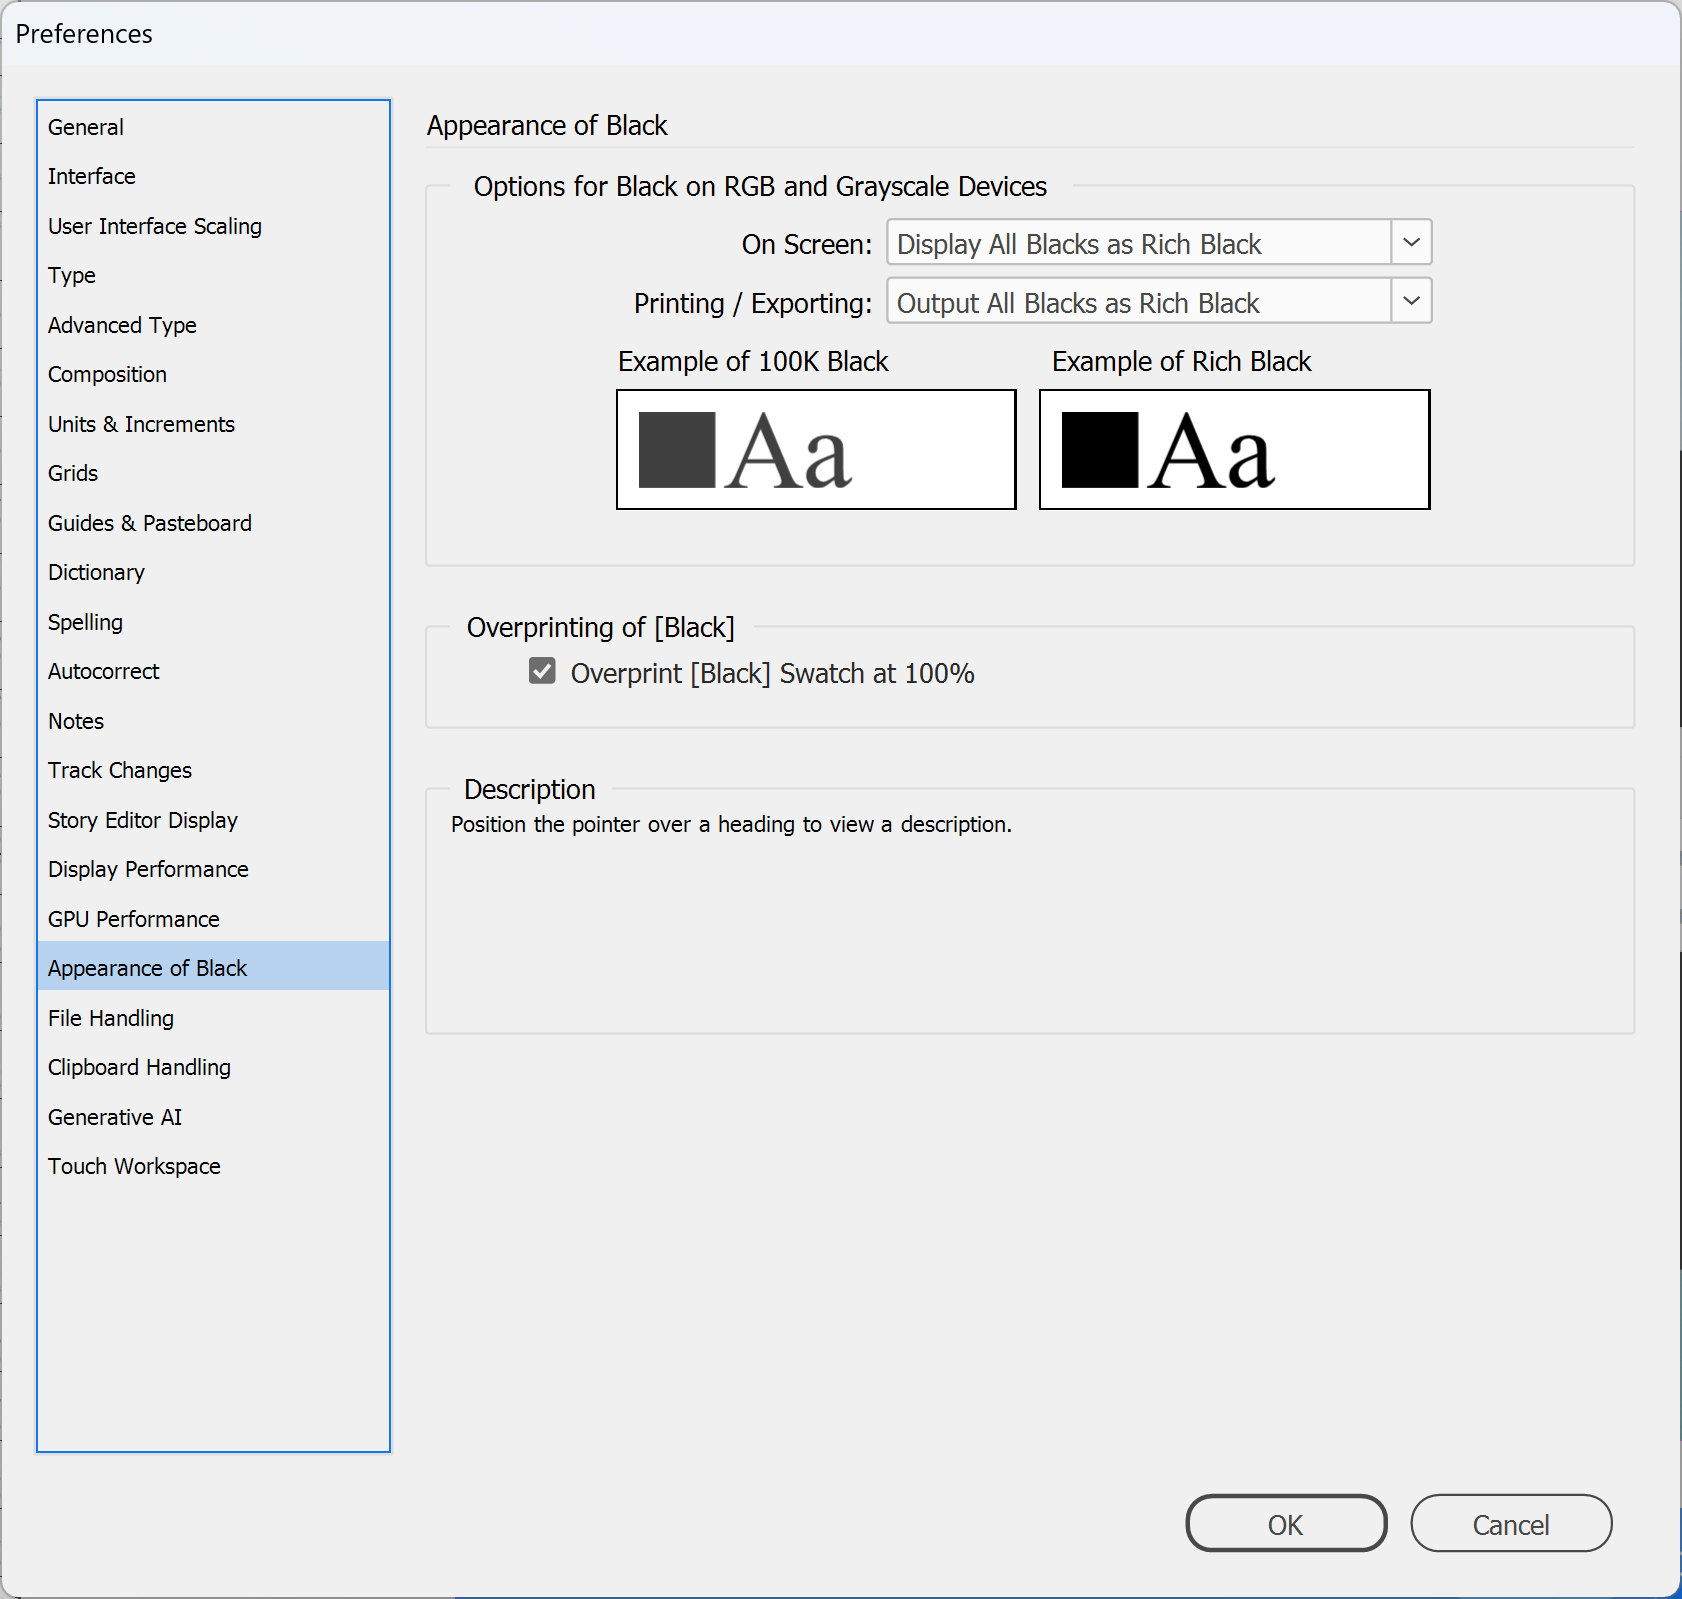
3. Check black. InDesign overprints the default [Black] swatch at 100% automatically, which helps small black text and strokes print cleanly on colour. For a large black panel over a photo or colour, use a rich black swatch instead, because the automatic overprint only applies to the [Black] swatch. The Attributes panel doesn't show this automatic overprint, so check black areas in Separations Preview rather than relying on step 2.
Note: The setting is Overprint [Black] Swatch at 100%, in Edit > Preferences > Appearance of Black (Windows) or InDesign > Preferences > Appearance of Black (macOS). It applies to all your documents, so leave it on and use rich black for big black areas instead.
4. Finally, export your PDF, check it against our artwork specifications and email it to sales@displays2go.com.au, and you're done! If you'd like a second pair of eyes first, book our artwork preflighting service.
Need some help?
We're here for you
If you're needing some advice or just a helping hand, please get in touch with our team, by clicking this button. Complete the enquiry form and one of our specialists will call you back as soon as we can.