

YOUR CART IS CURRENTLY EMPTY
How do I open and edit a PDF in Illustrator without losing fonts?
Why do fonts go wrong when I open a PDF in Illustrator?
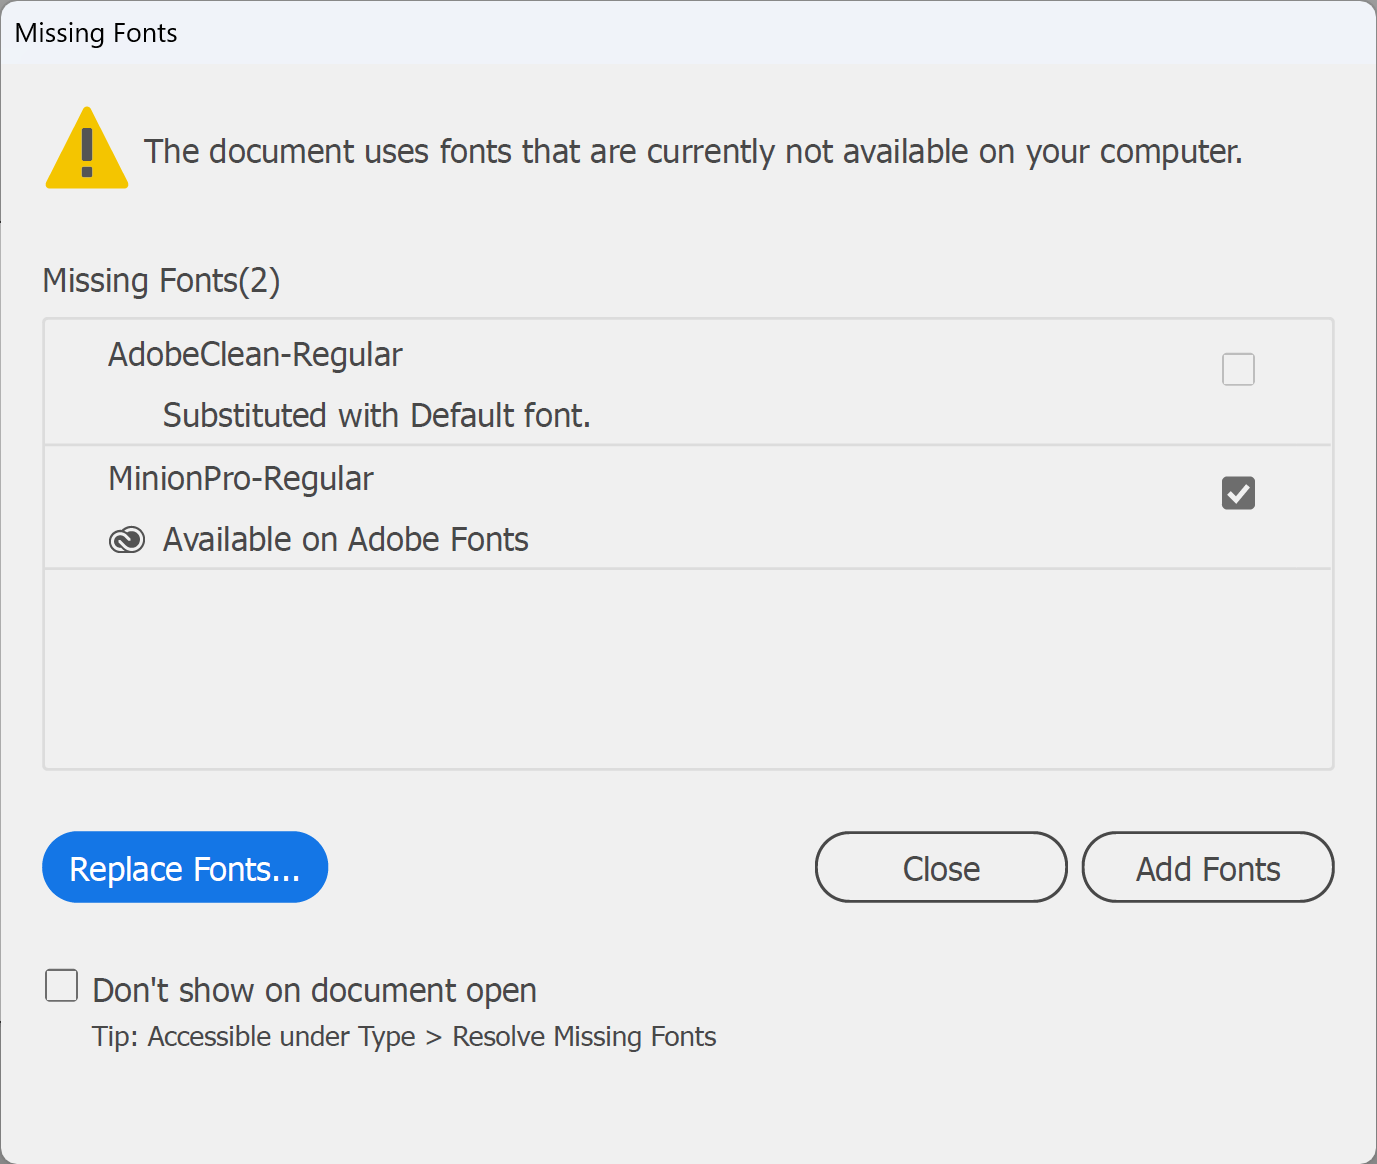
A print-ready PDF usually carries its fonts inside it, often as a subset containing only the characters used in the file. That's enough to display and print the file, but it's not the same as having the font installed. When you open the PDF in Illustrator to edit it, Illustrator looks for the fonts on your computer. If it can't find them, it shows the Missing Fonts dialog box, and if you edit the text anyway, Illustrator substitutes its default font.
That's how a headline set in your brand font ends up reflowed in something else, often without anyone noticing until it's printed.
Why can't I just ask for the original file?
You should, if you can! The native artwork file is always the safest thing to edit. But sometimes the printer's PDF is all a client has. In that case, follow the steps below.
Steps to open and edit a PDF in Illustrator
1. Check which fonts the PDF uses before you open it in Illustrator. In Acrobat, select Document properties from the Menu (Windows) or the File menu (macOS), then select the Fonts tab in the Document Properties dialog box. Fonts marked (Embedded Subset) are embedded in the file, but that doesn't mean they're installed on your computer.
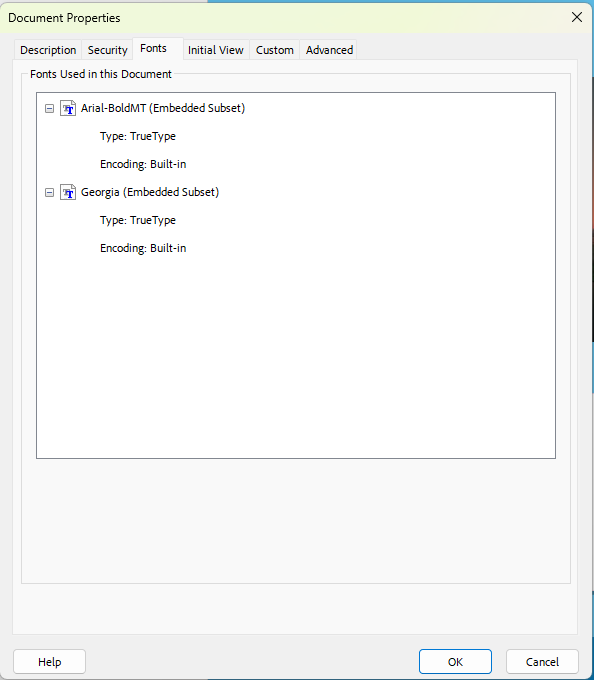
2. Make sure every font on that list is installed on your computer (with a licence that covers your use) or available in Adobe Fonts, so you don't need to substitute.
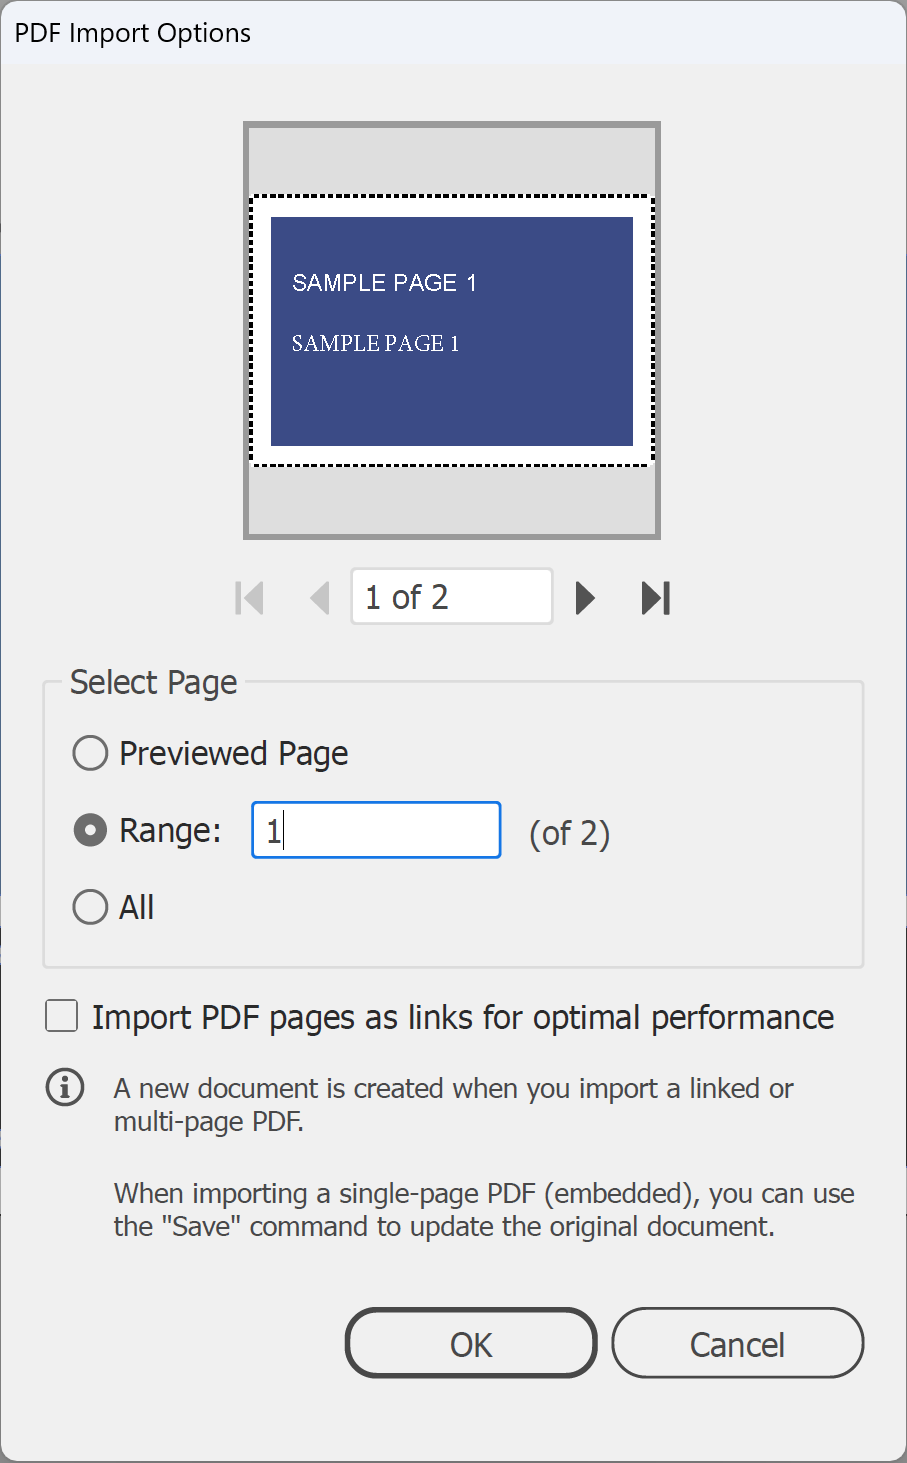
3. Open the PDF. In Illustrator, go to File > Open, select the PDF and click Open. If the PDF has more than one page, the PDF Import Options dialog box appears. Select Range and type the page you need, or select All, then click OK.
4. If the Missing Fonts dialog box appears, deal with it before you edit anything:
- Select Add Fonts to activate fonts that are available in Adobe Fonts. These show Available on Adobe Fonts with a selected checkbox. Add Fonts only works if Adobe Fonts is turned on in the Creative Cloud desktop app. - Select Replace Fonts only if you've agreed a replacement with the client. - Select Close to open the file without changing anything, so you can look before you decide. You can reopen the dialog later from Type > Resolve Missing Fonts.
IMPORTANT: Don't double-click text set in a missing font unless you mean to change it. Illustrator shows a warning, and if you select OK it substitutes the default font.
5. If you can't select the text or artwork you need, it may be inside a clipping mask. Open the Layers panel (Window > Layers), select the group that contains the clipping path, then in the main menu go to Object > Clipping Mask > Release.
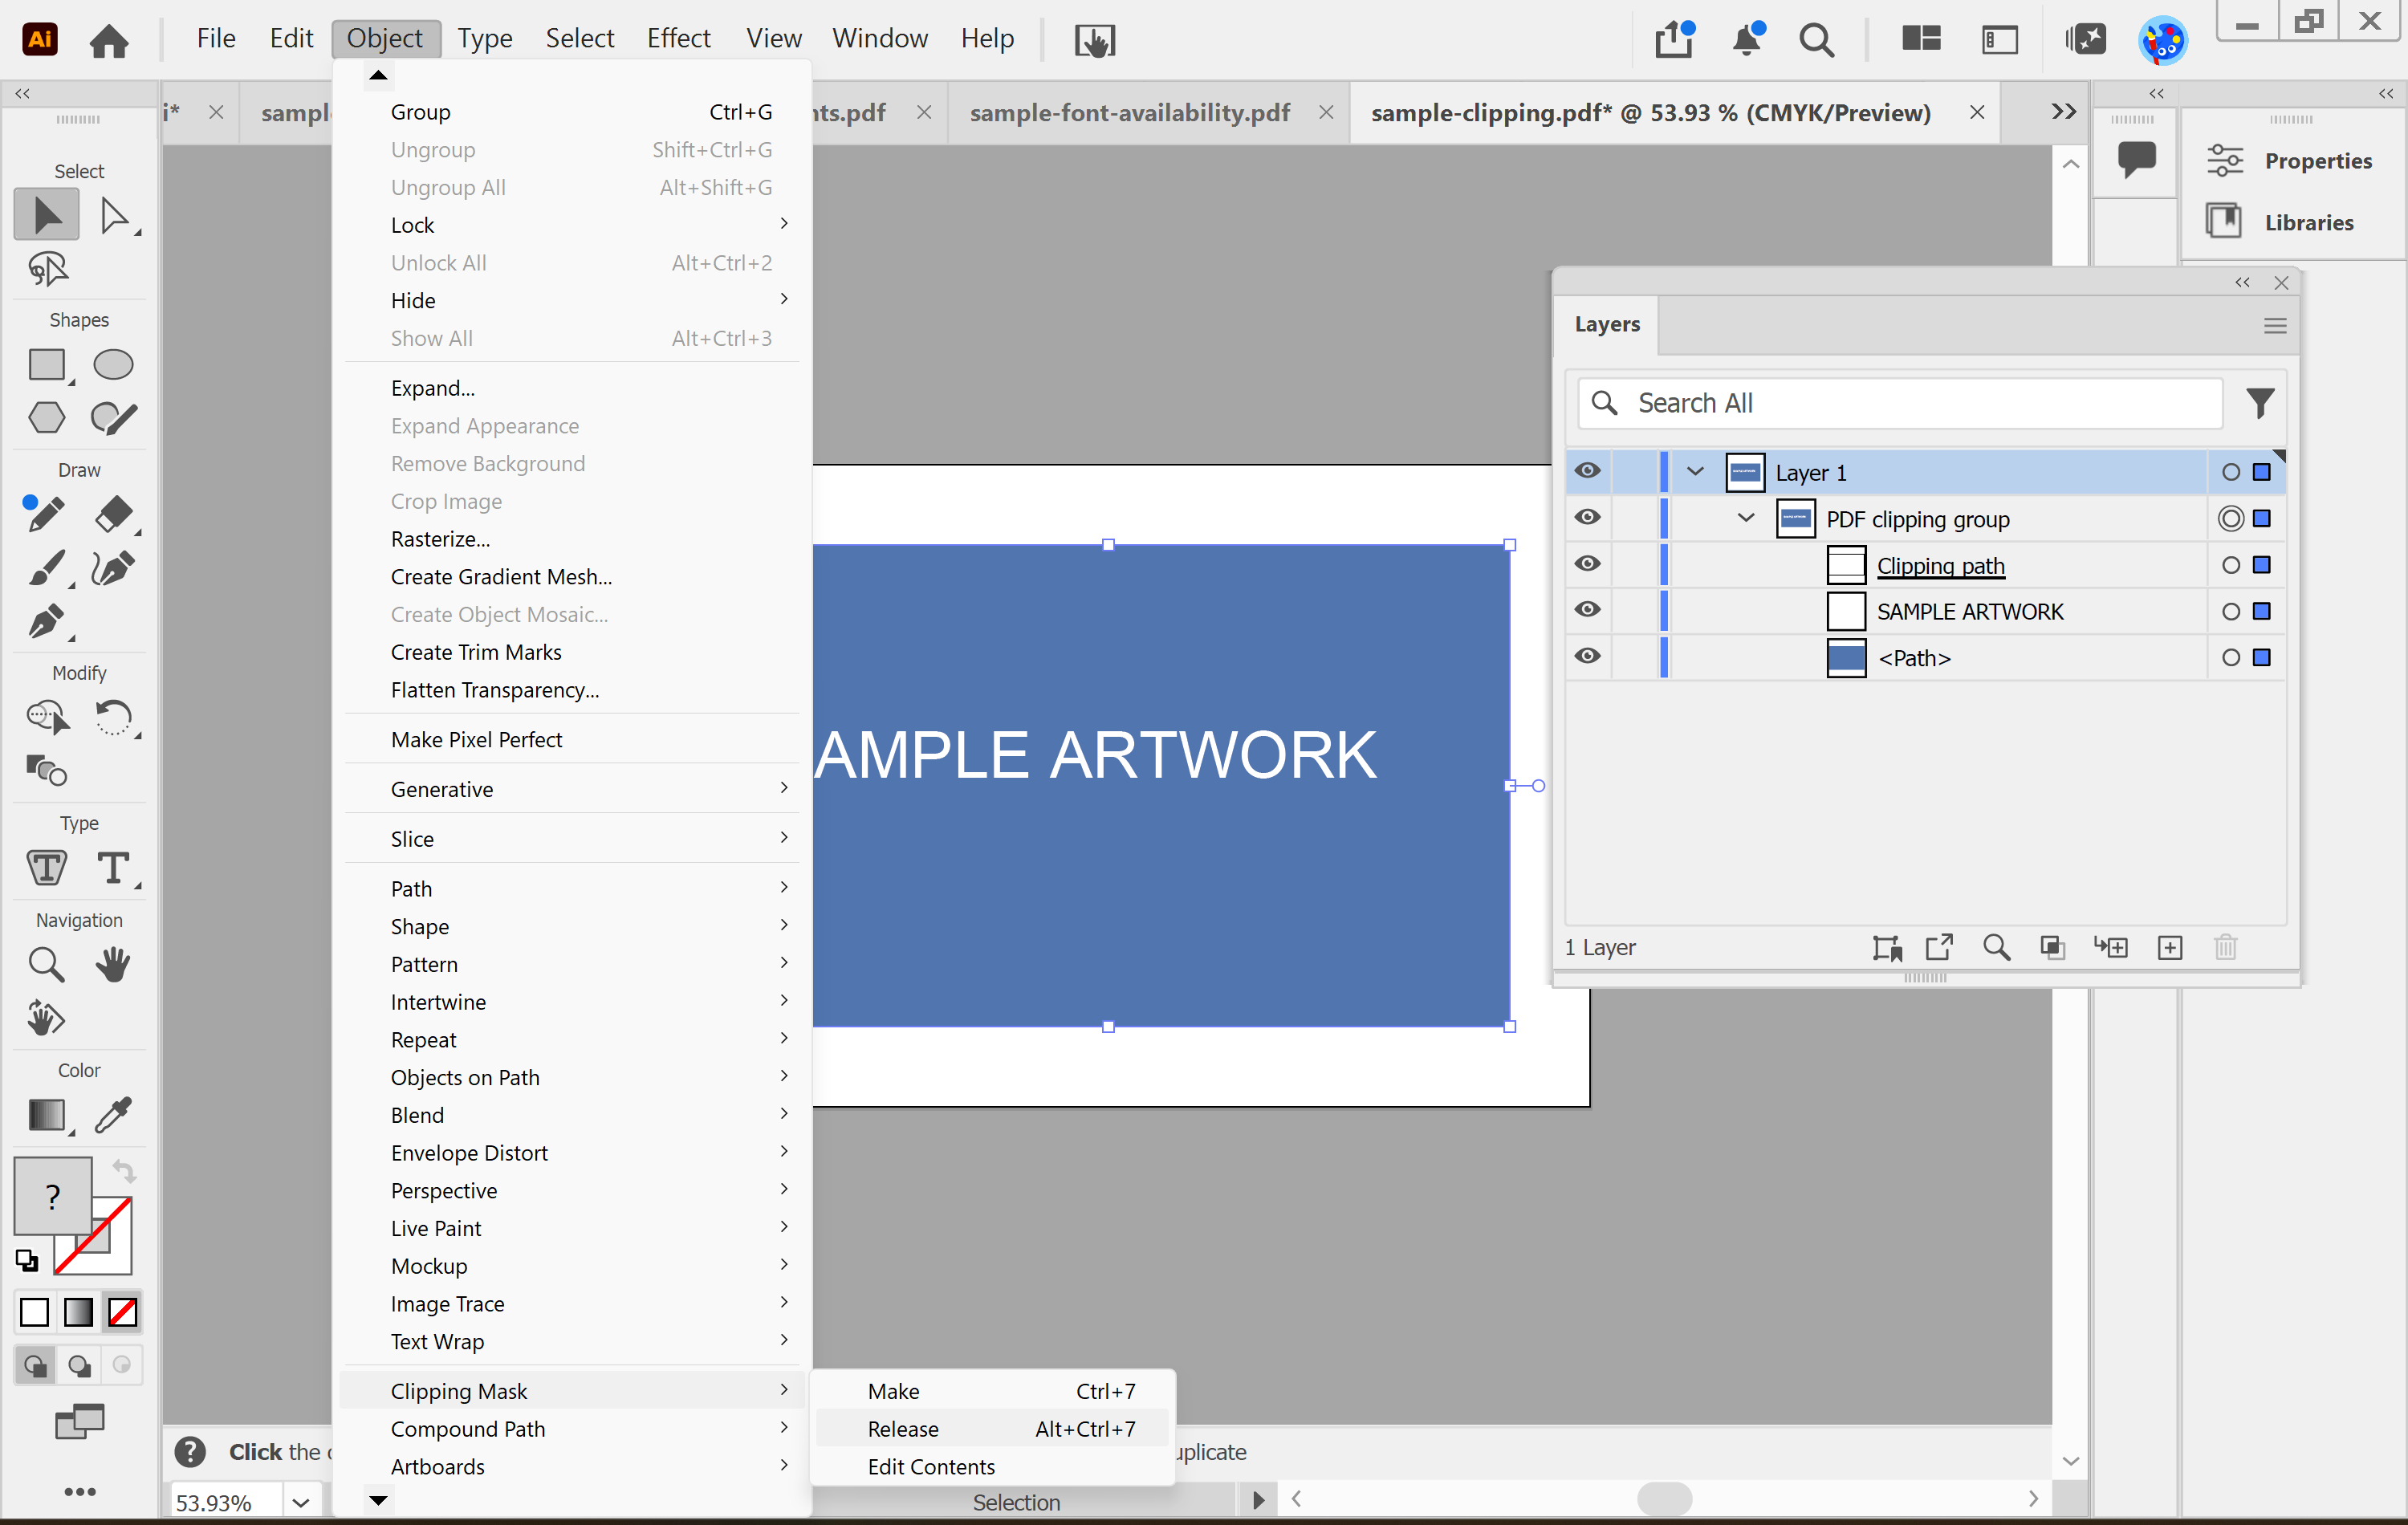
Note: After you release a clipping mask, the clipping path stays in the file but has no fill or stroke, so you can't see it. Delete it or keep it, but don't forget it's there.
6. Make your edits. If you need to swap a font throughout the file, in the main menu go to Type > Find/Replace Font. Select the font in the Fonts in Document list, choose the replacement, then select Change All and Done.
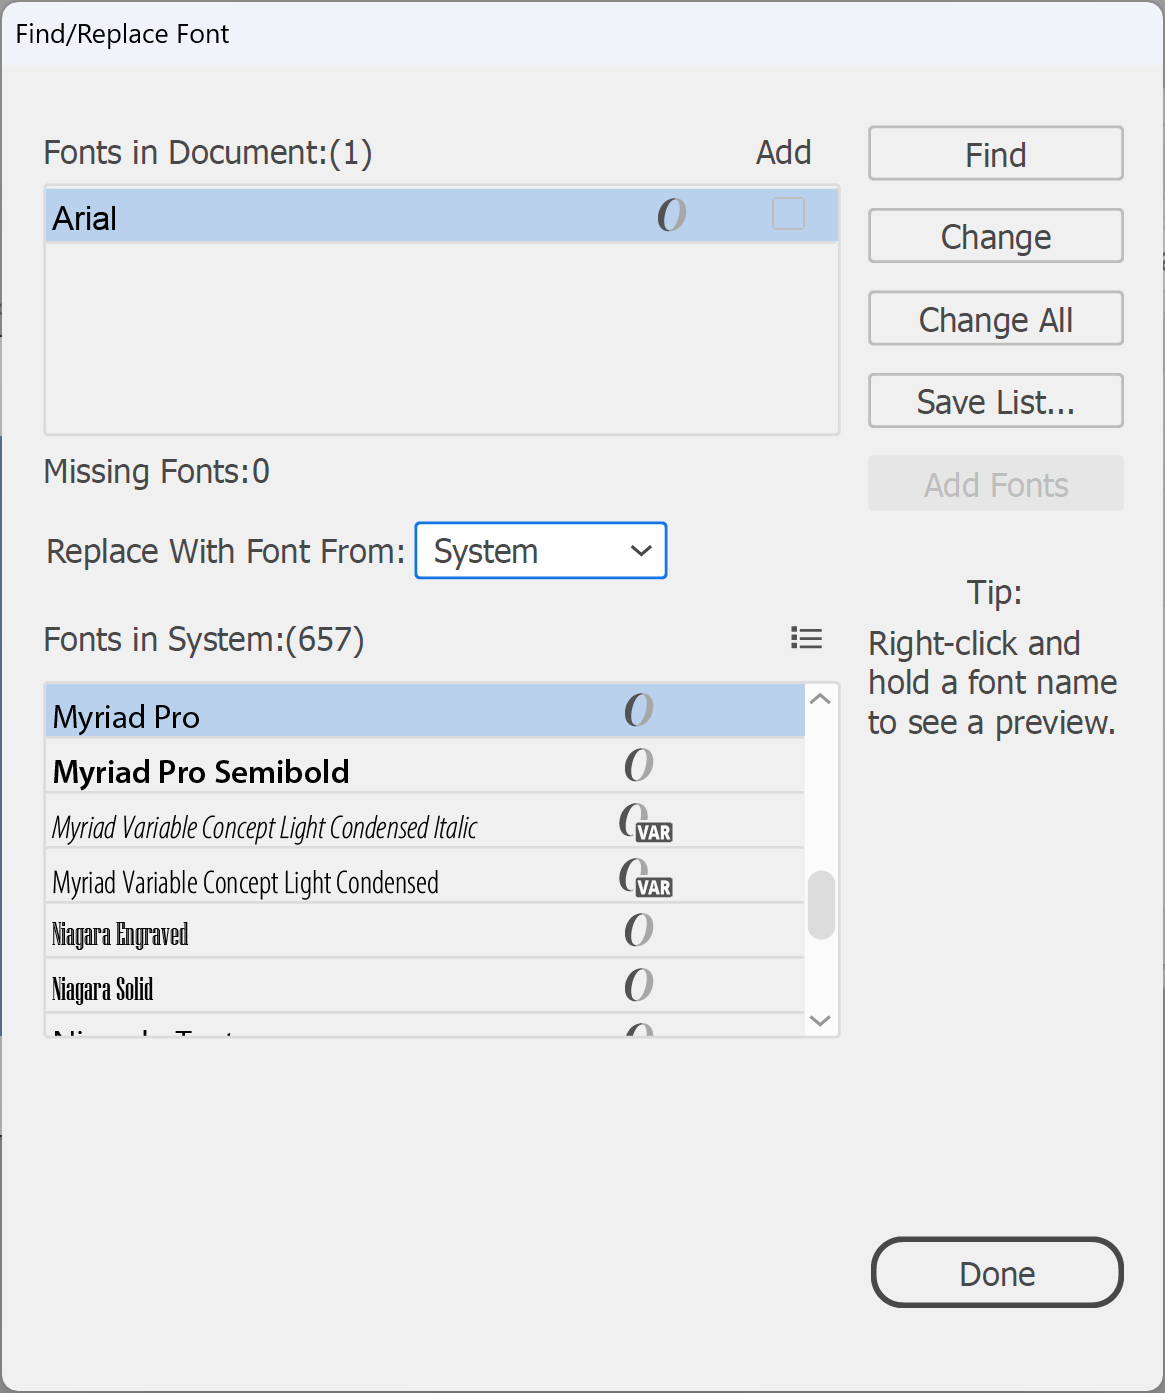
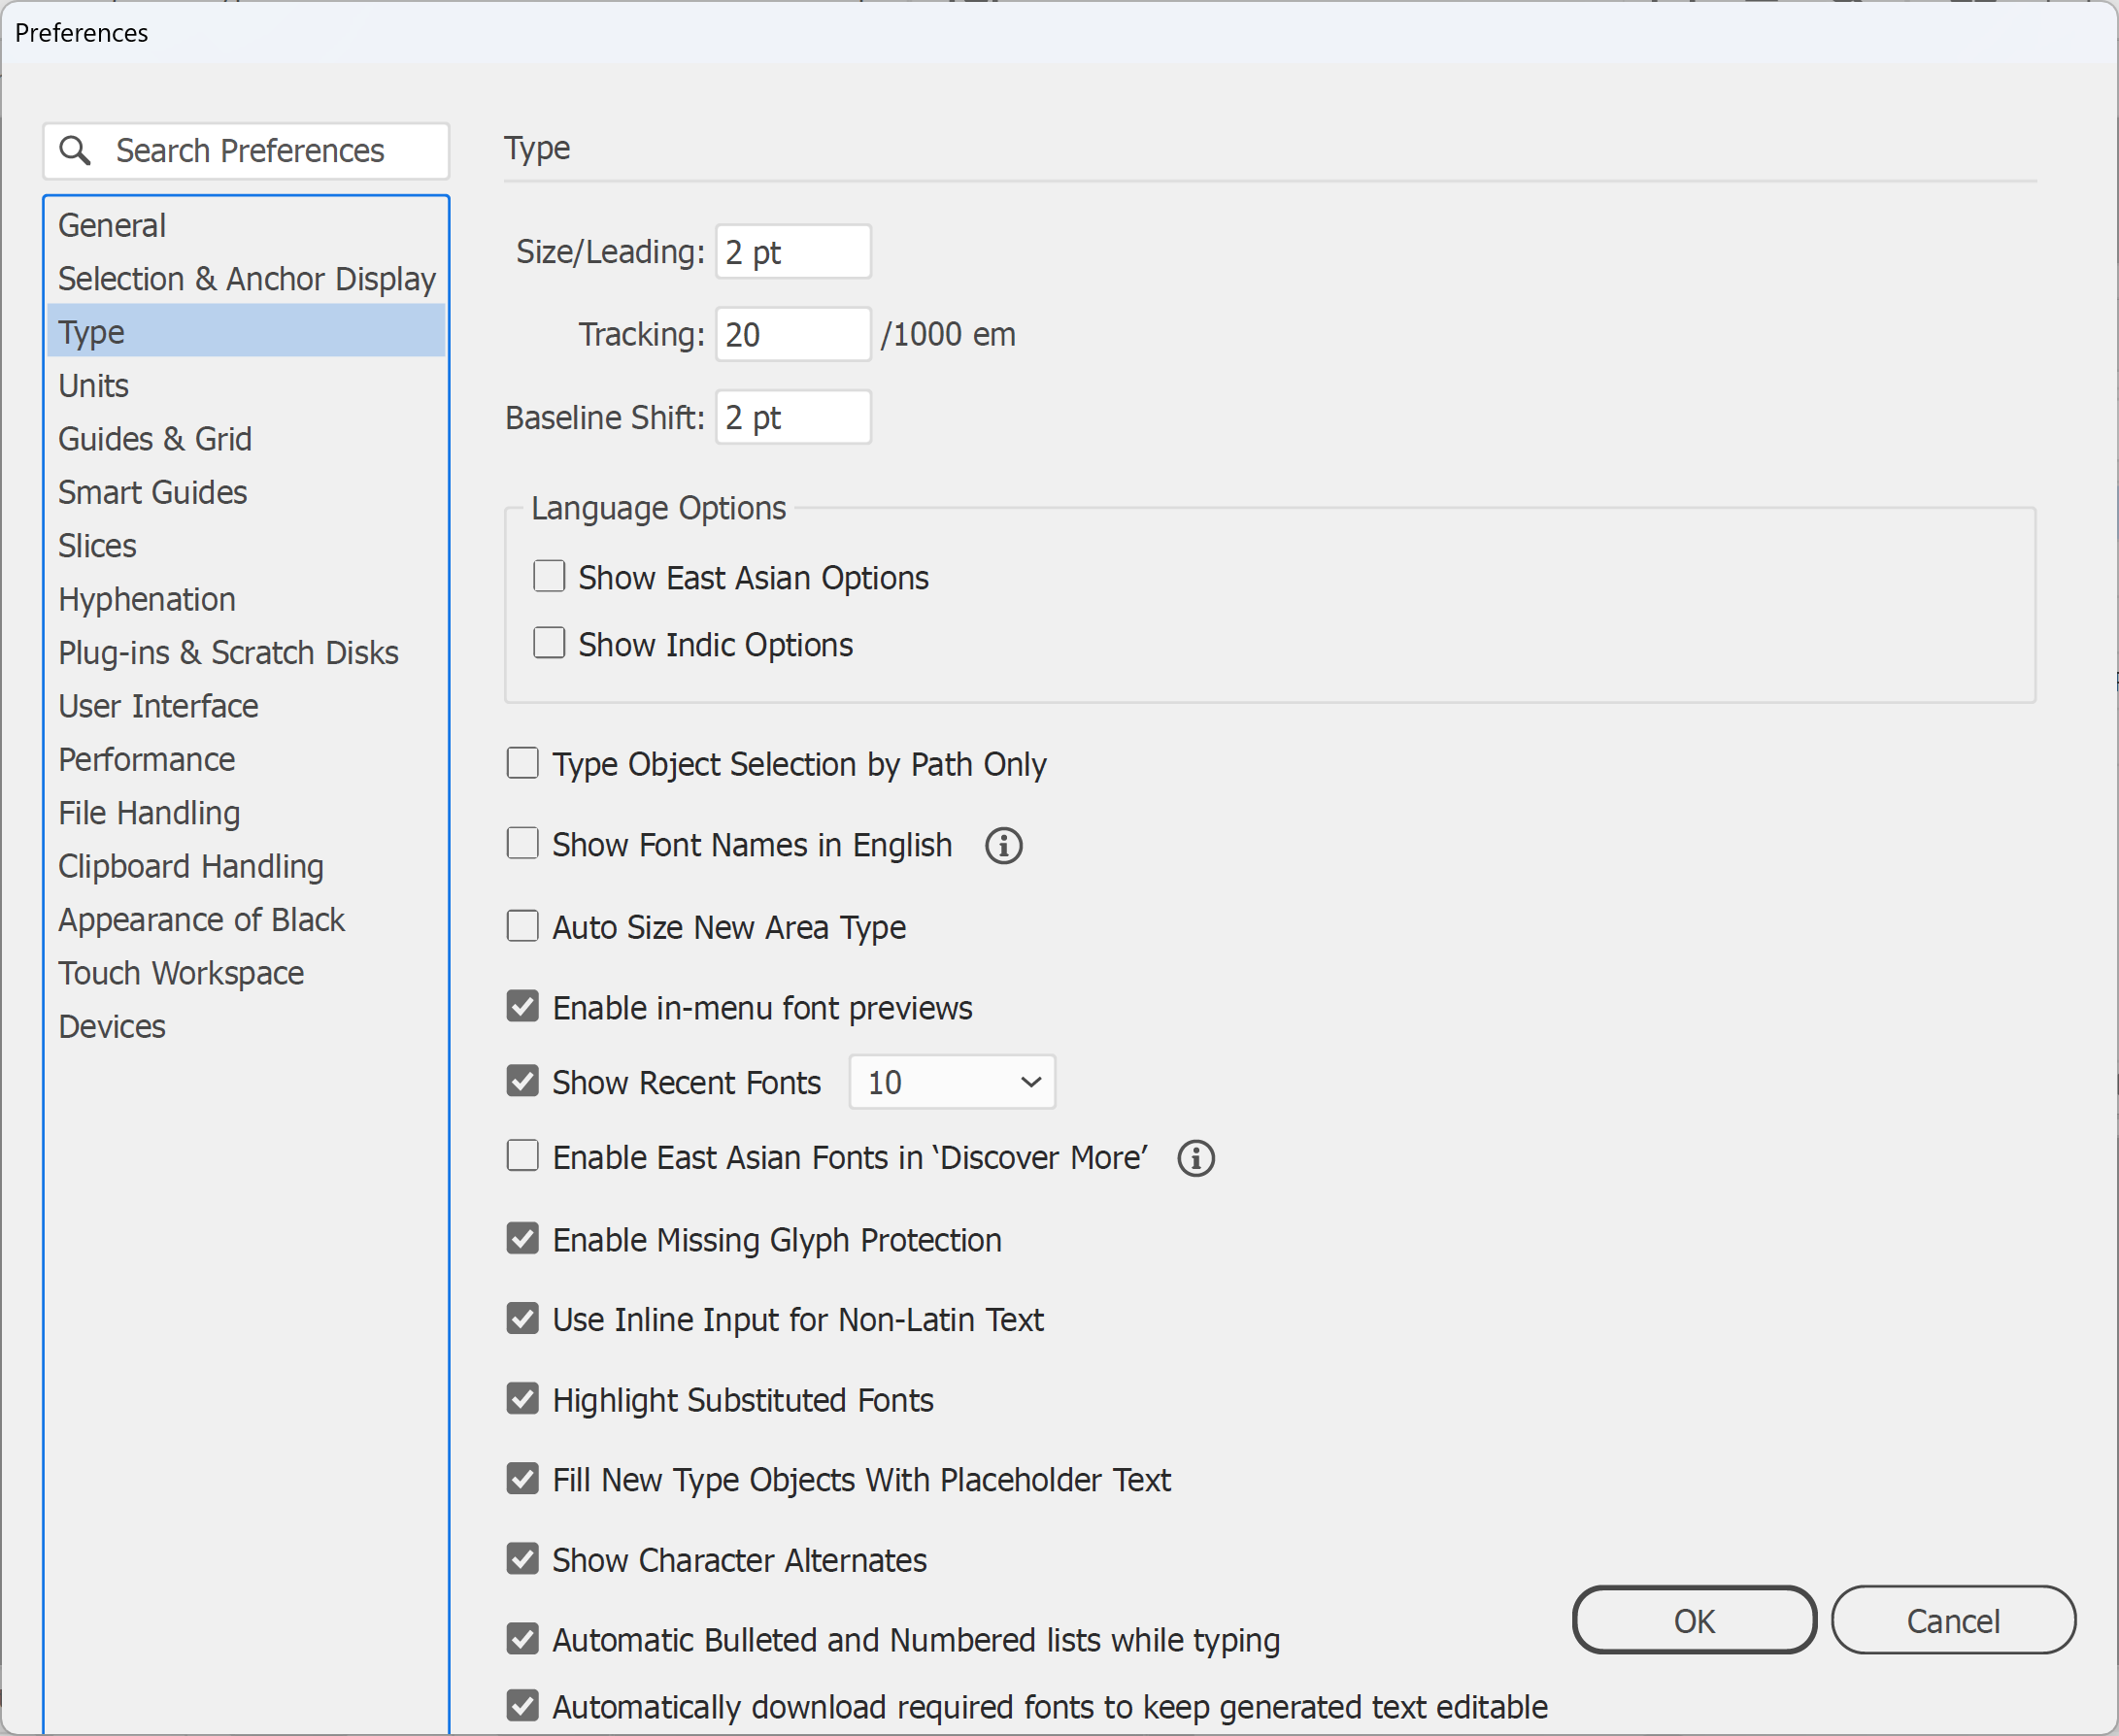
7. Check there are no substituted fonts left. Illustrator highlights substituted text, as long as Highlight Substituted Fonts is turned on in Edit > Preferences > Type (Windows) or Illustrator > Settings > Type (macOS).
8. Outline the text for print. Our guide on how to outline text shows how. Before you outline, save a copy with live text as your new master file.
9. Finally, save a print-ready PDF. In the main menu, go to File > Save As, choose Adobe PDF (*.PDF), then in the Save Adobe PDF dialog box choose [Press Quality]. Under Marks and Bleeds, check the bleed matches our template (10mm on every edge unless it says otherwise). That's it, you're done!
Note: If you leave Preserve Illustrator Editing Capabilities unticked, the file is smaller, but reopening it in Illustrator later flattens any transparency. Our guide on how to make a PDF file smaller covers the other settings.
Before you send the file, check it against our artwork specifications.
Need some help?
We're here for you
If you're needing some advice or just a helping hand, please get in touch with our team, by clicking this button. Complete the enquiry form and one of our specialists will call you back as soon as we can.