

YOUR CART IS CURRENTLY EMPTY
How do I package an InDesign file for print?
What does packaging an InDesign file do?
An InDesign file doesn't contain your images or fonts. It links to them on your computer. If one of those files moves, is renamed or isn't on the next computer, the job can print with a low-resolution preview or the wrong font.
File > Package gathers everything into one folder: the InDesign file, a copy of every linked graphic, the fonts it uses and a report. It can also make the print PDF at the same time.
Why does it matter for printing?
We print from a PDF, not from the InDesign file. A high-resolution PDF is our preferred format, because it's the least likely to cause a problem. Packaging helps in two ways:
- Before you export, it shows any missing or out-of-date links and fonts, so the PDF you send us is right.
- After the job, it gives you one tidy folder to archive, so you or another designer can reopen the brochure, poster or counter wrap later and change it without hunting for files.
Steps to package an InDesign file for print
1. First, check for problems. In the main menu, go to Window > Output > Preflight and make sure the On checkbox is ticked. A green circle in the status bar at the bottom of the document window means no errors. A red circle means there's something to fix.
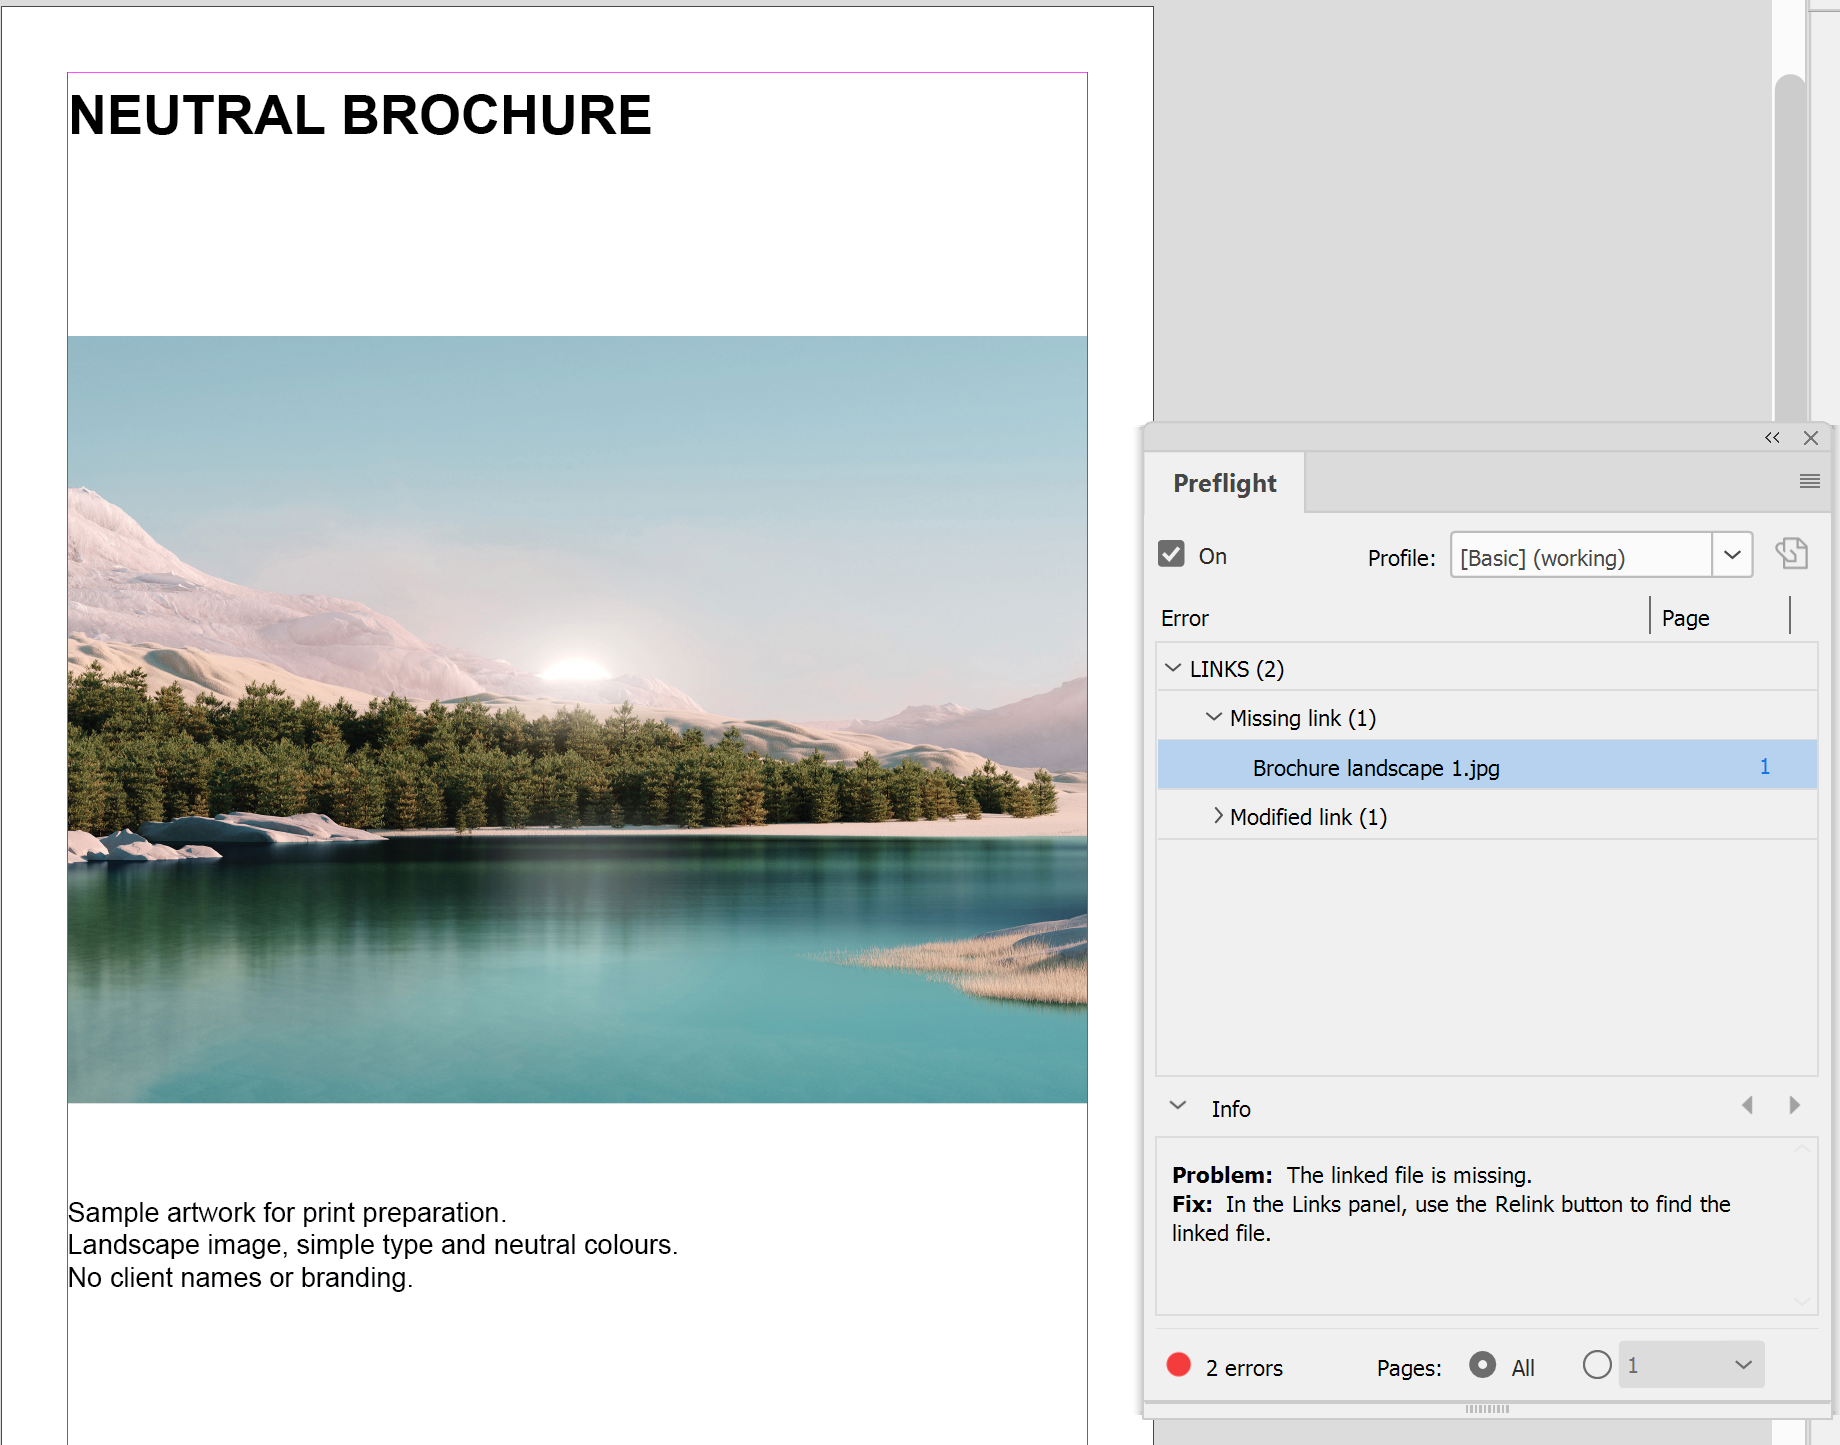
2. Click an error to see what's wrong in the Info section, then click the page number in the Page column to jump to the item.
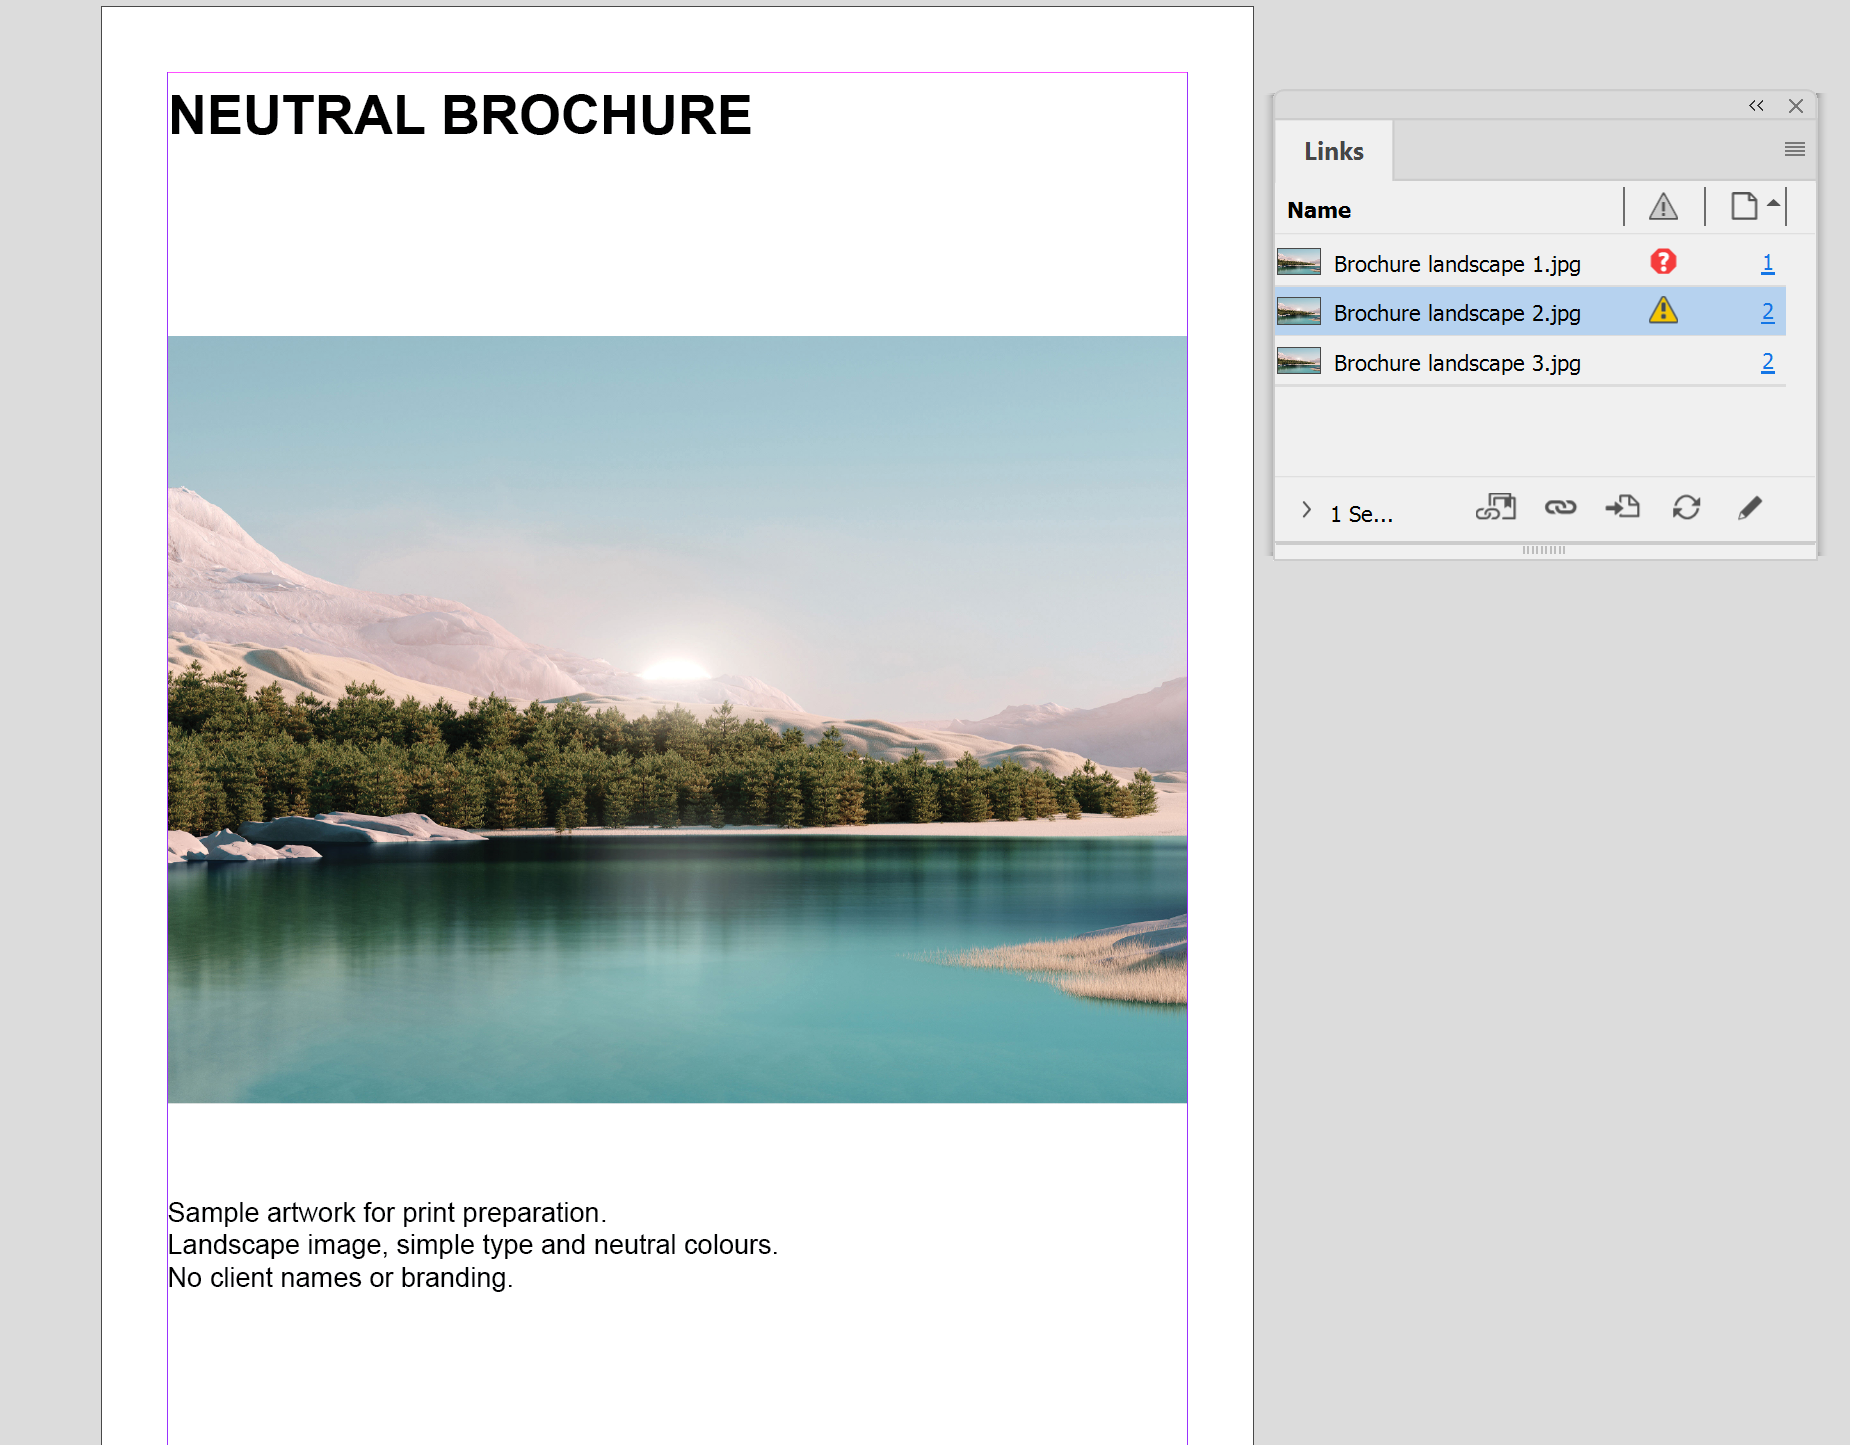
3. Fix missing or modified images. In the main menu, go to Window > Links. For an image marked with the Missing icon, click the Relink icon and find the file. For one marked with the modified-link icon, click the Update Link icon.
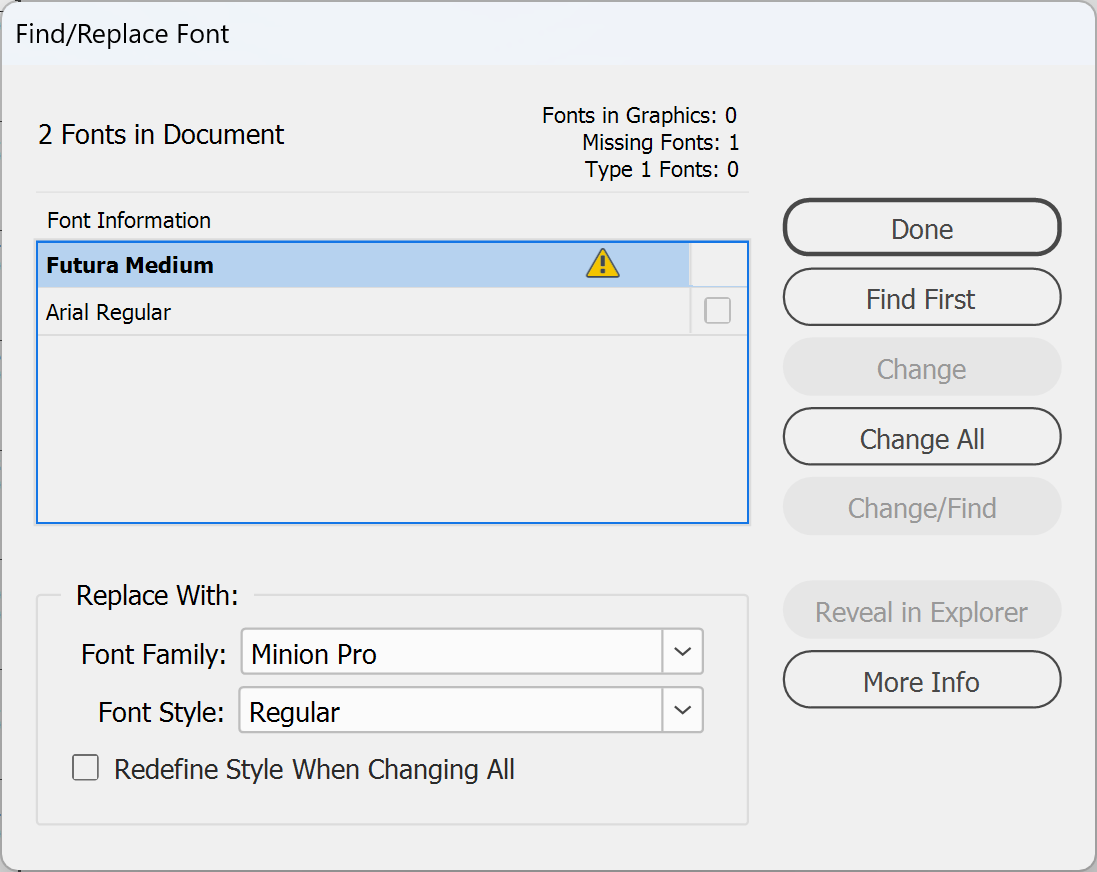
4. Fix missing fonts. In the main menu, go to Type > Find/Replace Font. Select the missing font under Fonts in Document, choose a Font Family and Font Style under Replace With, then click Change All and Done. Or install the missing font and reopen the file.
Note: Find/Replace Font can't change fonts inside a placed EPS or PDF. Install the font, or fix the graphic in the program it came from.
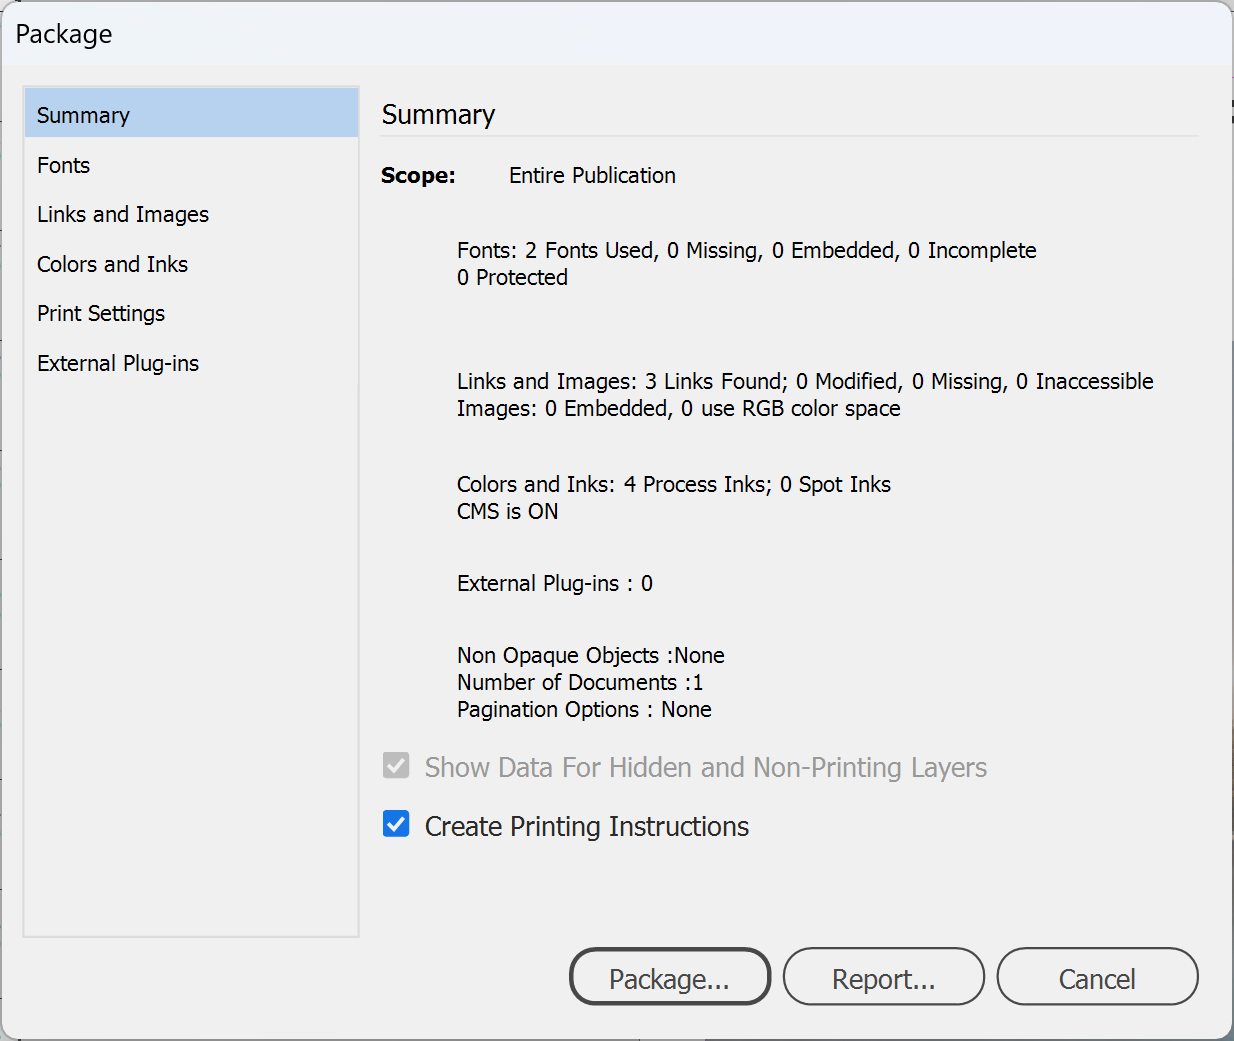
5. Save the file, then in the main menu, go to File > Package. Check the summary. If there's an alert icon, click Cancel and go back to step 1.
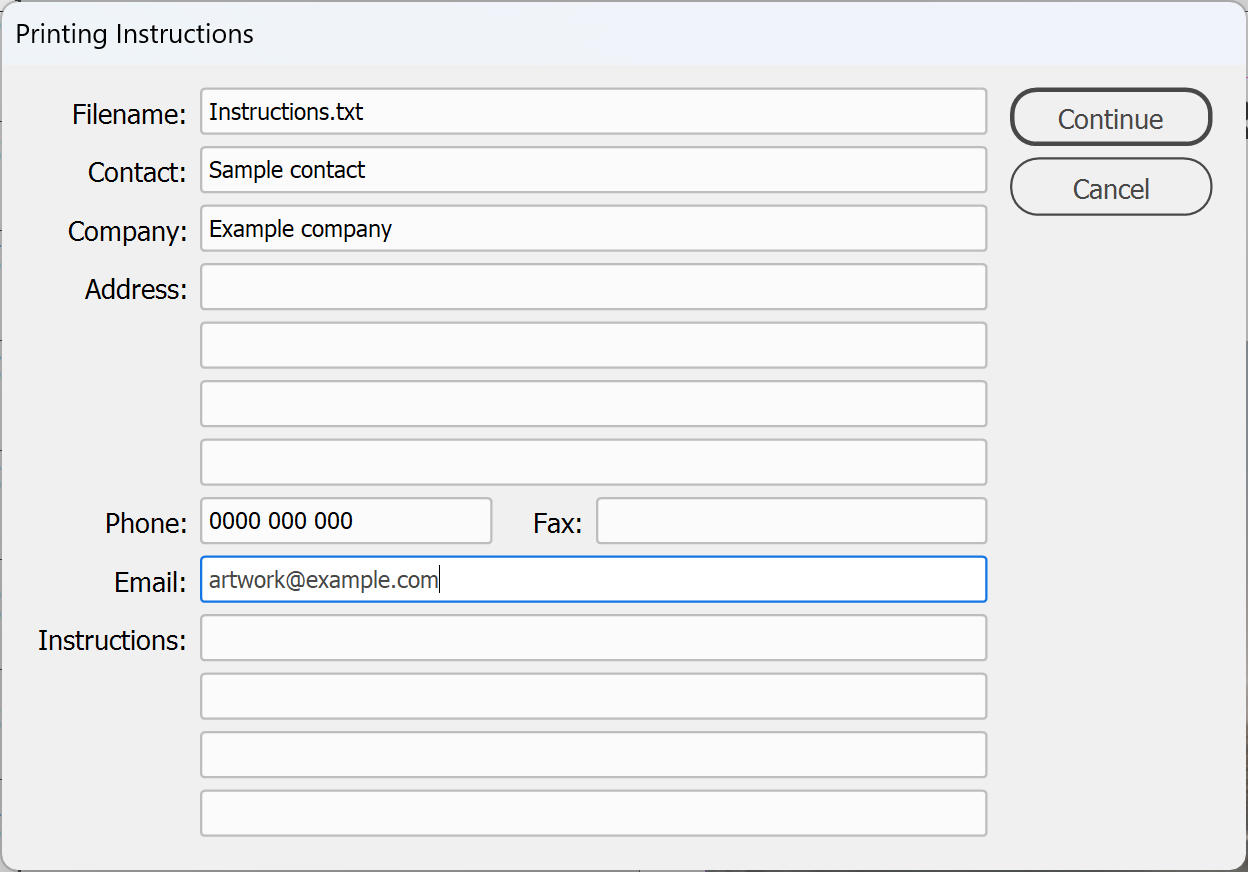
6. Click Package. If you ticked Create Printing Instructions, the Printing Instructions dialog box opens: add your contact details and click Continue.
7. In the Package Publication dialog box, choose a location and folder name. Tick these:
- Copy Fonts (Except added from Adobe Fonts)
- Copy Linked Graphics
- Update Graphic Links In Package
- Include PDF(Print), with [Press Quality] chosen as the PDF preset
Only tick Include Fonts and Links From Hidden and Non-Printing Content if a hidden layer holds something you'll need later. Tick Include IDML if someone with an older version of InDesign may need to open the file.
Note: Fonts activated from Adobe Fonts aren't copied into the package. Anyone opening the file later needs to activate them from their own Adobe account.
IMPORTANT: Include PDF(Print) uses the settings saved in the preset you choose. The built-in [Press Quality] preset doesn't include bleed, and built-in presets can't be edited. If your artwork bleeds off the page, choose your own saved preset with Use Document Bleed Settings ticked in Marks and Bleeds, or export the PDF yourself: go to File > Export, choose Adobe PDF (Print) as the file type, and tick Use Document Bleed Settings in Marks and Bleeds. We don't need printer's marks.
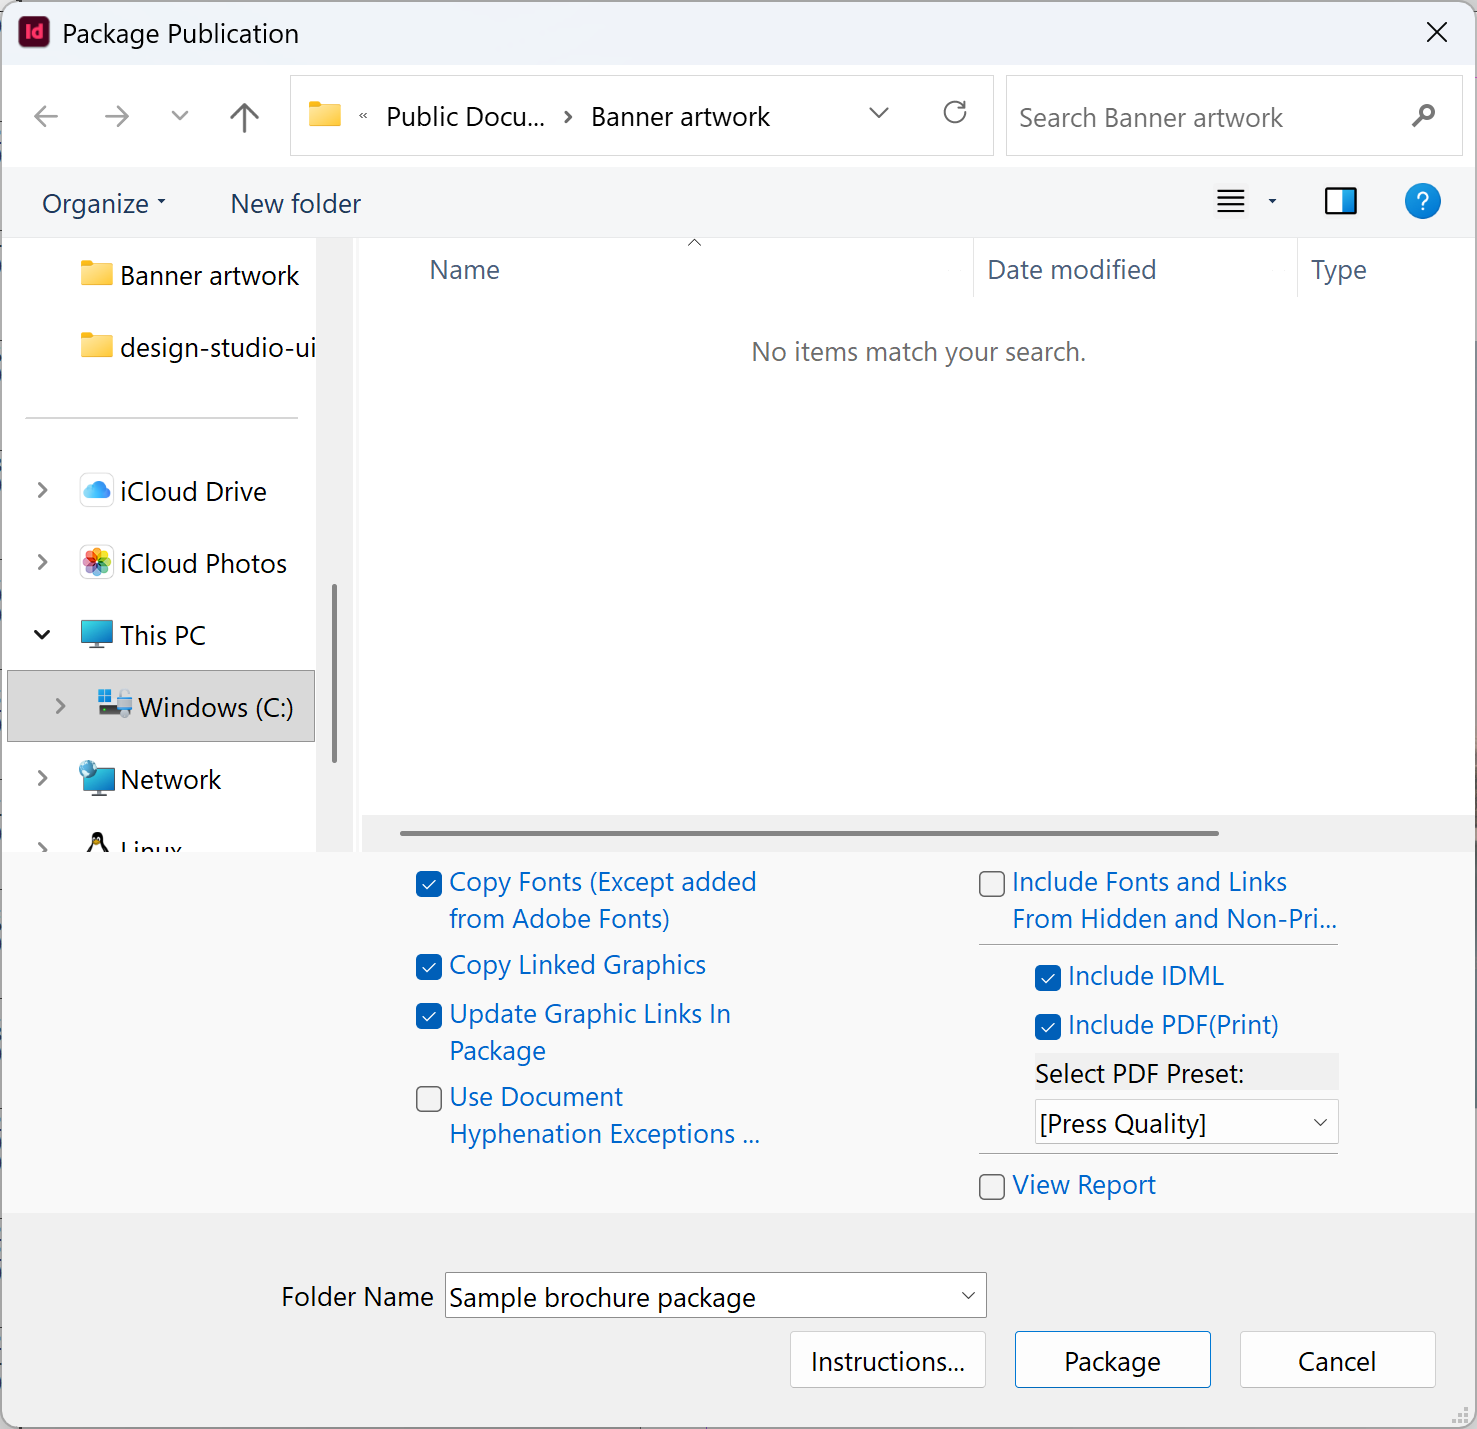
8. Click Package. InDesign makes a folder with the InDesign file, copies of the linked graphics and fonts, the report and the PDF. If there's a warning while the PDF is made, InDesign still makes it and shows you the warning, so read it before you send the file.
9. Open the PDF, make sure the artwork runs past the trim into the bleed, and check it against our artwork specifications: 10mm bleed unless the product template says otherwise, CMYK, images at least 150ppi at finished size, and fonts outlined or embedded. If it's too big to email, see How to make a PDF file smaller?
10. Finally, email the PDF to sales@displays2go.com.au, as explained in our sending artwork guide, keep the package folder as your archive, and you're done!
Need some help?
We're here for you
If you're needing some advice or just a helping hand, please get in touch with our team, by clicking this button. Complete the enquiry form and one of our specialists will call you back as soon as we can.