

YOUR CART IS CURRENTLY EMPTY
How do I preflight a PDF in Acrobat before I send it to print?
What is preflighting?
Preflighting is a final check of a print file before it goes to press. In Adobe Acrobat Pro, the Preflight tool inspects a PDF against a set of rules called a preflight profile, and flags problems with colours, fonts, transparency, image resolution and more.
Why should I preflight my own PDF?
The earlier a problem is found, the easier and cheaper it is to fix. A file that comes back from proofing means another round of changes, and production lead times only start once we have print-ready artwork.
The top five issues we find when we preflight artwork are:
1. Document size not consistent with the design template
2. Insufficient image resolution
3. Fonts not outlined
4. Colours specified incorrectly, most commonly not set up in CMYK
5. Artwork not flattened
You can check for every one of them in Acrobat Pro before you send the file.
Use the following steps to preflight a PDF in Acrobat Pro
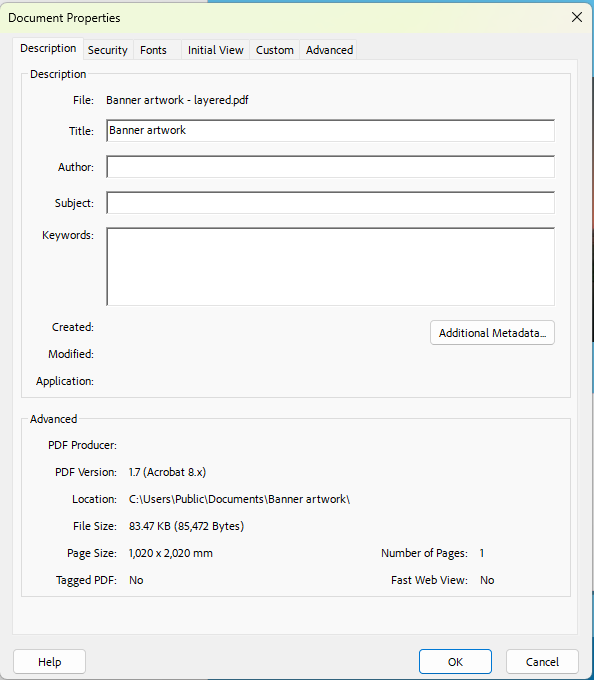
1. Open your PDF in Acrobat Pro and check the page size first. In the main menu, go to File > Document Properties (File > Properties in some versions) and click the Description tab. The Advanced area shows the page size and the number of pages.
Compare it with your product template. The PDF page should match the template's final artwork size, bleed included, and a product template always overrides our 10mm default. If there's no template, allow 10mm of bleed on every edge: a 1000 x 2000mm panel needs a 1020 x 2020mm file.
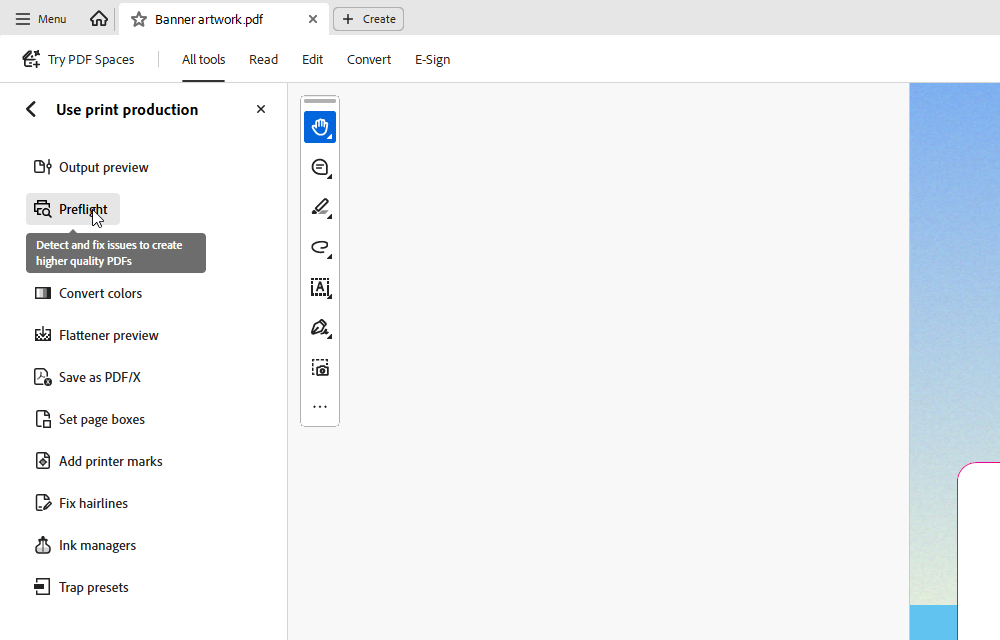
2. Open the Preflight tool. Select All tools, then Use print production, then Preflight.
3. Choose a profile. In the Preflight dialog box, make sure the Profiles tab is showing (the library is set to Essentials by default), then expand the Digital Printing group. Select a profile to read its description underneath.
Note: Profiles with the grey wrench icon include fixups, which can change your file.
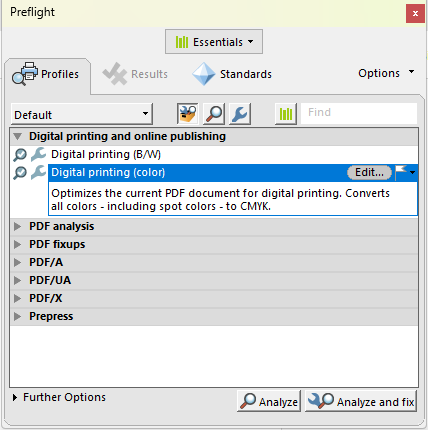
4. Click Analyze. This runs the inspection without changing anything in your file.
IMPORTANT: Avoid Analyze And Fix on your only copy. A fixup permanently changes the document, so fix problems in your original artwork file and export a new PDF instead.
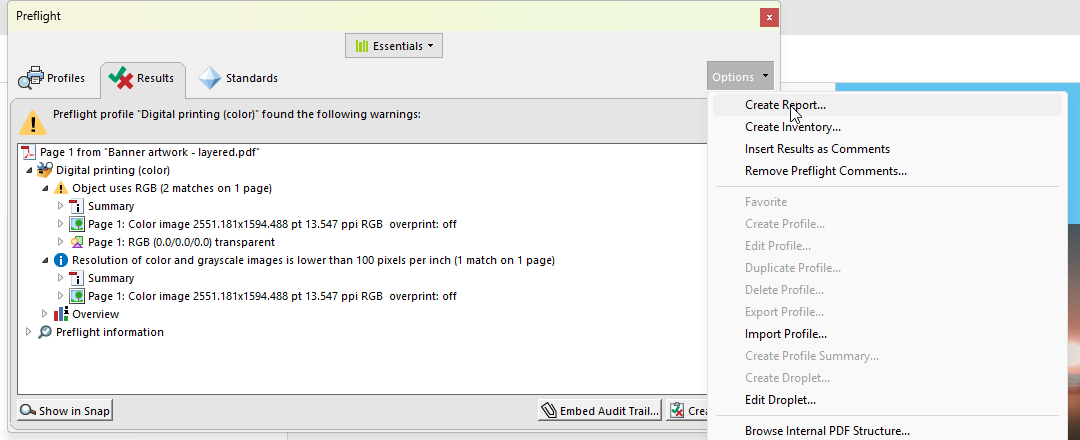
5. Read the results. Errors are listed first (red icon), then warnings (yellow) and information (blue). A green check mark means no problems were found. Expand a result to see the details, and double-click it to see the problem object highlighted on the page.
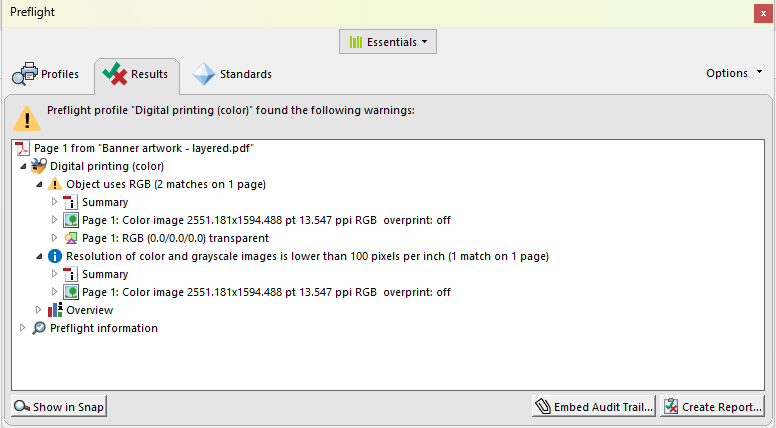
Note: A profile checks against its own rules, not ours. Check each warning against our artwork specifications: images at least 150ppi at 100% of finished size (75ppi is the lowest we accept), fonts outlined or embedded, CMYK only and transparency flattened.
6. Check for RGB colour. Select All tools > Use print production > Output preview. Open the Show menu and pick the RGB option, so the page shows only objects in RGB colour. If anything is still visible, it needs converting to CMYK.
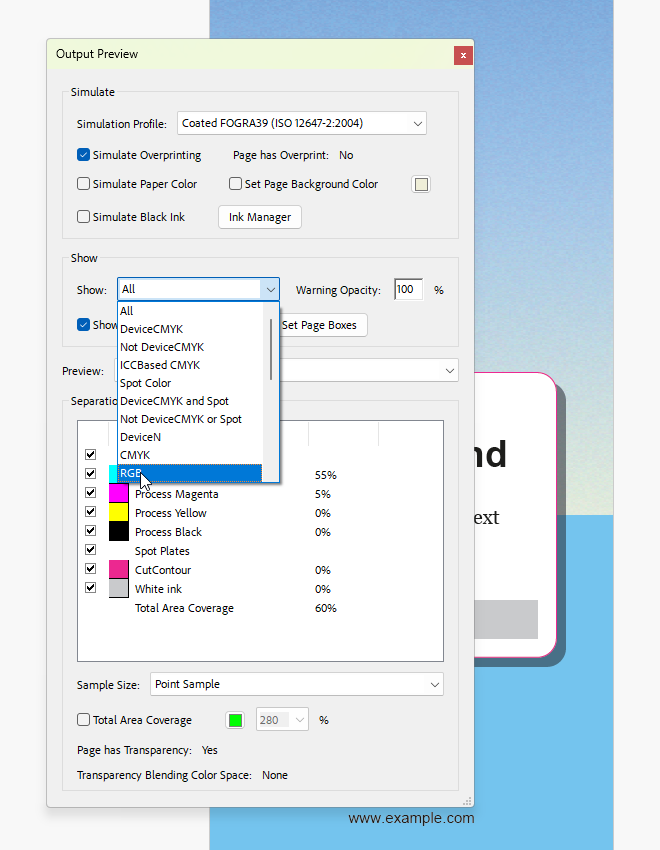
7. Check for spot colours. In the same dialog box, choose Separations from the Preview menu. Any ink listed after the four process plates (cyan, magenta, yellow and black) is a spot colour.
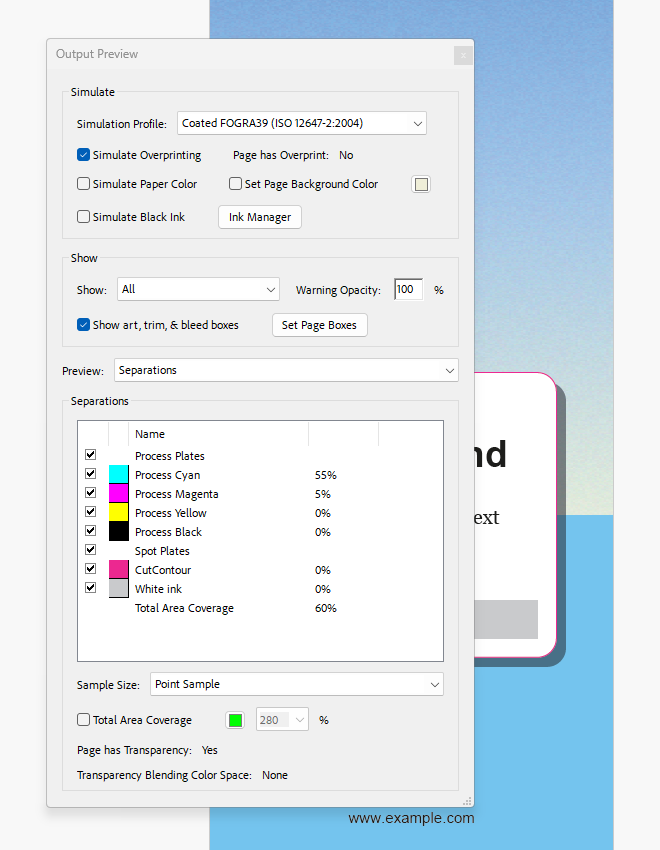
For ordinary spot colours, our guide How do I convert spot colours to CMYK? shows how to change them. Keep an intentional dieline or an agreed White ink layer as a spot colour; ask us before converting either.
8. Fix any problems in your artwork file, export a fresh PDF and run the preflight again until it's clean. To keep a record, select Create Report from the Options menu in the Results panel and save it as a PDF report.
9. Finally, email your PDF to sales@displays2go.com.au with your order or job number in the subject line if you have one, and you're done!
Note: If you'd rather we checked it, our artwork preflighting service is $45 ex-GST per job, not per file, and includes digital proofs back to you for approval.
Need some help?
We're here for you
If you're needing some advice or just a helping hand, please get in touch with our team, by clicking this button. Complete the enquiry form and one of our specialists will call you back as soon as we can.