

YOUR CART IS CURRENTLY EMPTY
How do I set up artwork for a printed table cloth?
What is a table cloth template?
A table cloth template is a PDF drawn at the finished size of the cloth, with every panel marked: the top, the front, the back and both sides. Our branded table cloths come in three styles, fitted/stretch, box and drape/throw, each with its own templates for 1.8m and 2.4m tables. The templates are listed on the product page under Artwork Sizing & Specifications.
The style changes how the artwork is laid out:
| Style | How the template is laid out |
|---|---|
| Fitted/stretch | Separate panels. The front and back taper from 1830mm at the table edge to 1474mm at the floor (1.8m size), because the cloth pulls in around the legs. |
| Box | Separate rectangular panels. On the 1.8m size the top is 1830 x 760mm and each side drops 700mm. |
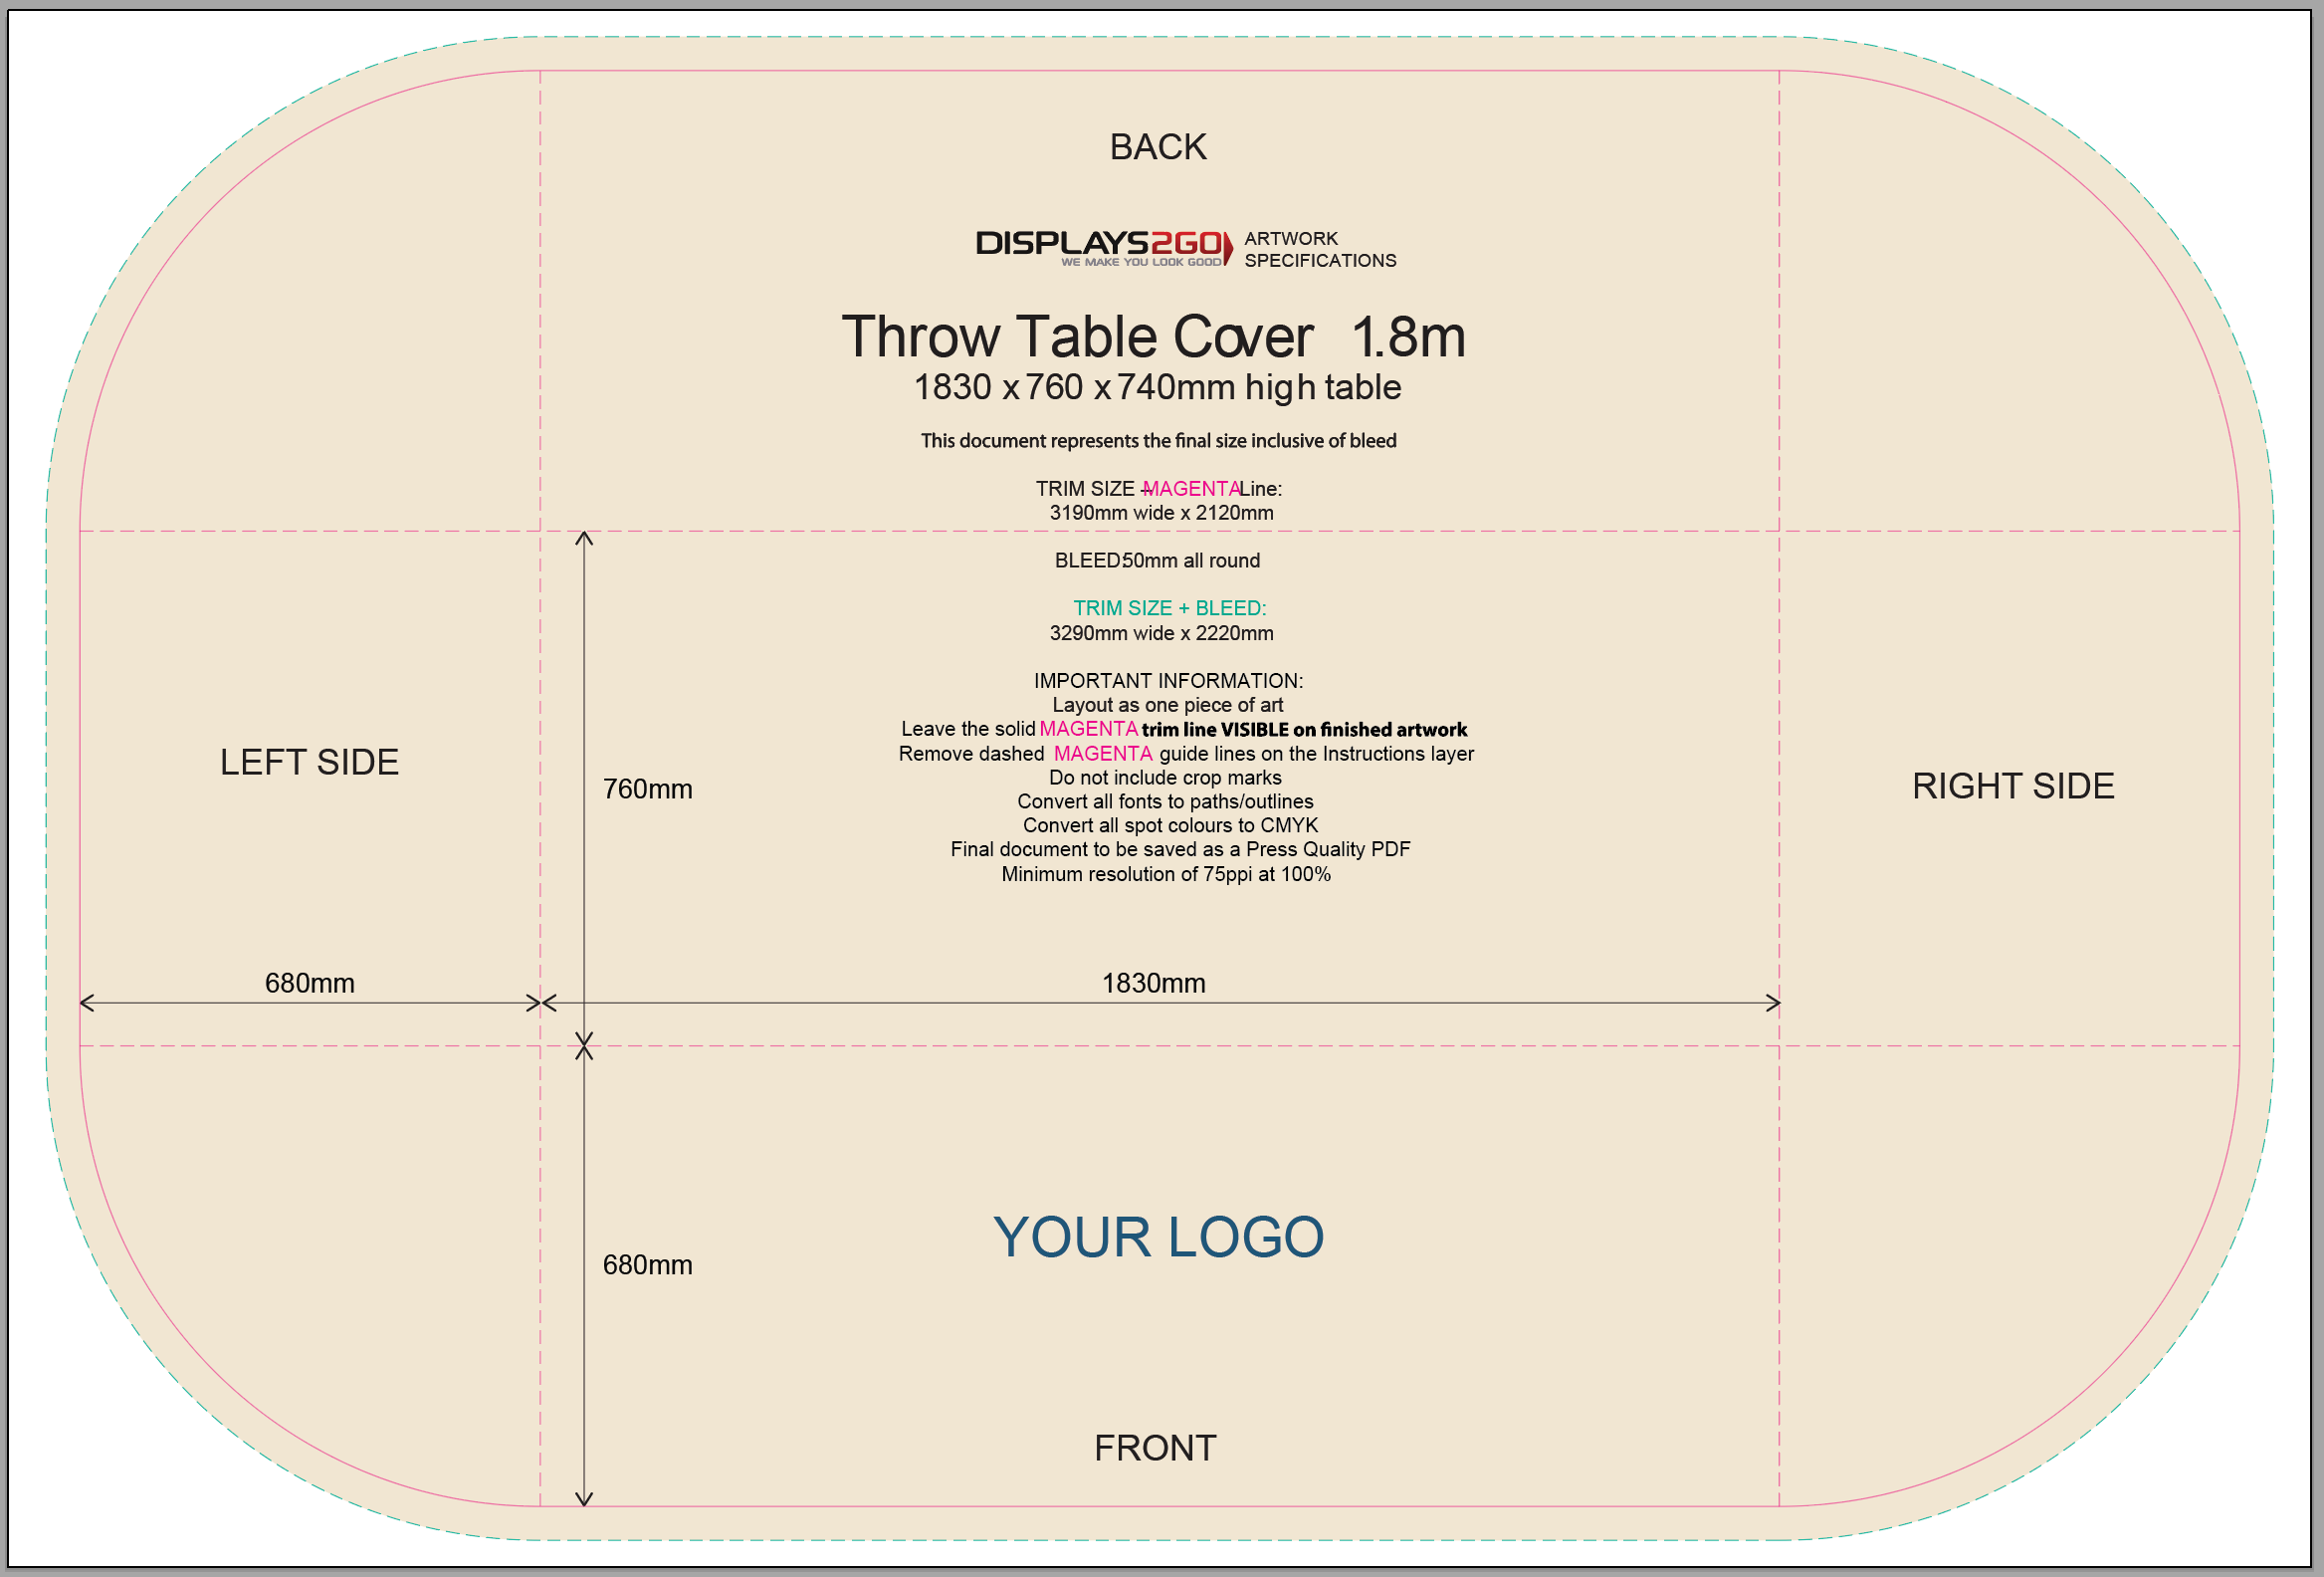
| Drape/throw | One piece of art with rounded corners. On the 1.8m size the trim is 3190 x 2120mm, and the front, back and side drops are each 680mm. The 2.4m throw is 3800 x 2120mm. |
Why does logo placement matter on a table cloth?
The front drop is the part people read, so that's where your logo and message go. The top is mostly hidden under whatever sits on the table.
The corners are where layouts go wrong. On a throw template, the dashed guide lines mark the edges of the table top, and the squares outside them, with the rounded corners, hang down at the corners of the table, so a logo placed there won't read. On a stretch cover, the front panel narrows towards the floor, so text placed low and wide gets cut off at the sides.
Steps to set up table cloth artwork in Illustrator
1. Download the template for your style and table size from the product page.
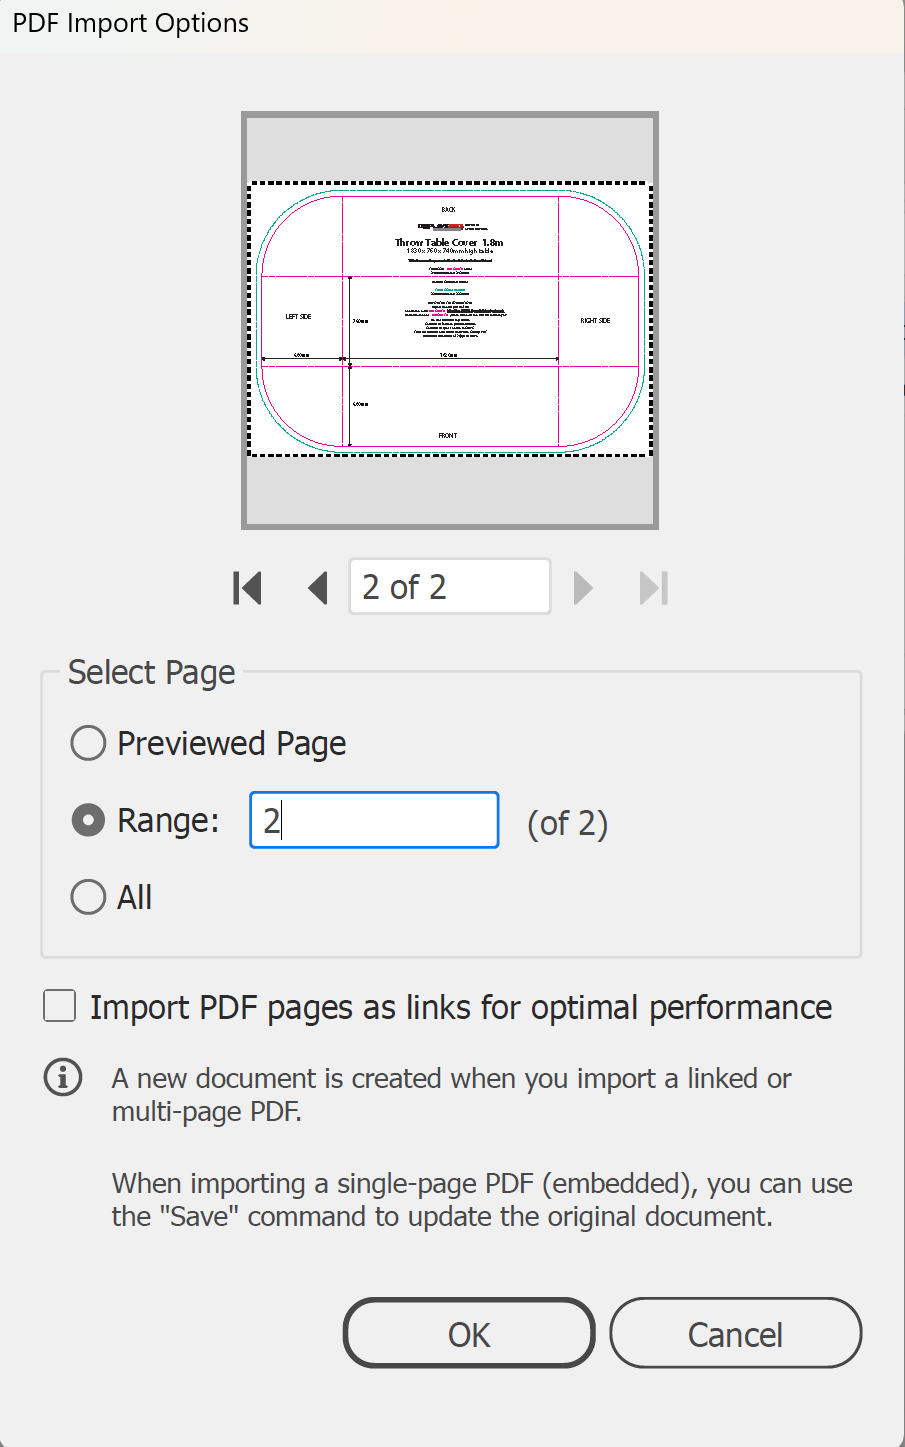
2. In the main menu, go to File > Open and select the template PDF. The template has two pages: an instruction page and the template itself. In the PDF Import Options dialog box, select Range, type 2, and click OK.
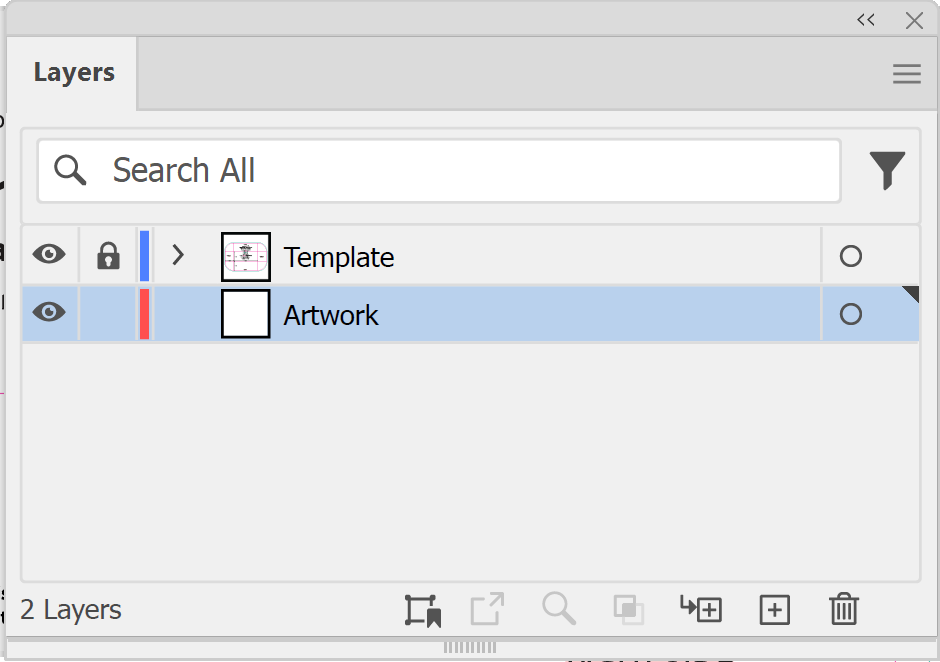
3. Put your artwork on its own layer. In the main menu, go to Window > Layers. Select the Create New Layer icon, then drag the new layer below the layer that holds the template, so the template's lines stay on top. Lock the template layer by selecting the empty Toggles Lock area between its eye icon and its name.
4. Run your background colour or image out to the bleed line on every panel. Stretch and box templates have 50mm of bleed around each individual panel, shown by the green line. The throw template has 50mm of bleed all round.
5. Place your logo and key message on the front panel, well inside the trim line. On a throw cloth, keep them between the dashed lines. On a stretch cover, keep them near the top of the front panel, where it is widest.
Note: Images should be 150ppi at 100% of the finished size. The minimum is 75ppi.
6. Convert all fonts to outlines (Type > Create Outlines) and convert any spot colours to CMYK. Our guide to outlining text shows how.
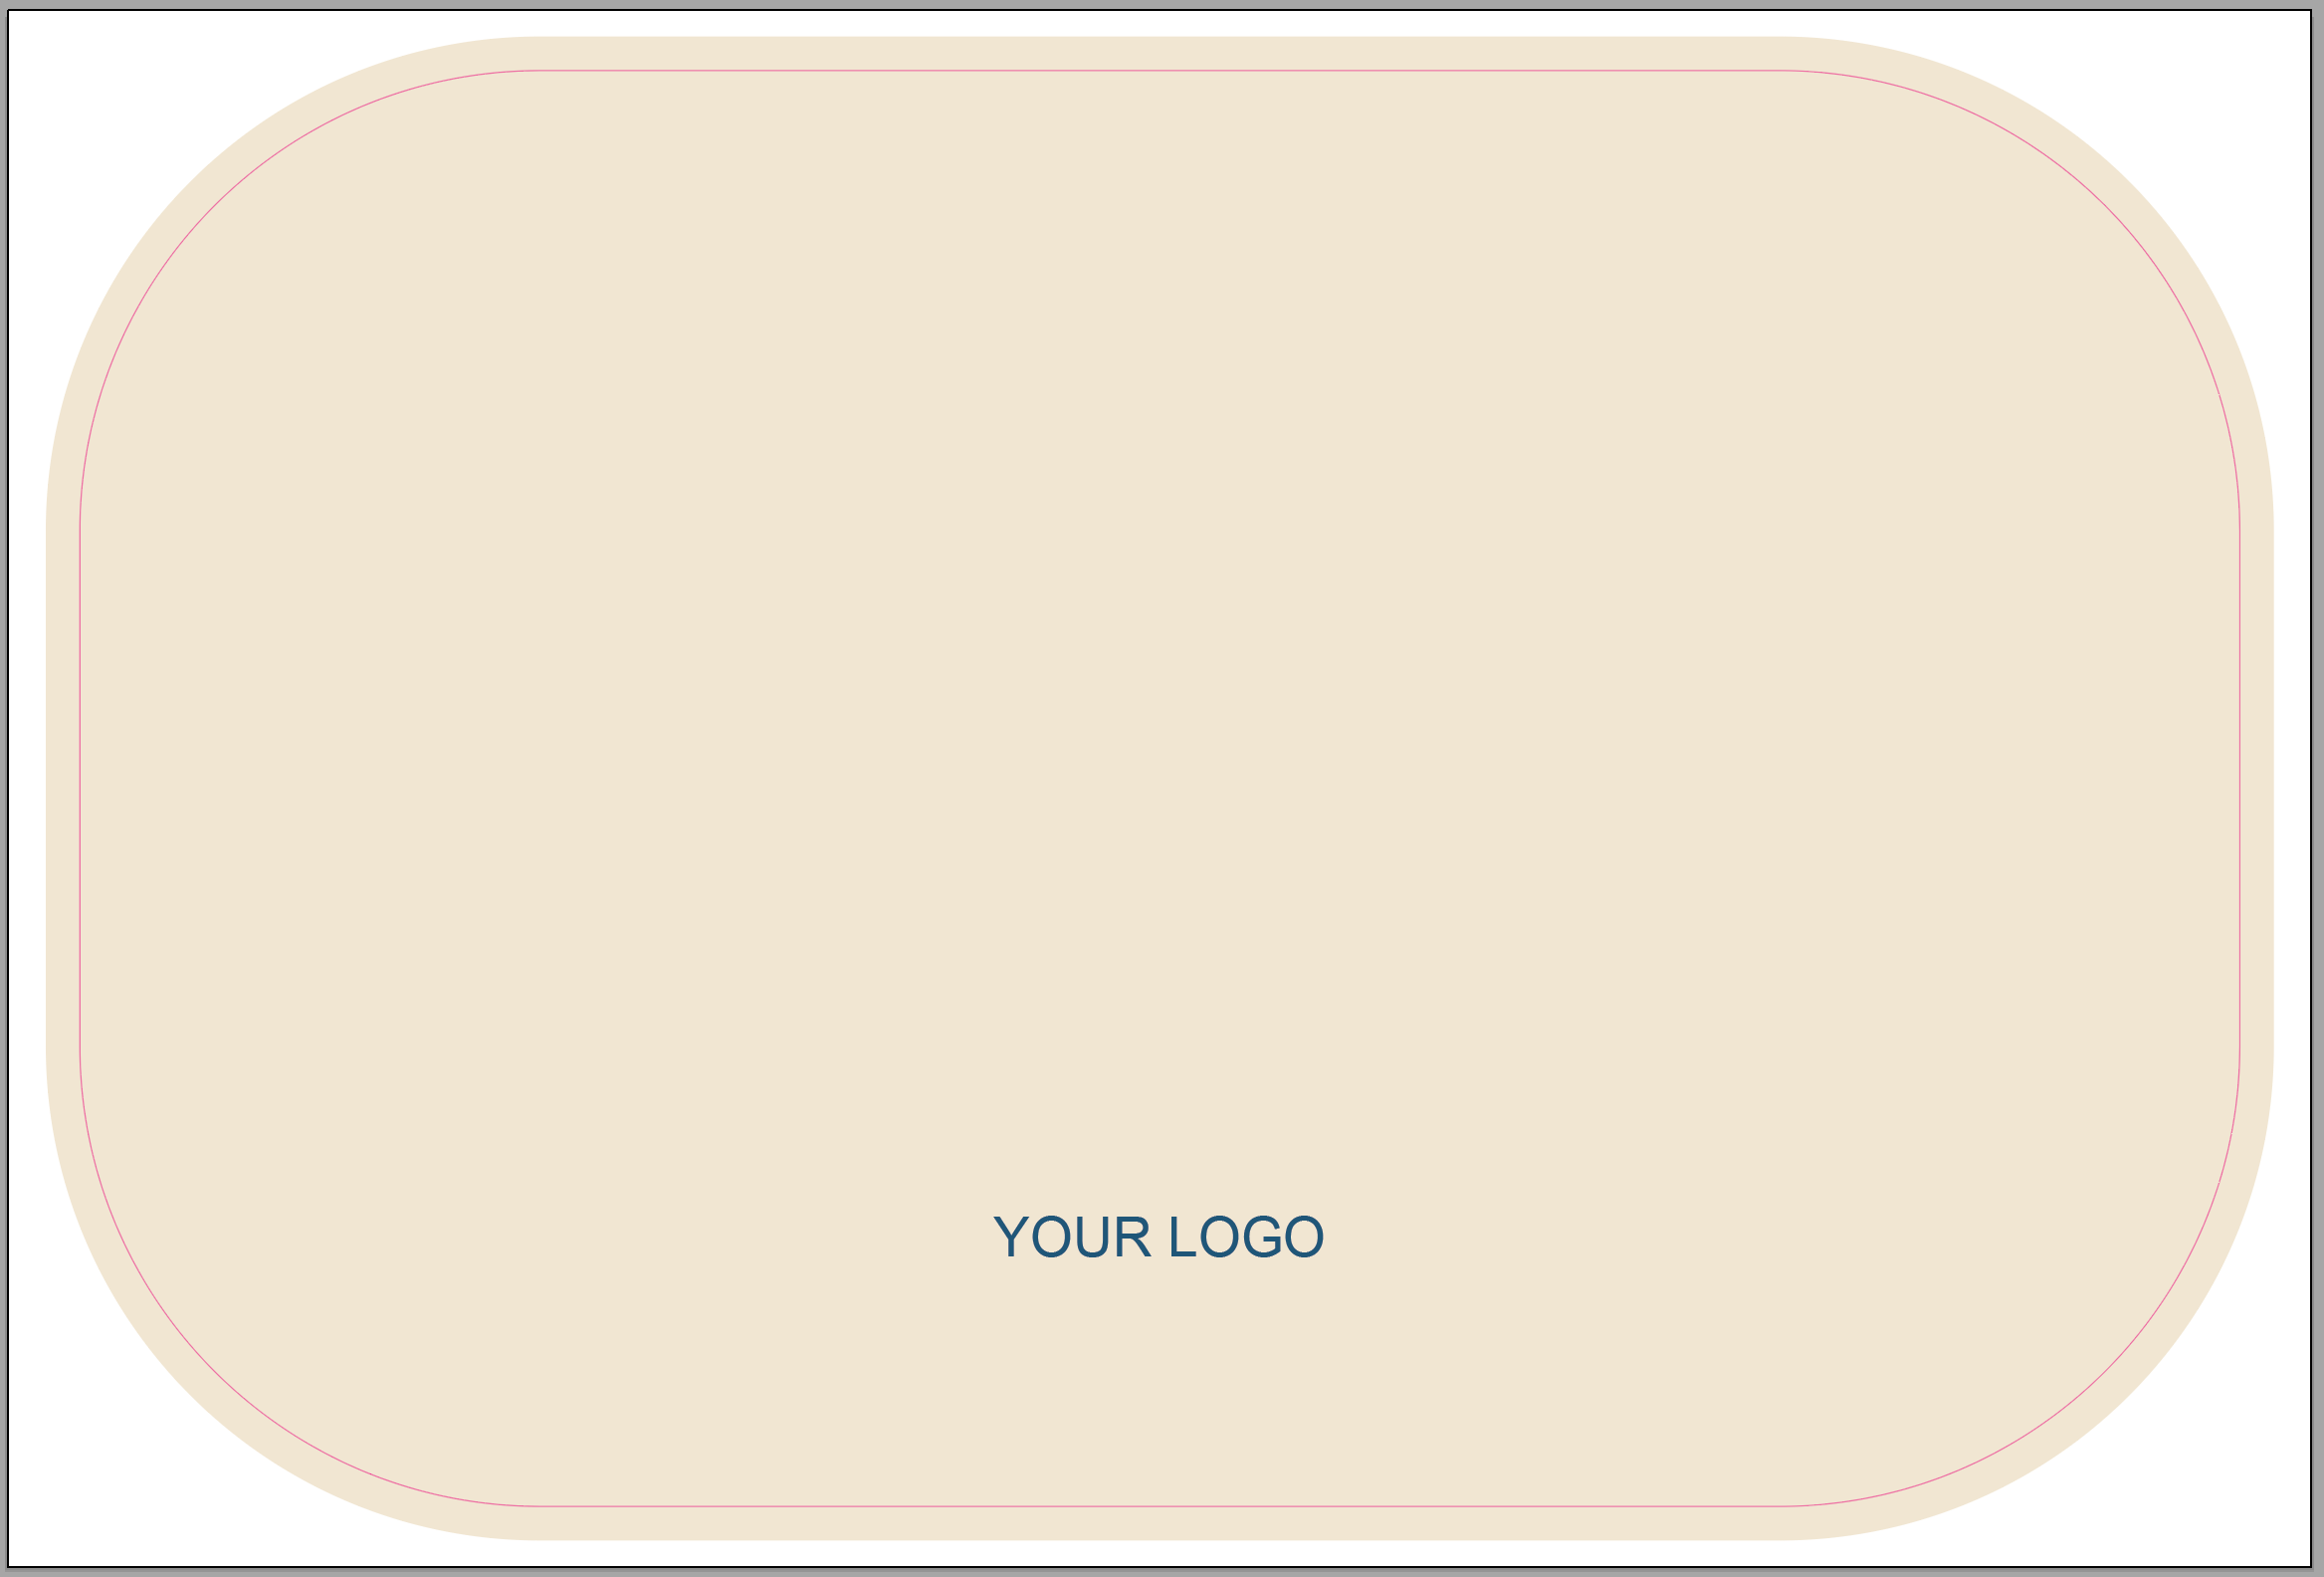
7. Tidy the template marks. Select the lock icon on the template layer first, so you can edit it. On stretch and box templates, leave the grey trim line visible and delete the panel names, measurements and instruction text. On a throw template, leave the solid magenta trim line visible, delete the dashed magenta guide lines and the panel names and measurements, and delete the template's title and instruction text from the middle of the cloth so none of it prints. Don't add crop marks.
8. Finally, save a Press Quality PDF. In the main menu, go to File > Save As, choose Adobe PDF (*.PDF) and click Save. In the Save Adobe PDF dialog box, choose [Press Quality] from the Adobe PDF Preset menu. Untick Preserve Illustrator Editing Capabilities to keep the file smaller (the preset then shows [Press Quality] (Modified)), then click Save PDF. That's it, you're done!
![Illustrator Save Adobe PDF dialog with [Press Quality] (Modified) preset and Preserve Illustrator Editing Capabilities unticked](/media/lbgnvfgy/howto-3026-illustrator-save-adobe-pdf-dialog-with-press-quality-modifie.png)
Before you send the file, check it against our artwork specifications.
Need some help?
We're here for you
If you're needing some advice or just a helping hand, please get in touch with our team, by clicking this button. Complete the enquiry form and one of our specialists will call you back as soon as we can.