

YOUR CART IS CURRENTLY EMPTY
How to compress a JPG without losing print quality?
Why is my JPG so big?
Photos straight from a camera or a stock library often carry far more pixels than a print needs, and every extra pixel adds to the file. Wide-format files can be slow to transfer, and a file that's too big to email can bounce back before it reaches us.
How do I make a JPG smaller without losing print quality?
JPEG compresses file size by selectively discarding data, so turning the quality slider down is the quickest way to make a photo look worse. The better way is to take away pixels the print doesn't need. You can't set the file size directly in Photoshop. It changes when you change the total amount of data in the image, which is the pixel dimensions.
For large format printing, images should be at least 150ppi at 100% of the finished size, and 150ppi is more than acceptable for most large format work. Graphics read at arm's length, such as a counter front, show every soft edge, so aim above the minimum for those. The steps below crop off what you don't need, bring the image down to the resolution it needs at its printed size, then save one good-quality JPEG.
Note: A high-resolution PDF is our preferred format. We do accept JPEG files, but a $75 conversion fee (ex GST) applies to print-ready artwork that isn't a PDF. If the photo is going into a layout, place it and follow our guide How to make a PDF file smaller? instead.
Steps to compress a JPG in Photoshop
1. Open the photo and check its current size. In the main menu, go to Image > Image Size. The Image Size figure at the top shows the current file size (the uncompressed size open in Photoshop, so it's much bigger than the JPEG on disk), and Dimensions shows the total pixel count. Make a note of both, then click Cancel.
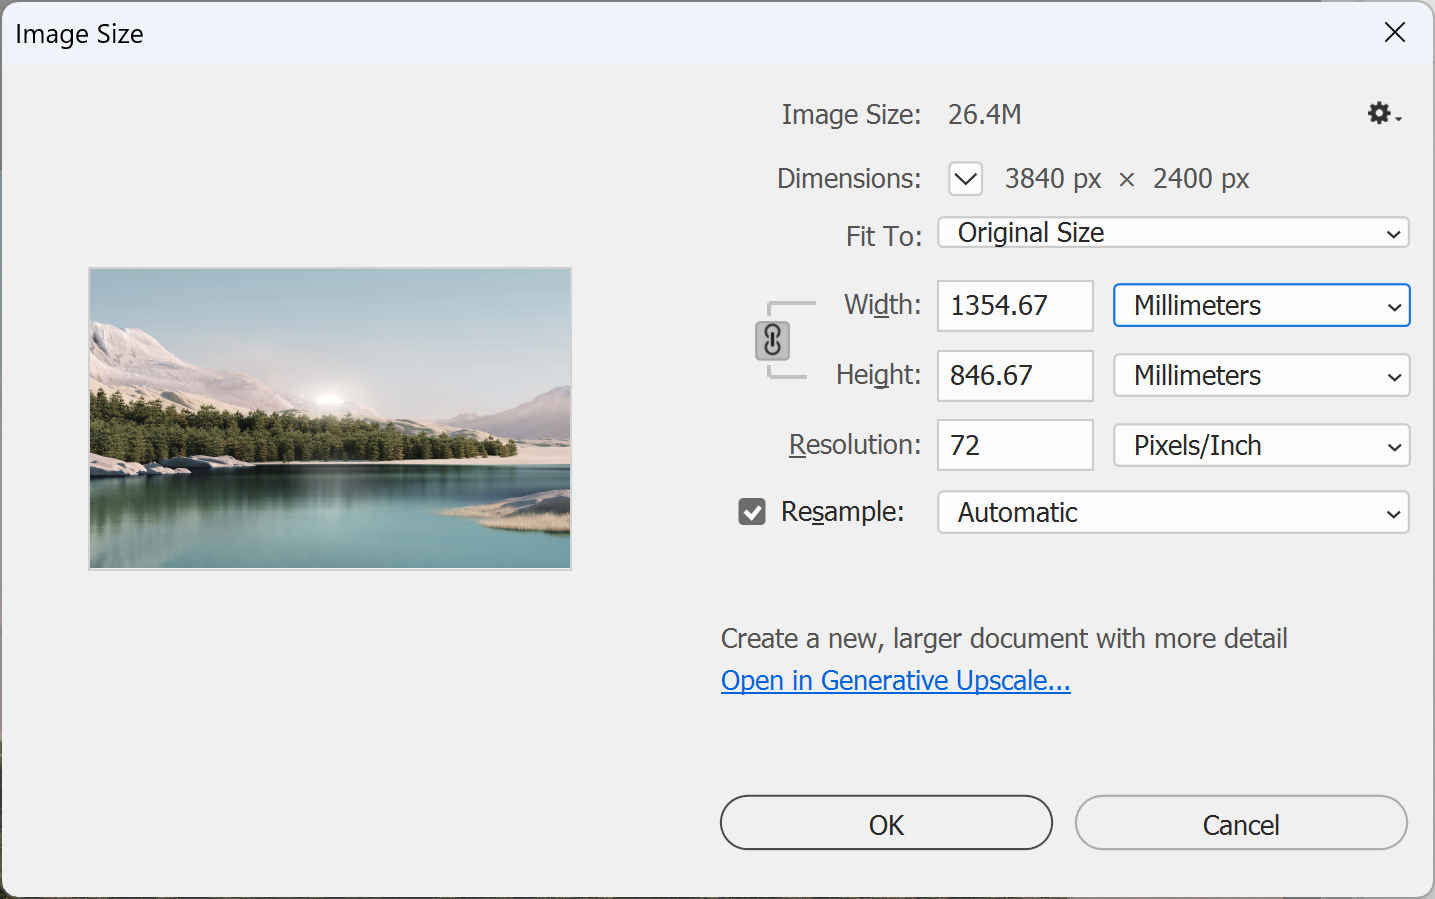
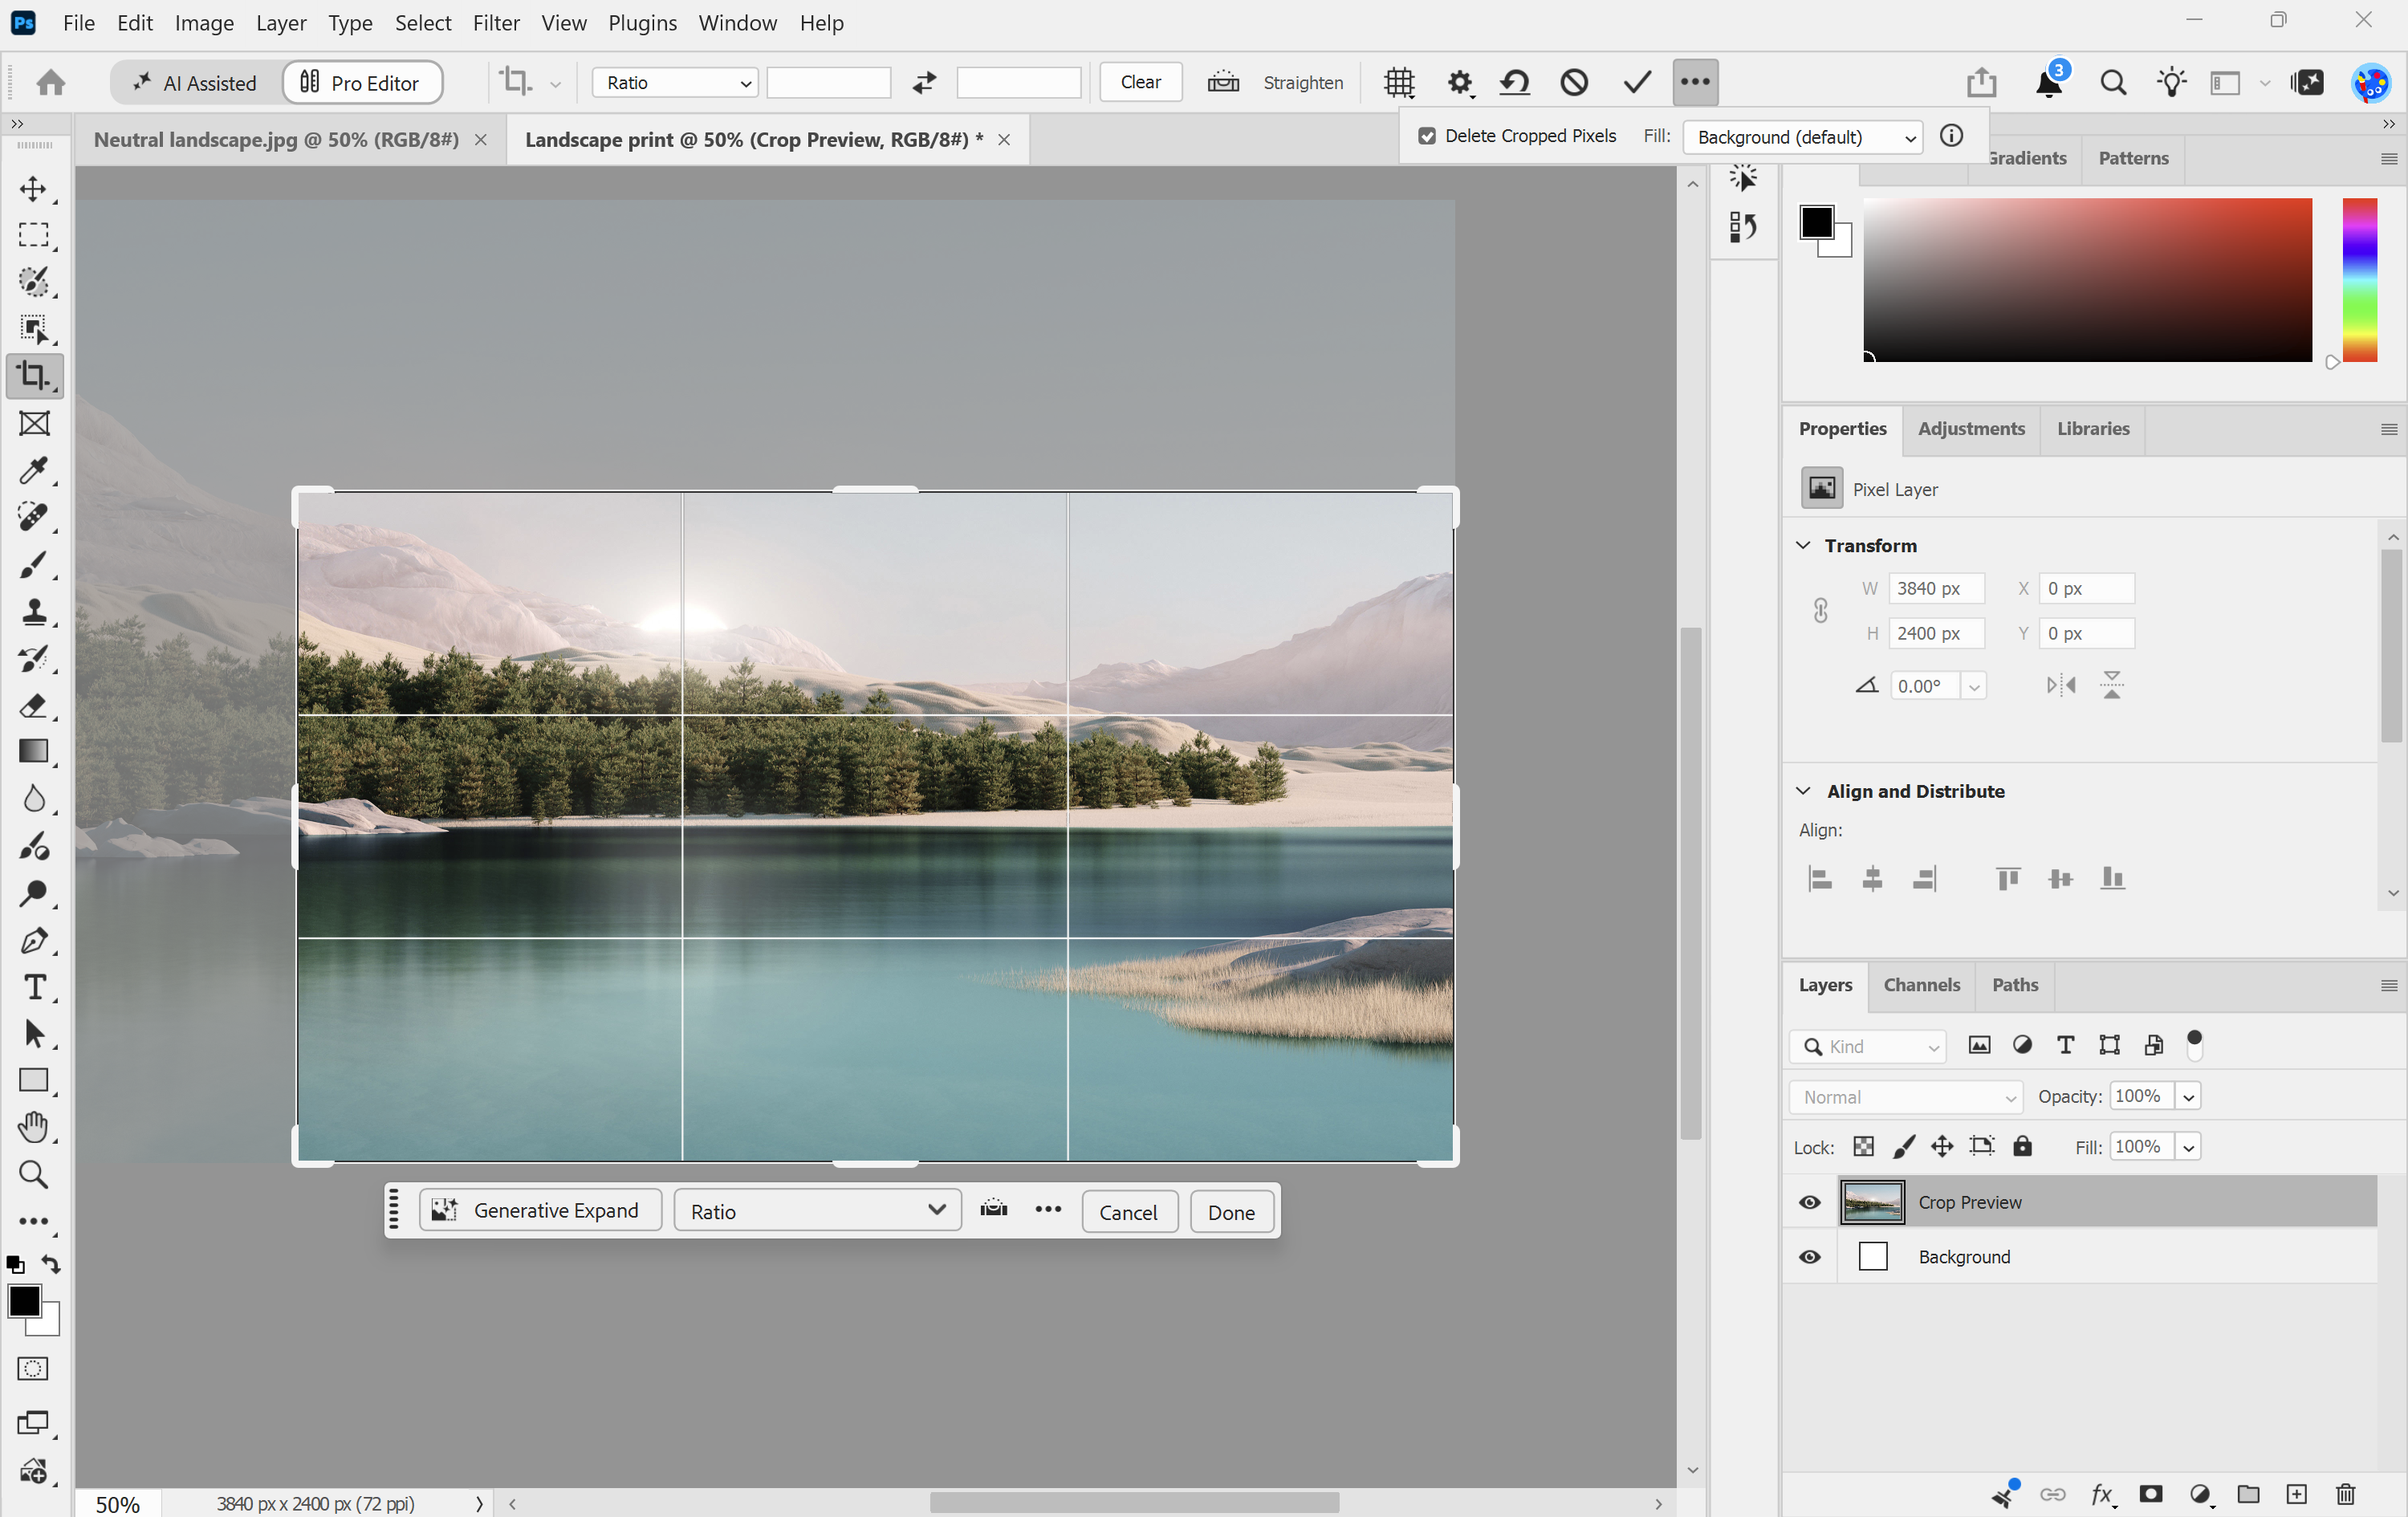
2. Crop off anything that won't be printed. Select the Crop tool and, in the options bar, check Delete Cropped Pixels (if it's hidden, click the three-dot icon at the end of the options bar). Drag the crop handles in to the area you need and press Enter (Windows) or Return (macOS).
IMPORTANT: With Delete Cropped Pixels on, the area outside the crop is removed for good. That's what makes the file smaller, so work on a copy of your original.
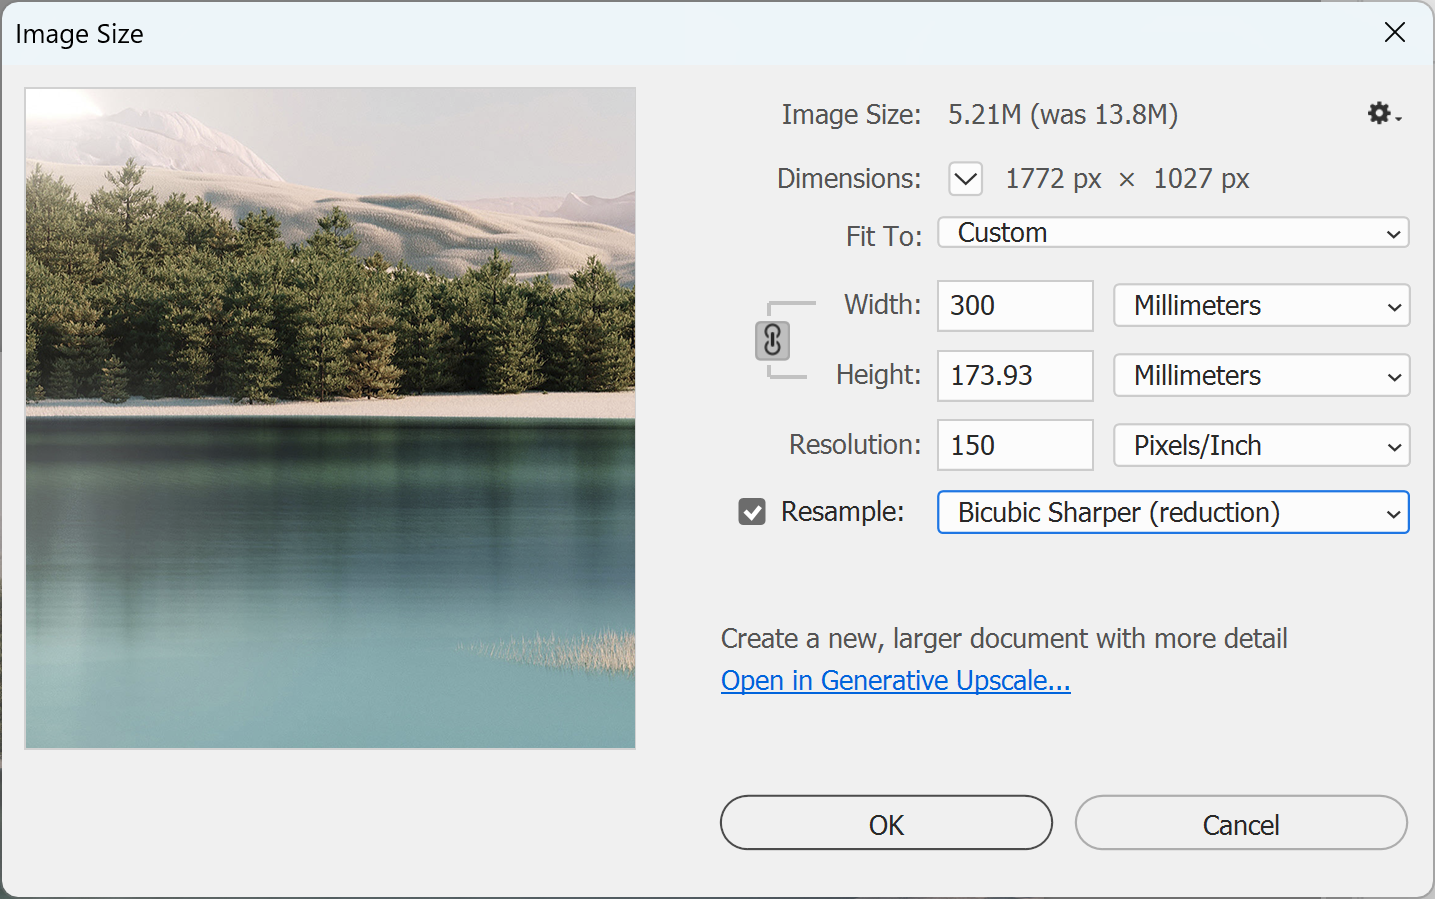
3. Resize the image to its printed size. In the main menu, go to Image > Image Size again. Check Resample and choose Bicubic Sharper (reduction) from the Resample menu, which helps keep the image sharp as it gets smaller. Set the Resolution to 150 Pixels/Inch (higher for a graphic people will see up close), then enter the finished print width in Millimeters (include bleed if the photo runs to the edge: 10mm each side unless the template says otherwise). Watch the Image Size figure drop, then click OK.
Note: Only ever reduce here. If the Image Size figure goes up instead, the photo is below 150ppi at that size: click Cancel and don't enlarge it. We can accept down to 75ppi. Adobe also recommends resampling only once.
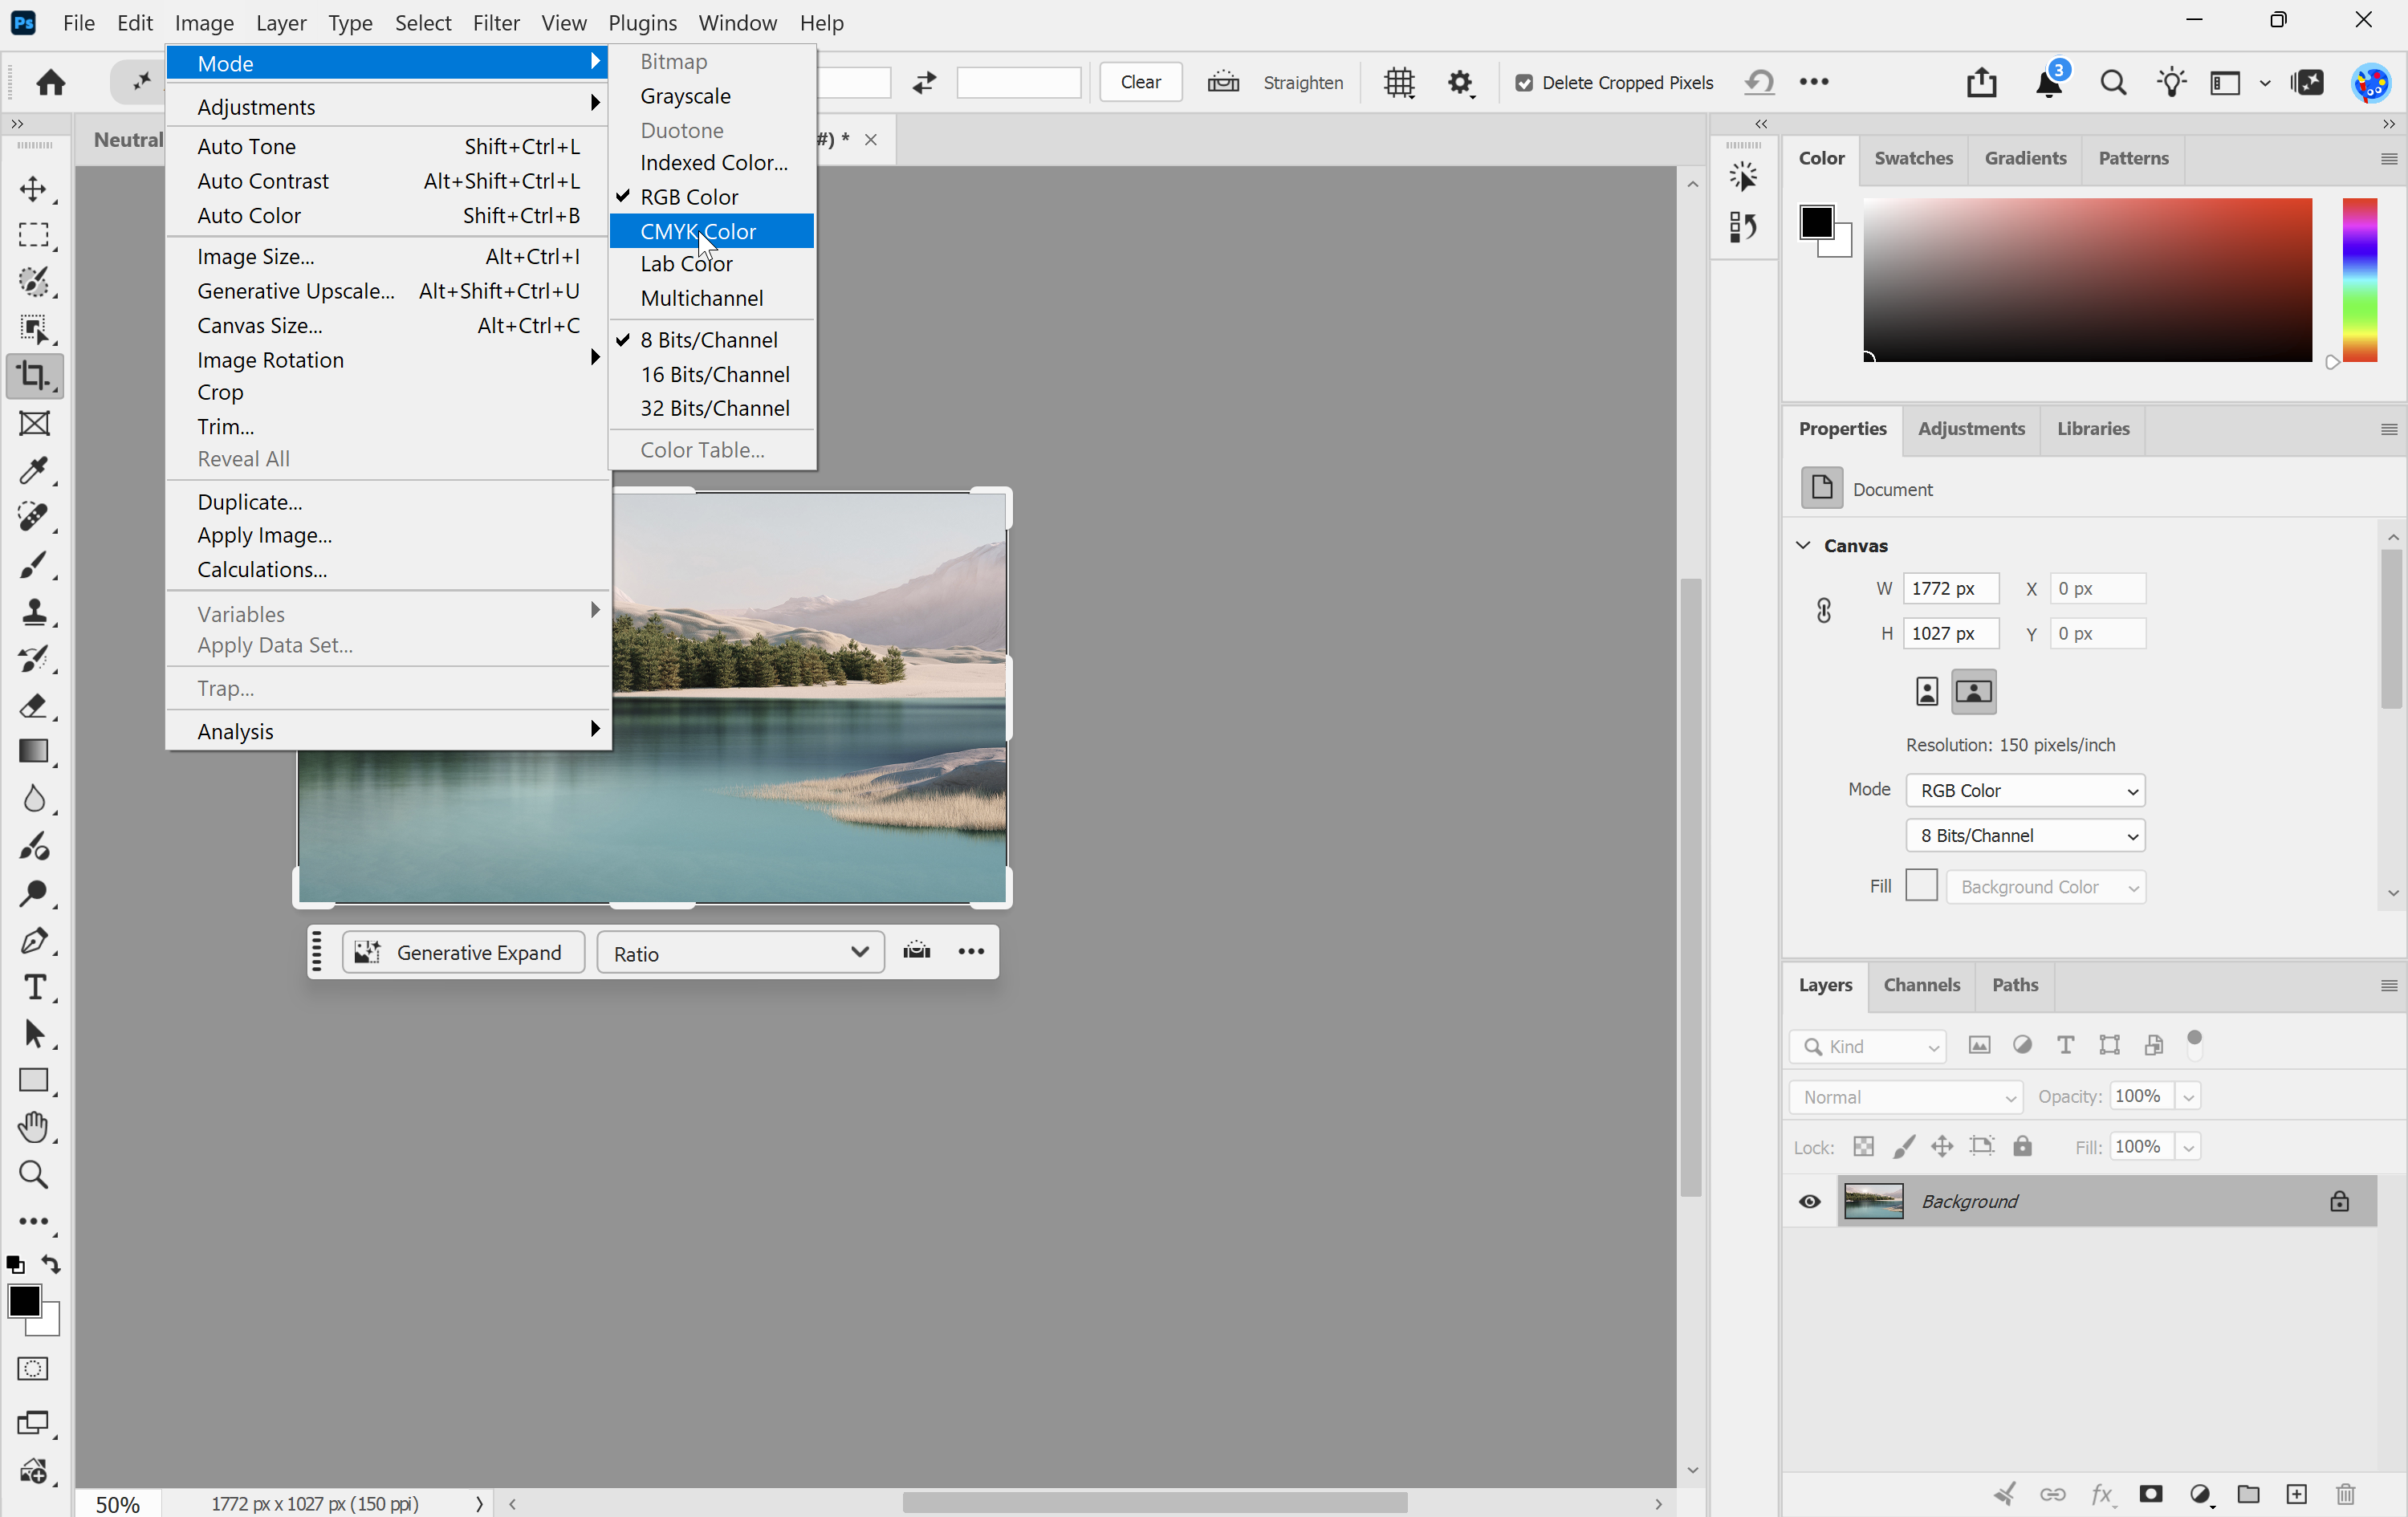
4. Convert the photo to CMYK. Photoshop converts to the Working CMYK profile in Edit > Color Settings, so check that's set to the profile we recommend first. Then, in the main menu, go to Image > Mode > CMYK Color.
Note: Converting from RGB to CMYK permanently changes colour values, and some very bright colours may shift. Do it on your copy, never on your original.
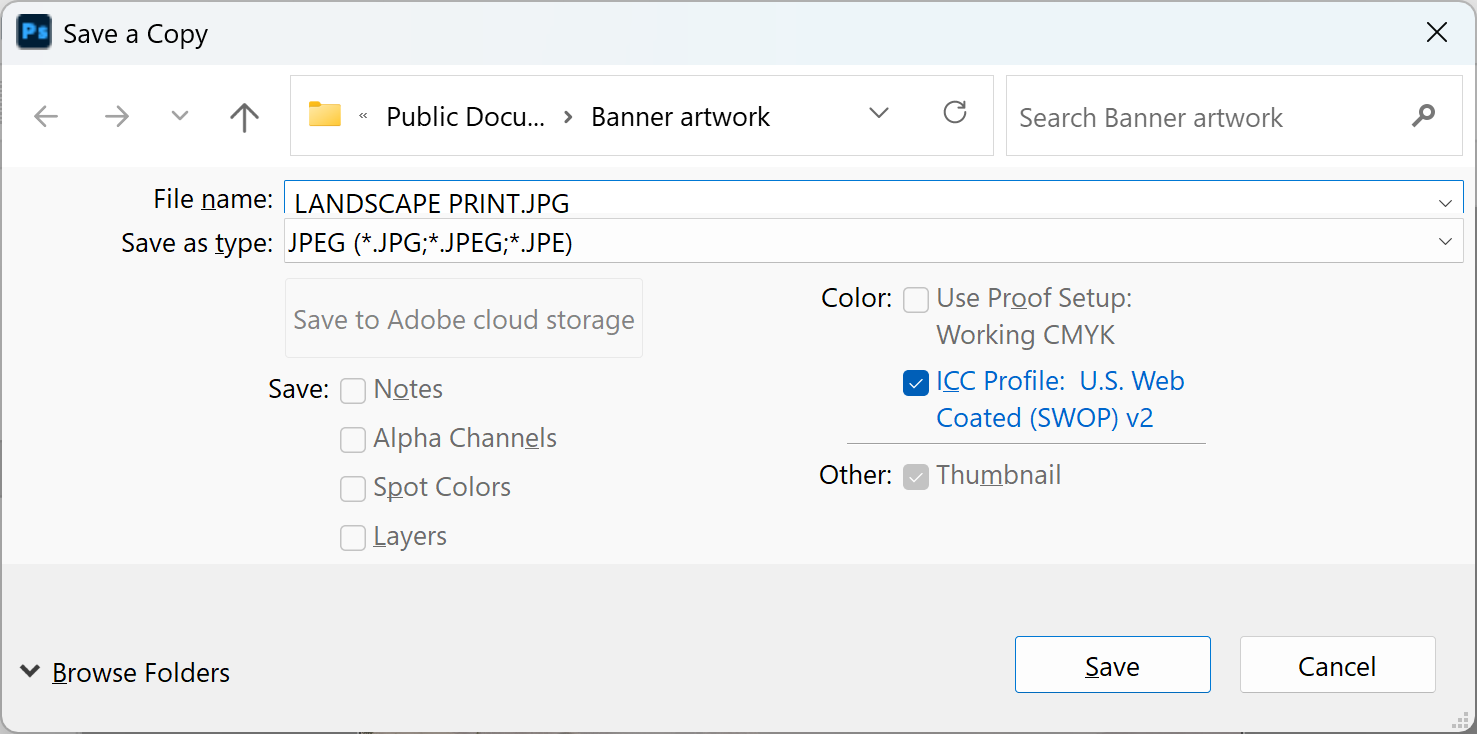
5. Save a copy as a JPEG. In the main menu, go to File > Save a Copy. Choose JPEG from the format menu, give the file a new name, choose where to save it, leave ICC Profile ticked and click Save.
Note: Use Save a Copy rather than File > Export > Export As for print. Export As converts the image to the sRGB colour space, which suits screens, and we need artwork supplied in CMYK.
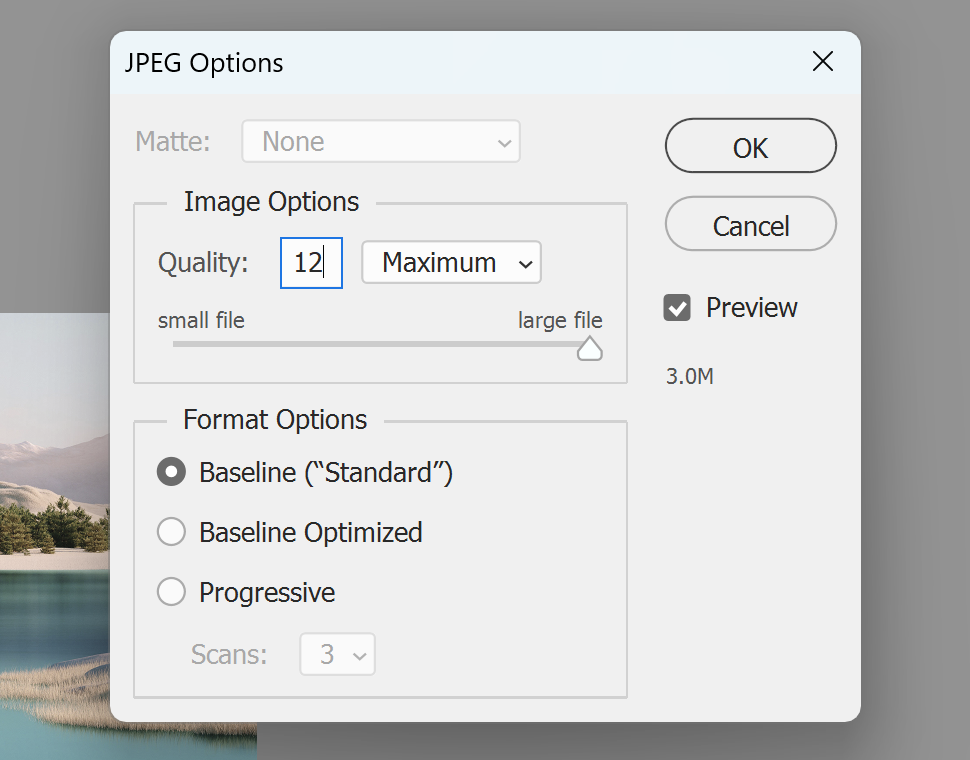
6. Set the quality in the JPEG Options dialog box. Keep Image Options Quality high: the scale runs from 0 to 12, and most of the saving has already come from step 3. Under Format Options, choose Baseline ("Standard"). Click OK.
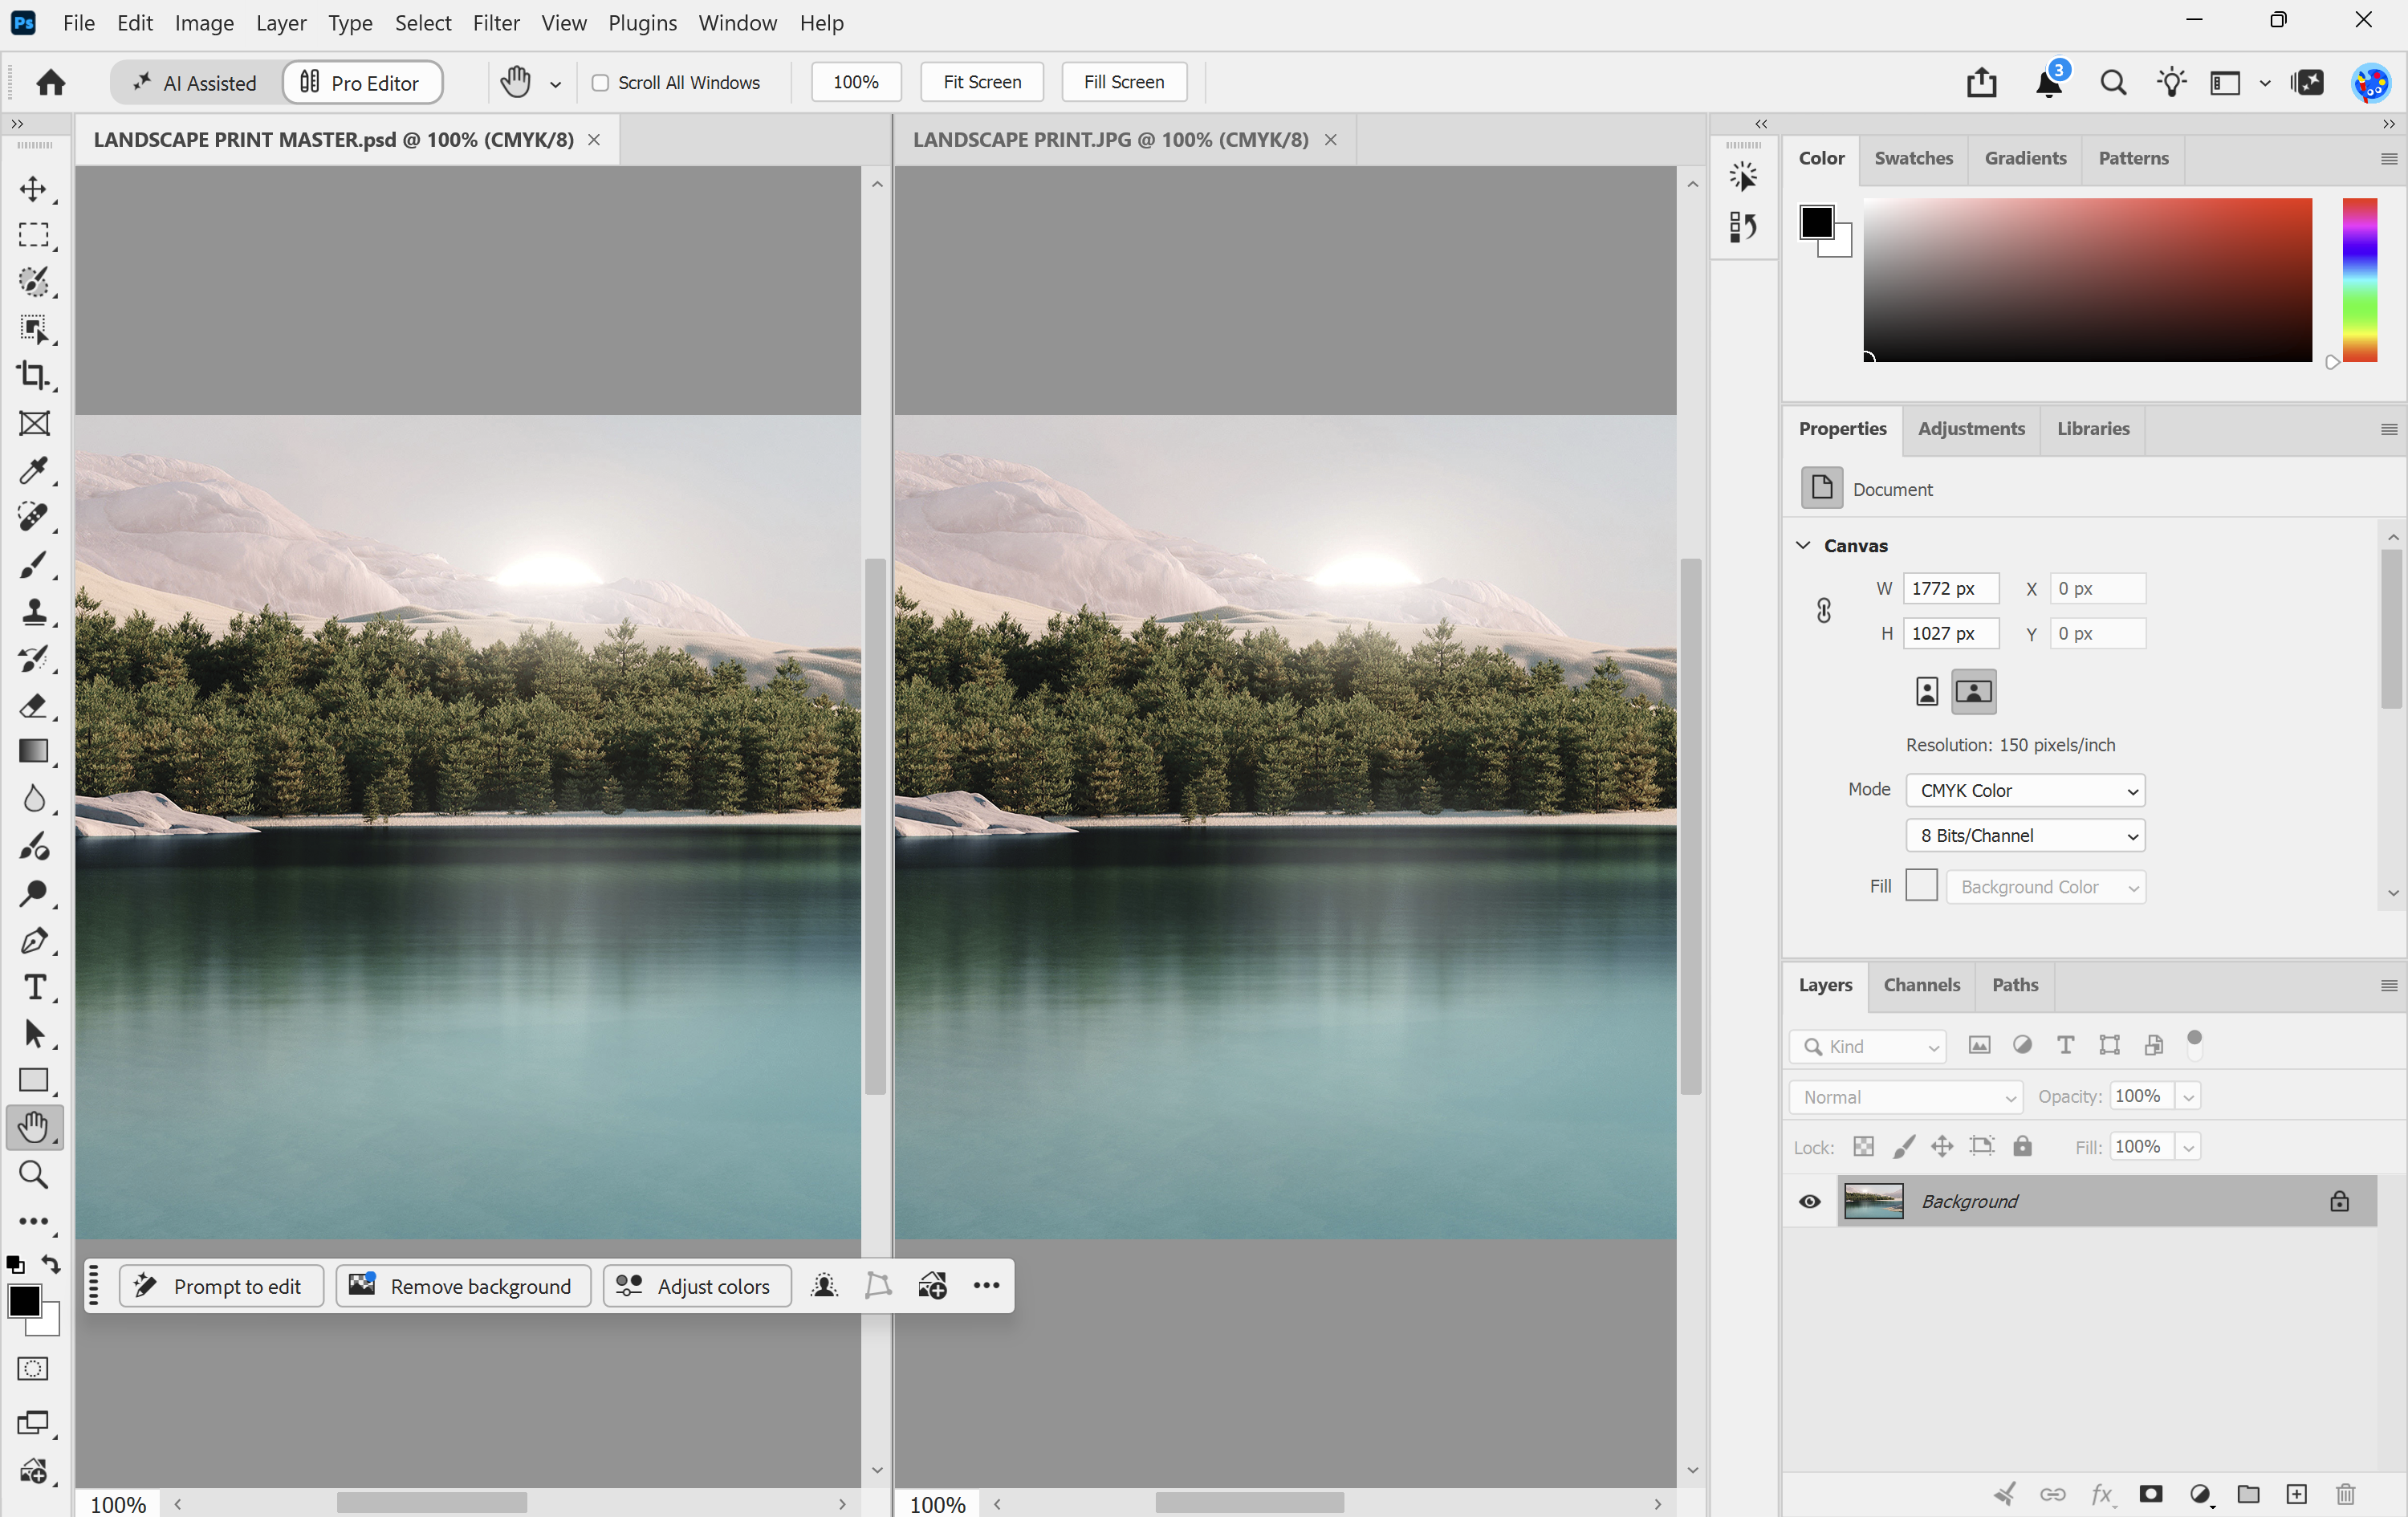
7. Finally, compare the saved JPEG with your working file. Open the JPEG next to it and zoom both to 100% on an area of fine detail, such as text or hair. If the copy looks the same, check it against our artwork specifications and email it to sales@displays2go.com.au, with your order or job number in the subject line if you have one. If it's still too big to email, see sending artwork and we'll arrange another way to get it across. You're done!
Need some help?
We're here for you
If you're needing some advice or just a helping hand, please get in touch with our team, by clicking this button. Complete the enquiry form and one of our specialists will call you back as soon as we can.