

YOUR CART IS CURRENTLY EMPTY
How to set up artwork for a printed marquee or gazebo?
What gets printed on a marquee?
Our Gazebo 2 Go event marquees come with a custom printed canopy, and you can add printed walls at full height or half height. The canopy and the walls are dye-sublimation printed onto 600 denier polyester, so the ink goes into the fabric rather than sitting on top of it. Across our branded marquees and printed gazebos, canopies, walls and doors can all be digitally printed. If you've ordered a door or another printed add-on, ask us for its template.
Why does each part need its own template?
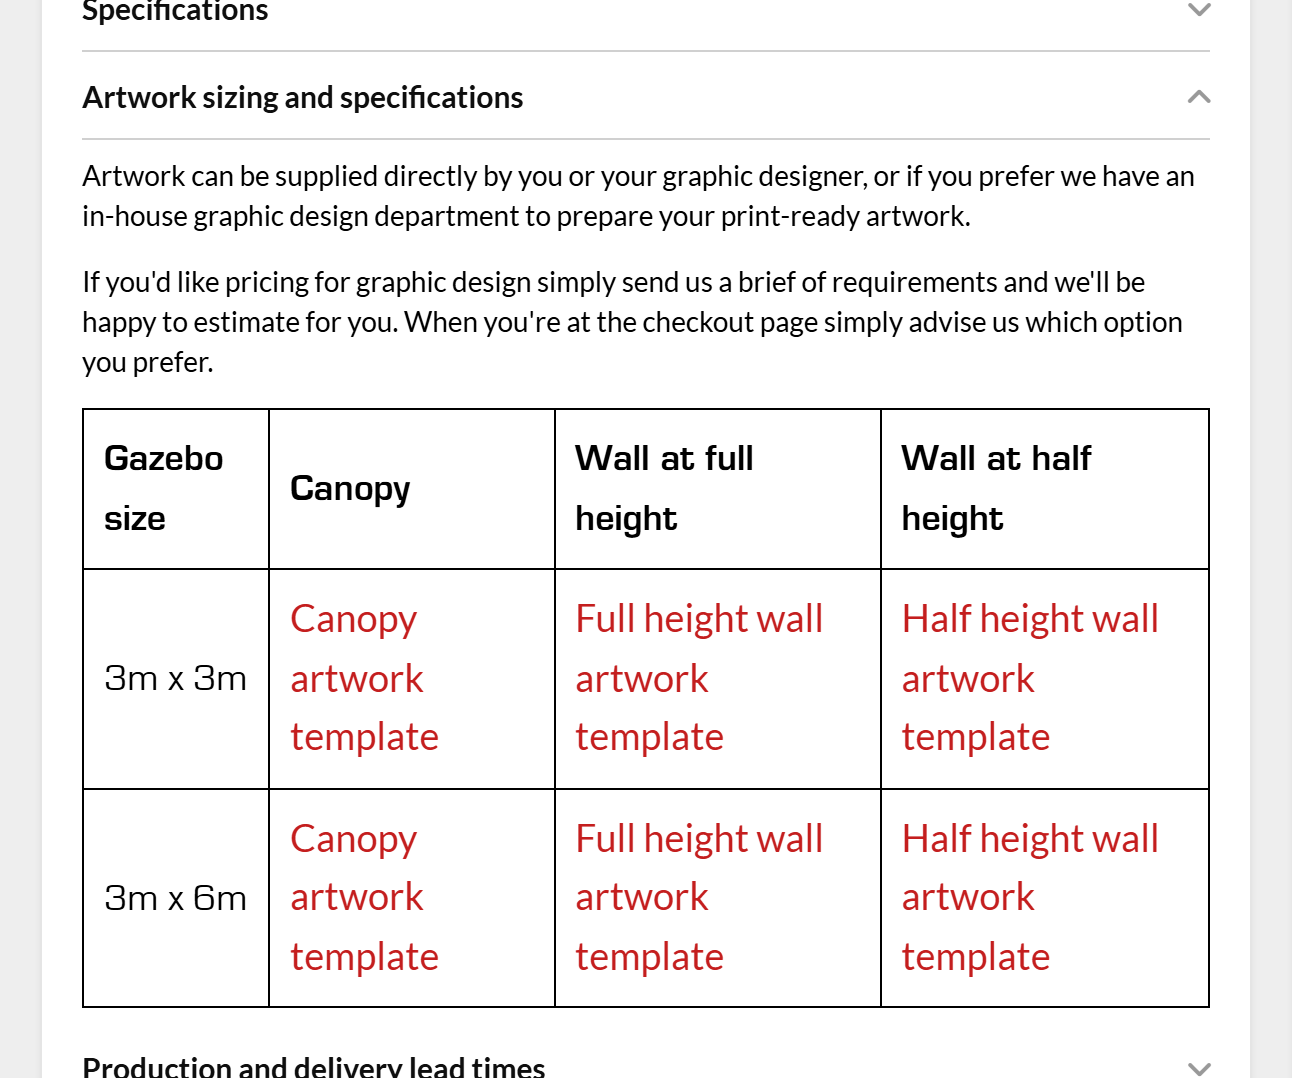
The canopy and walls are different shapes and sizes, and each marquee size has its own set. On the product page you'll find canopy, full-height wall and half-height wall templates for the 3m x 3m and 3m x 6m Gazebo 2 Go sizes.
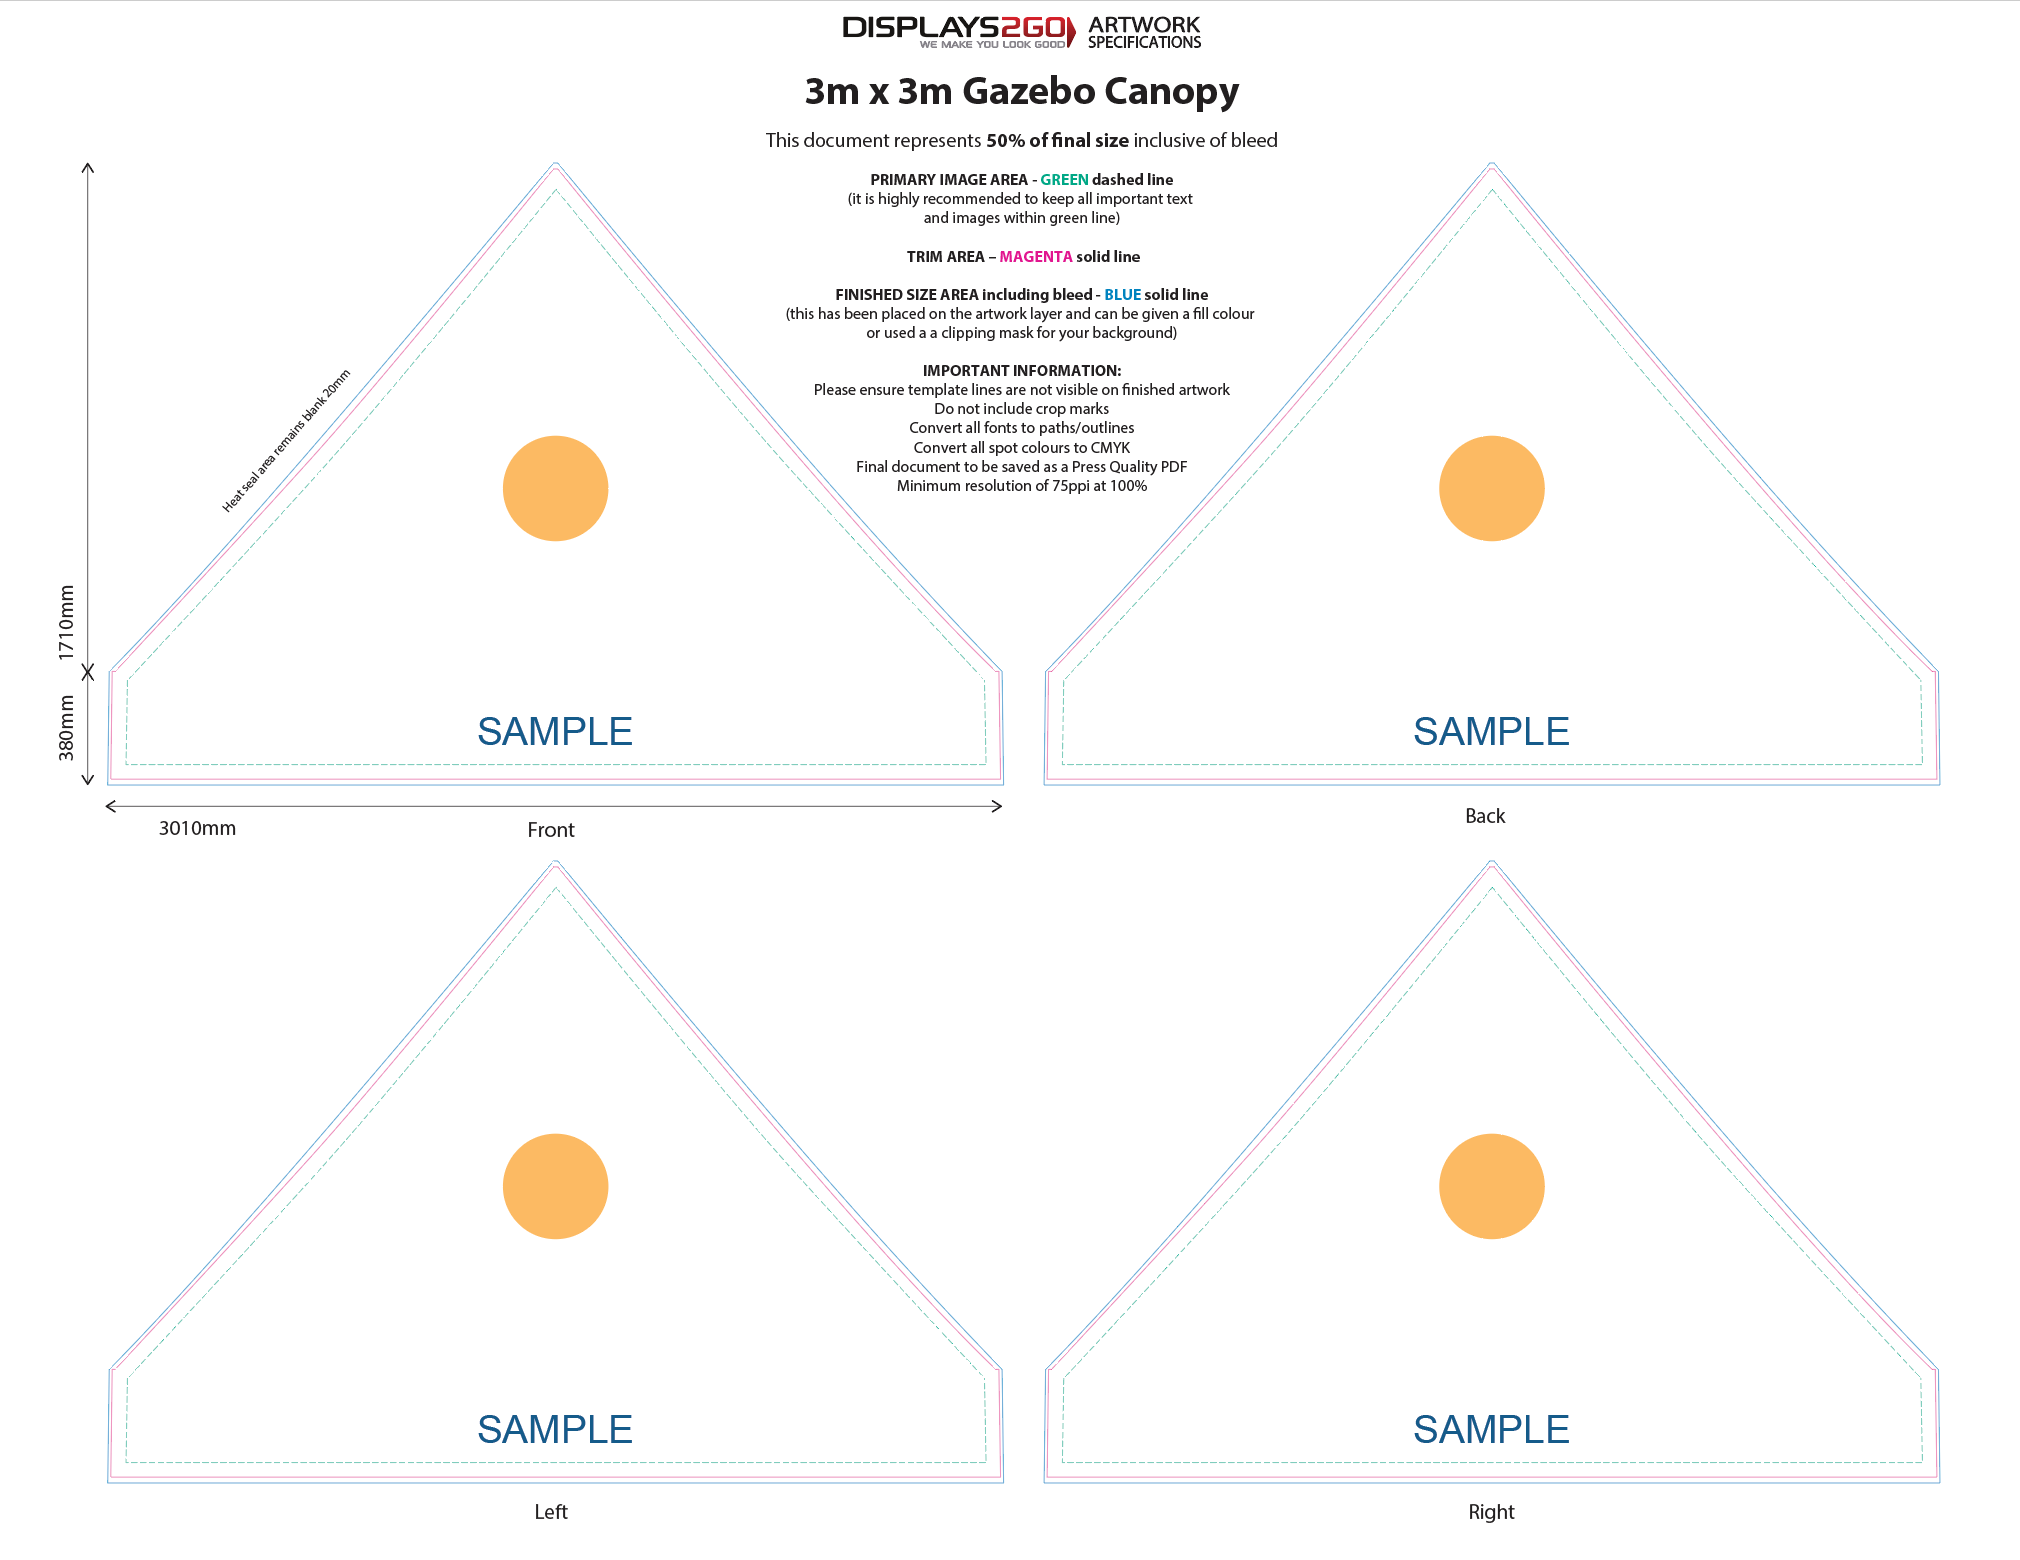
Each canopy panel is a roof triangle with a straight strip along the bottom edge, and the template marks a heat seal area that has to stay blank. The template shows you exactly where it falls, so you can keep your logo and text clear of it.
Steps to set up marquee artwork in Illustrator
1. Download the templates for your marquee size. Go to Artwork sizing and specifications on the Gazebo 2 Go product page and download the canopy template, plus a wall template for each wall you've ordered.
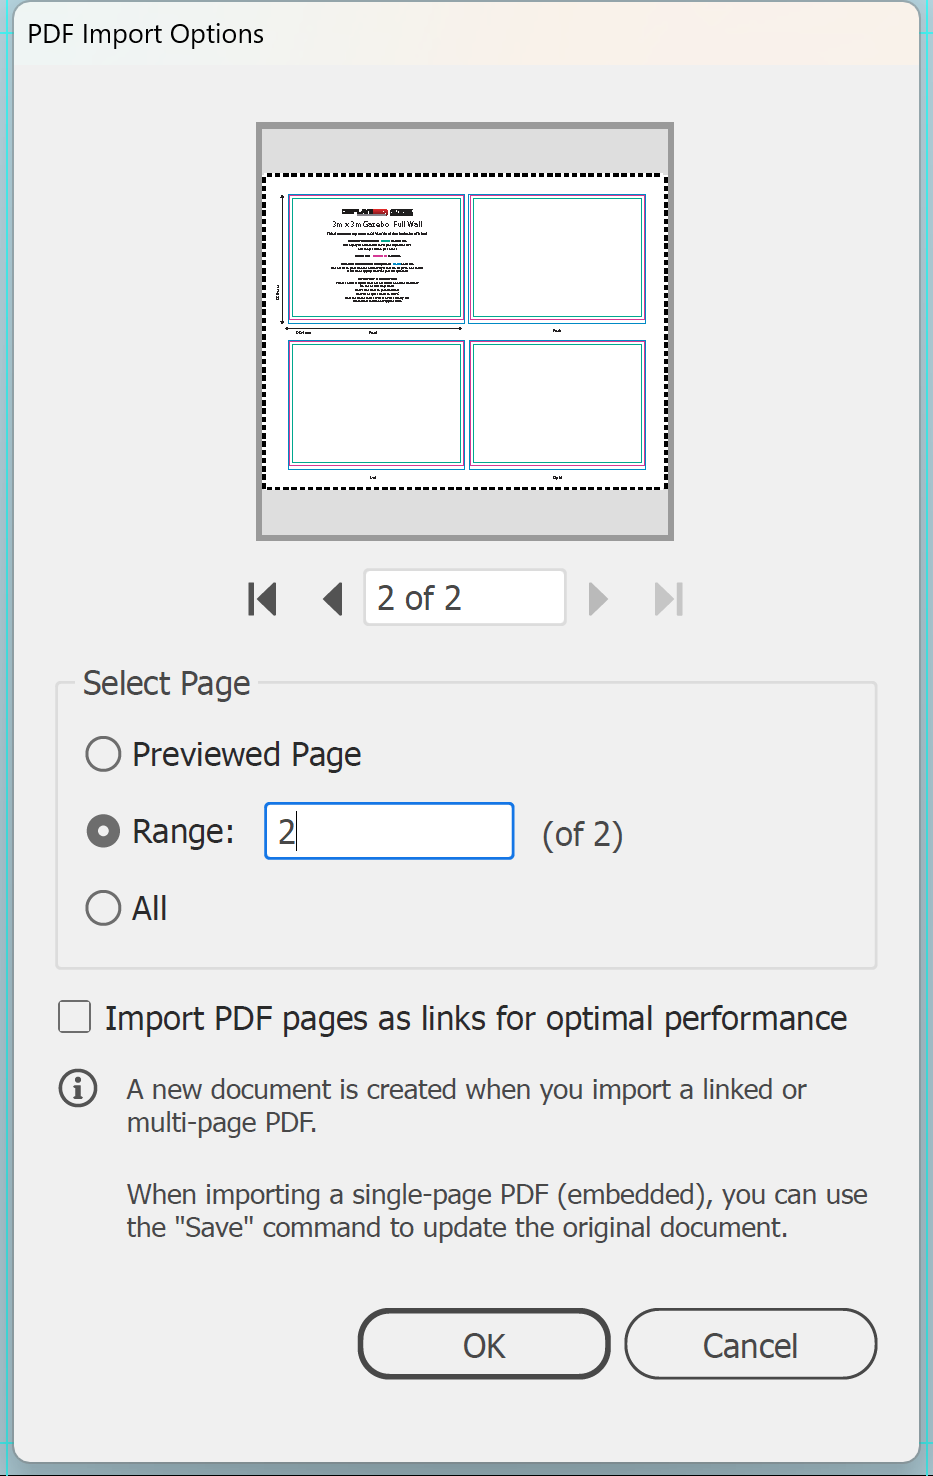
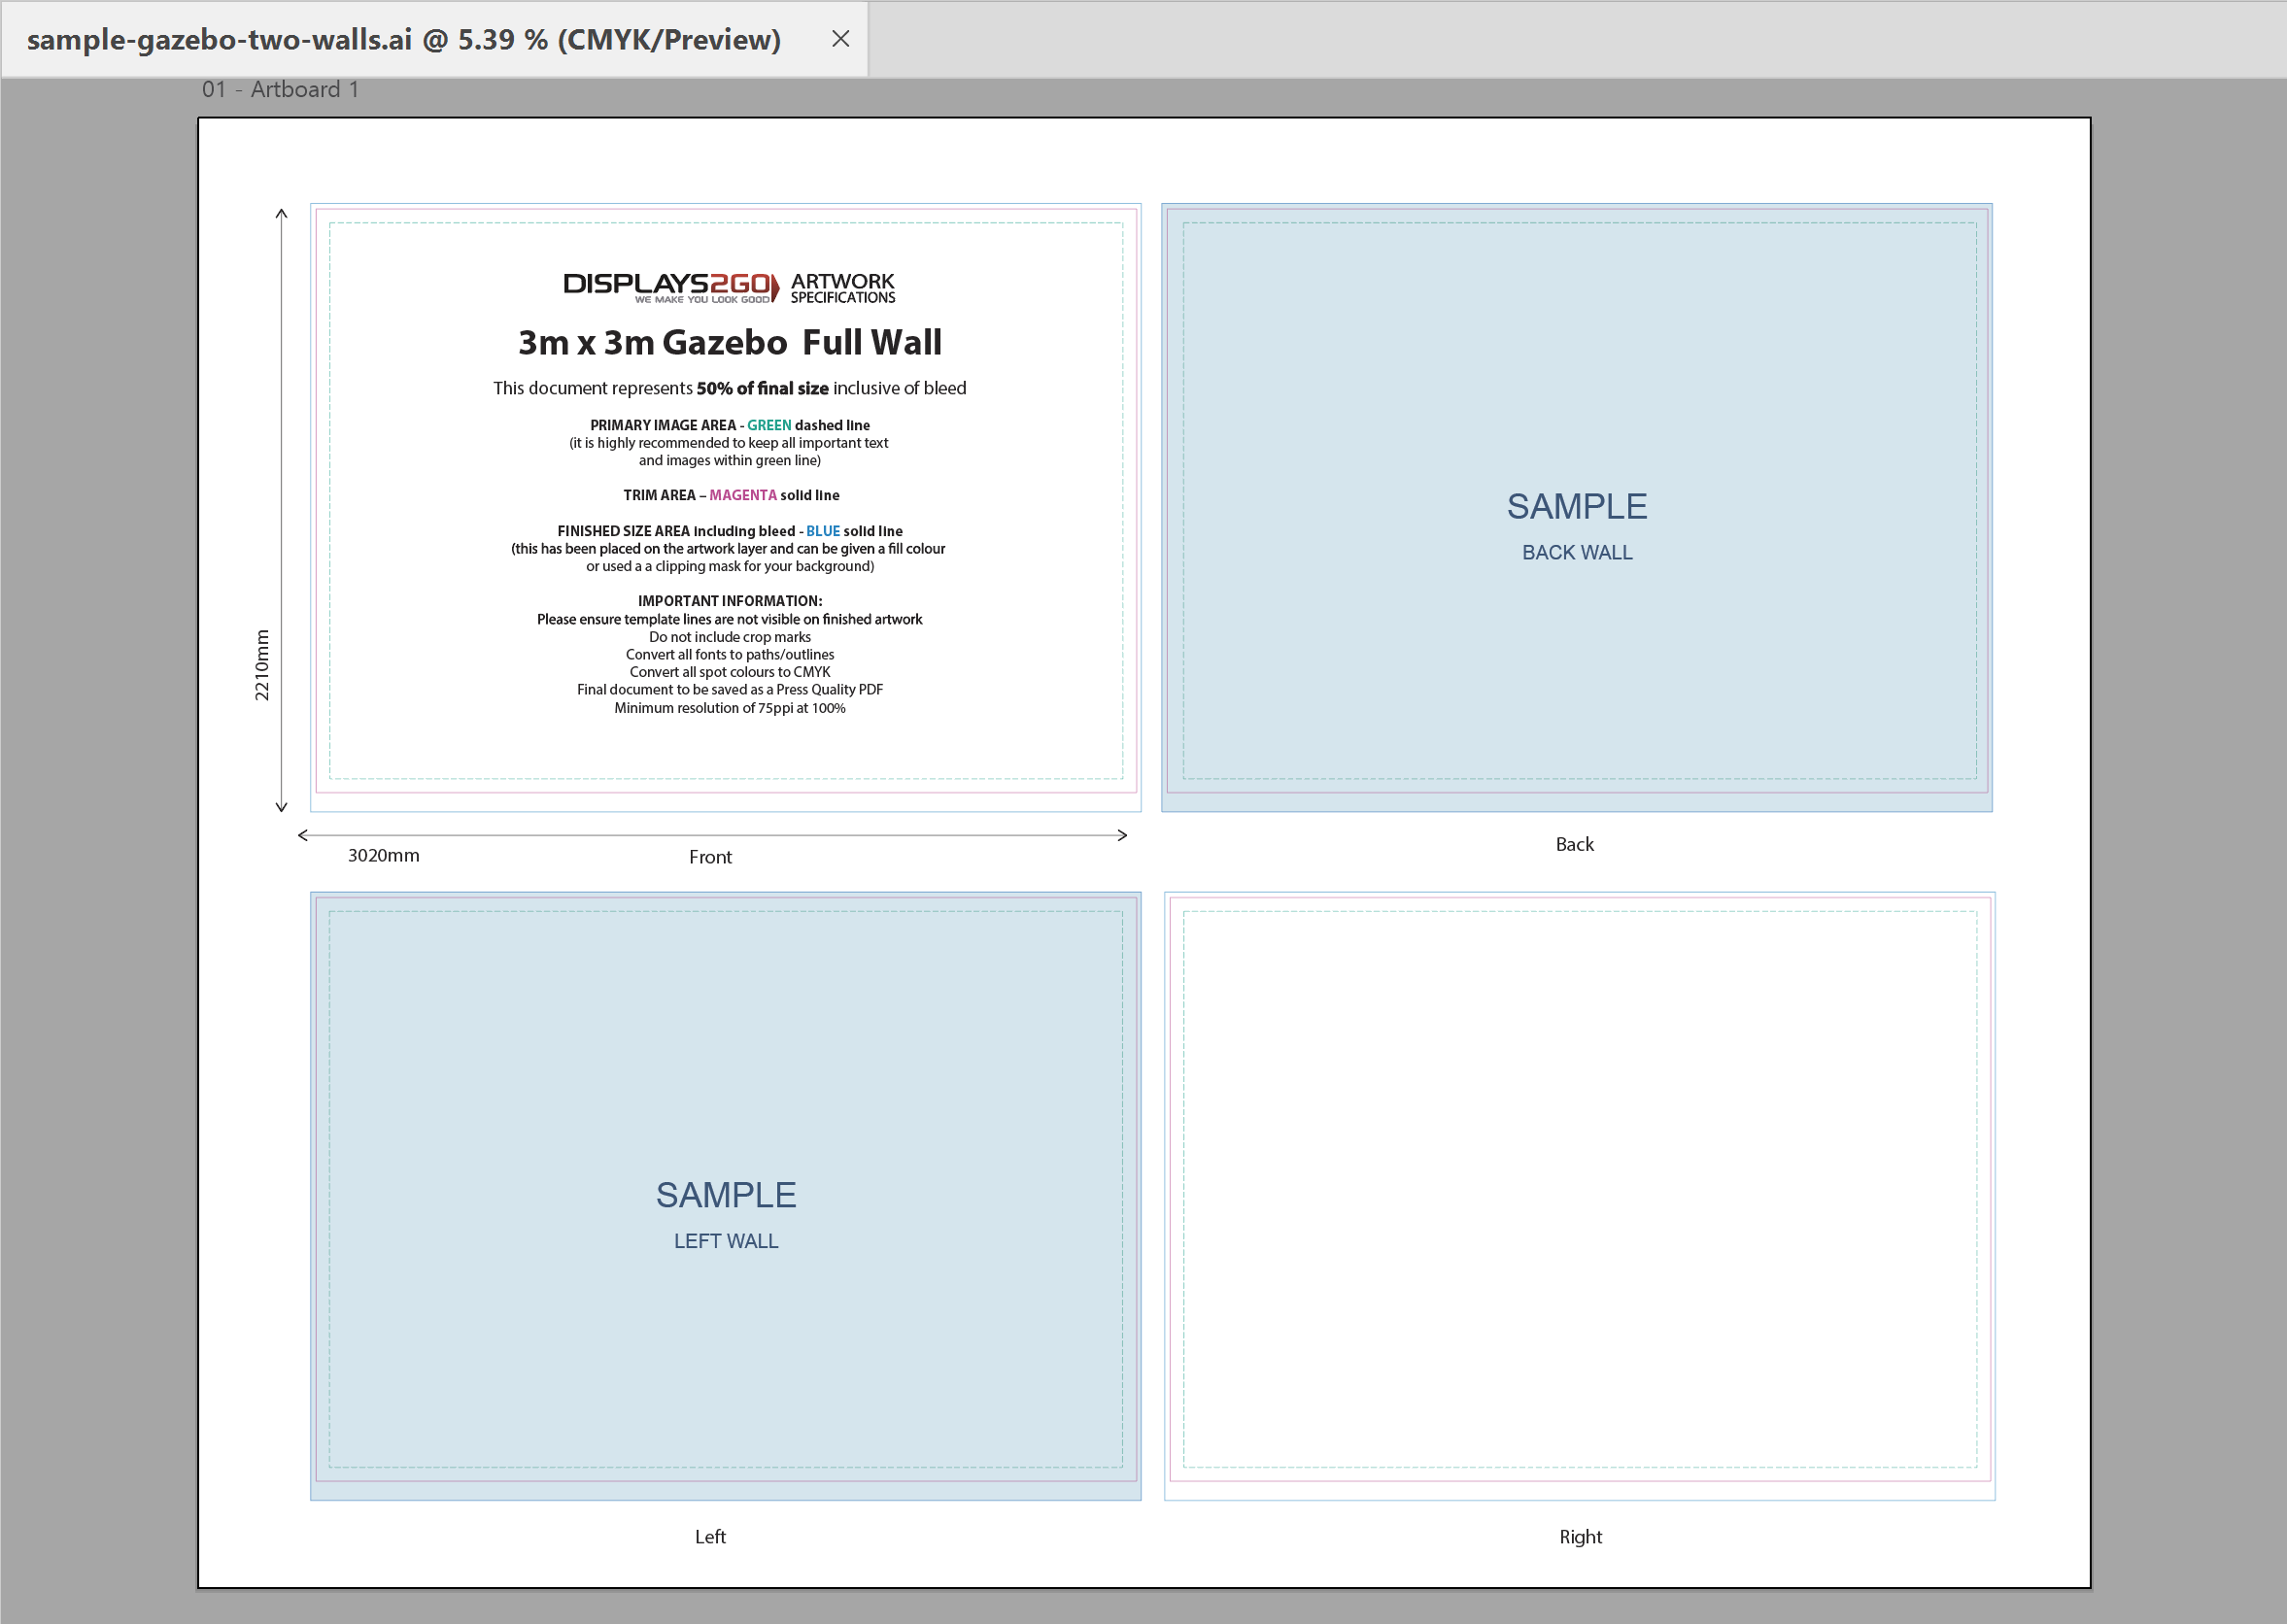
2. Open the template in Illustrator. In the main menu, go to File > Open, select the template PDF and click Open. The wall templates have an instruction sheet on page 1 and the template on page 2, so the PDF Import Options dialog box appears. Select Range, type 2 and click OK.
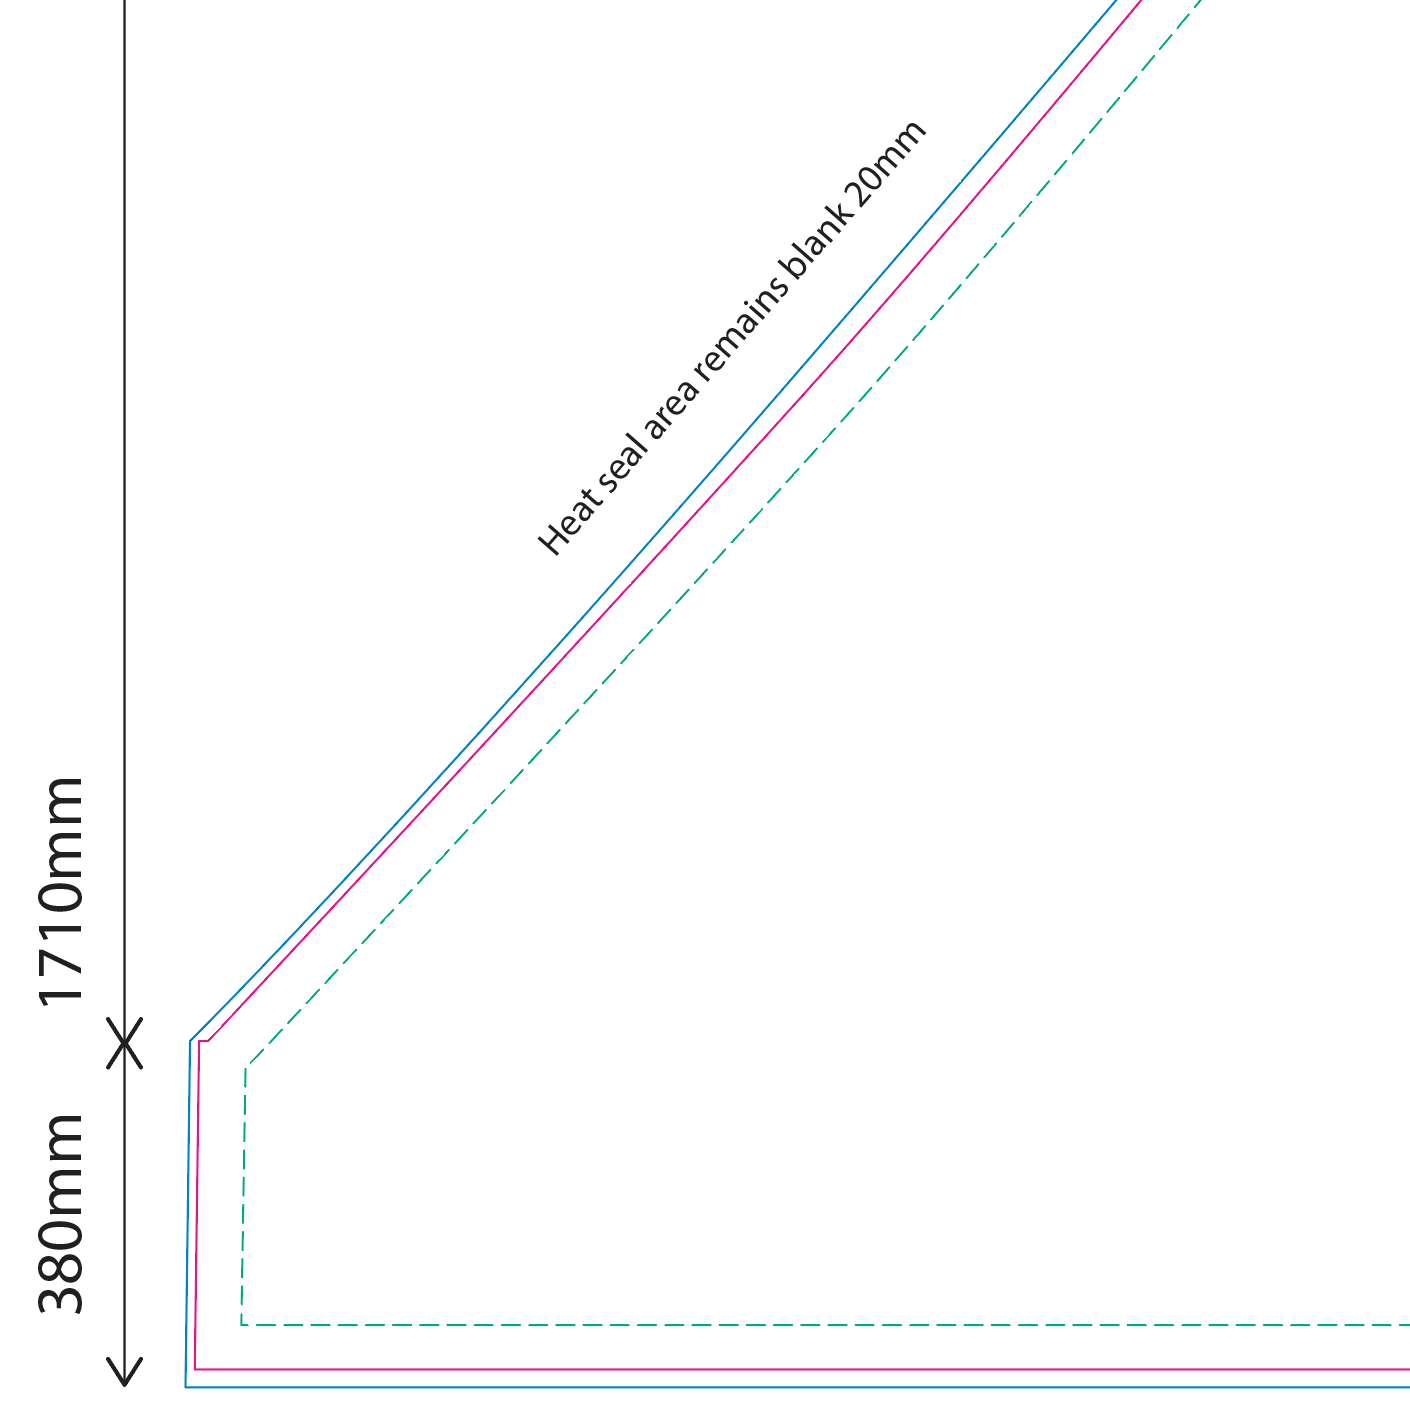
3. Check the scale and the three template lines. The templates are set at 50% of final size, including bleed:
- GREEN dashed line: the primary image area. Keep all important text and images inside it.
- MAGENTA solid line: the trim area.
- BLUE solid line: the finished size including bleed. This sits on the artwork layer, and you can give it a fill colour or use it as a clipping mask for your background.
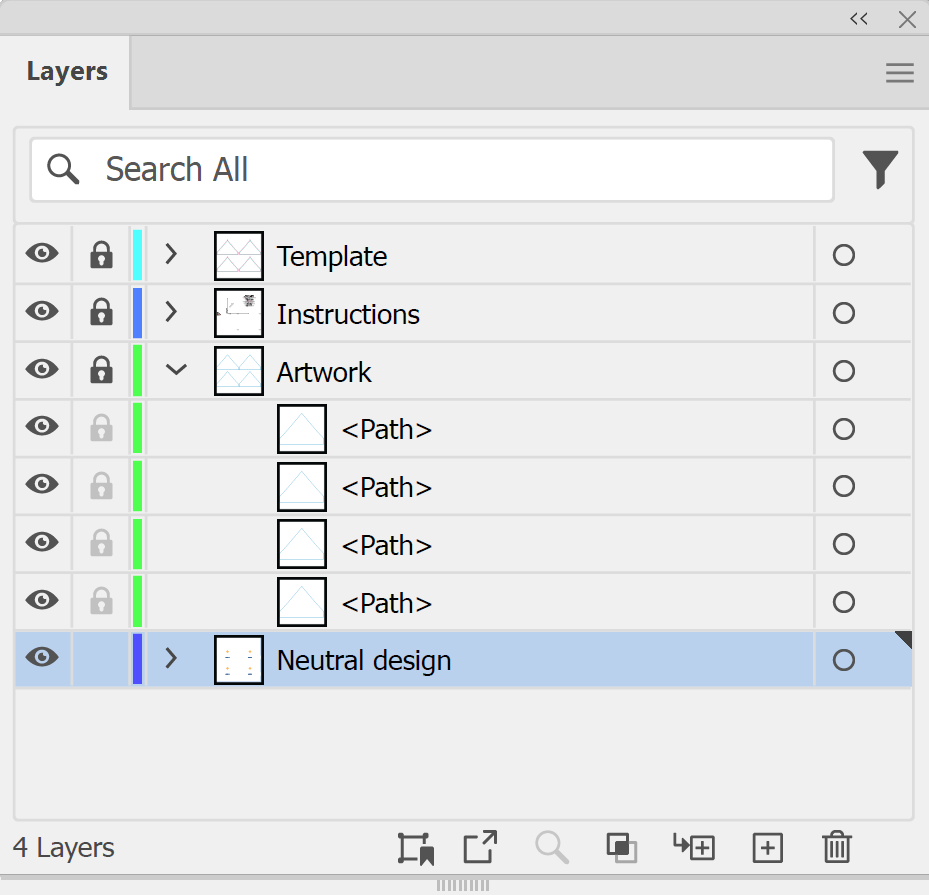
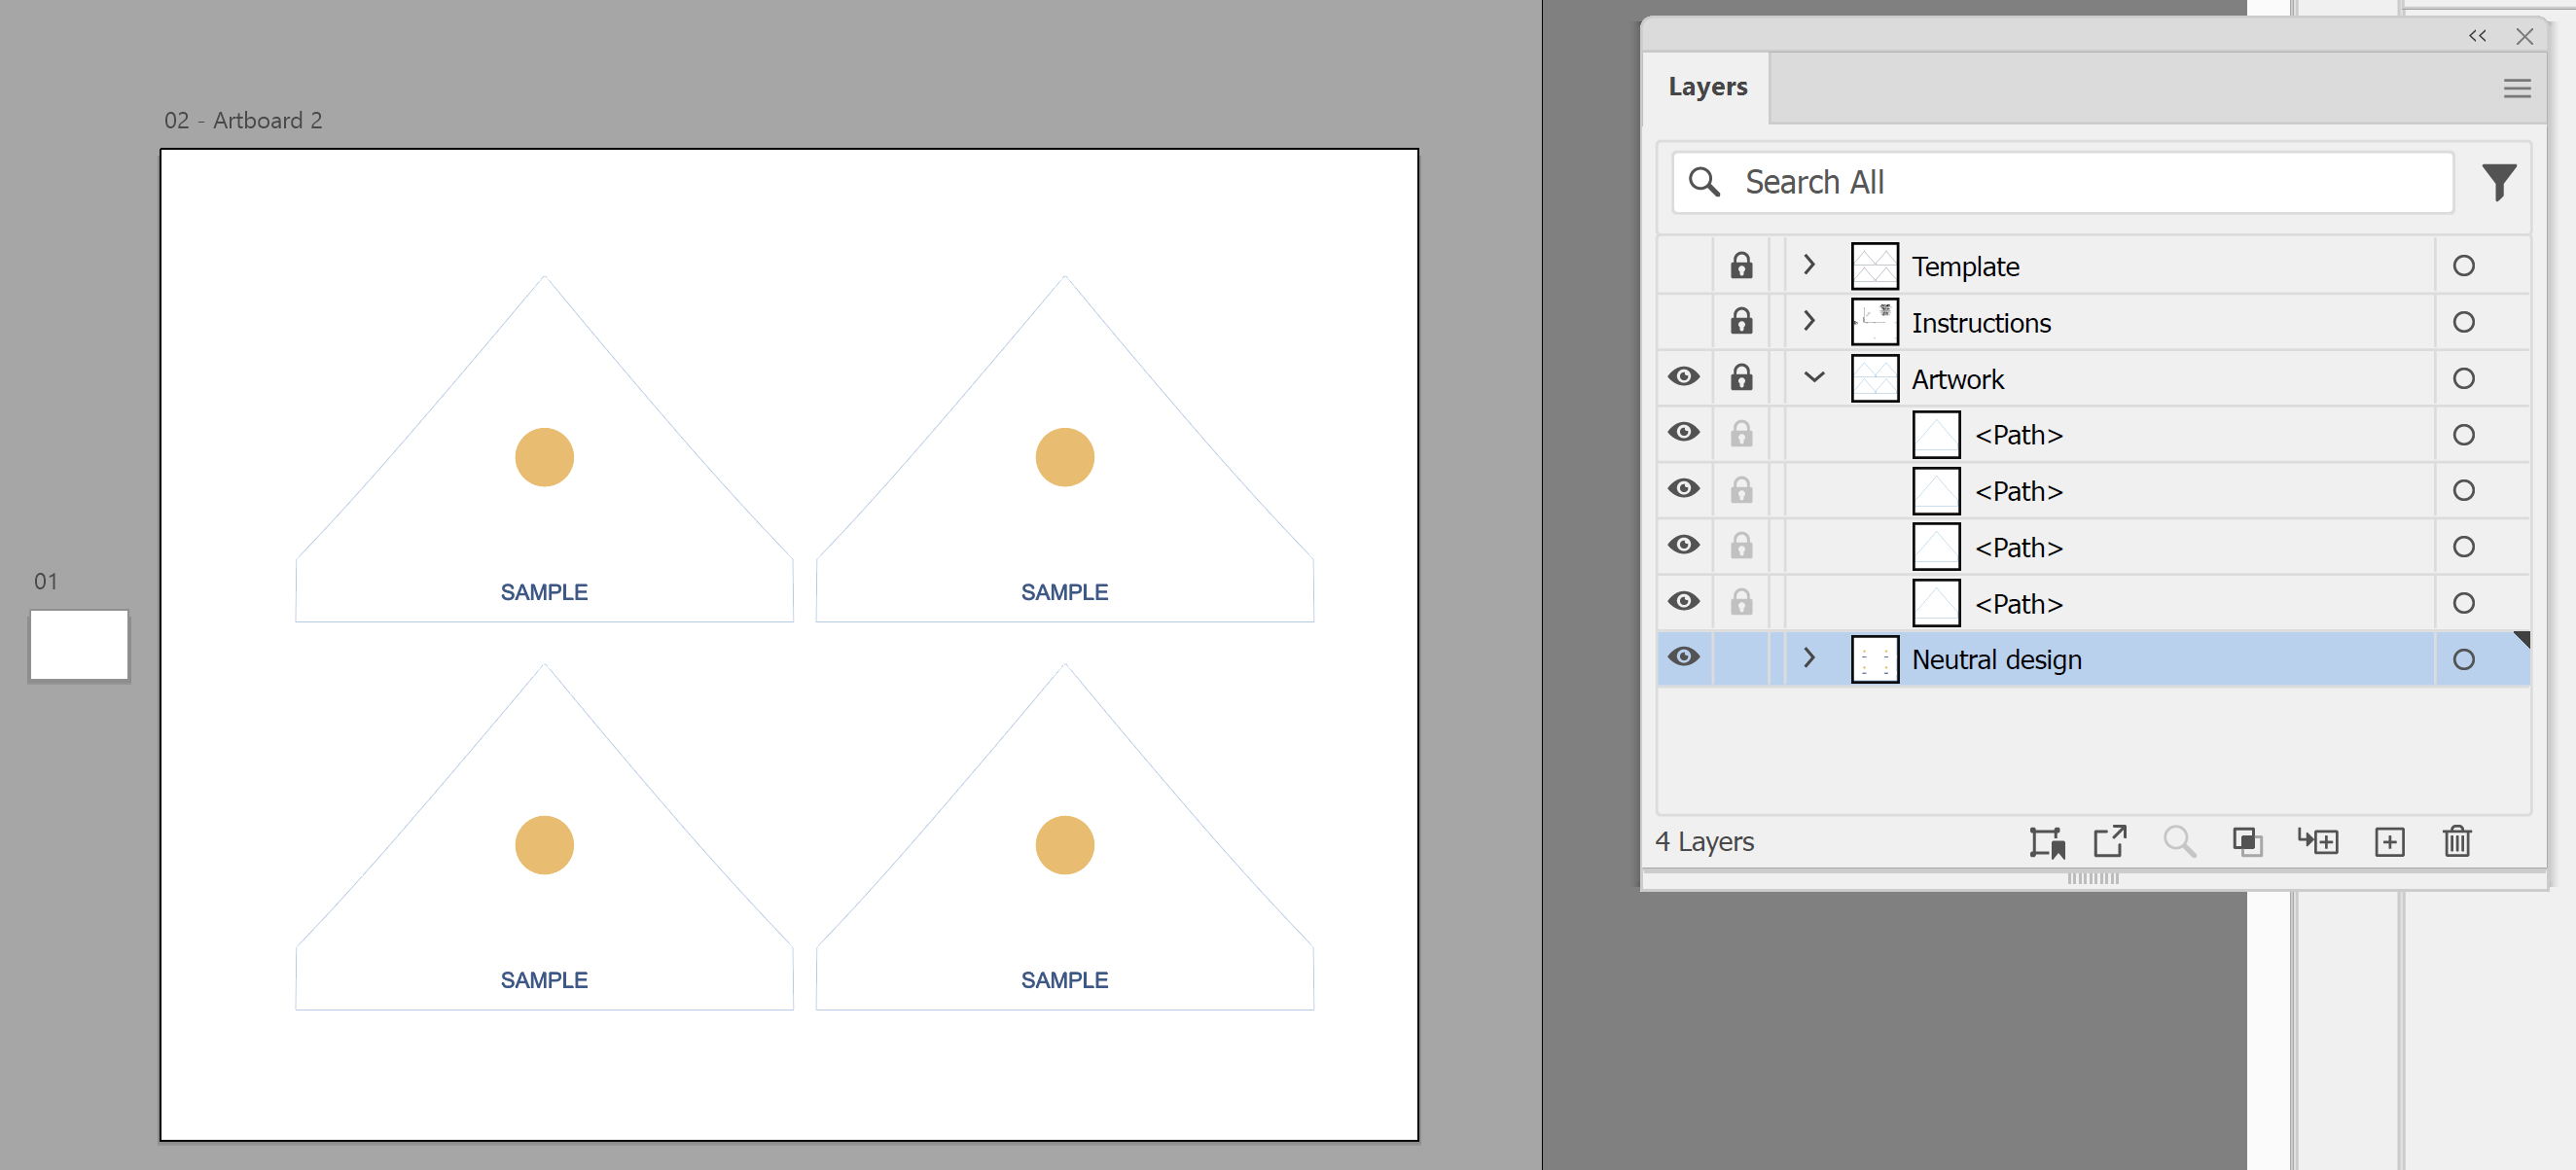
4. Lock the template and add a layer for your artwork. In the main menu, go to Window > Layers. Click the empty Toggles Lock area next to the Template and Instructions layers, then click the Create New Layer icon.
5. Design the four canopy panels: Front, Back, Left and Right. On the 3m x 3m canopy, each panel is 3010mm wide, with a 1710mm high roof triangle above a 380mm strip.
IMPORTANT: Leave the heat seal area blank. The template marks it as a 20mm strip along the sloping roof edge, labelled "Heat seal area remains blank 20mm".
6. Design the walls on their own templates. Each wall template also has Front, Left, Back and Right panels. On a 3m x 3m marquee, a full height wall is 3020mm x 2210mm and a half height wall is 3020mm x 1150mm. Only fill in the panels for the walls you've ordered.
7. Check your images at 50% scale. For best results, images should be at least 150ppi at 100% of finished size, so on a 50% template an image needs 300ppi in the file. The lowest we accept is 75ppi at 100%, which is 150ppi on the 50% template.
8. Outline all fonts and convert any spot colours to CMYK. Our guide on how to outline text shows how.
9. Hide the template before you save, so no template lines show on the finished artwork. In the Layers panel, click the eye icons on the Template and Instructions layers. The blue line stays on the Artwork layer, so if you didn't fill it or use it as a clipping mask, set its stroke to None.
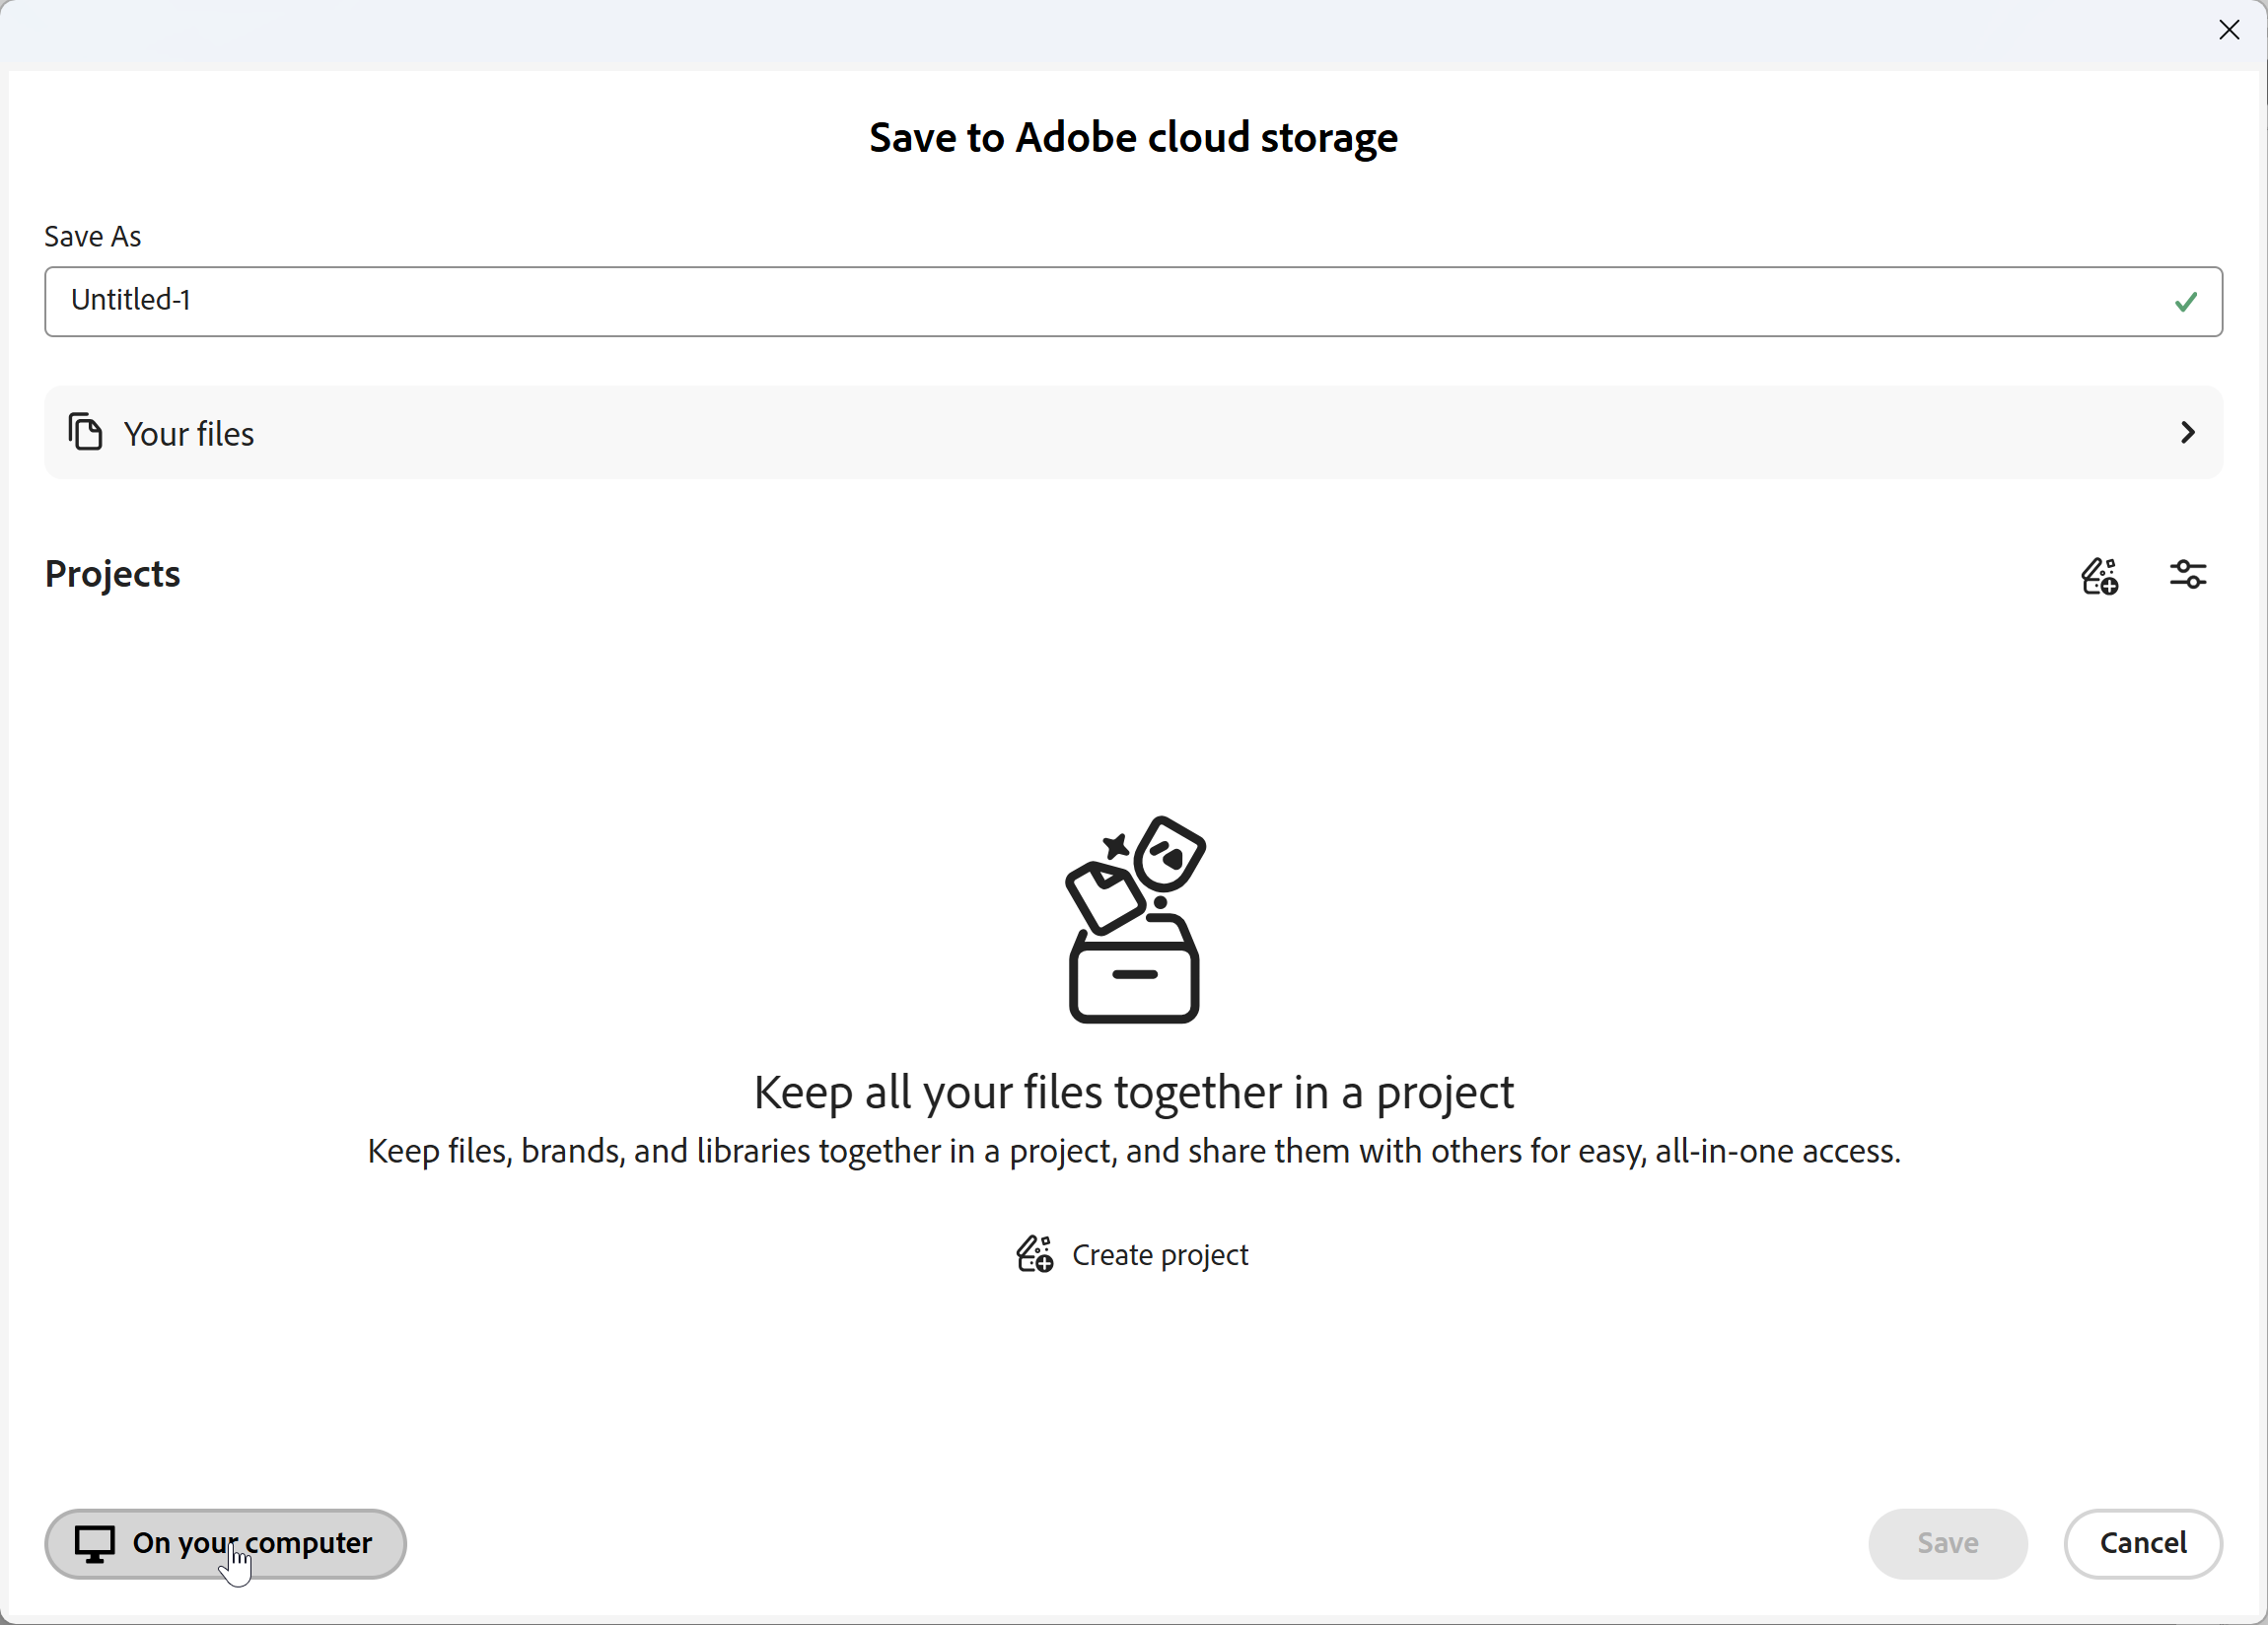
10. Save each file as a PDF. In the main menu, go to File > Save As. If the Save to Adobe cloud storage dialog box appears, select On your computer. Then choose Adobe PDF (*.PDF) from the Save as type menu and click Save.
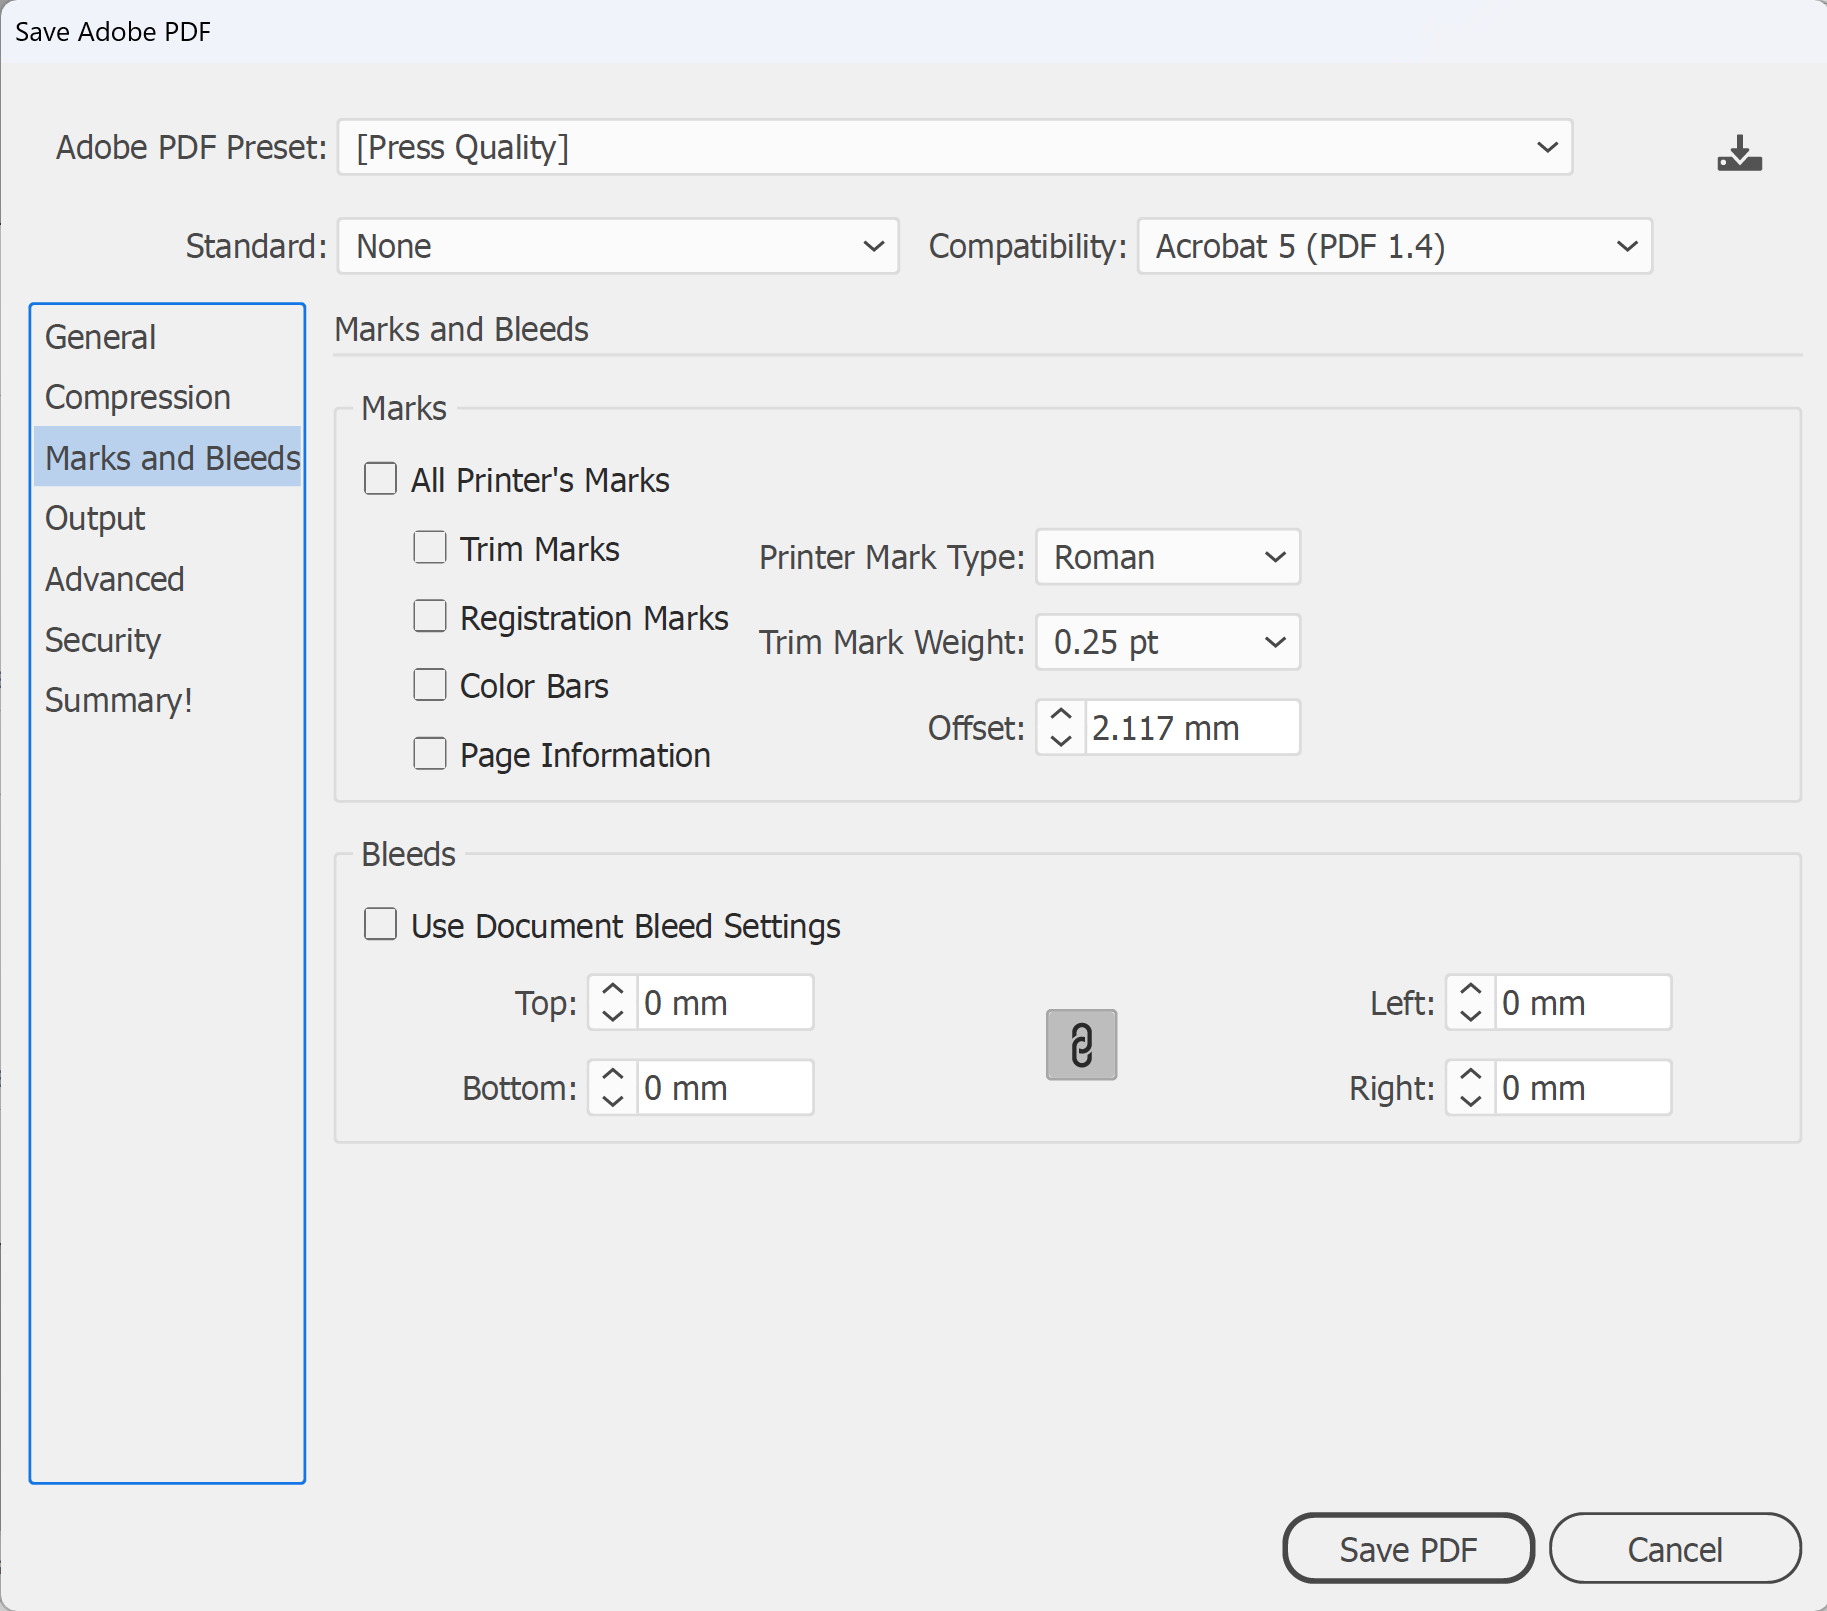
11. Choose the Press Quality settings. In the Save Adobe PDF dialog box, choose [Press Quality] from the Adobe PDF Preset menu. Under Marks and Bleeds, leave All Printer's Marks unchecked, because we don't want crop marks. In the General panel, untick Preserve Illustrator Editing Capabilities to keep the file size down. Click Save PDF.
12. Finally, check your files against our artwork specifications and email them to sales@displays2go.com.au, with your order or job number in the subject line if you have one. You're done!
Note: Standard production for Gazebo 2 Go marquees is 2 weeks, counted from when you place your order and your print-ready artwork has been prepared.
Need some help?
We're here for you
If you're needing some advice or just a helping hand, please get in touch with our team, by clicking this button. Complete the enquiry form and one of our specialists will call you back as soon as we can.