

YOUR CART IS CURRENTLY EMPTY
How do I make a logo background transparent for printing?
Why does my logo have a white box around it?
Many logo files, especially JPGs, are saved with a solid white background. On a white page you'd never notice. Put that logo on a coloured tablecloth, a dark banner or a photo, and the white box prints too.
A transparent background means only the logo prints, and whatever is behind it shows through.
Is there a better fix?
Yes: ask for a vector logo. A vector file (an Illustrator .ai, an .eps or a vector PDF) is the best choice for print, and it stays sharp at any size. Our guide on how to supply the right logo file for printing explains what to ask for.
If all you have is a JPG or PNG, use the steps below. They work best on a high-resolution logo on a plain, high-contrast background.
Use the following steps to make a logo background transparent in Photoshop
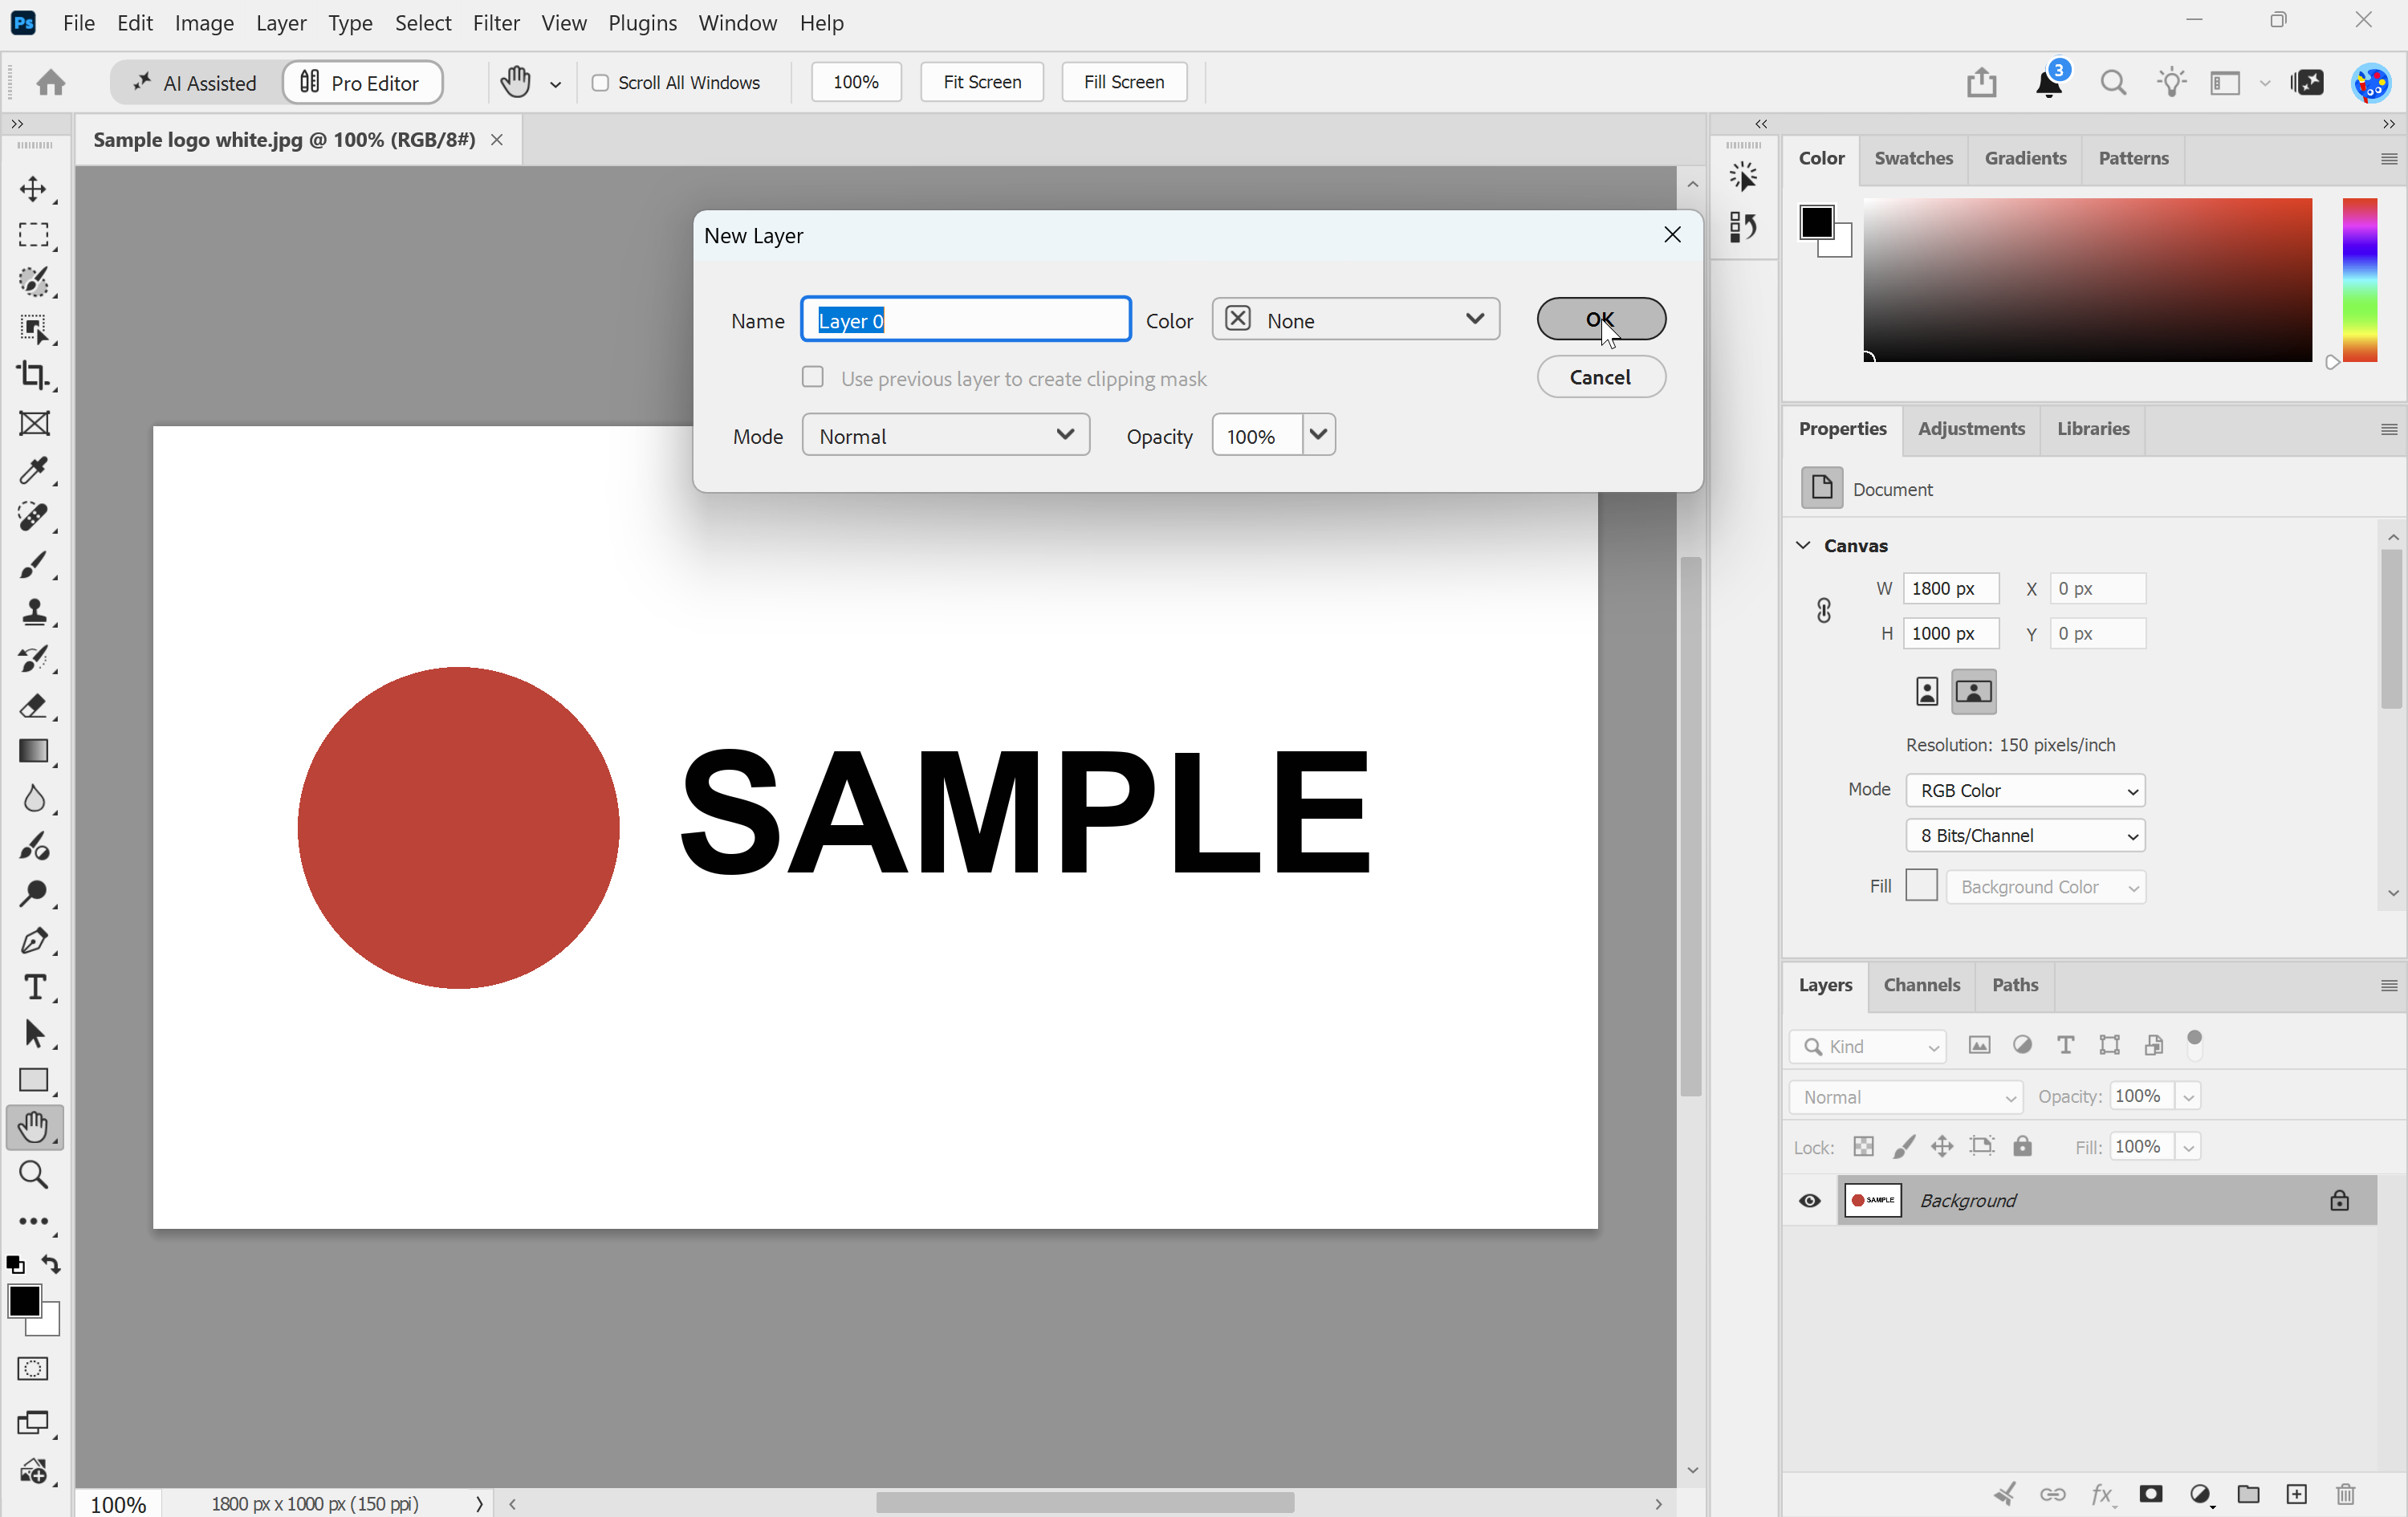
1. Open the logo in Photoshop and turn the background into a regular layer. A JPG opens as a single Background layer, which is locked. Select it in the Layers panel, then in the main menu go to Layer > New > Layer From Background. In the dialog box, name the layer if you like, then click OK.
2. Remove the background. Make sure Layer 0 is selected in the Layers panel. In the main menu, go to Help > Photoshop Help (or press Ctrl+F on Windows, Cmd+F on Mac) to open the Search panel. It needs an internet connection. Search for Remove background, then under Quick Actions, select Remove background. Photoshop isolates the logo and creates a transparent background or a masked layer.
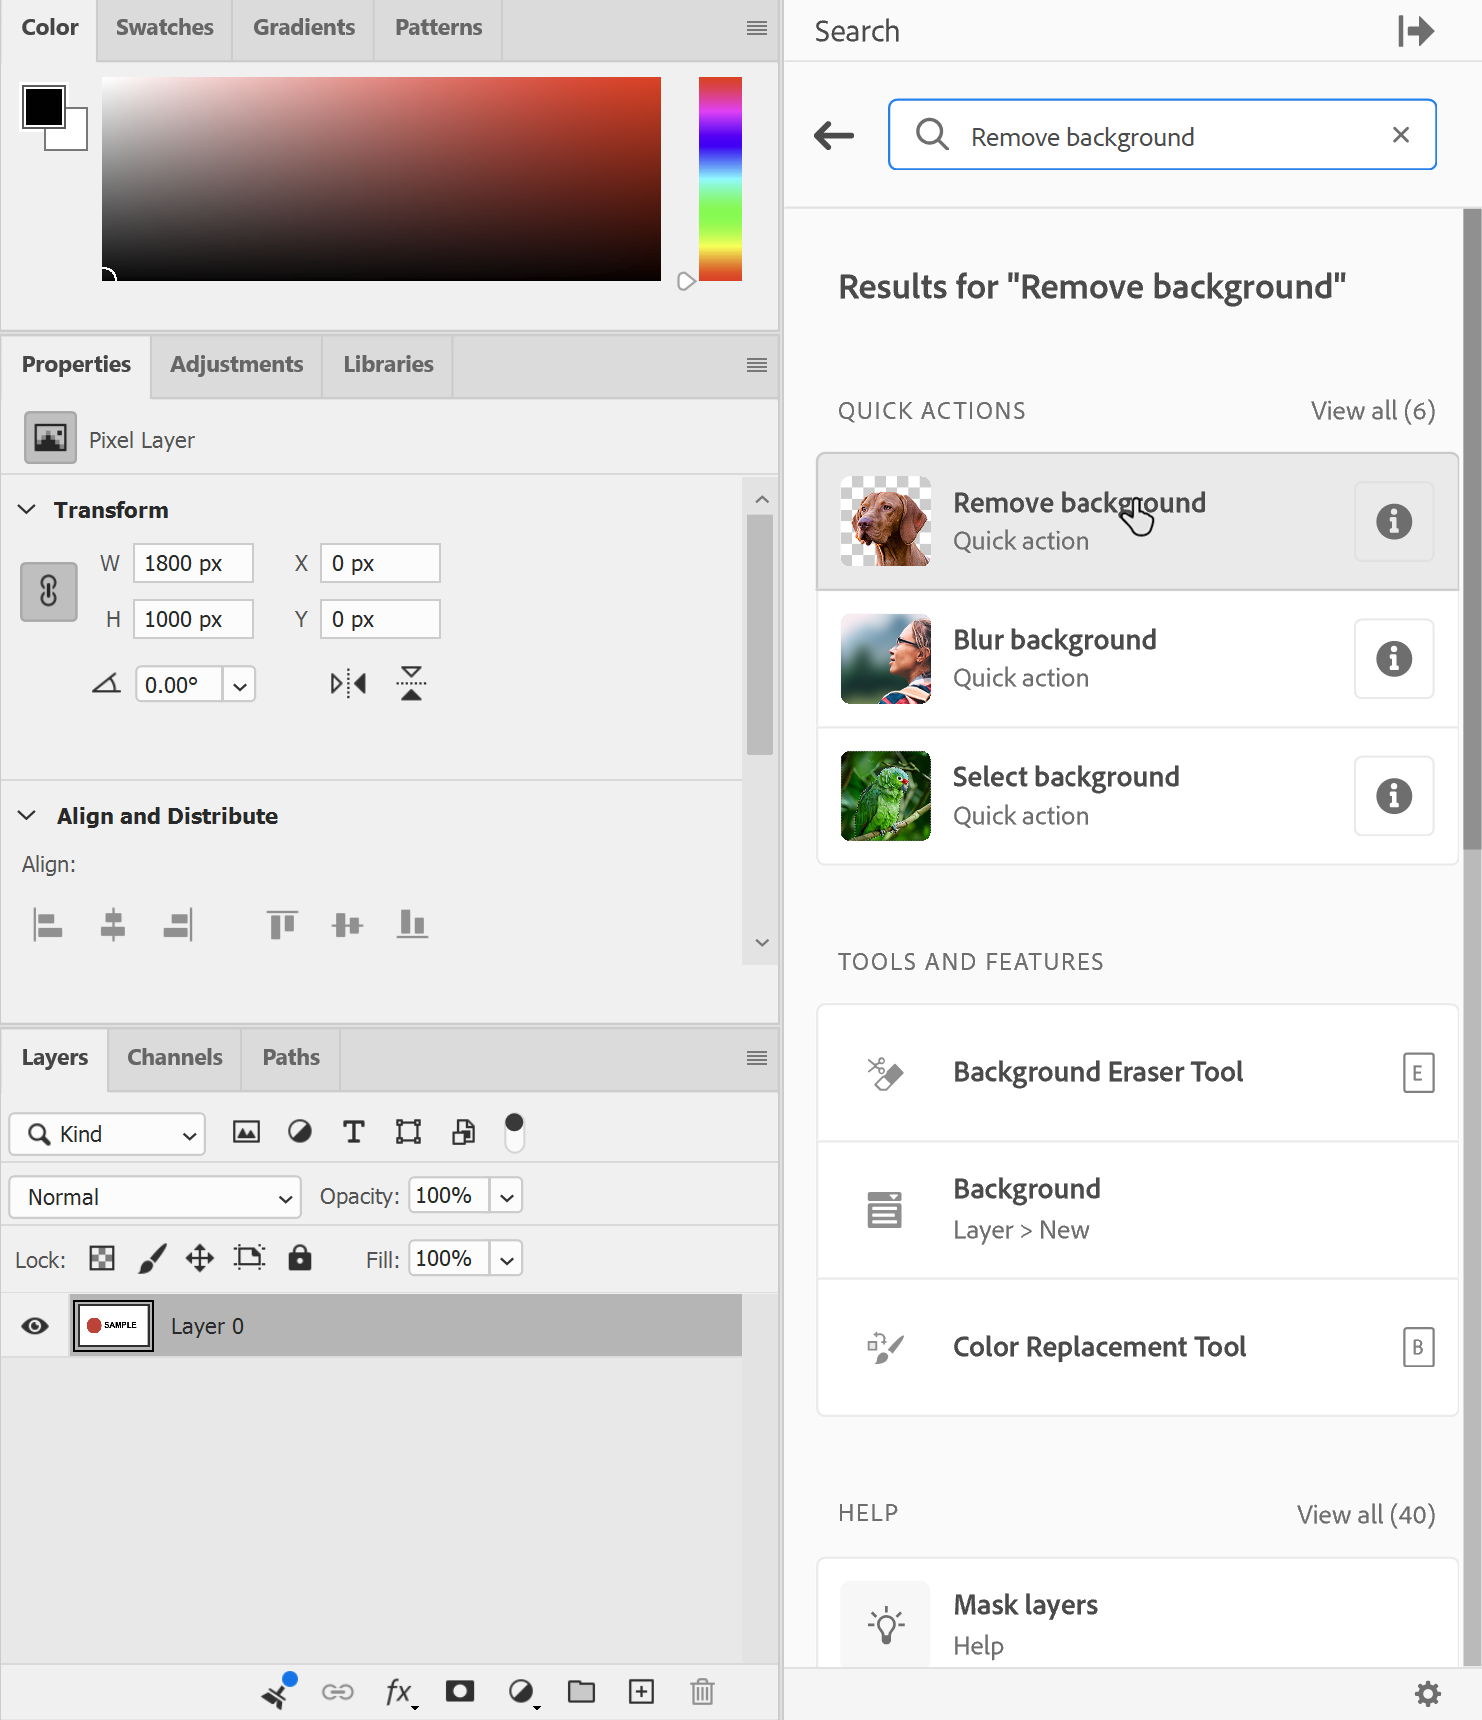
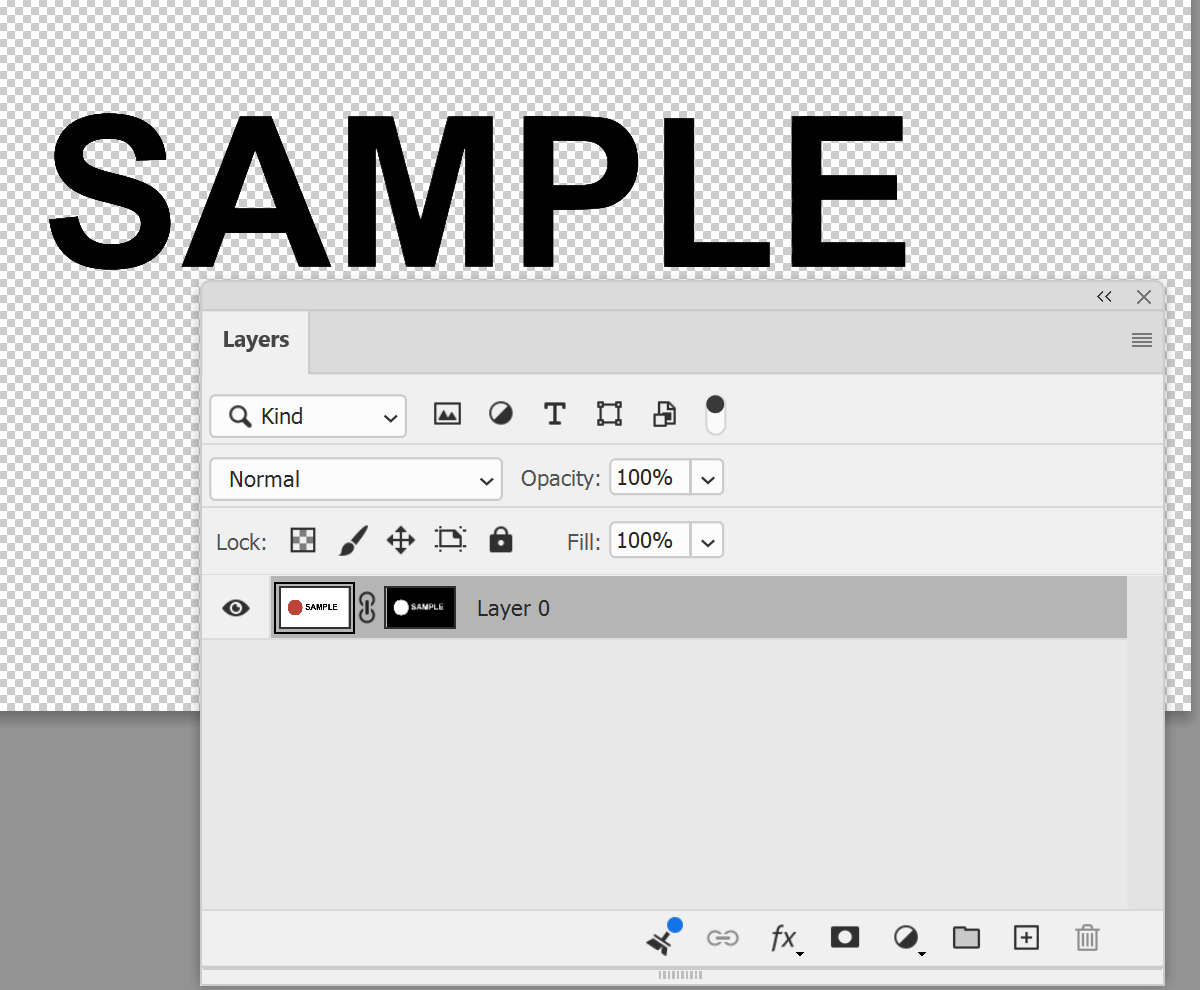
Note: Remove Background works best on high-contrast images. Check the white inside letters such as "o" and "a" too. If any was missed, paint it out on the mask in step 4.
3. Check the result. Transparent areas show as a checkerboard pattern. Zoom in to 100% and look at the edges and inside letters for leftover white.
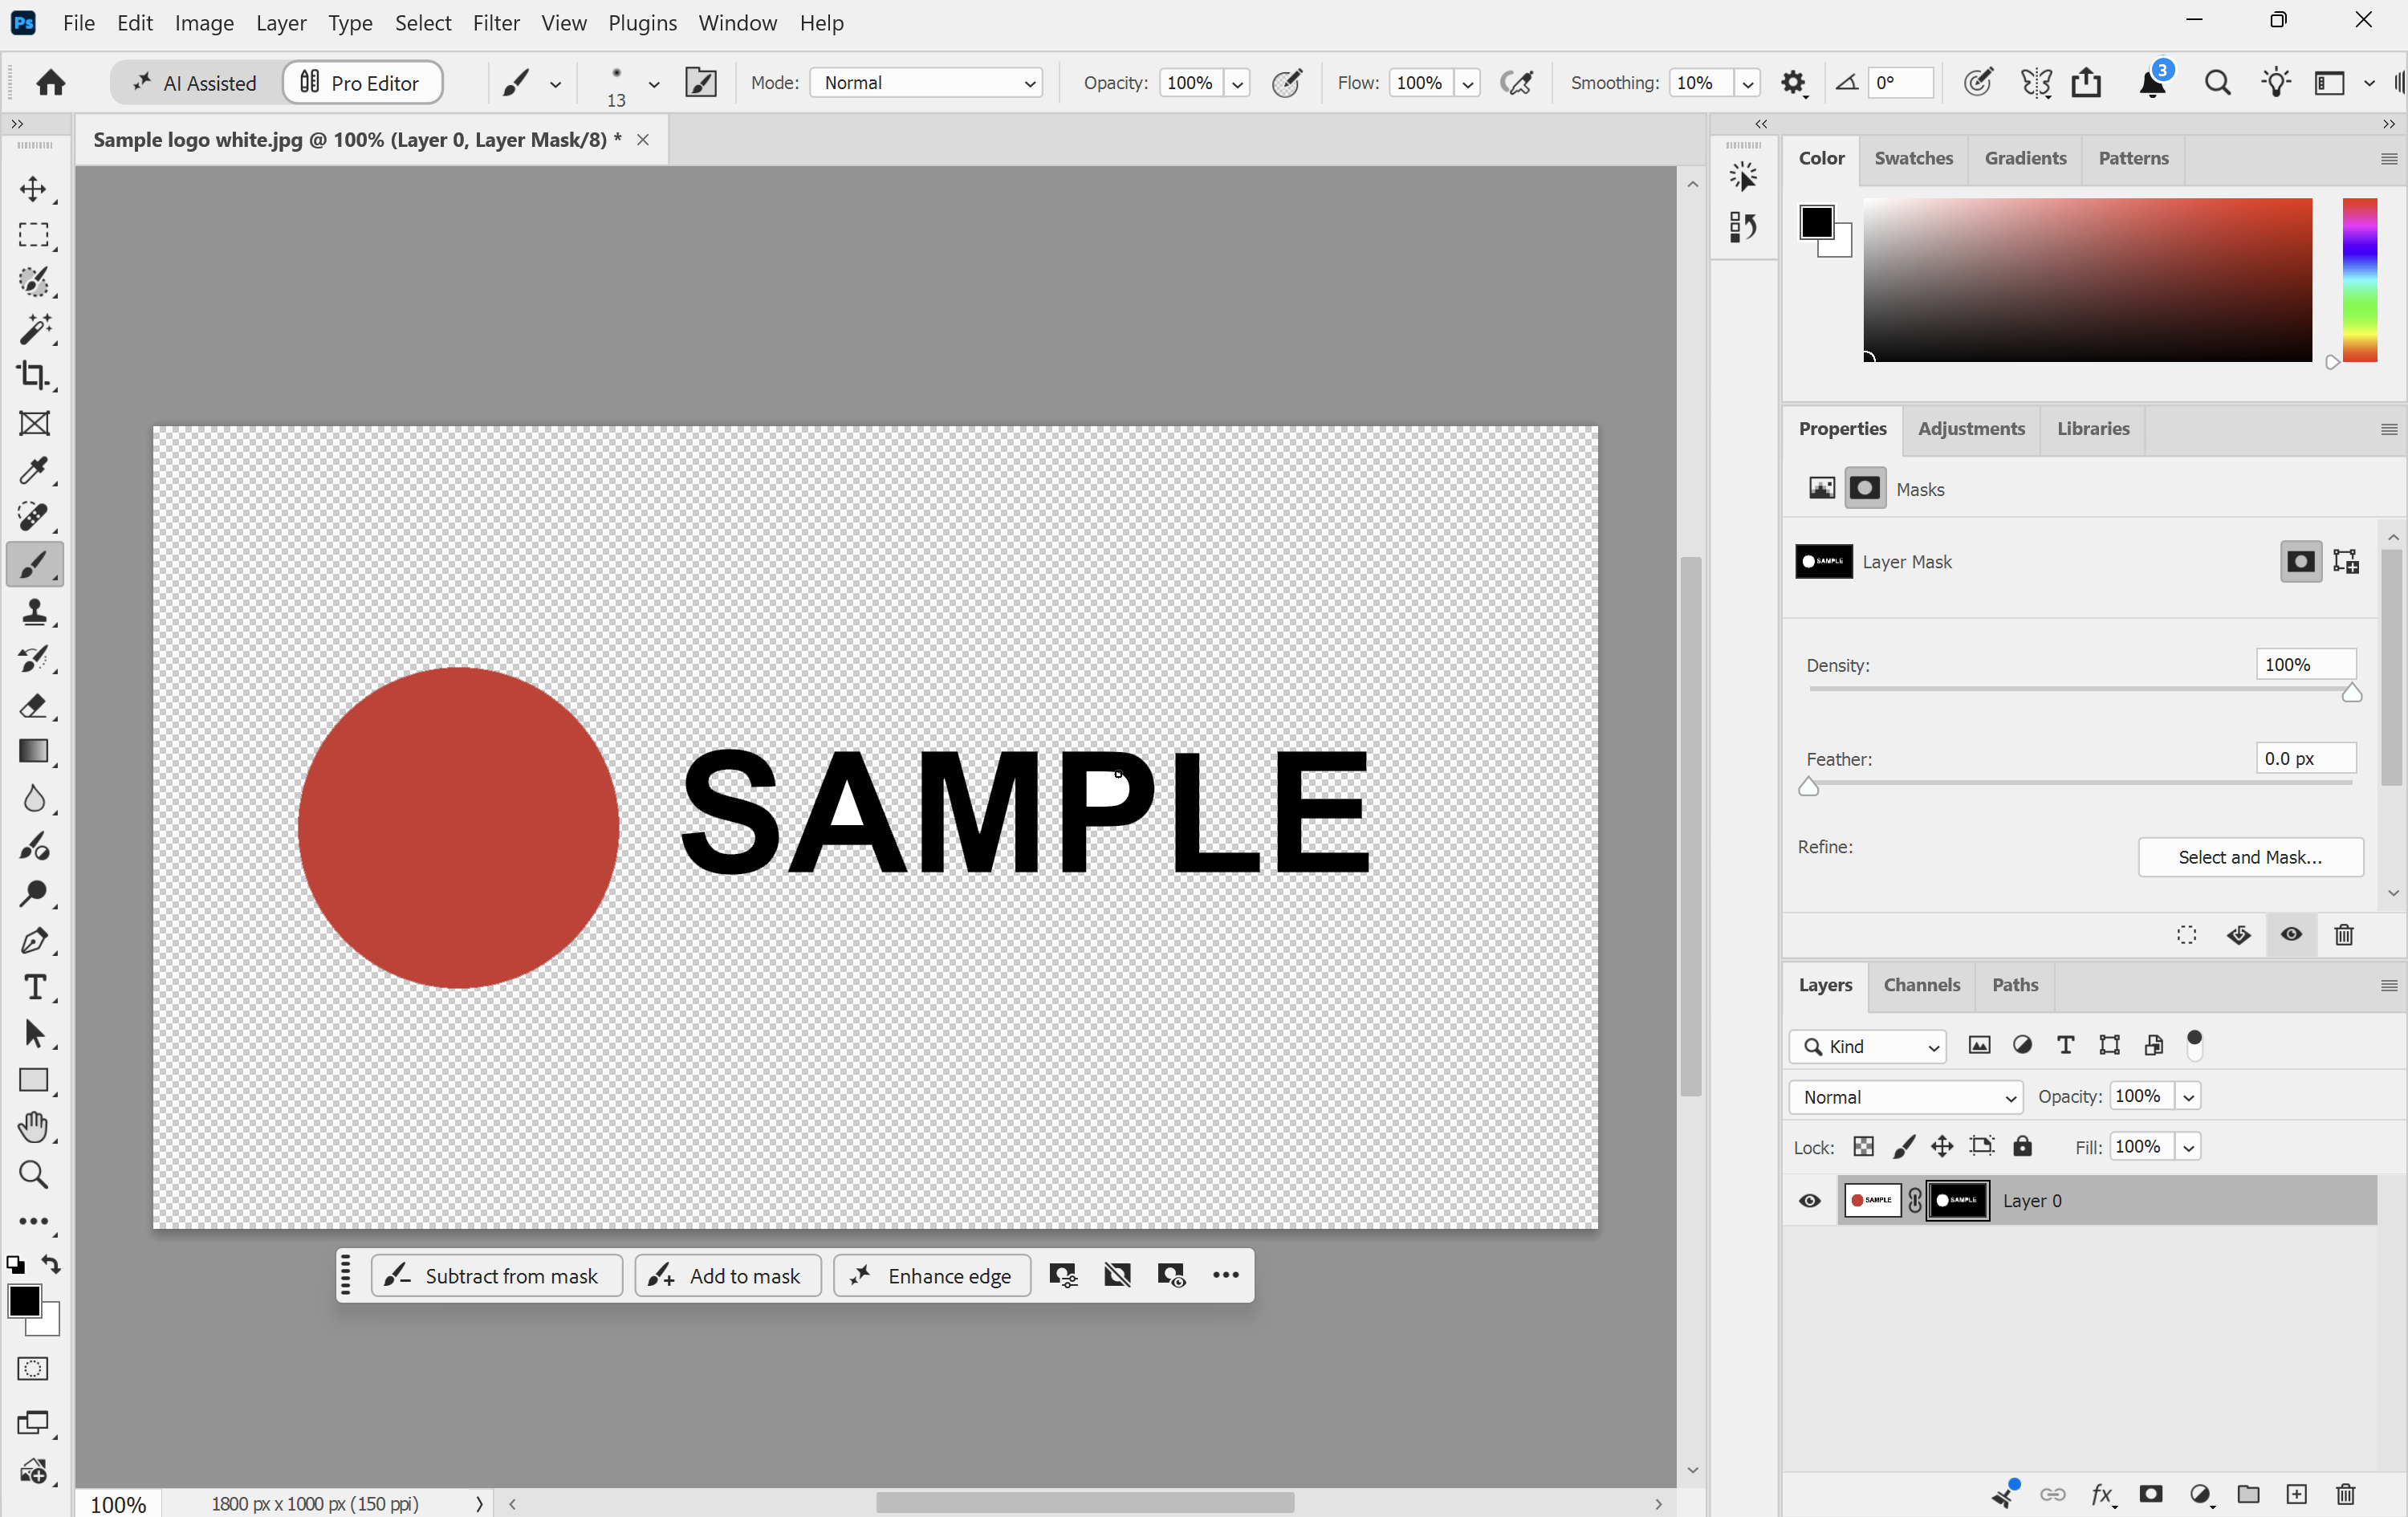
4. Tidy the edges if needed. Select the layer mask thumbnail in the Layers panel (a border shows it's active), choose the Brush tool, then paint with black to hide leftover background, or white to bring back part of the logo.
IMPORTANT: Never save the result as a JPG. A JPG can't keep transparency, so the background comes back as a solid colour.
5. Save a copy to your computer. In the main menu, go to File > Save a Copy. If Photoshop asks where to save, select On your computer.

6. Choose TIFF. In the Save a Copy dialog box, choose TIFF as the format, keep Layers ticked, tick ICC Profile (Embed Color Profile on a Mac) so the colour profile goes with the file, then click Save.
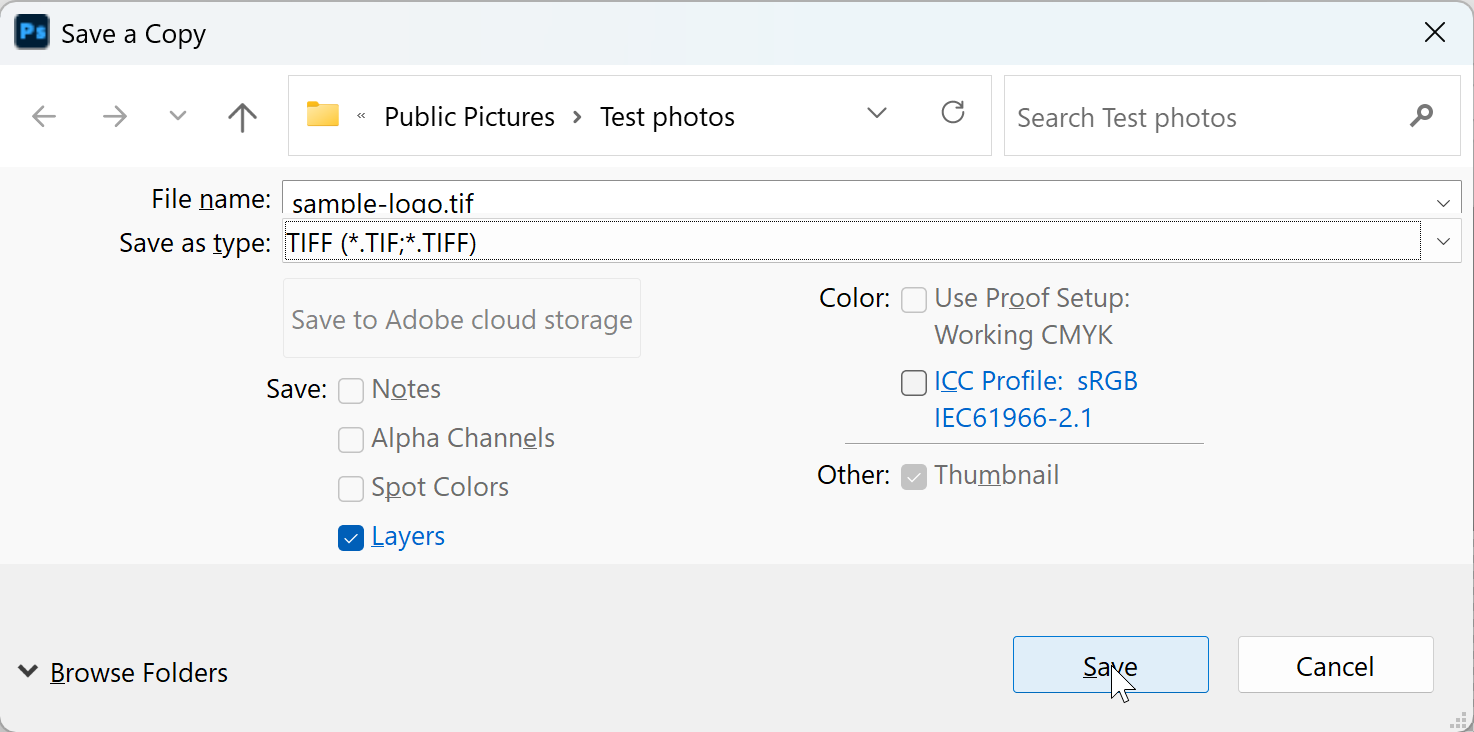
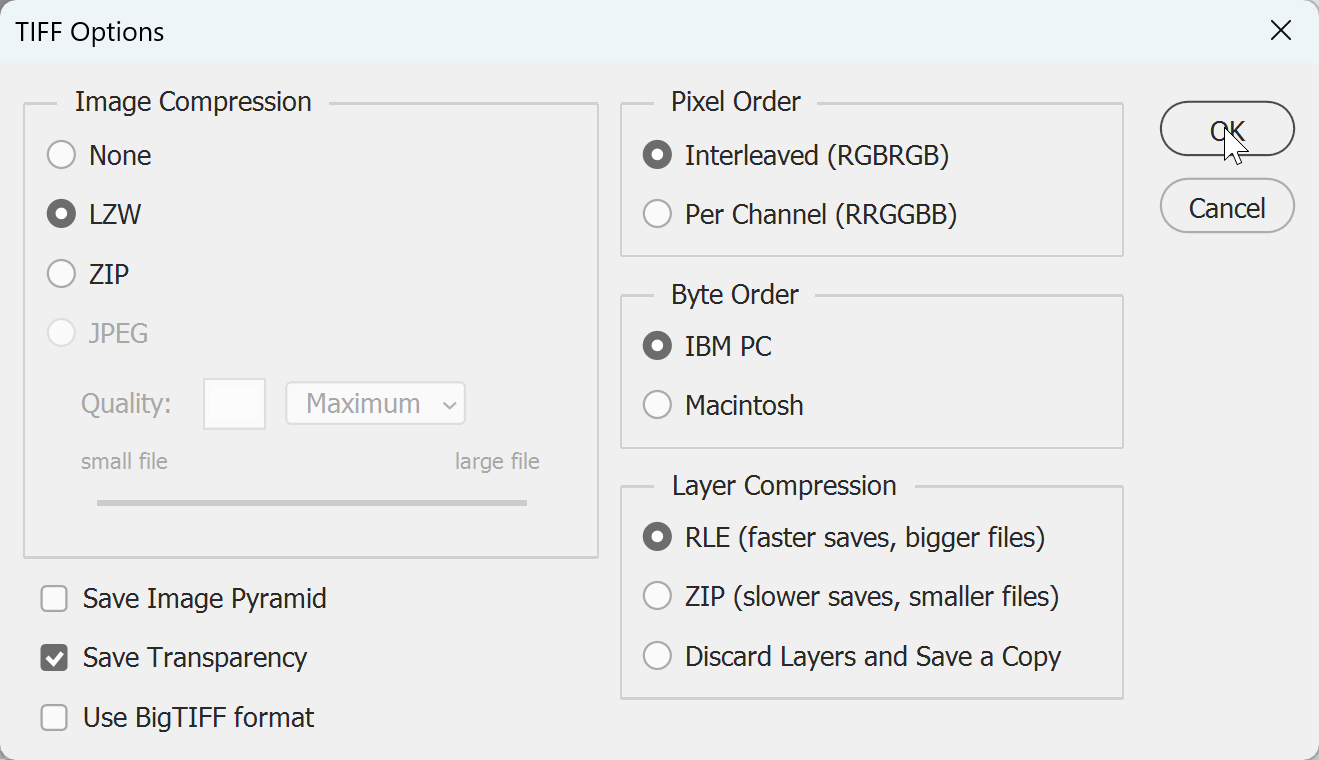
7. Keep the transparency. In the TIFF Options dialog box, tick Save Transparency, so the transparency is kept when the file is opened in other software, then click OK.
Note: Keep the logo's resolution in mind. For best results, images should be at least 150ppi at 100% of the finished size; 75ppi is the lowest we accept, and below that we can't print them well, whatever we do at our end. Removing a background won't fix a small, low-resolution logo.
8. Finally, place the logo in your artwork, check it over the coloured background it will sit on, and export a print-ready PDF to our artwork specifications. A transparent logo adds transparency to your layout, so flatten it before export, as the specifications ask. Then you're done!
Need some help?
We're here for you
If you're needing some advice or just a helping hand, please get in touch with our team, by clicking this button. Complete the enquiry form and one of our specialists will call you back as soon as we can.