

YOUR CART IS CURRENTLY EMPTY
How do I save a print-quality JPEG or TIFF from Photoshop?
What makes a JPEG or TIFF print quality?
A print-quality image file is set up at the size it will print, with enough pixels to stay sharp at that size, in CMYK colour, and saved with as little compression as possible. For large format print, that means at least 150ppi at 100% of the finished size, with 10mm of bleed on every edge unless your product template says otherwise.
Should I send a JPEG, a TIFF or a PDF?
A high-resolution PDF is our preferred format, because it's the least likely to cause a problem. We also accept TIFF and JPEG files, with a $75 conversion fee (ex GST) for print-ready artwork that isn't a PDF.
If your poster or exhibition graphic is a single photo, a JPEG or TIFF straight from Photoshop is often the simplest file to supply, but the $75 conversion fee still applies. If it has text and logos on top, build it on our template in InDesign or Illustrator and send a PDF instead.
Use the following steps to save a print-quality file in Photoshop
1. Keep your layered original. In the main menu, go to File > Save As, choose Photoshop as the format, then click Save. Converting colour mode and flattening can't be undone once you save, so from here on, don't save over this PSD. You'll save the print file as a copy in step 5 or 6.
2. Check the size and resolution. In the main menu, go to Image > Image Size. Deselect Resample so Photoshop doesn't add or remove pixels, choose millimetres from the unit menu next to Width, then type the finished width including bleed. The Resolution box now shows the real resolution at that size. If the Height doesn't then match the finished height including bleed, the image is a different shape, so crop it to those proportions first.
Aim for at least 150ppi. The lowest we can accept is 75ppi at 100% of the finished size. For example, a 1000 x 2000mm poster with bleed is a 1020 x 2020mm file, which needs about 6,024 x 11,929 pixels at 150ppi.
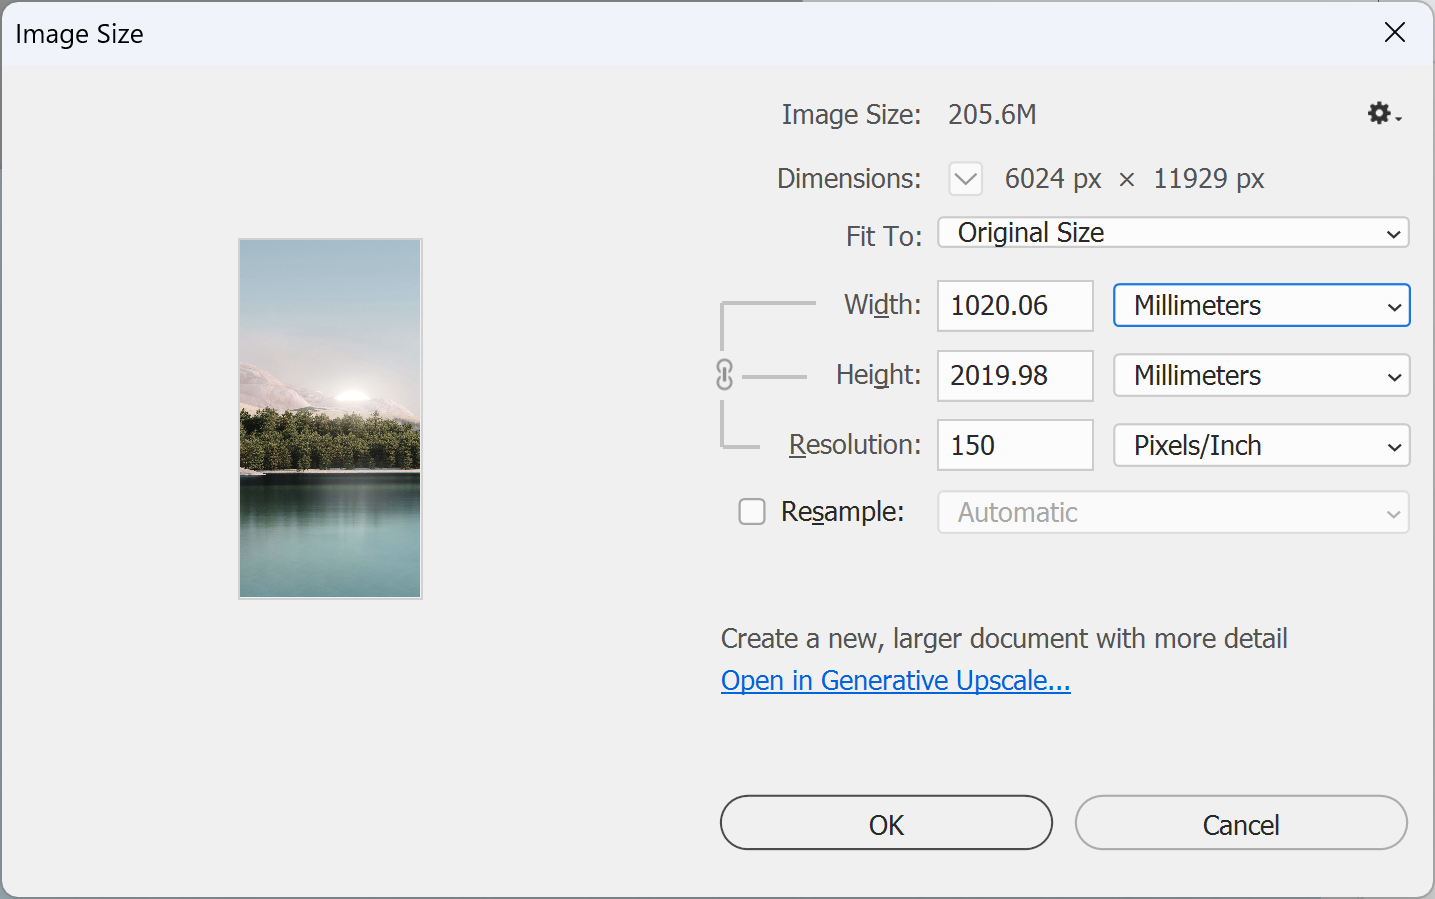
Note: If you're working at a smaller scale, the resolution scales too. At 10% of the finished size, an image needs at least 1,500ppi.
3. Convert to CMYK. Photoshop converts to the CMYK working space set in Edit > Color Settings, so check that first: our guide to setting the right CMYK colour profile shows how. If your layers use blending modes, flatten first (step 4), as Adobe advises. Then, in the main menu, go to Image > Mode > CMYK Color. RGB colours that fall outside the CMYK range are remapped, so check your brightest colours afterwards.
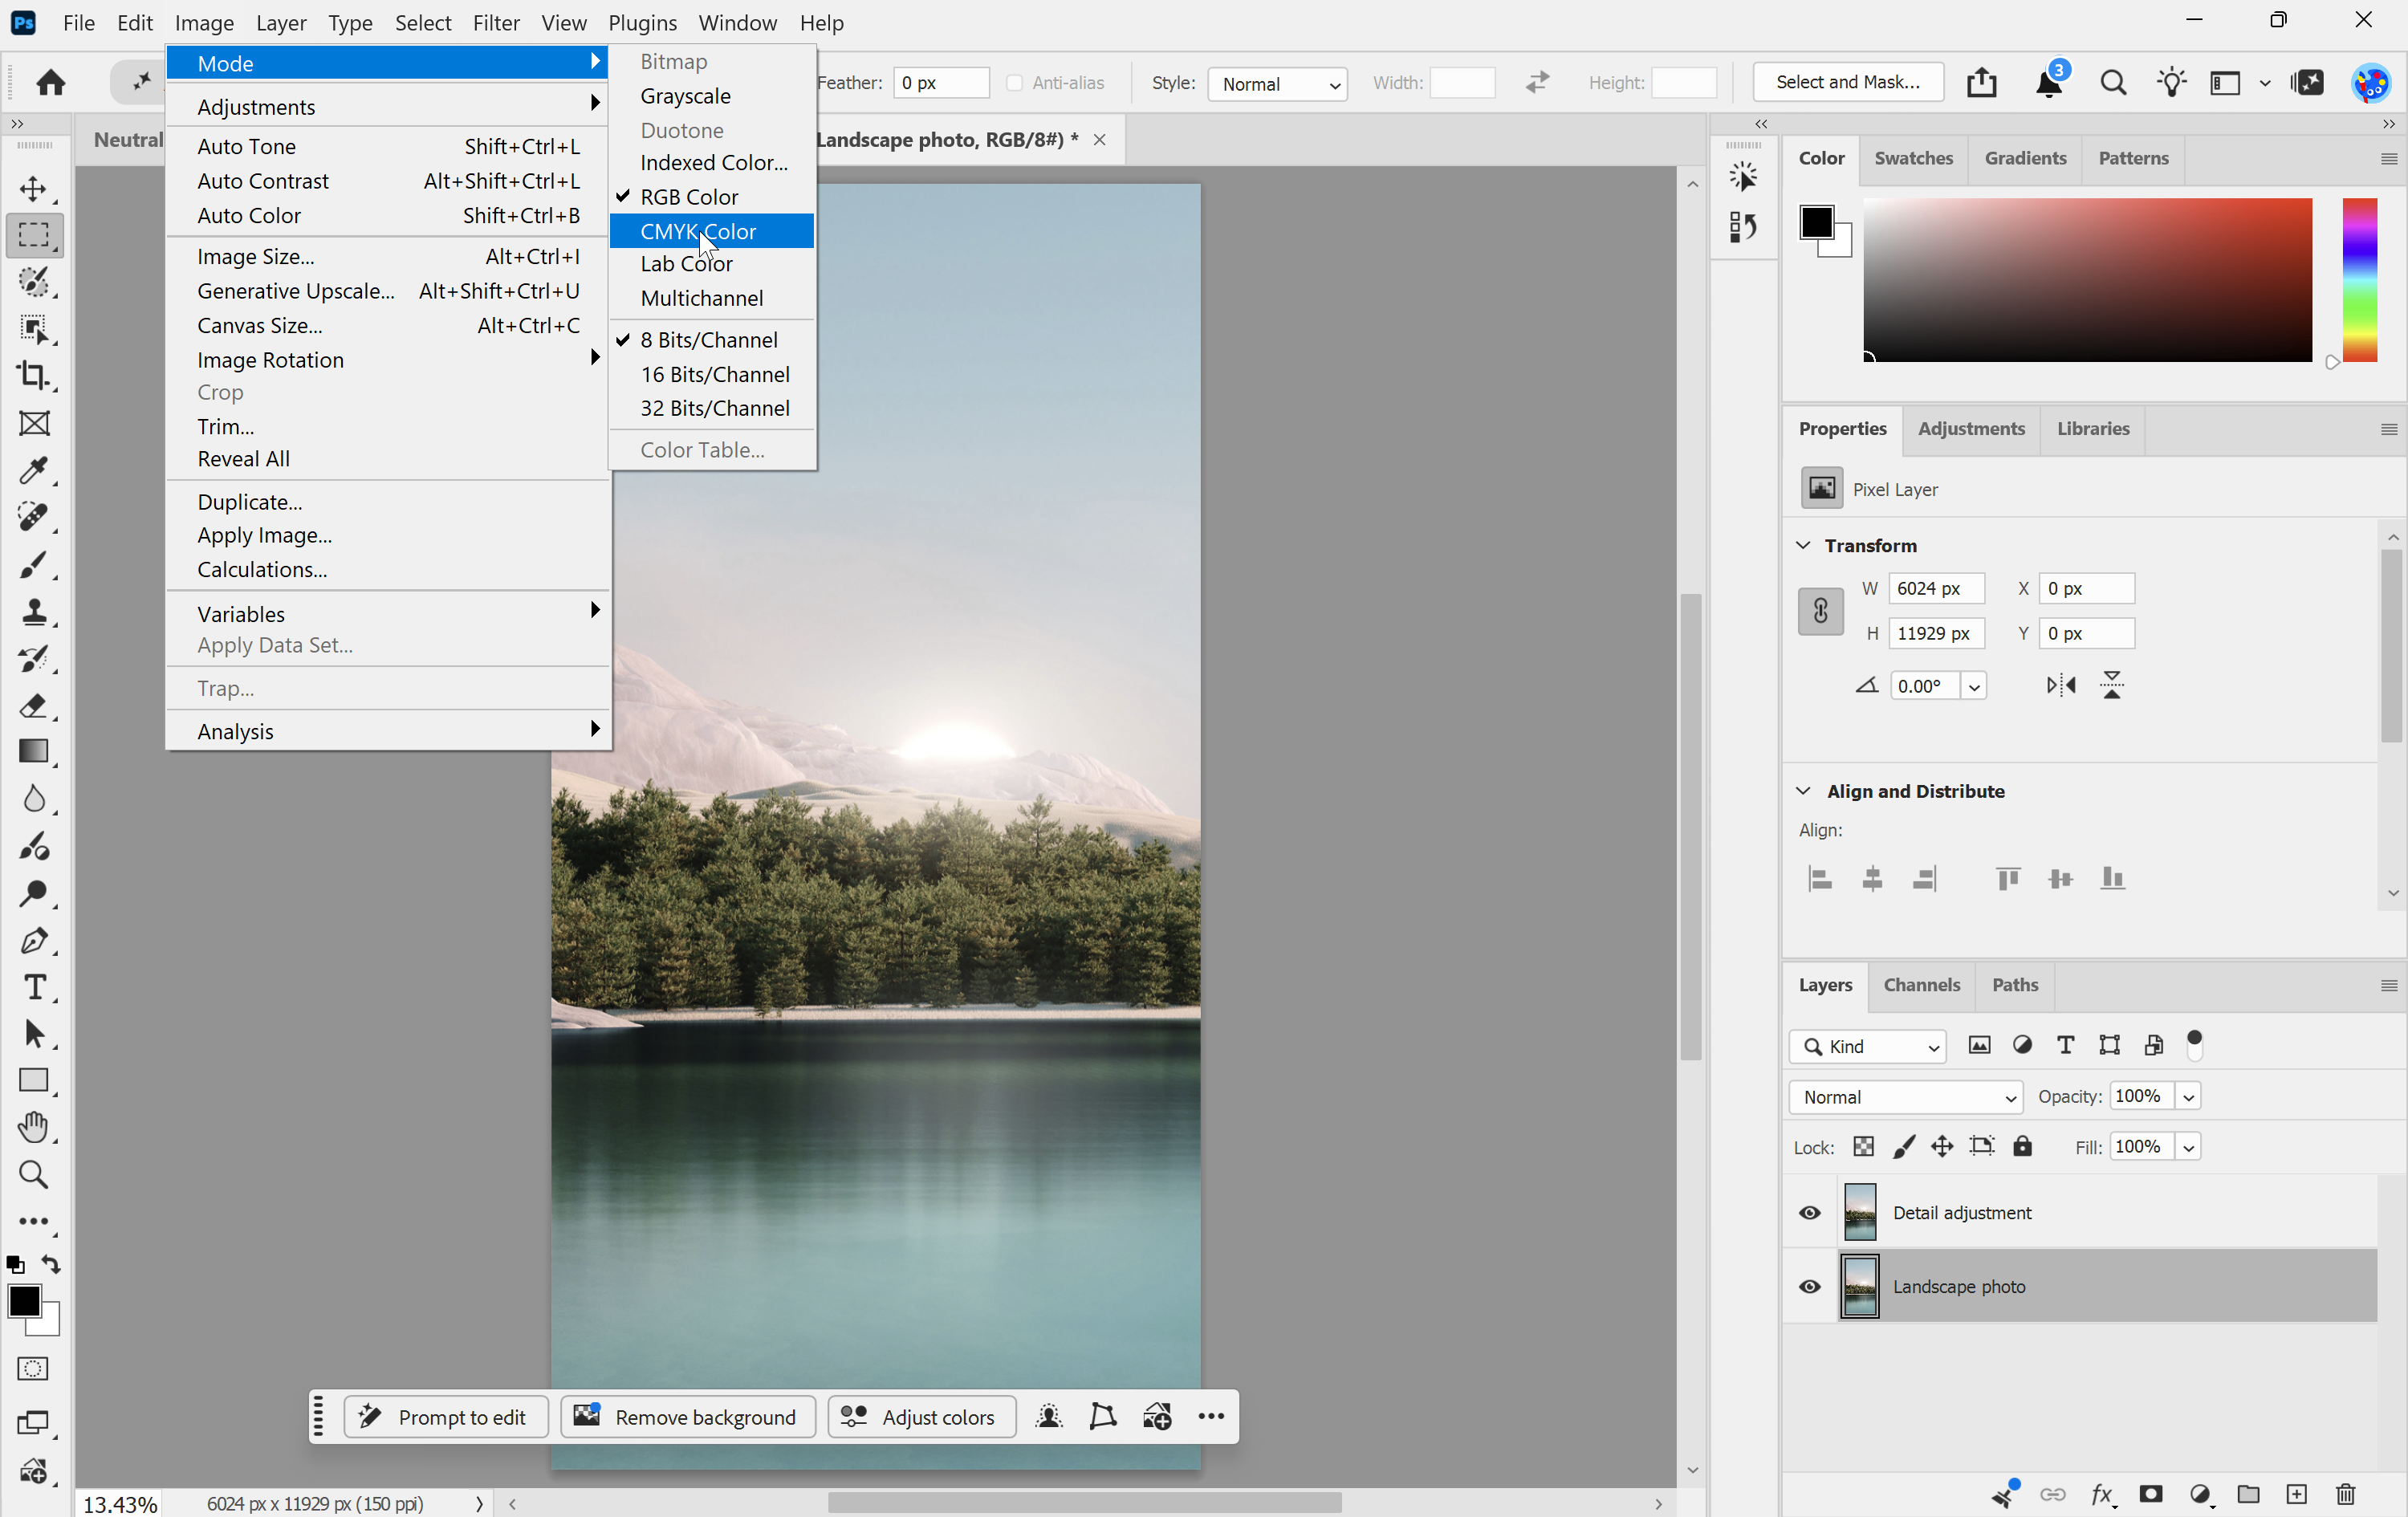
Note: To preview the change before you commit, go to View > Proof Colors.
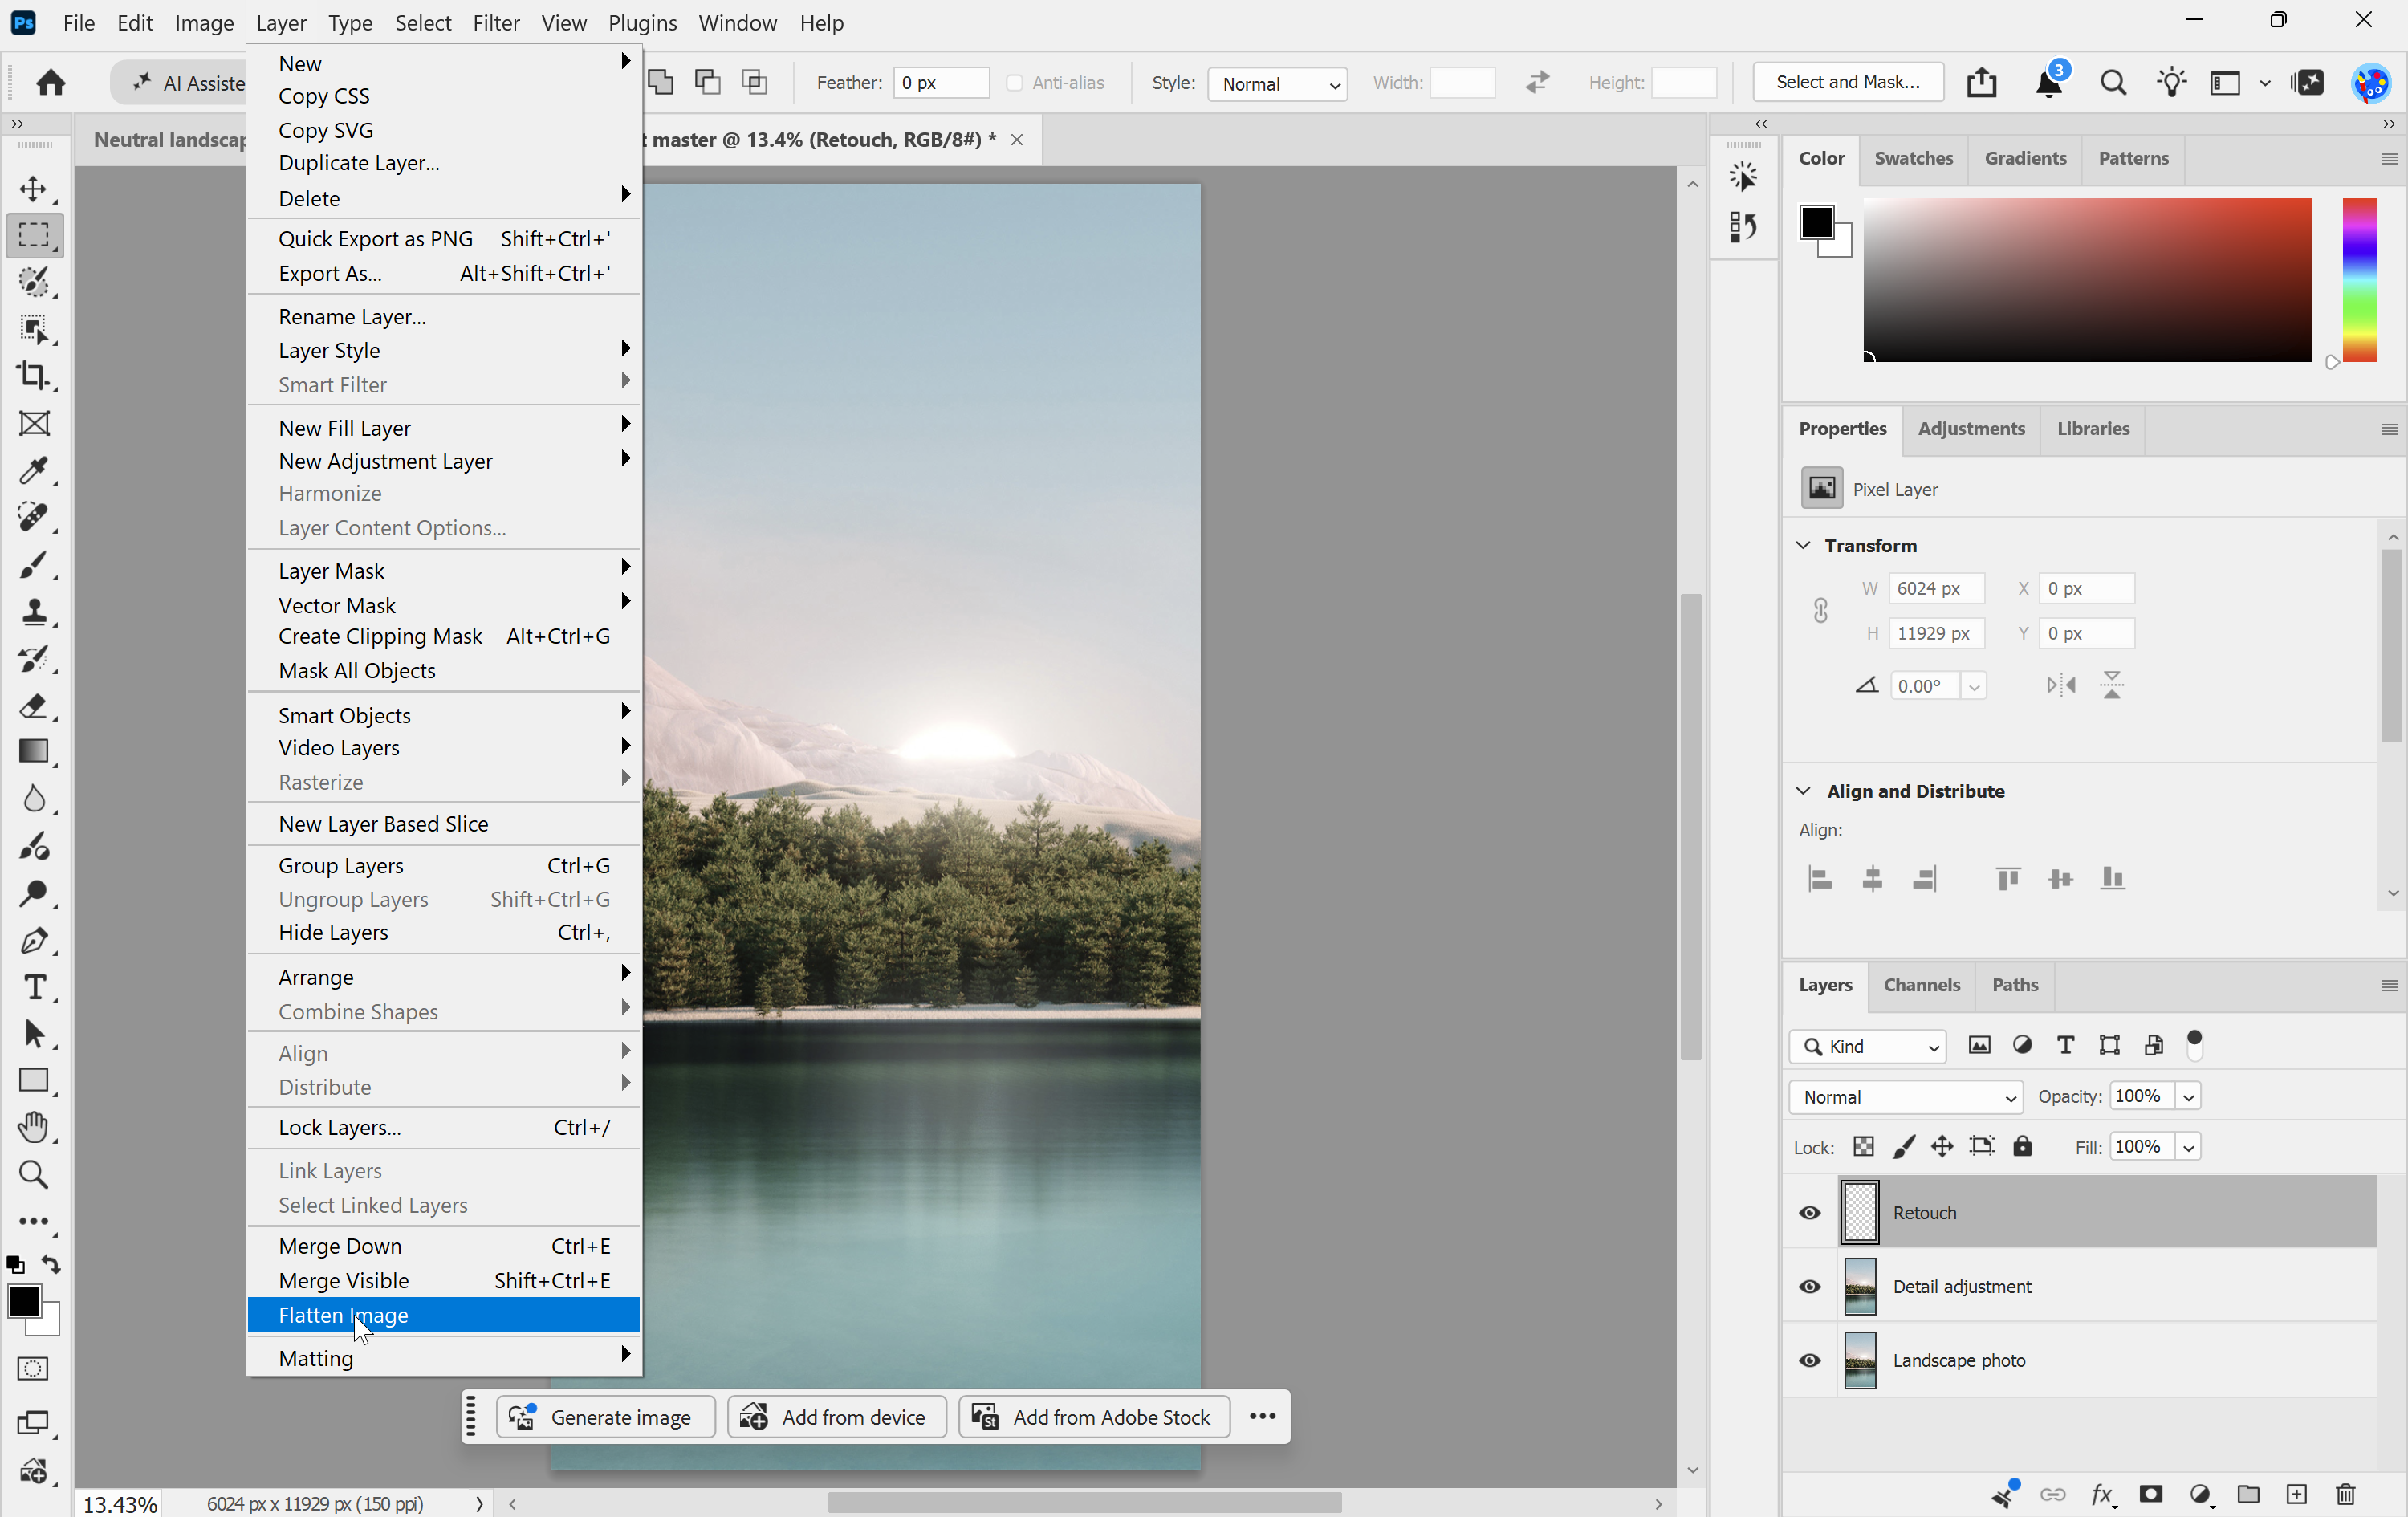
4. Flatten the image. In the main menu, go to Layer > Flatten Image. Any transparent areas are filled with white.
5. To save a JPEG, go to File > Save a Copy, choose JPEG from the format menu, leave ICC Profile ticked and click Save. In the JPEG Options dialog box, set Quality to 12 (the highest setting) and choose Baseline ("Standard"). Click OK.
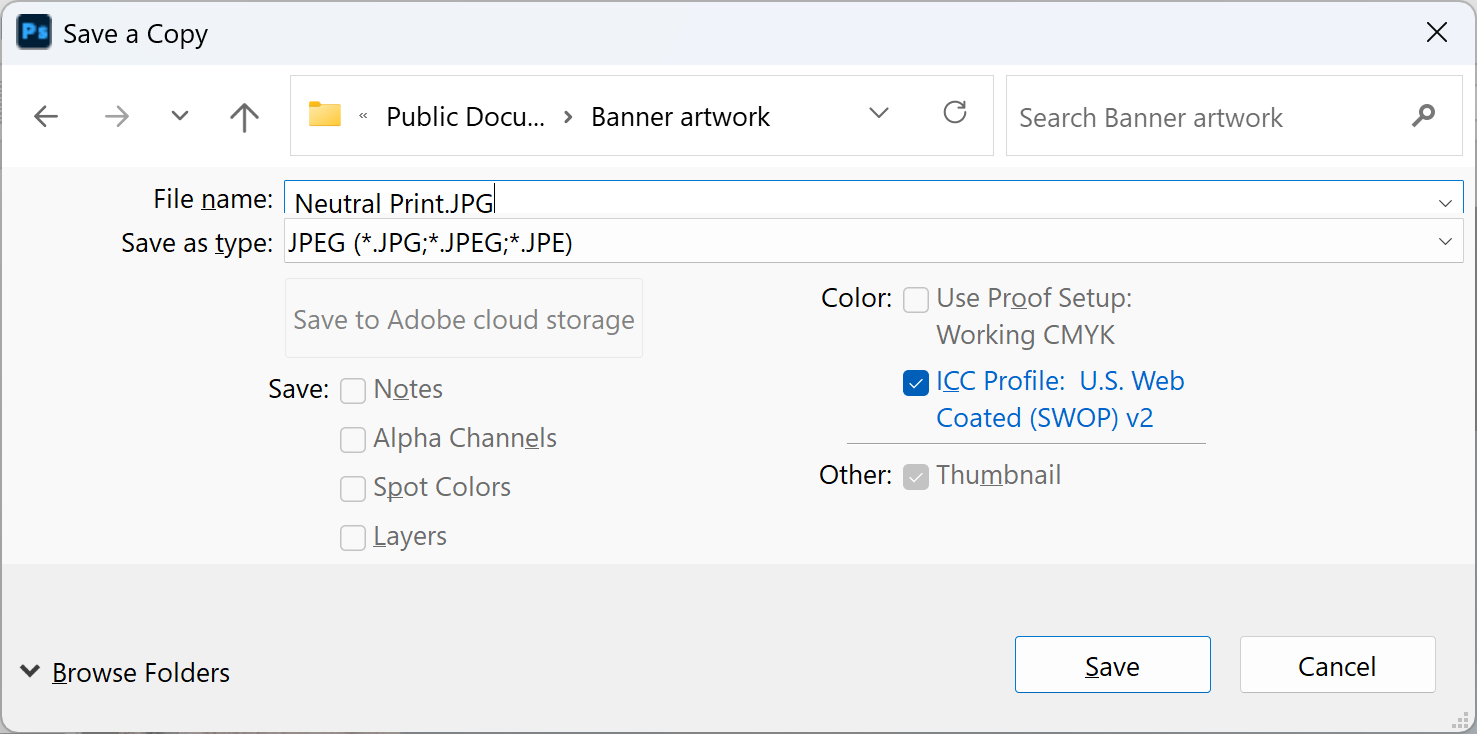
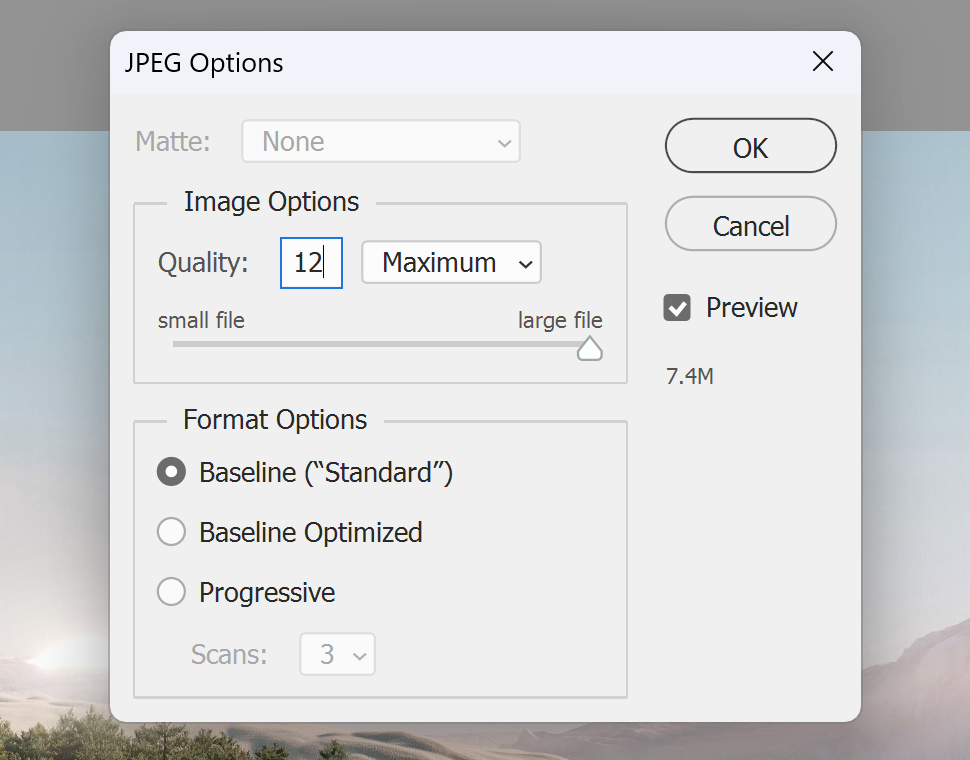
IMPORTANT: JPEG makes the file smaller by discarding image data. Make any changes in your PSD, not in the JPEG.
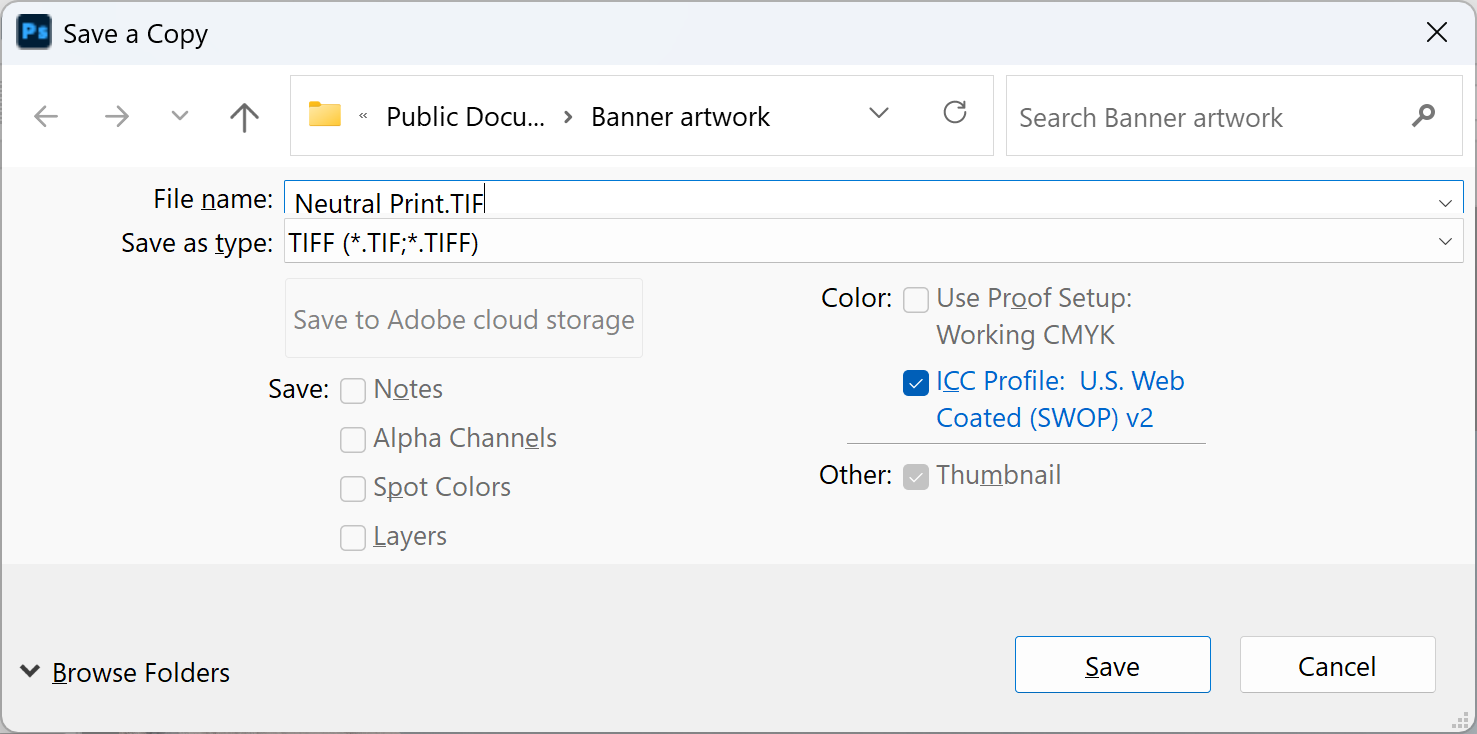
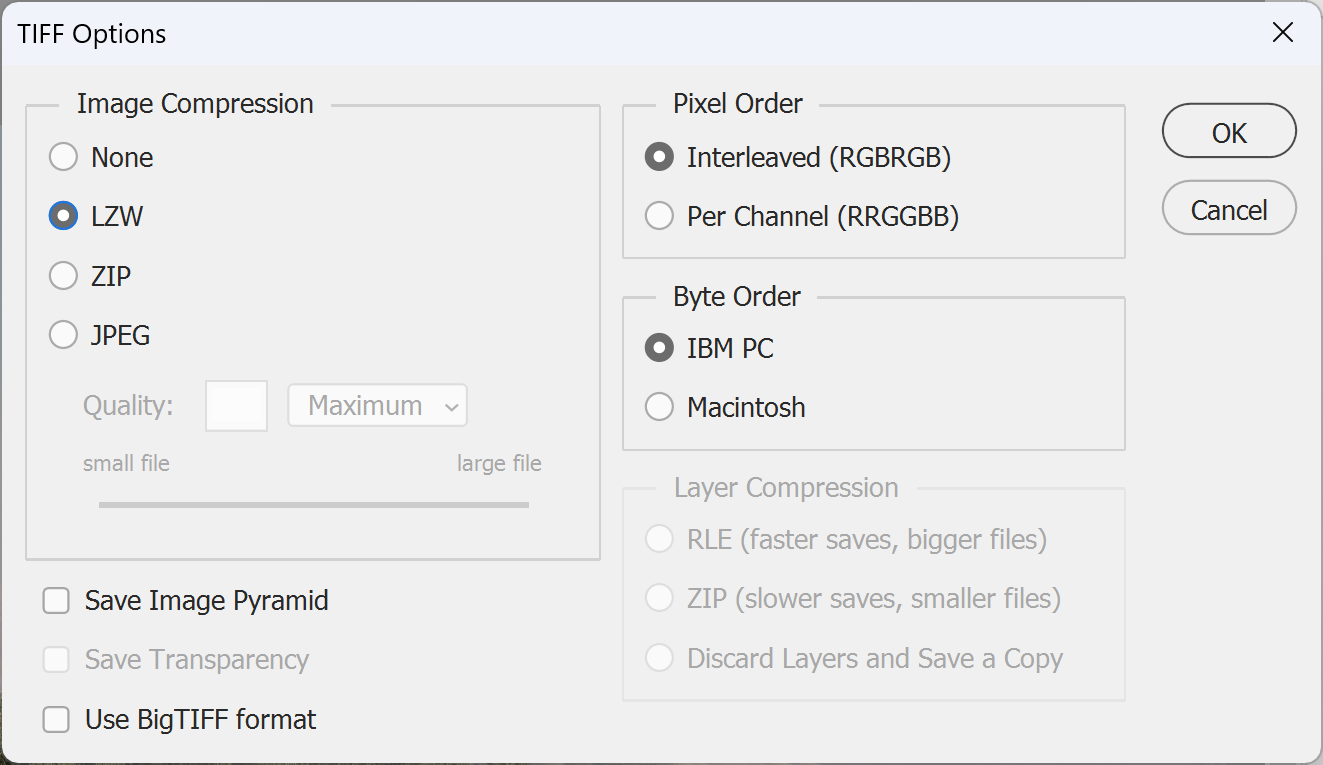
6. To save a TIFF instead, go to File > Save a Copy, choose TIFF from the format menu, leave ICC Profile ticked and click Save. In the TIFF Options dialog box, set Image Compression to LZW, which shrinks the file without losing any image data. Click OK.
7. Finally, check the file against our artwork specifications and email it to sales@displays2go.com.au with your order or job number in the subject line if you have one. If it's too big to email, see sending artwork and we'll arrange another way, and you're done!
Need some help?
We're here for you
If you're needing some advice or just a helping hand, please get in touch with our team, by clicking this button. Complete the enquiry form and one of our specialists will call you back as soon as we can.