

YOUR CART IS CURRENTLY EMPTY
How do I set the right CMYK colour profile in Adobe apps?
What is a CMYK colour profile?
A colour profile is a file that defines how a device reproduces colour. A CMYK profile describes a printing condition: a particular combination of ink and paper. Adobe puts it plainly: all CMYK working spaces are device-dependent, meaning they are based on actual ink and paper combinations.
Each Adobe app has a CMYK working space, and new CMYK documents use it as their profile. If Photoshop, Illustrator and InDesign are set up differently, colours can look different from one app to the next, so Adobe recommends synchronising them.
What's the difference between FOGRA39 and ISO Coated v2?
They aren't rivals. FOGRA39 is a set of measurement data, developed by the German research organisation Fogra in 2006, that represents a typical commercial offset print on gloss or matte coated paper to the ISO 12647-2 printing standard. ICC profiles are then built from that data:
- Coated FOGRA39 (ISO 12647-2:2004) is one of the CMYK profiles Adobe supplies.
- ISO Coated v2 (ECI) is the European Color Initiative's profile, a free download from eci.org. It's based on FOGRA39L, and ECI calls it a good choice when the printing condition isn't yet known.
Both are built from FOGRA39 data, so they target the same printing condition. The ICC notes that FOGRA39 is widely used in Europe, while North America more often uses a different data set. If your printer or brand team names a profile, use that one.
Why does it matter for display graphics?
We need all artwork supplied in CMYK. Our artwork specifications don't name a particular CMYK profile, so use the one your brand team names and set it the same in every app. What matters most is that your CMYK numbers are deliberate. If your brand guidelines list CMYK values, use those rather than an automatic conversion from RGB or HEX. Our post on colour matching explains why colours shift between screen and print, and across materials such as fabric and vinyl.
Steps to set the same CMYK profile in every Adobe app
1. Open Adobe Bridge. From a Creative Cloud app, go to File > Browse In Bridge (File > Browse in some apps) in the main menu, or open Bridge from the Start menu (Windows) or its icon (macOS). If you don't have Bridge, install it free from the Creative Cloud desktop app.
2. In Bridge, go to Edit > Color Settings. Select the colour setting you saved in the steps below, or Europe Prepress 3, which uses Coated FOGRA39. If you can't see it, select Show Expanded List of Color Setting Files. Avoid the North America settings unless your printer asks for one: they use U.S. Web Coated (SWOP) v2.
3. Click Apply. Bridge synchronises the setting across your colour-managed Adobe apps, so colours look the same in each of them on your screen. A screen match doesn't guarantee a print match, so still order a proof for colour-critical work.
Steps to choose the CMYK working space in one app
1. In Photoshop, Illustrator or InDesign, go to Edit > Color Settings in the main menu.
2. Under Working Spaces, open the CMYK menu and choose the profile your brand team or printer names. If no one names one, Coated FOGRA39 (ISO 12647-2:2004) comes with Adobe apps, or install ISO Coated v2 (ECI), which ECI suggests when you don't yet know how the job will be printed.
Note: If the profile you want isn't listed, select Advanced Mode (Illustrator and InDesign) to show the other profiles installed on your computer. Downloaded profiles go in the system profiles folder: usually windows/system32/spool/drivers/color on a PC (or right-click the profile and choose Install Profile) or Library/ColorSync/Profiles on a Mac. Then restart your Adobe apps.
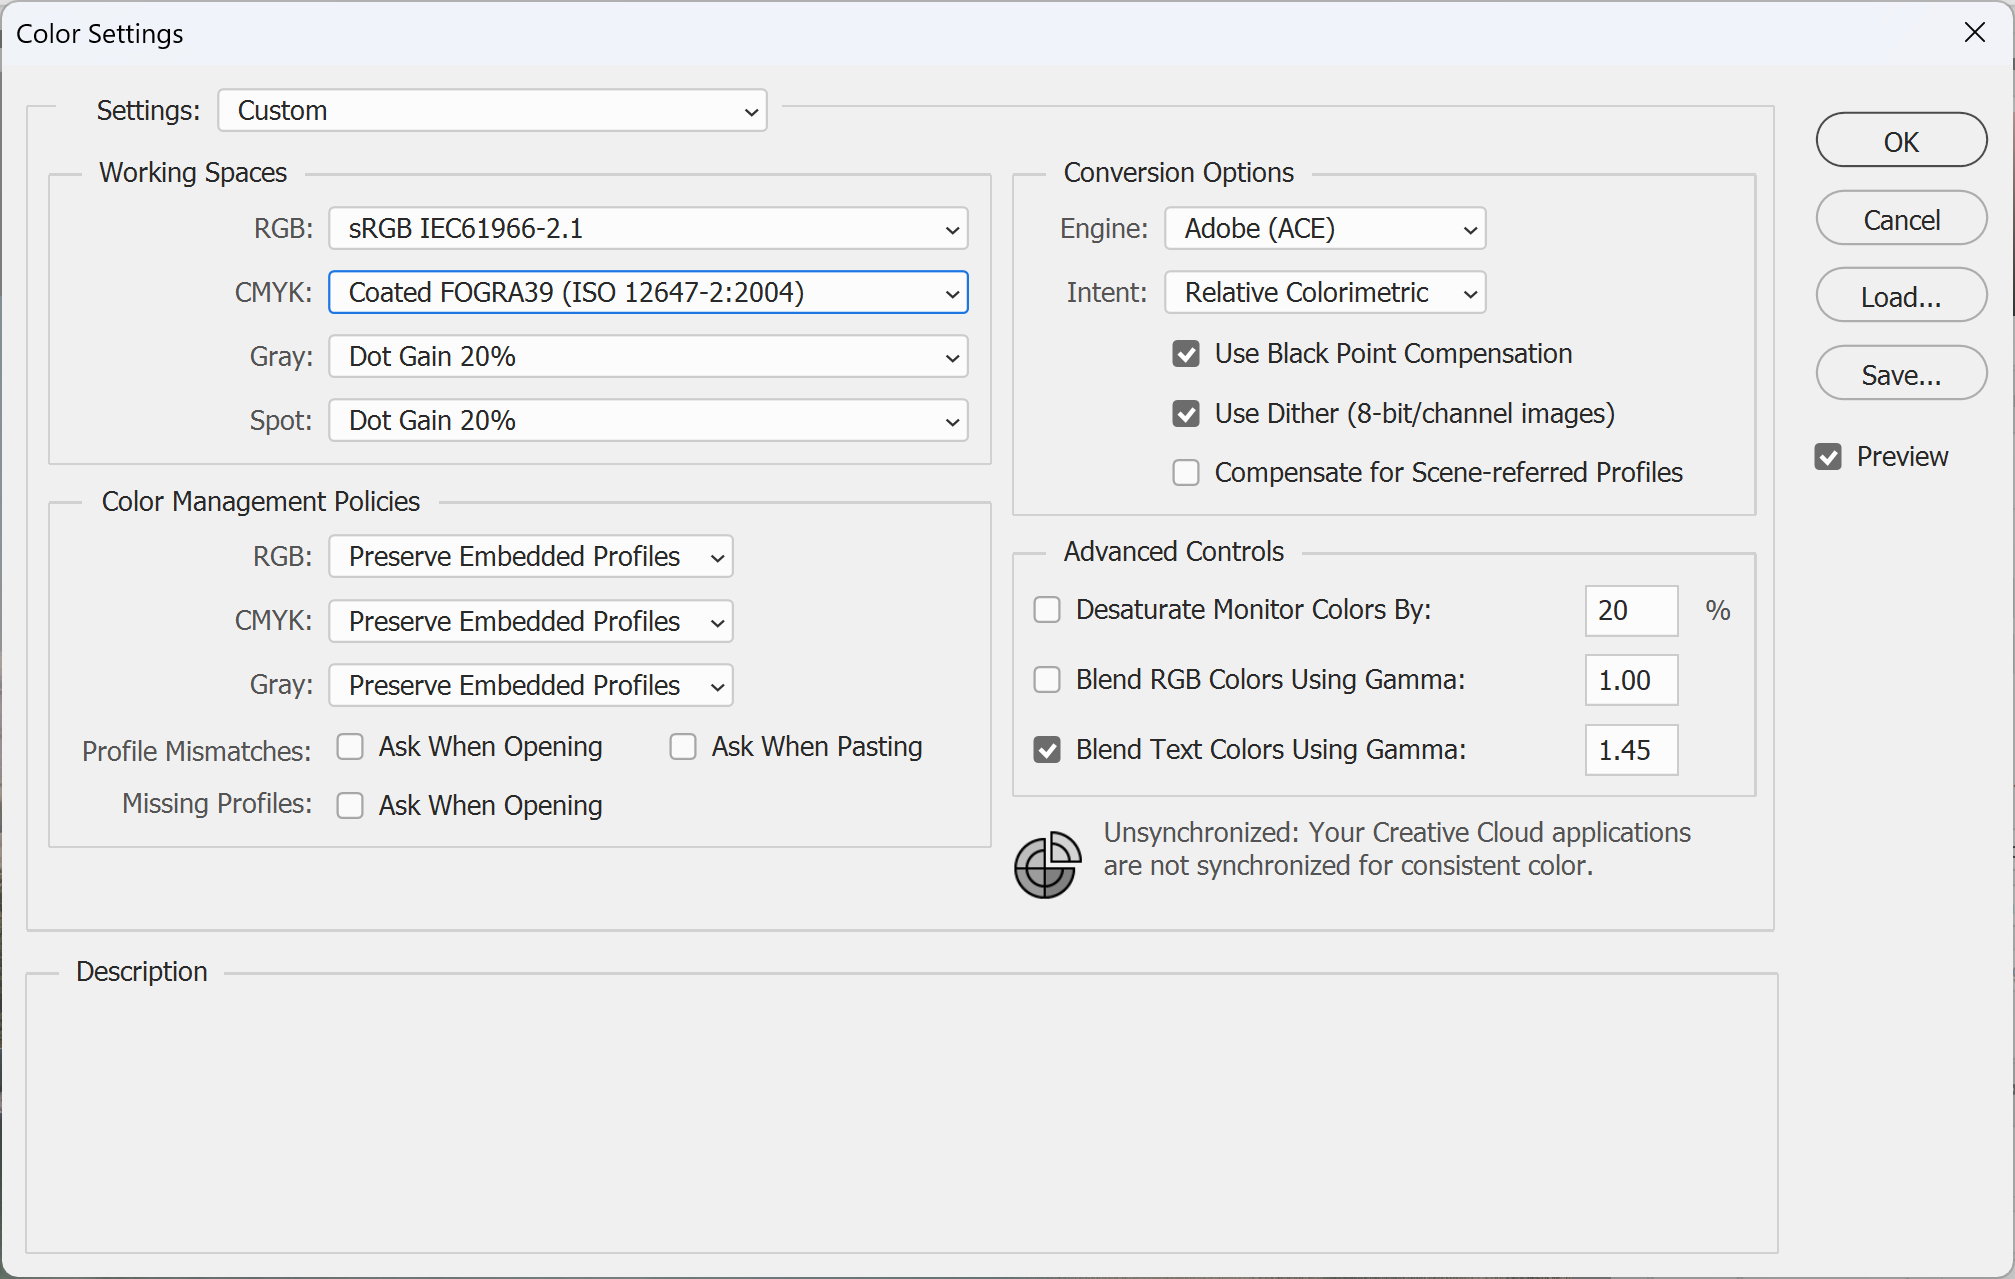
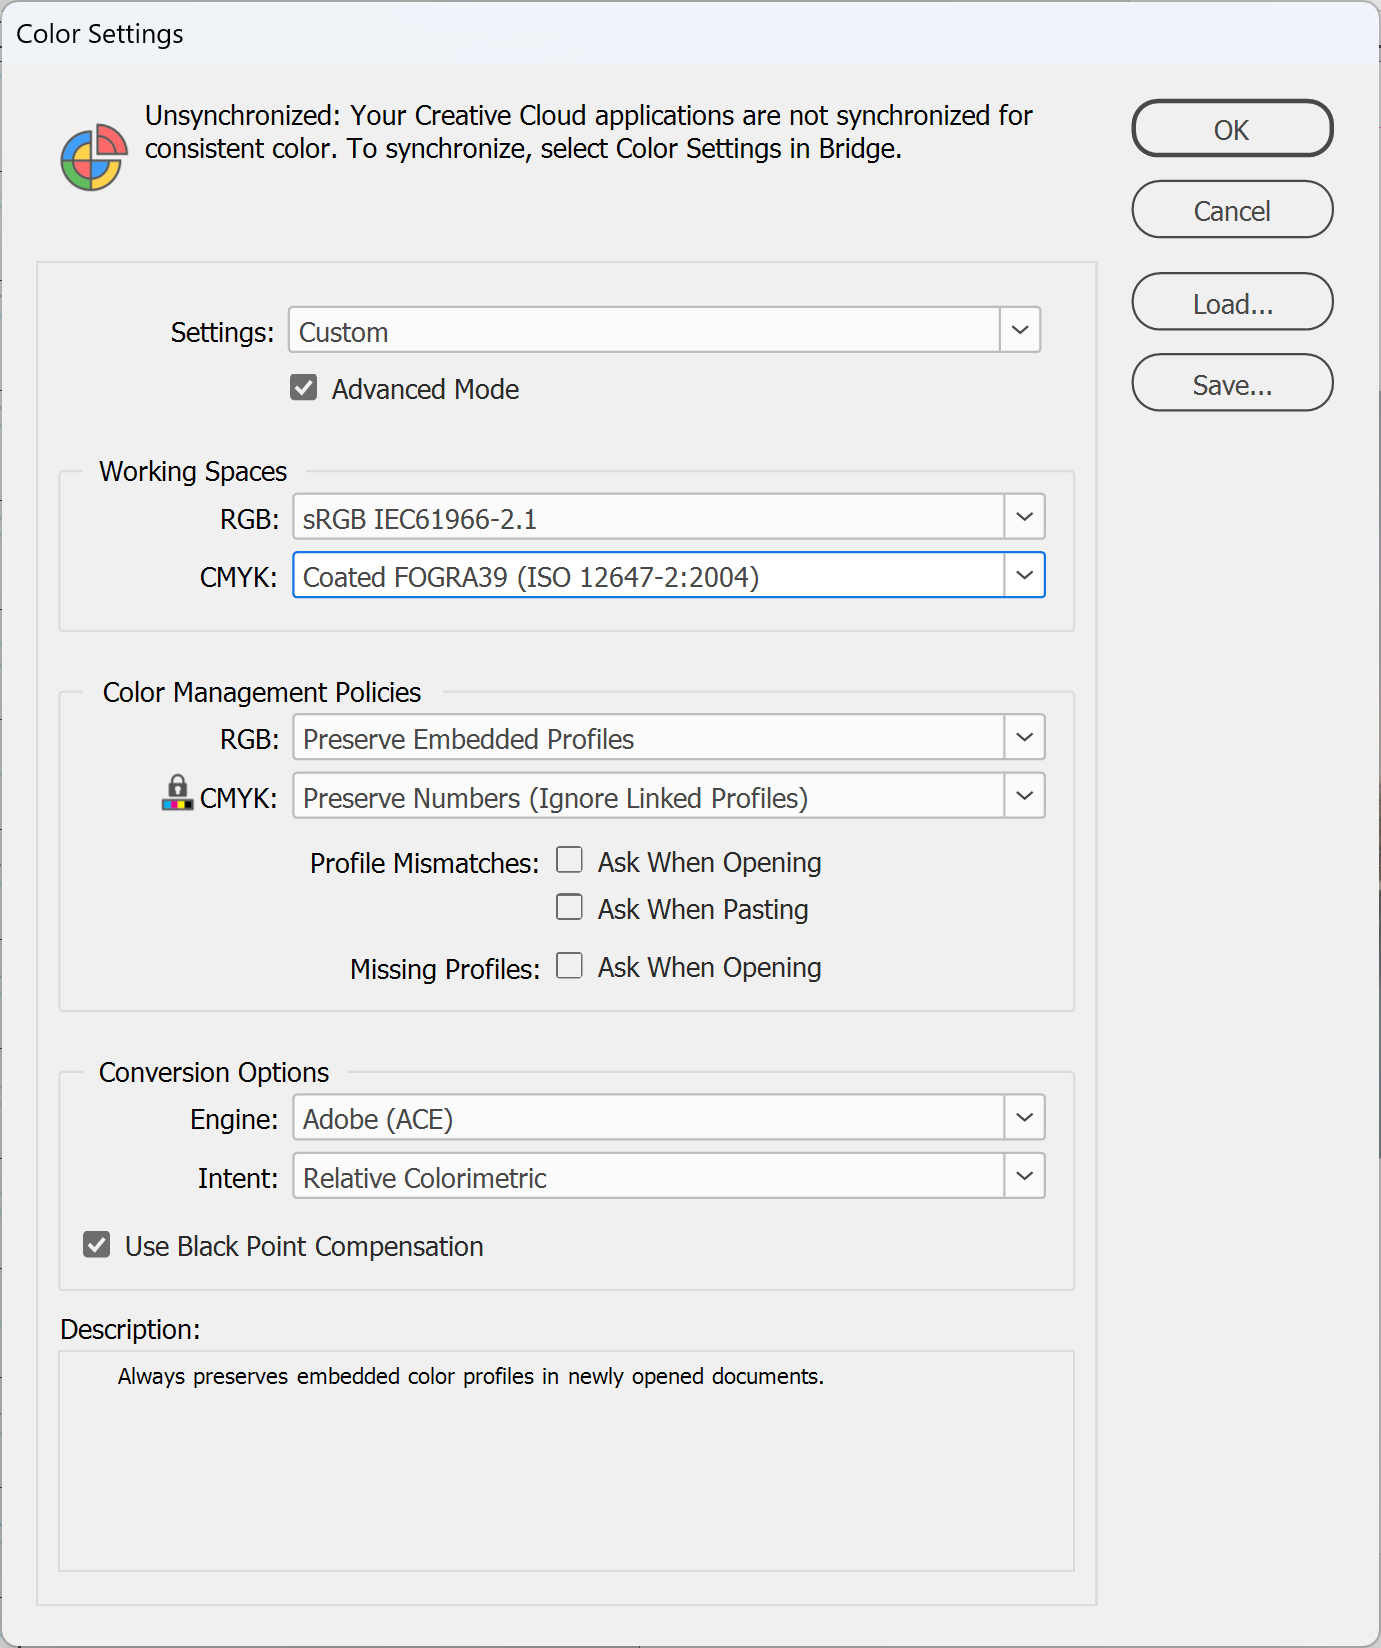
3. Click Save and keep the file in the default location, so the setting name shows in the Color Settings dialog box. Then click OK.
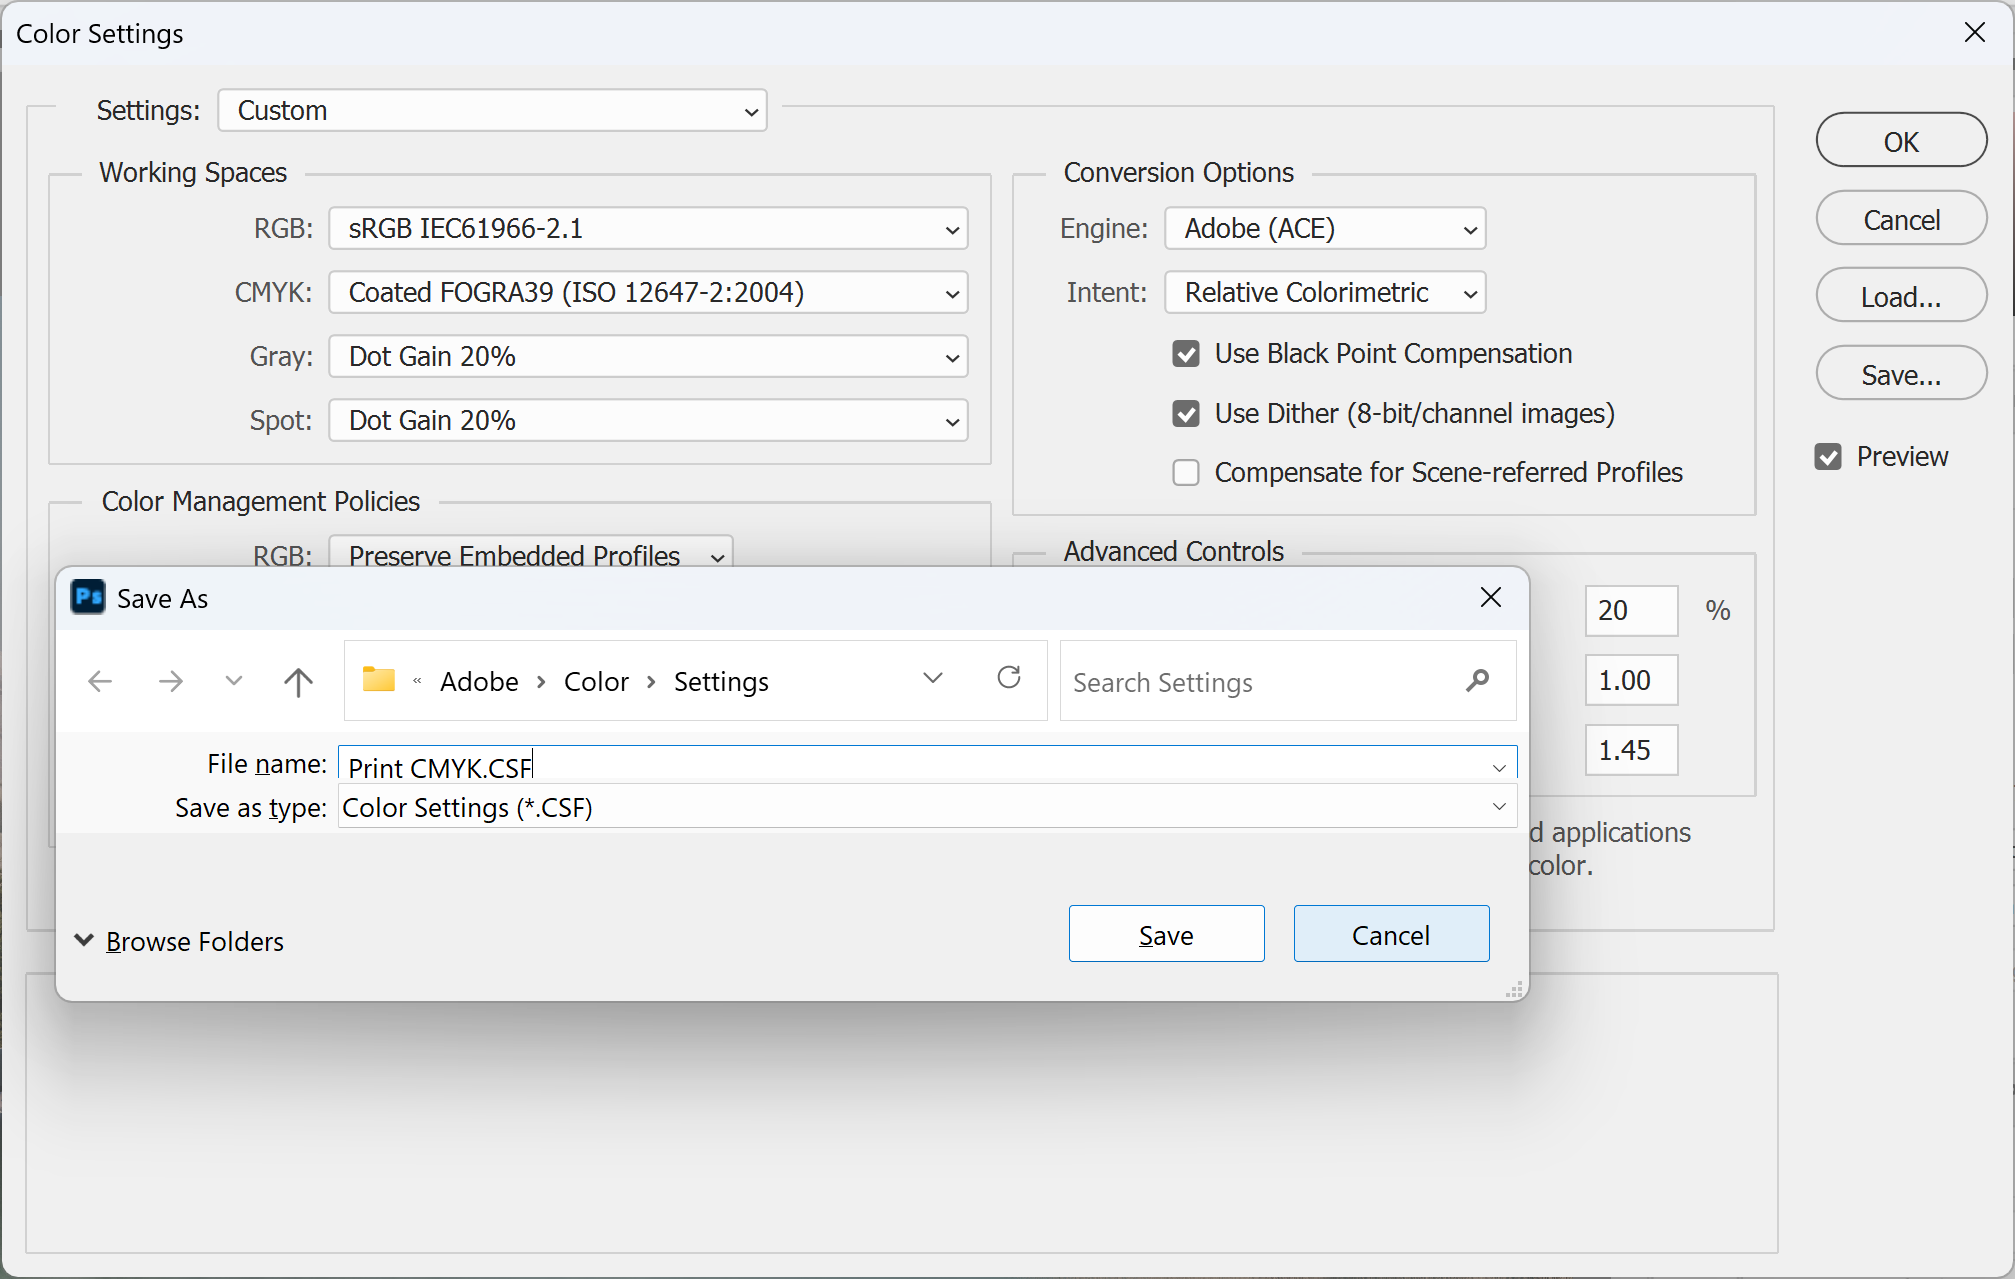
IMPORTANT: If a warning appears in the Color Settings dialog box, your apps aren't synchronised. Adobe recommends syncing them before you work on new or existing documents: follow the Bridge steps above and select the setting you just saved.
Steps to convert an RGB image to your CMYK profile in Photoshop
1. In the main menu, go to Edit > Convert to Profile.
2. Under Destination Space, choose your CMYK profile from the Profile menu. Under Conversion Options, leave Engine set to Adobe (ACE) and keep Use Black Point Compensation checked. Select Preview to see the change, then click OK.
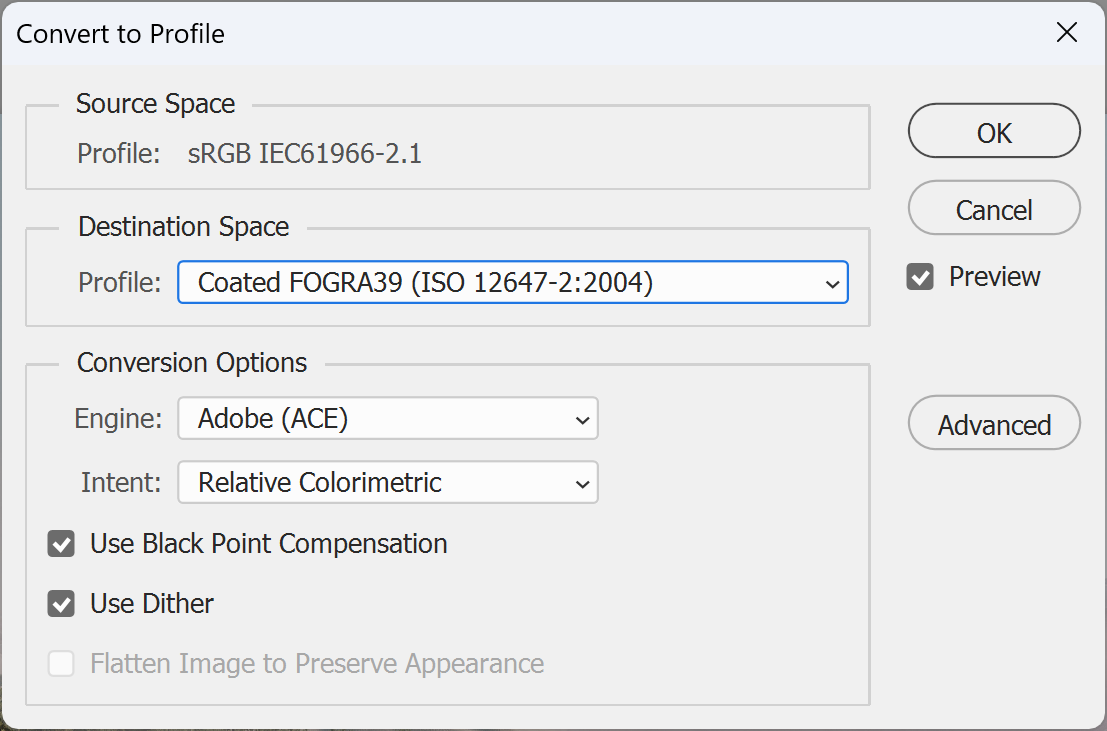
Note: Choose Convert to Profile, not Assign Profile. Assigning a profile doesn't change the colour values, only how Photoshop reads them.
3. Finally, convert any spot colours to CMYK too, except a dieline or an agreed White ink layer (our guide on converting spot colours to CMYK shows how), and check the file against our artwork specifications. When a brand colour must be matched closely, tell us when you order, give the PMS colour reference and order a printed proof. You're done!
Need some help?
We're here for you
If you're needing some advice or just a helping hand, please get in touch with our team, by clicking this button. Complete the enquiry form and one of our specialists will call you back as soon as we can.