

YOUR CART IS CURRENTLY EMPTY
How do I set up SEG fabric artwork?
What is SEG fabric artwork?
SEG stands for silicone edge graphic. The artwork is dye-sublimation printed onto fabric, and a silicone edge runs around the outside of the print. That edge pushes into a groove in an aluminium frame, which holds the face flat and taut. No tools are needed to fit or swap the graphic, so you can change it when your message changes.
Our Brandframe walls and lightboxes all use SEG graphics.
Why do I need to use the template?
Fabric in a frame doesn't behave like a flat print. The edges of the graphic disappear into the groove, so anything placed too close to the edge can be lost. The bleed is what stops a white sliver showing at the edge once the fabric is tensioned.
That's why a product template always overrides our standard 10mm bleed. Brandframe templates ask for 50mm of bleed on every edge. On a 3m x 2.4m Brandframe, for example, the visual area is 3000mm x 2400mm and the finished document, bleed included, is 3100mm x 2500mm.
Some large templates, such as the 6m x 2.4m Brandframe, are set at 50% of finished size. The bleed on that template is 25mm, and every measurement doubles at full size.
Steps to set up SEG fabric artwork in Illustrator
1. Download the sizing template for your frame. Templates for the most popular Brandframe sizes are listed on the product pages. Brandframes are custom built, so if your size isn't listed, we'll confirm the artwork size once your stand specification is agreed.
2. Open the template. In the main menu, go to File > Open, select the template PDF and click Open.
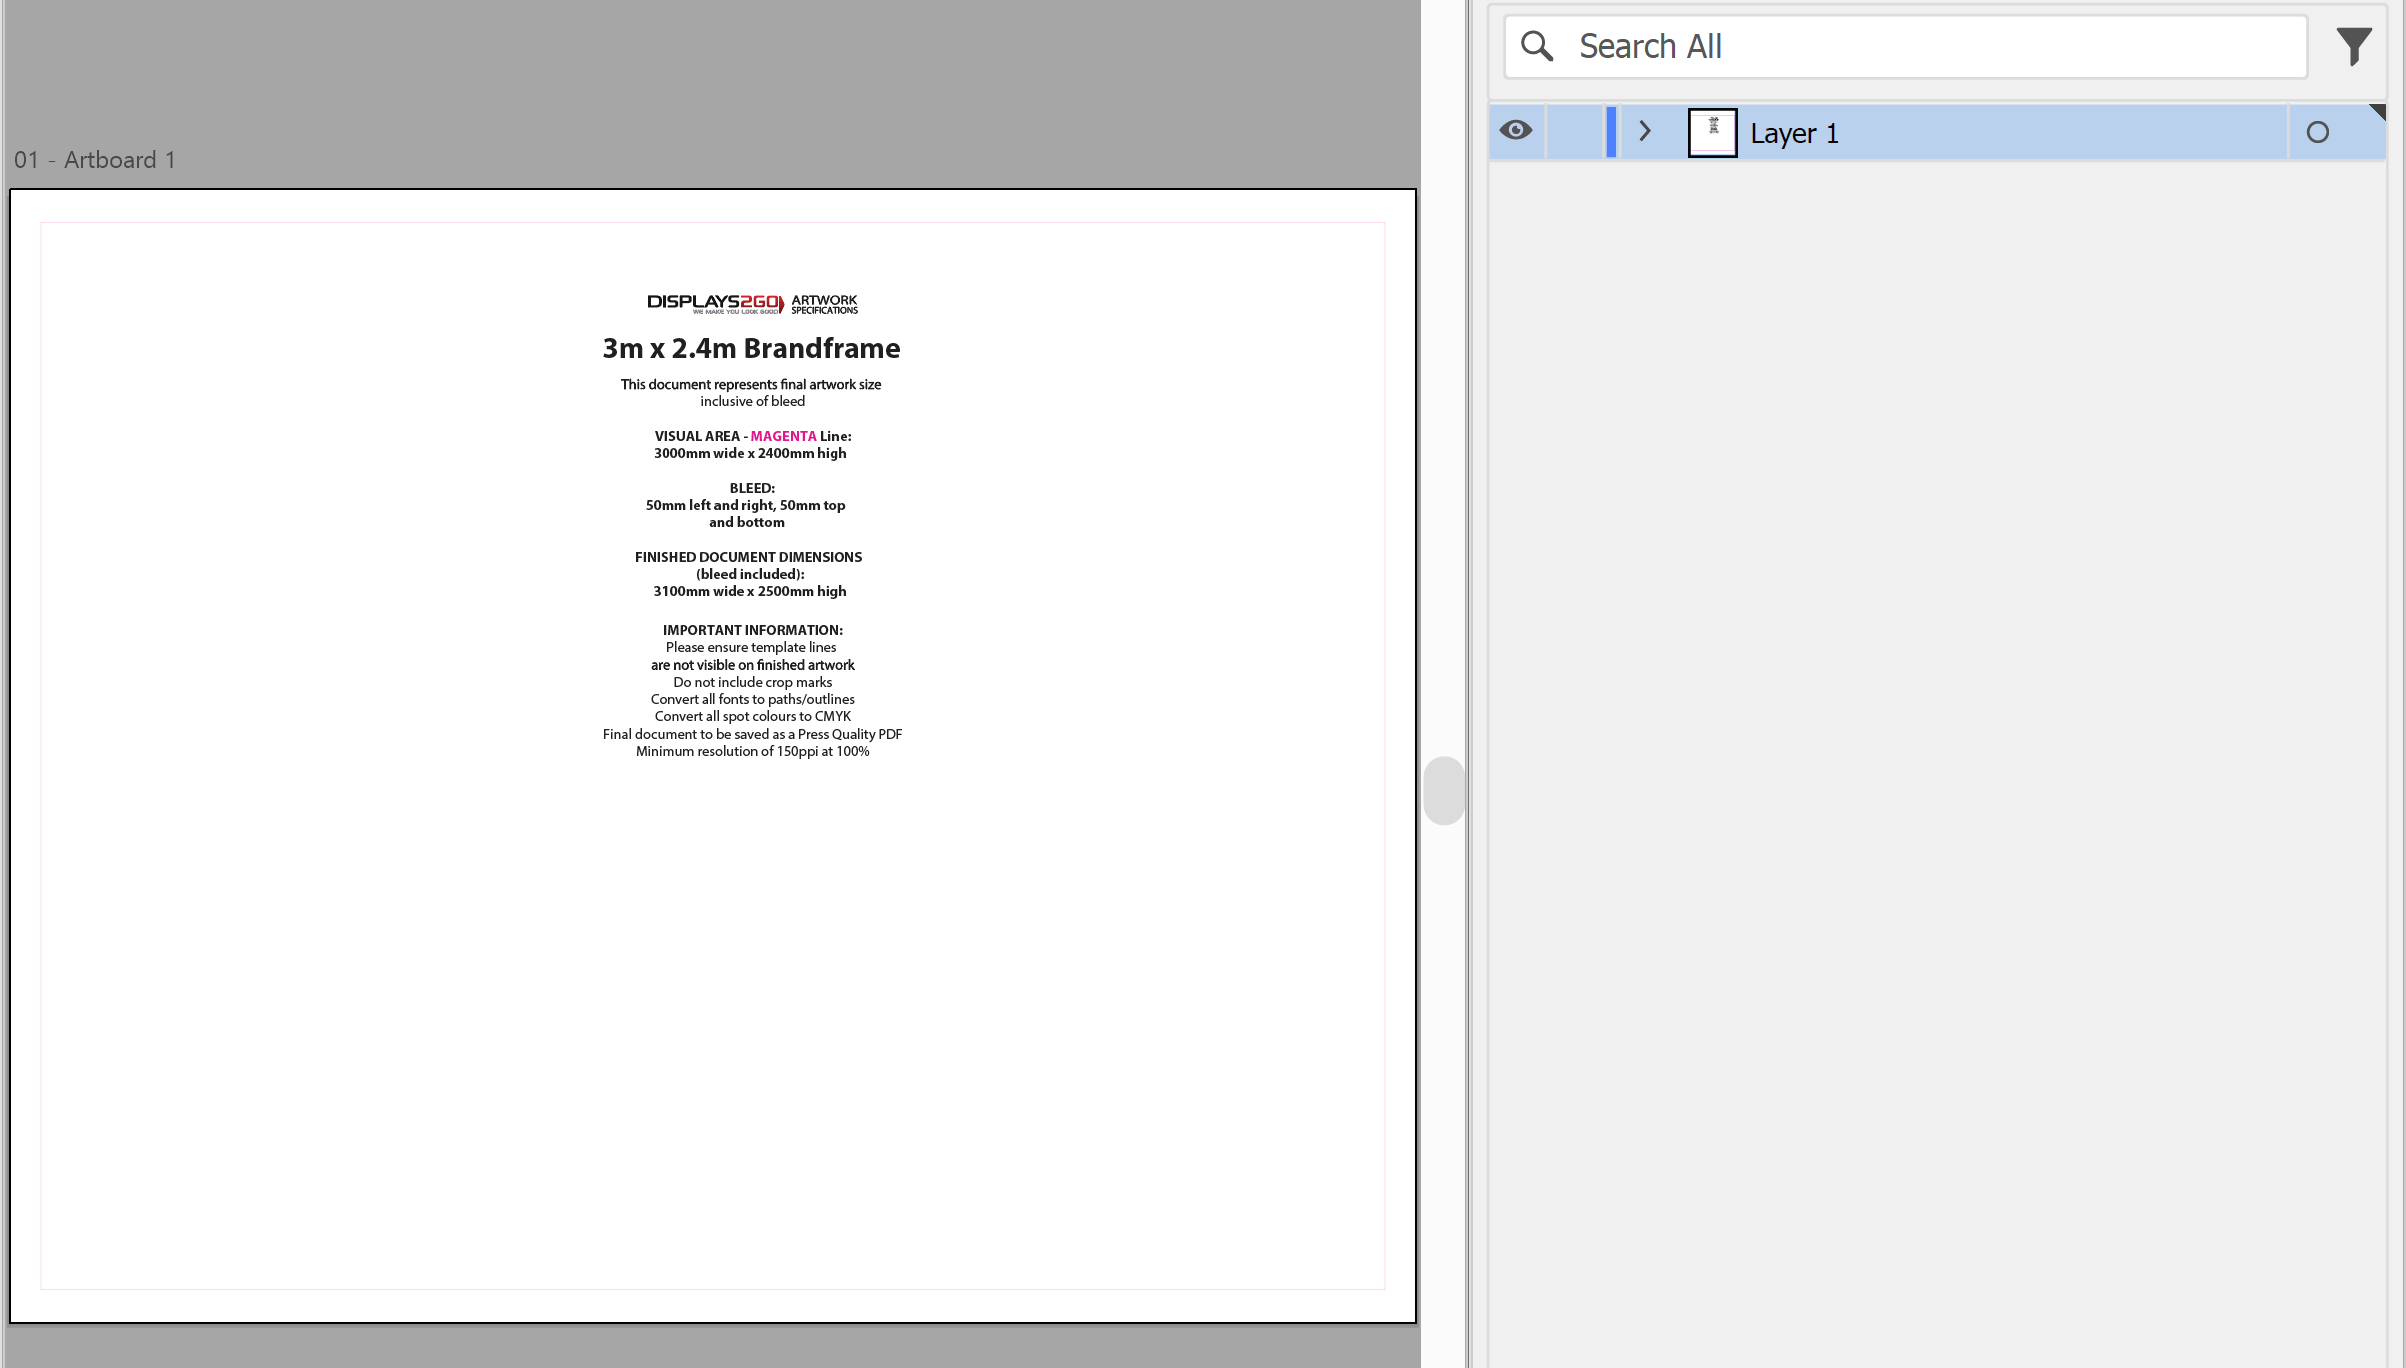
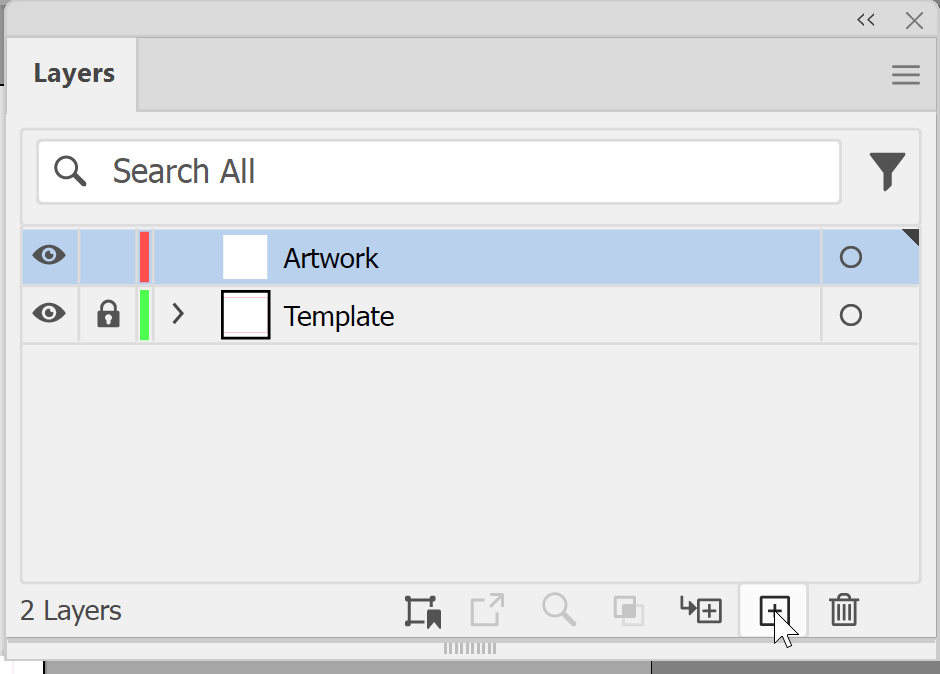
3. Lock the template so it can't move. In the main menu, go to Window > Layers. In the Layers panel, click the empty lock area between the eye icon and the layer name.
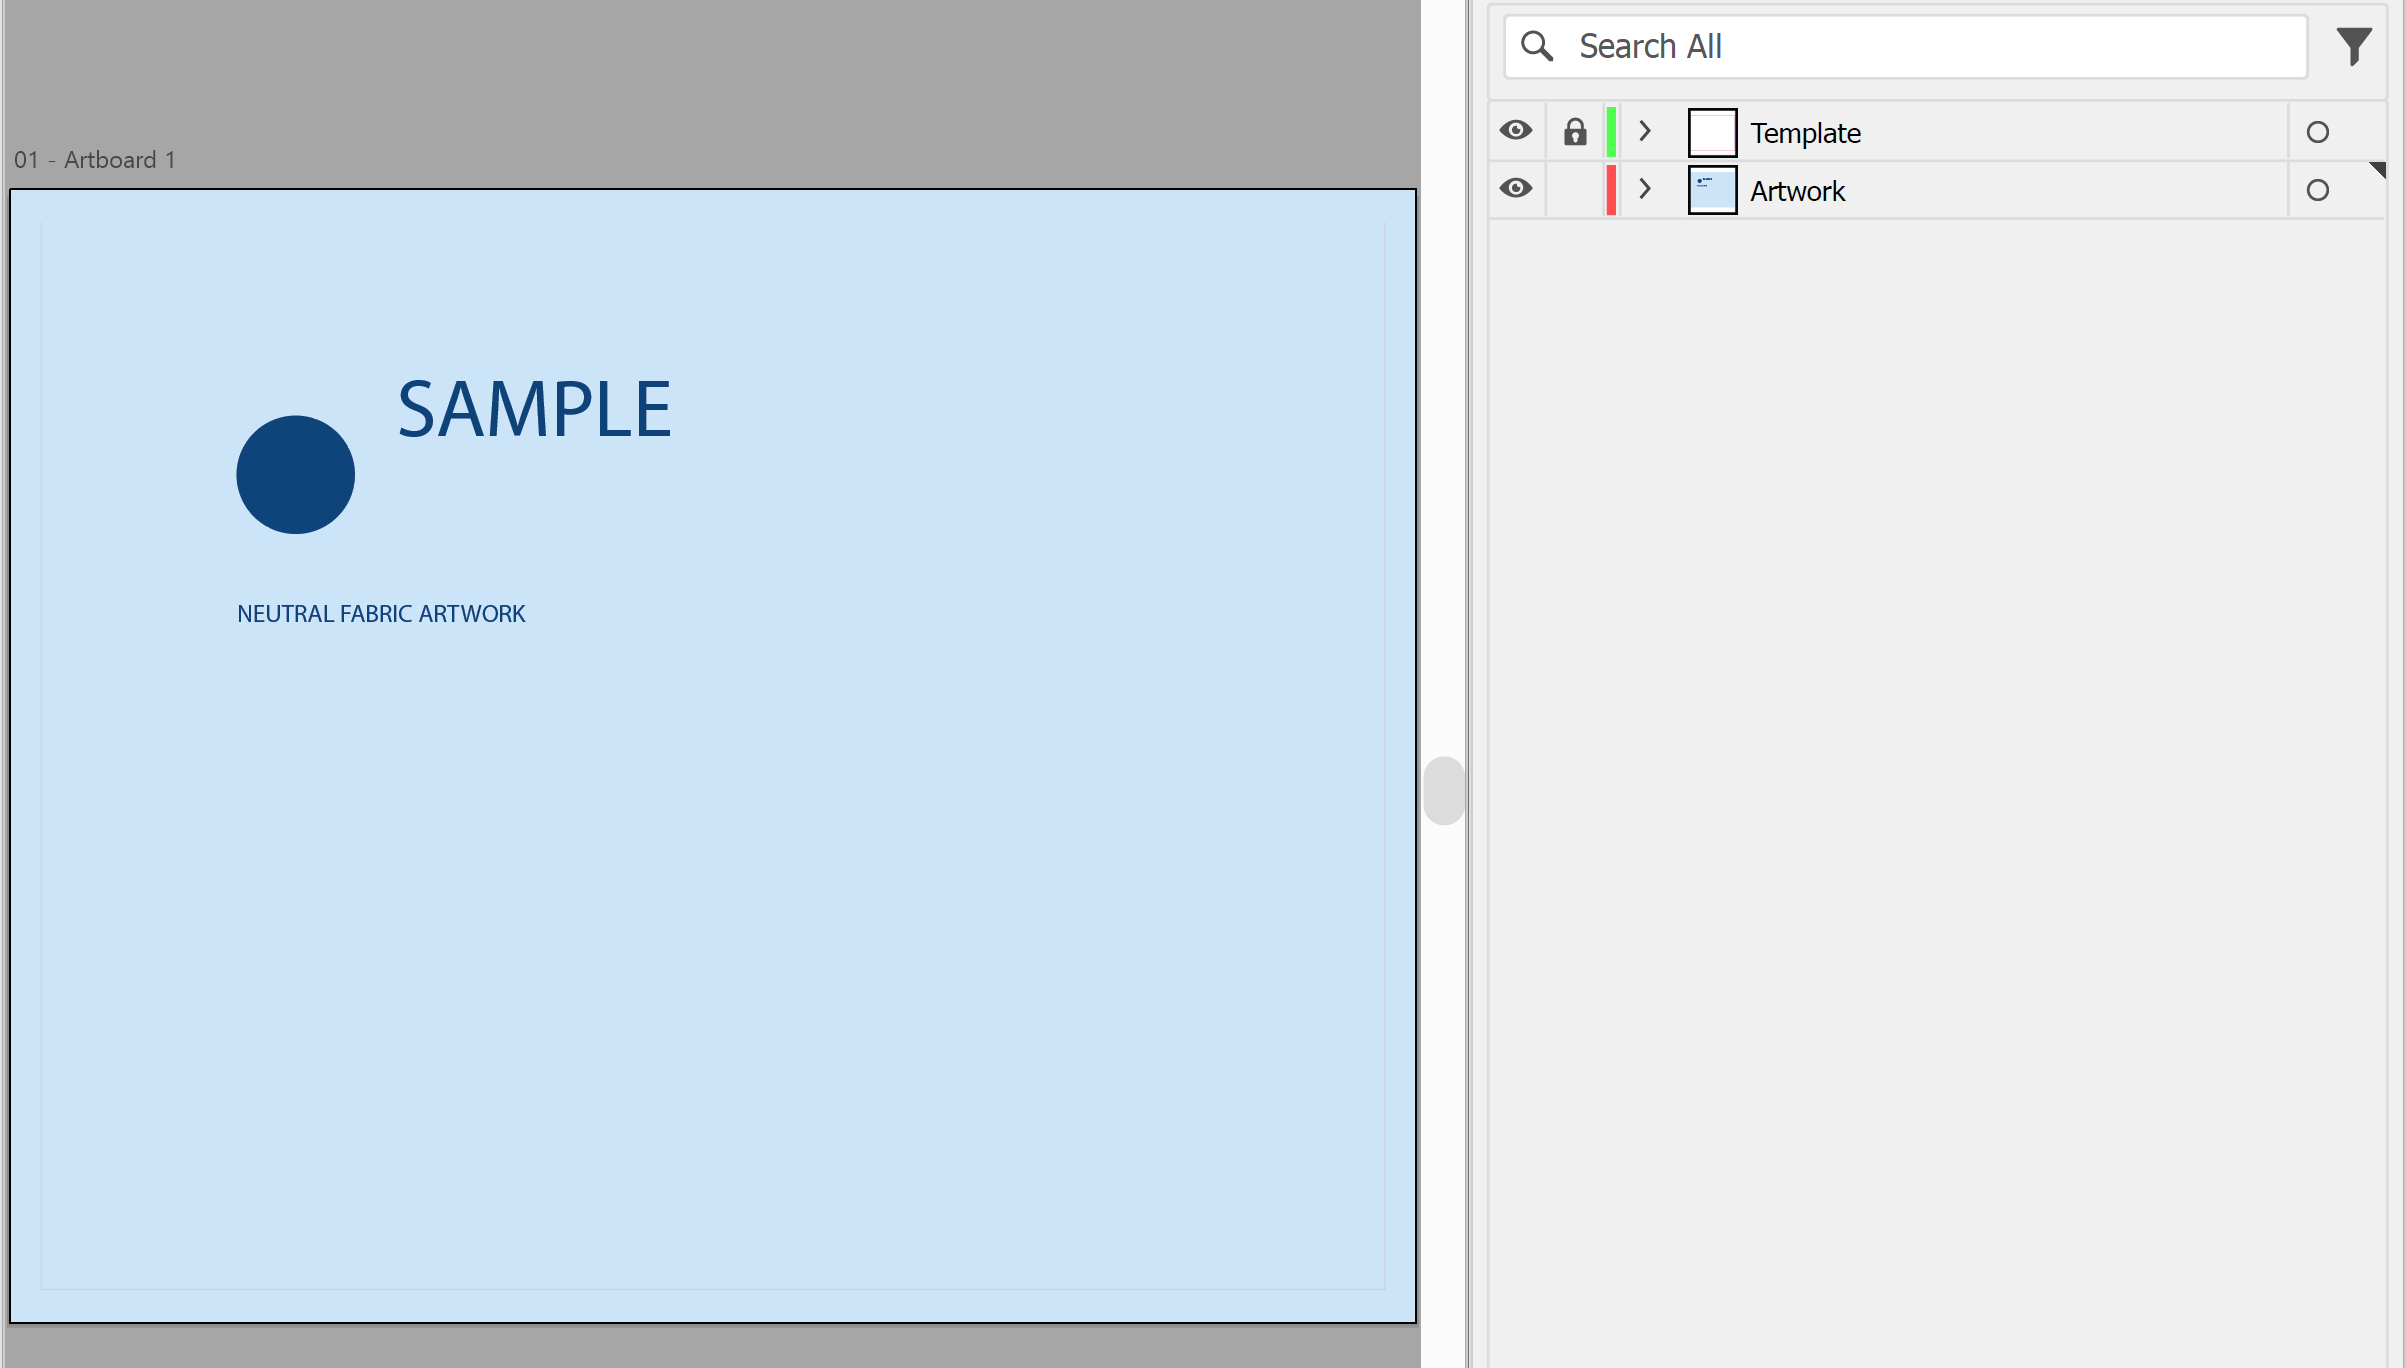
4. Add a new layer for your artwork. In the Layers panel, click the Create New Layer icon. Put all your artwork on this new layer, then drag it below the template layer so the template lines stay visible over your background.
5. Run your background to the outer edge of the artboard. Photos, colour and patterns must fill the bleed on every side.
IMPORTANT: Keep logos, text and faces well inside the magenta line. The fabric edge sits in the frame groove, so nothing important belongs near the edge. If your template also has a green primary image area line, keep them inside that.
6. Check where any joins fall. A single Brandframe wall uses a one-piece fabric skin with no seams. A Display-in-a-Bag Brandframe is 950mm wide as standard, and with the Infinity option you put modules side by side with edgeless graphic prints, so a wall built from modules has a join where each module meets the next.
Note: Panel joins fall in fixed places. Check the template before you put text, faces or a logo near a join.
7. Check your resolution: select each image and read its PPI under Link Info in the Links panel (Window > Links). Images need at least 150ppi at 100% of finished size. On a template set at 50%, that means 300ppi in your file.
Note: Check the notes printed on your template too. Each one lists its own sizes and minimum resolution.
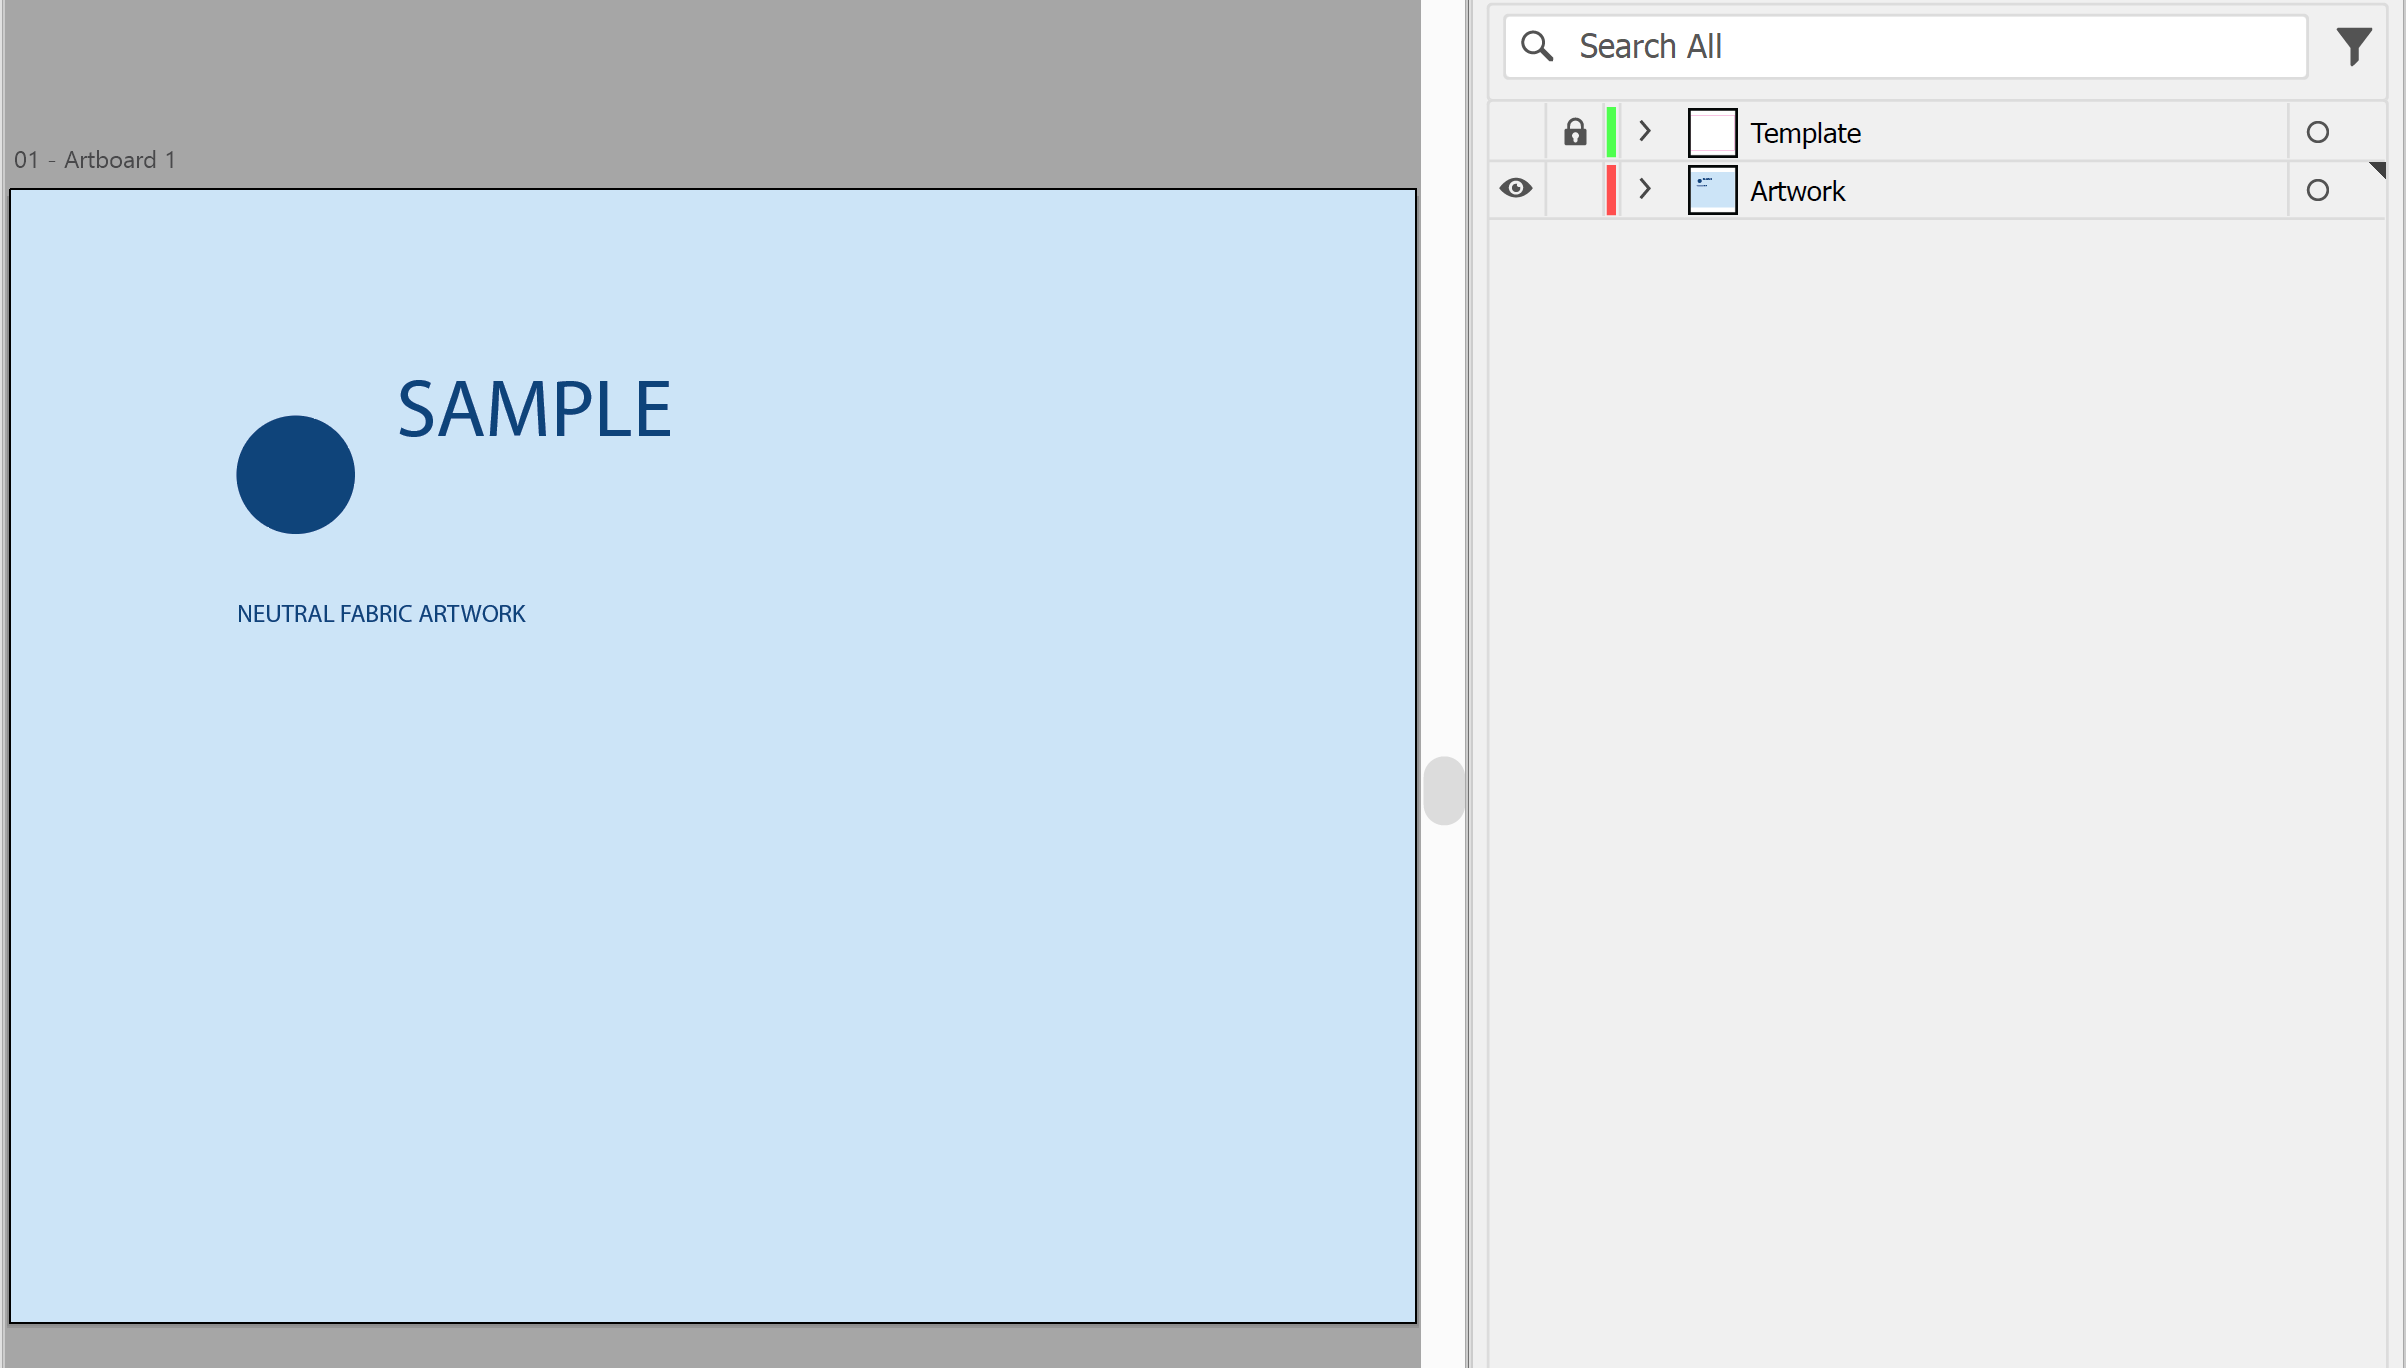
8. Hide the template before you save. In the Layers panel, click the eye icon on the template layer. Template lines must not show on the finished artwork.
9. Outline your fonts and convert any spot colours to CMYK. Our guides to outlining text and converting spot colours to CMYK show how.
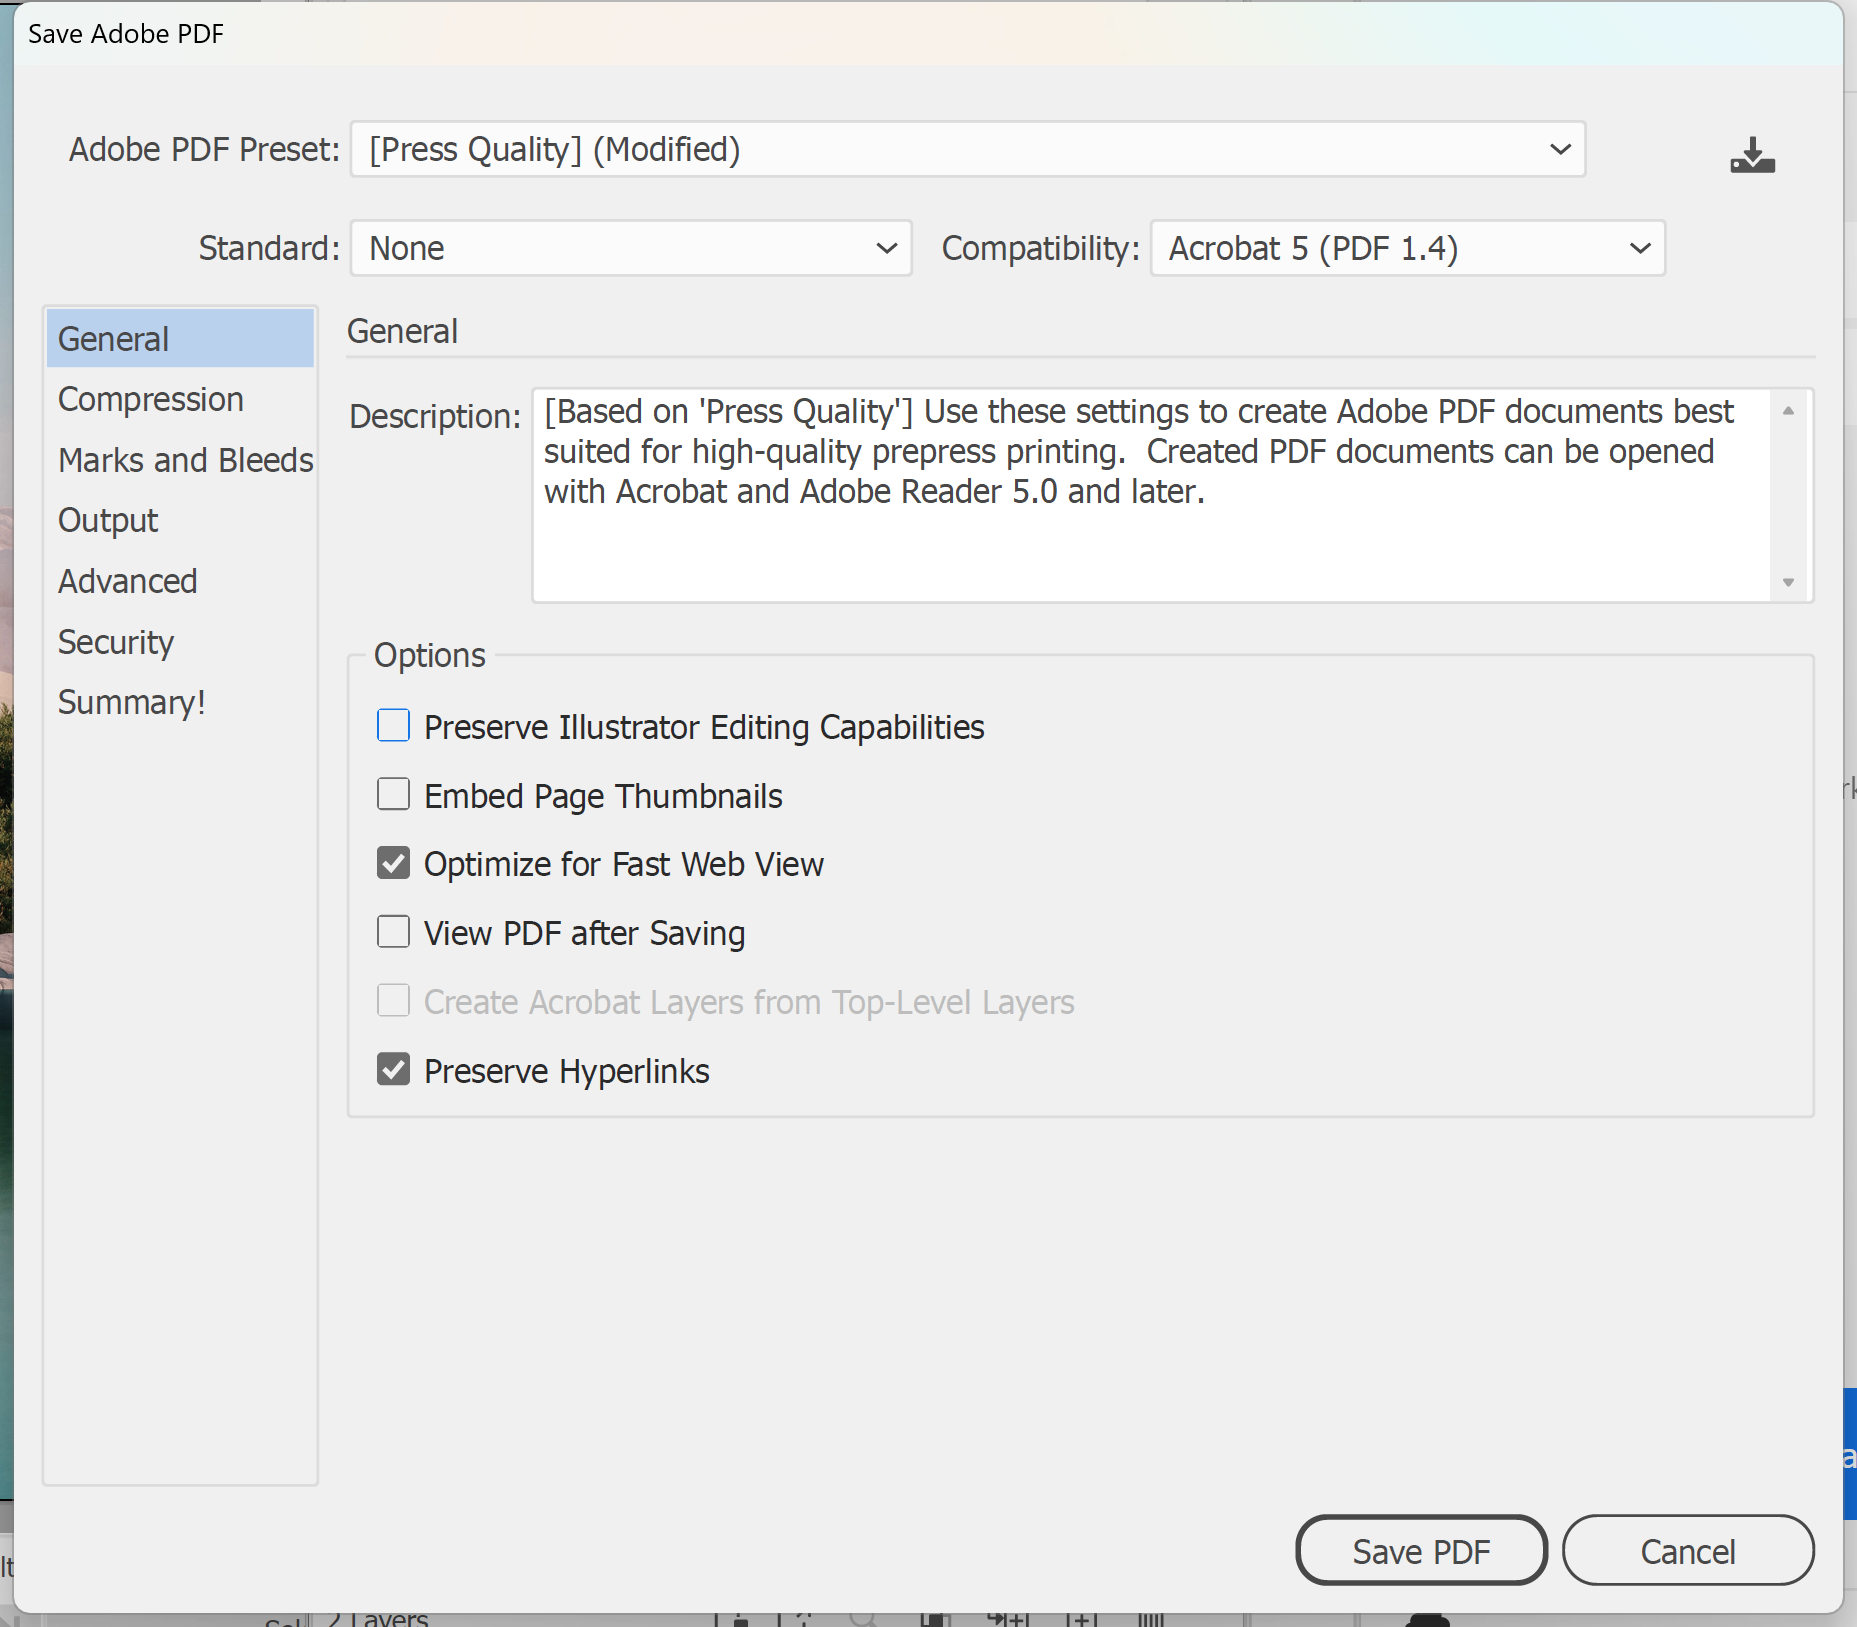
10. Save a print-ready PDF. In the main menu, go to File > Save As. If the Save to Adobe cloud storage dialog box appears, select On your computer. Choose Adobe PDF (*.PDF) as the type and click Save.
In the Save Adobe PDF dialog box, choose Press Quality from the Adobe PDF Preset menu. In the General panel, uncheck Preserve Illustrator Editing Capabilities to keep the file smaller. The preset then shows as [Press Quality] (Modified).
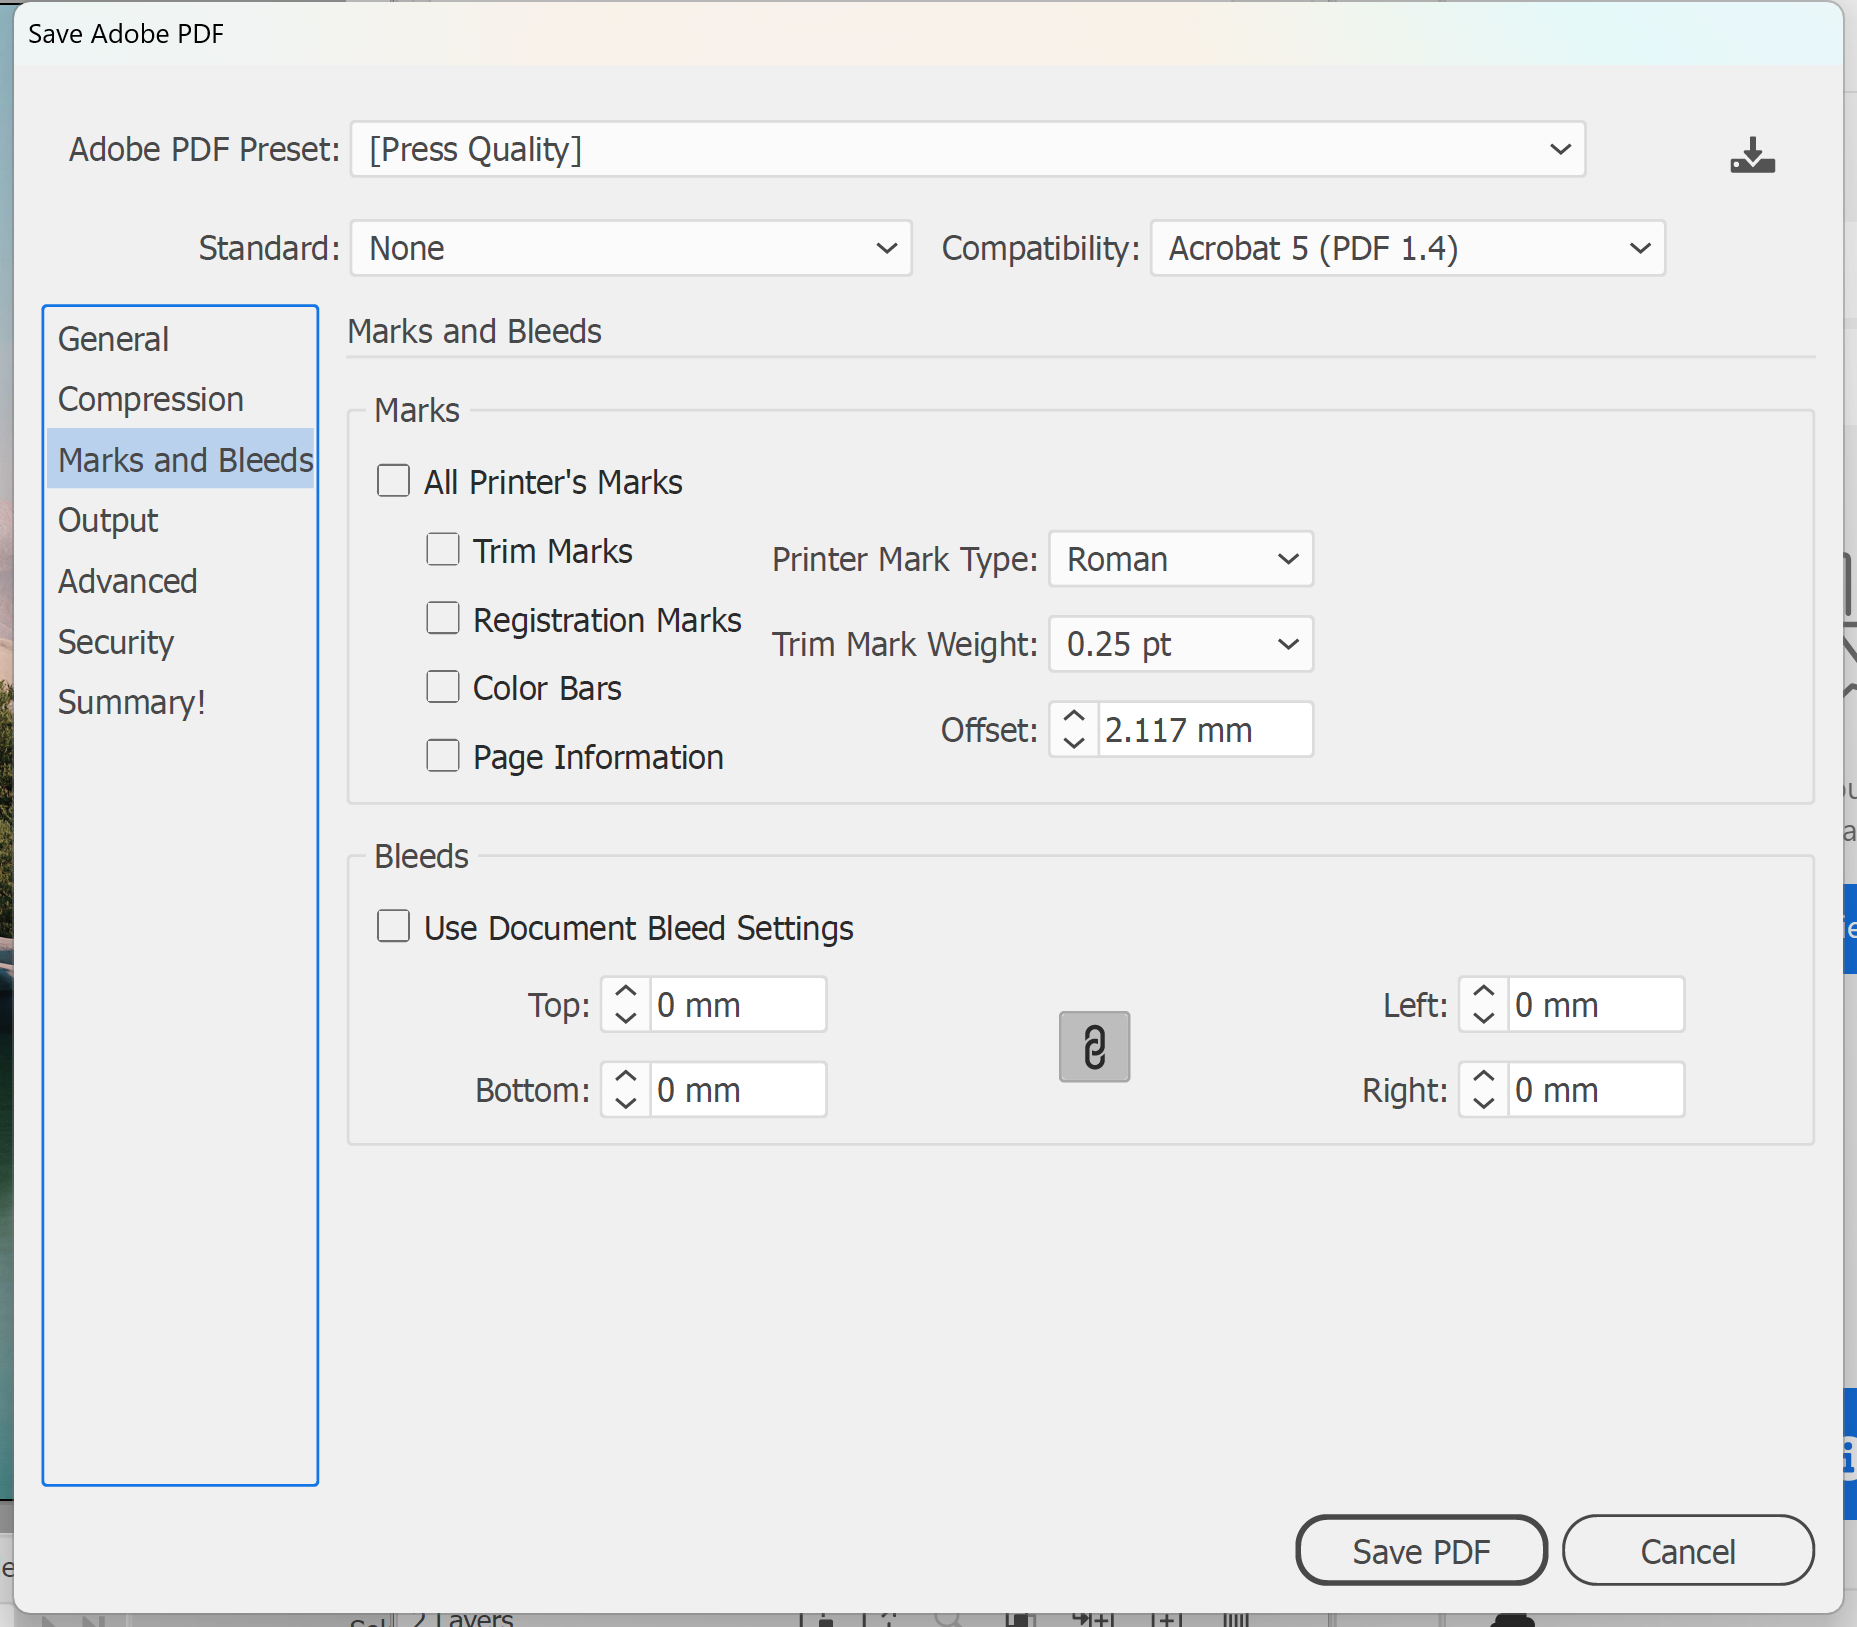
11. Click Marks and Bleeds in the list on the left. Leave All Printer's Marks unchecked, because we don't need crop marks. Your bleed is already built into the document, so set the Bleed values to 0mm. Click Save PDF.
12. Finally, check your PDF against our artwork specifications and email it to sales@displays2go.com.au, with your order or job number in the subject line if you have one. You're done!
Need some help?
We're here for you
If you're needing some advice or just a helping hand, please get in touch with our team, by clicking this button. Complete the enquiry form and one of our specialists will call you back as soon as we can.