

YOUR CART IS CURRENTLY EMPTY
How do I upscale a low-resolution image for printing?
Why do large prints need so many pixels?
Resolution is how densely the pixels in your image are packed when it prints, measured in pixels per inch (ppi). The bigger the print, the more pixels you need to keep that density up.
For best results, images should be at least 150ppi at 100% of the finished size. The lowest we can accept is 75ppi at 100% of the finished size. Below that, an image can't be printed well whatever we do at our end.
That adds up fast on large format. A 2m tall banner is about 79 inches tall, so it needs around 11,800 pixels top to bottom for 150ppi, or about 5,900 for 75ppi. An image taken from a website is usually much smaller, because it only needs to be large enough to look right on a screen. Stretch a 1,200 pixel web image to 2m and it prints at about 15ppi.
Can upscaling add the missing detail?
Not really. When you upscale, Photoshop adds pixels and estimates what they should look like. Adobe's own advice is that upsampling can't add detail that wasn't in the original image, and that you should start with properly sized source images rather than enlarging small files.
So before you upscale, ask for the original photo or the largest version available. For logos, a web image is the wrong starting point: you will likely need to have the logo rebuilt by a designer. Our guide on supplying the right logo file explains why.
When a small photo is all there is, the steps below get the most out of it.
Steps to upscale an image in Photoshop
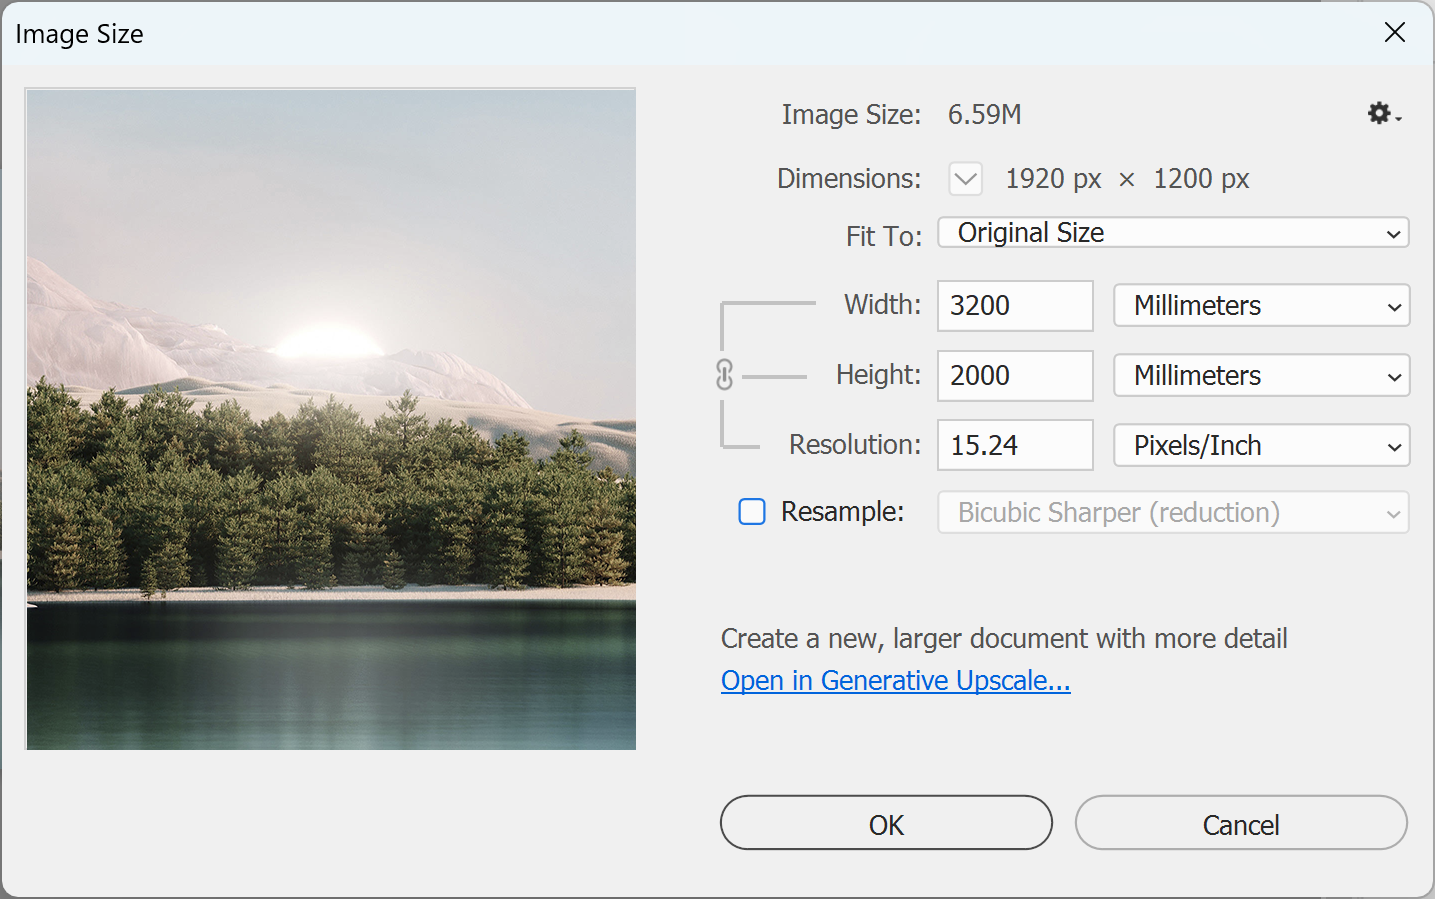
1. Check how large the image will actually print. In the main menu, go to Image > Image Size. Uncheck Resample, then set the Width or Height to your finished size in millimetres. The Resolution field now shows the ppi the image will print at. If it's 150 or more, you don't need to upscale.
Note: If you work at a proportional scale, multiply the resolution to match. At 10% scale, an image needs 1,500ppi in the file to print at 150ppi at full size.
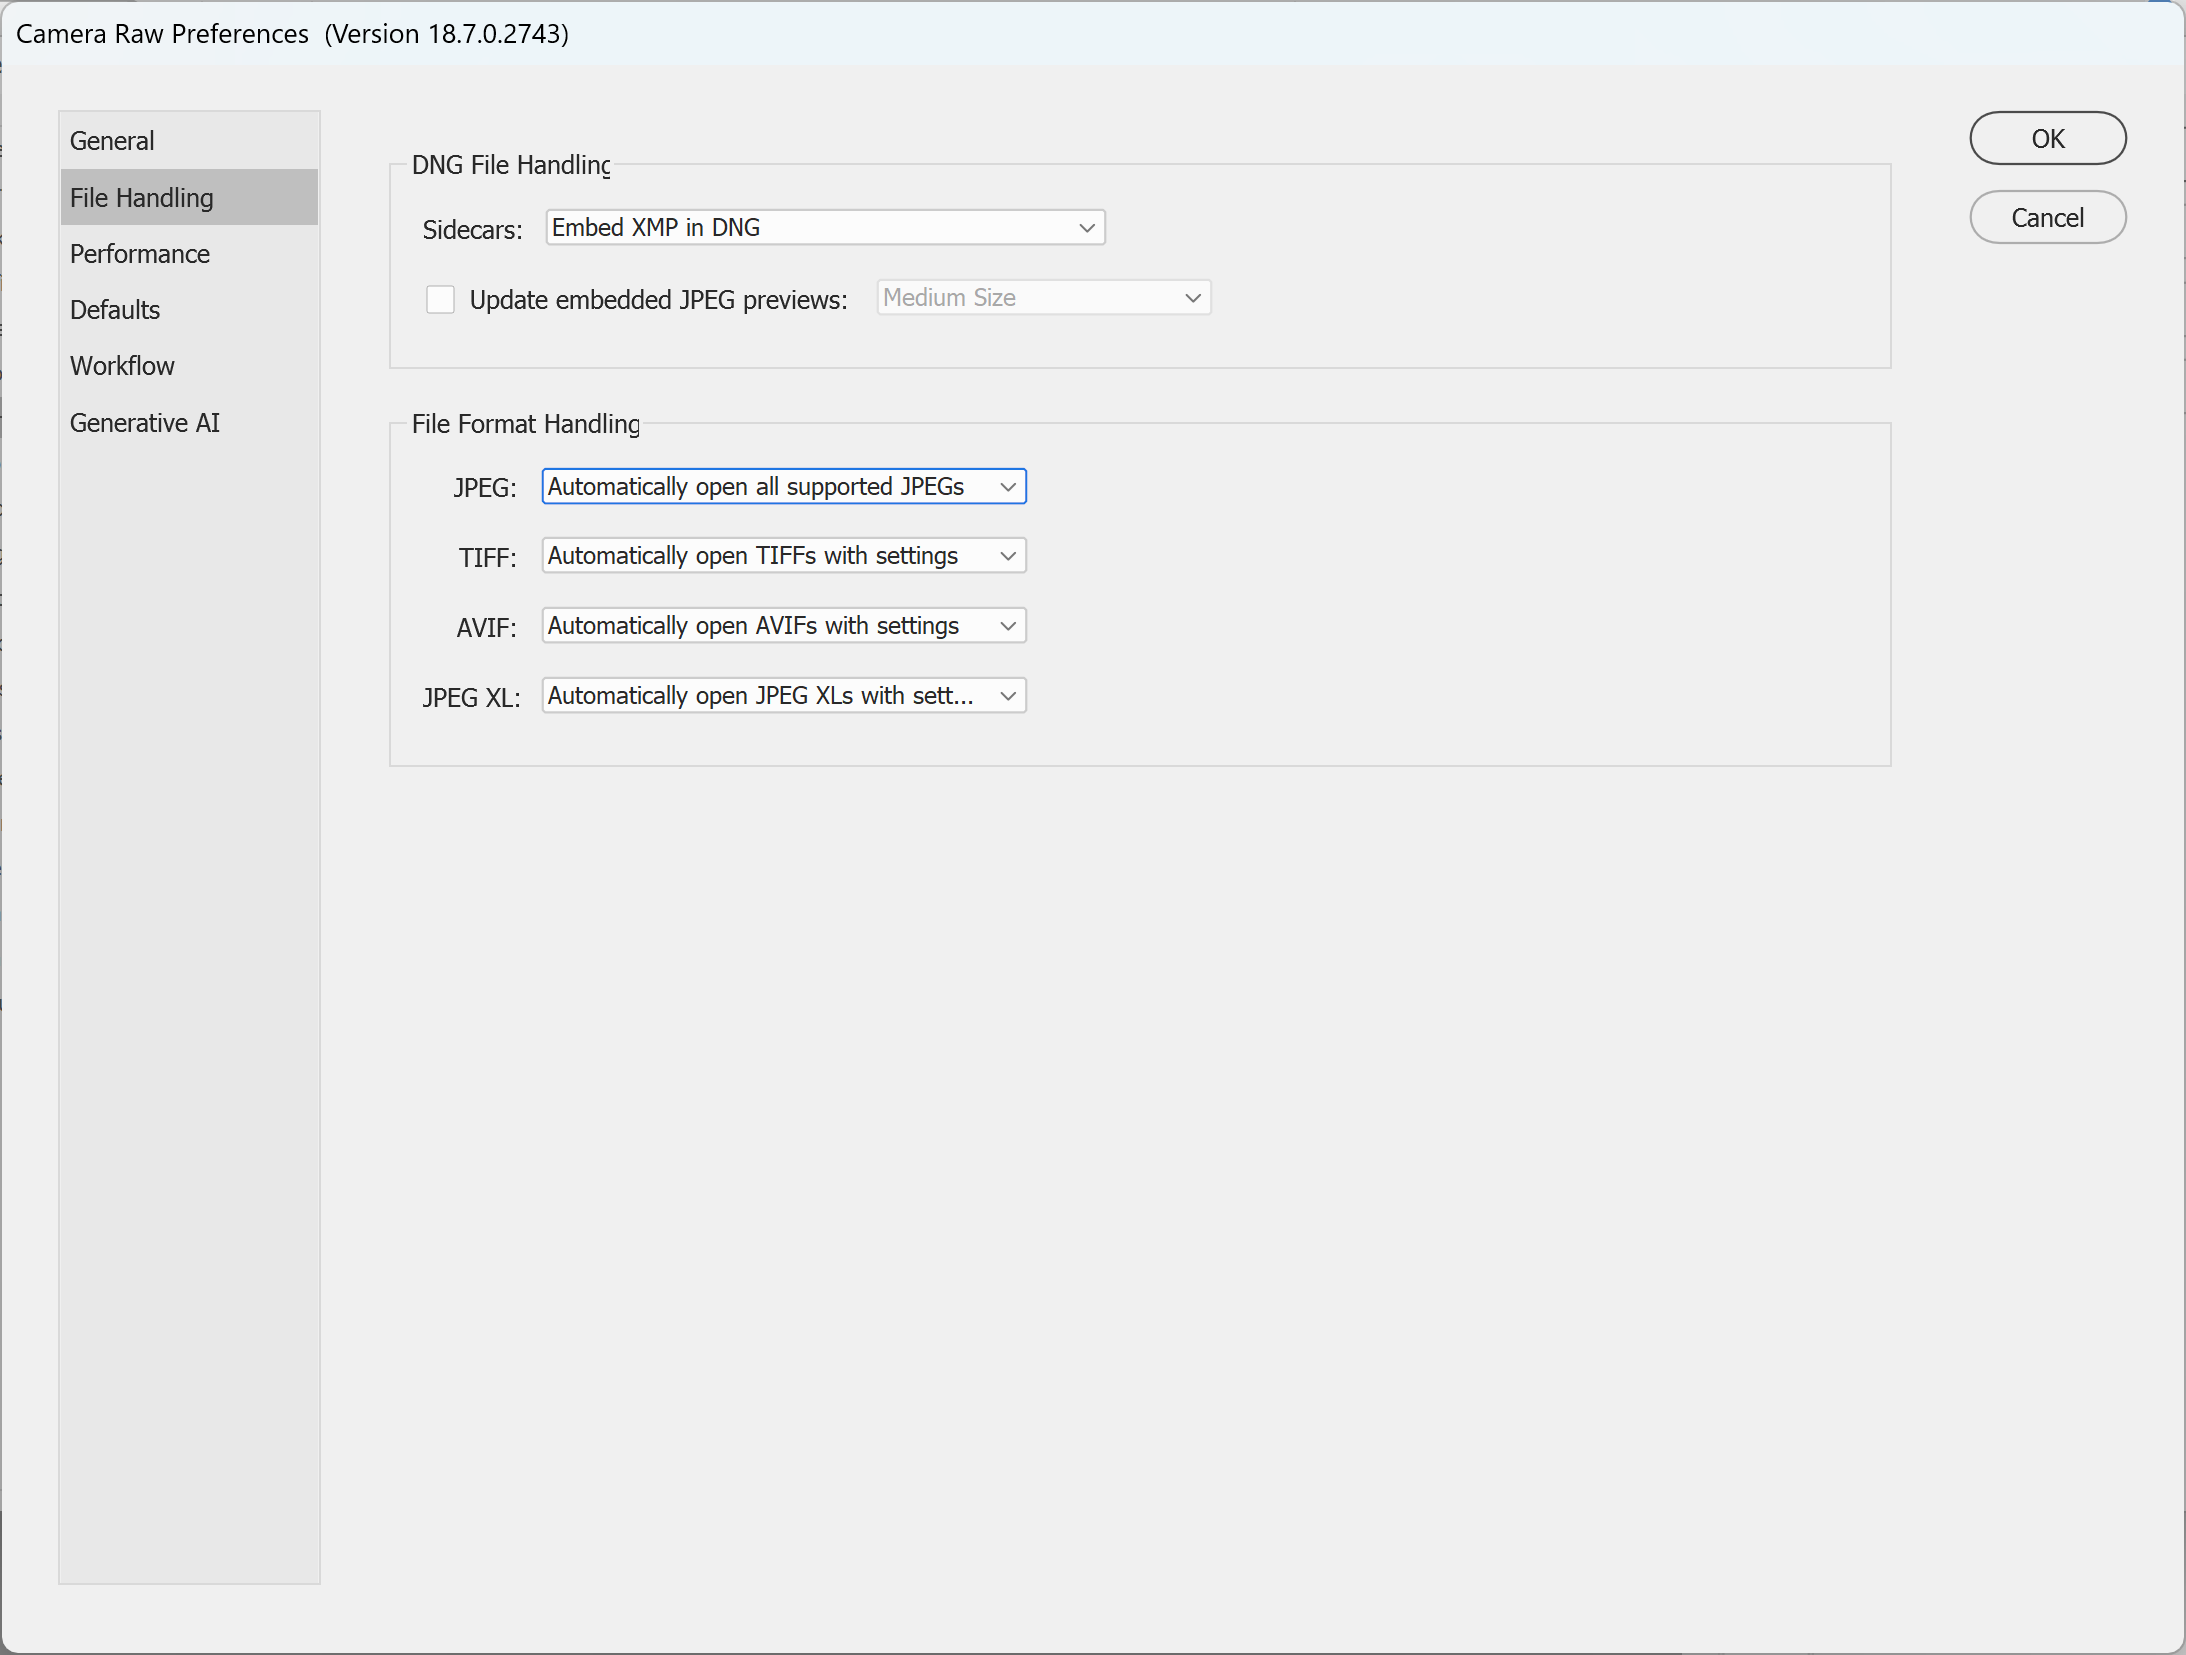
2. Set Camera Raw to open your JPEG or TIFF. In the main menu, go to Edit > Preferences > Camera Raw. In the File Handling tab, set JPEG (or TIFF) to Automatically open all supported JPEGs (or TIFFs) and click OK.
3. Open the image. In the main menu, go to File > Open. The image opens in Camera Raw.
Note: Super Resolution is not available from Filter > Camera Raw Filter, so open the file this way.
4. Open the Detail panel. In the panels on the right, click Detail to expand it.
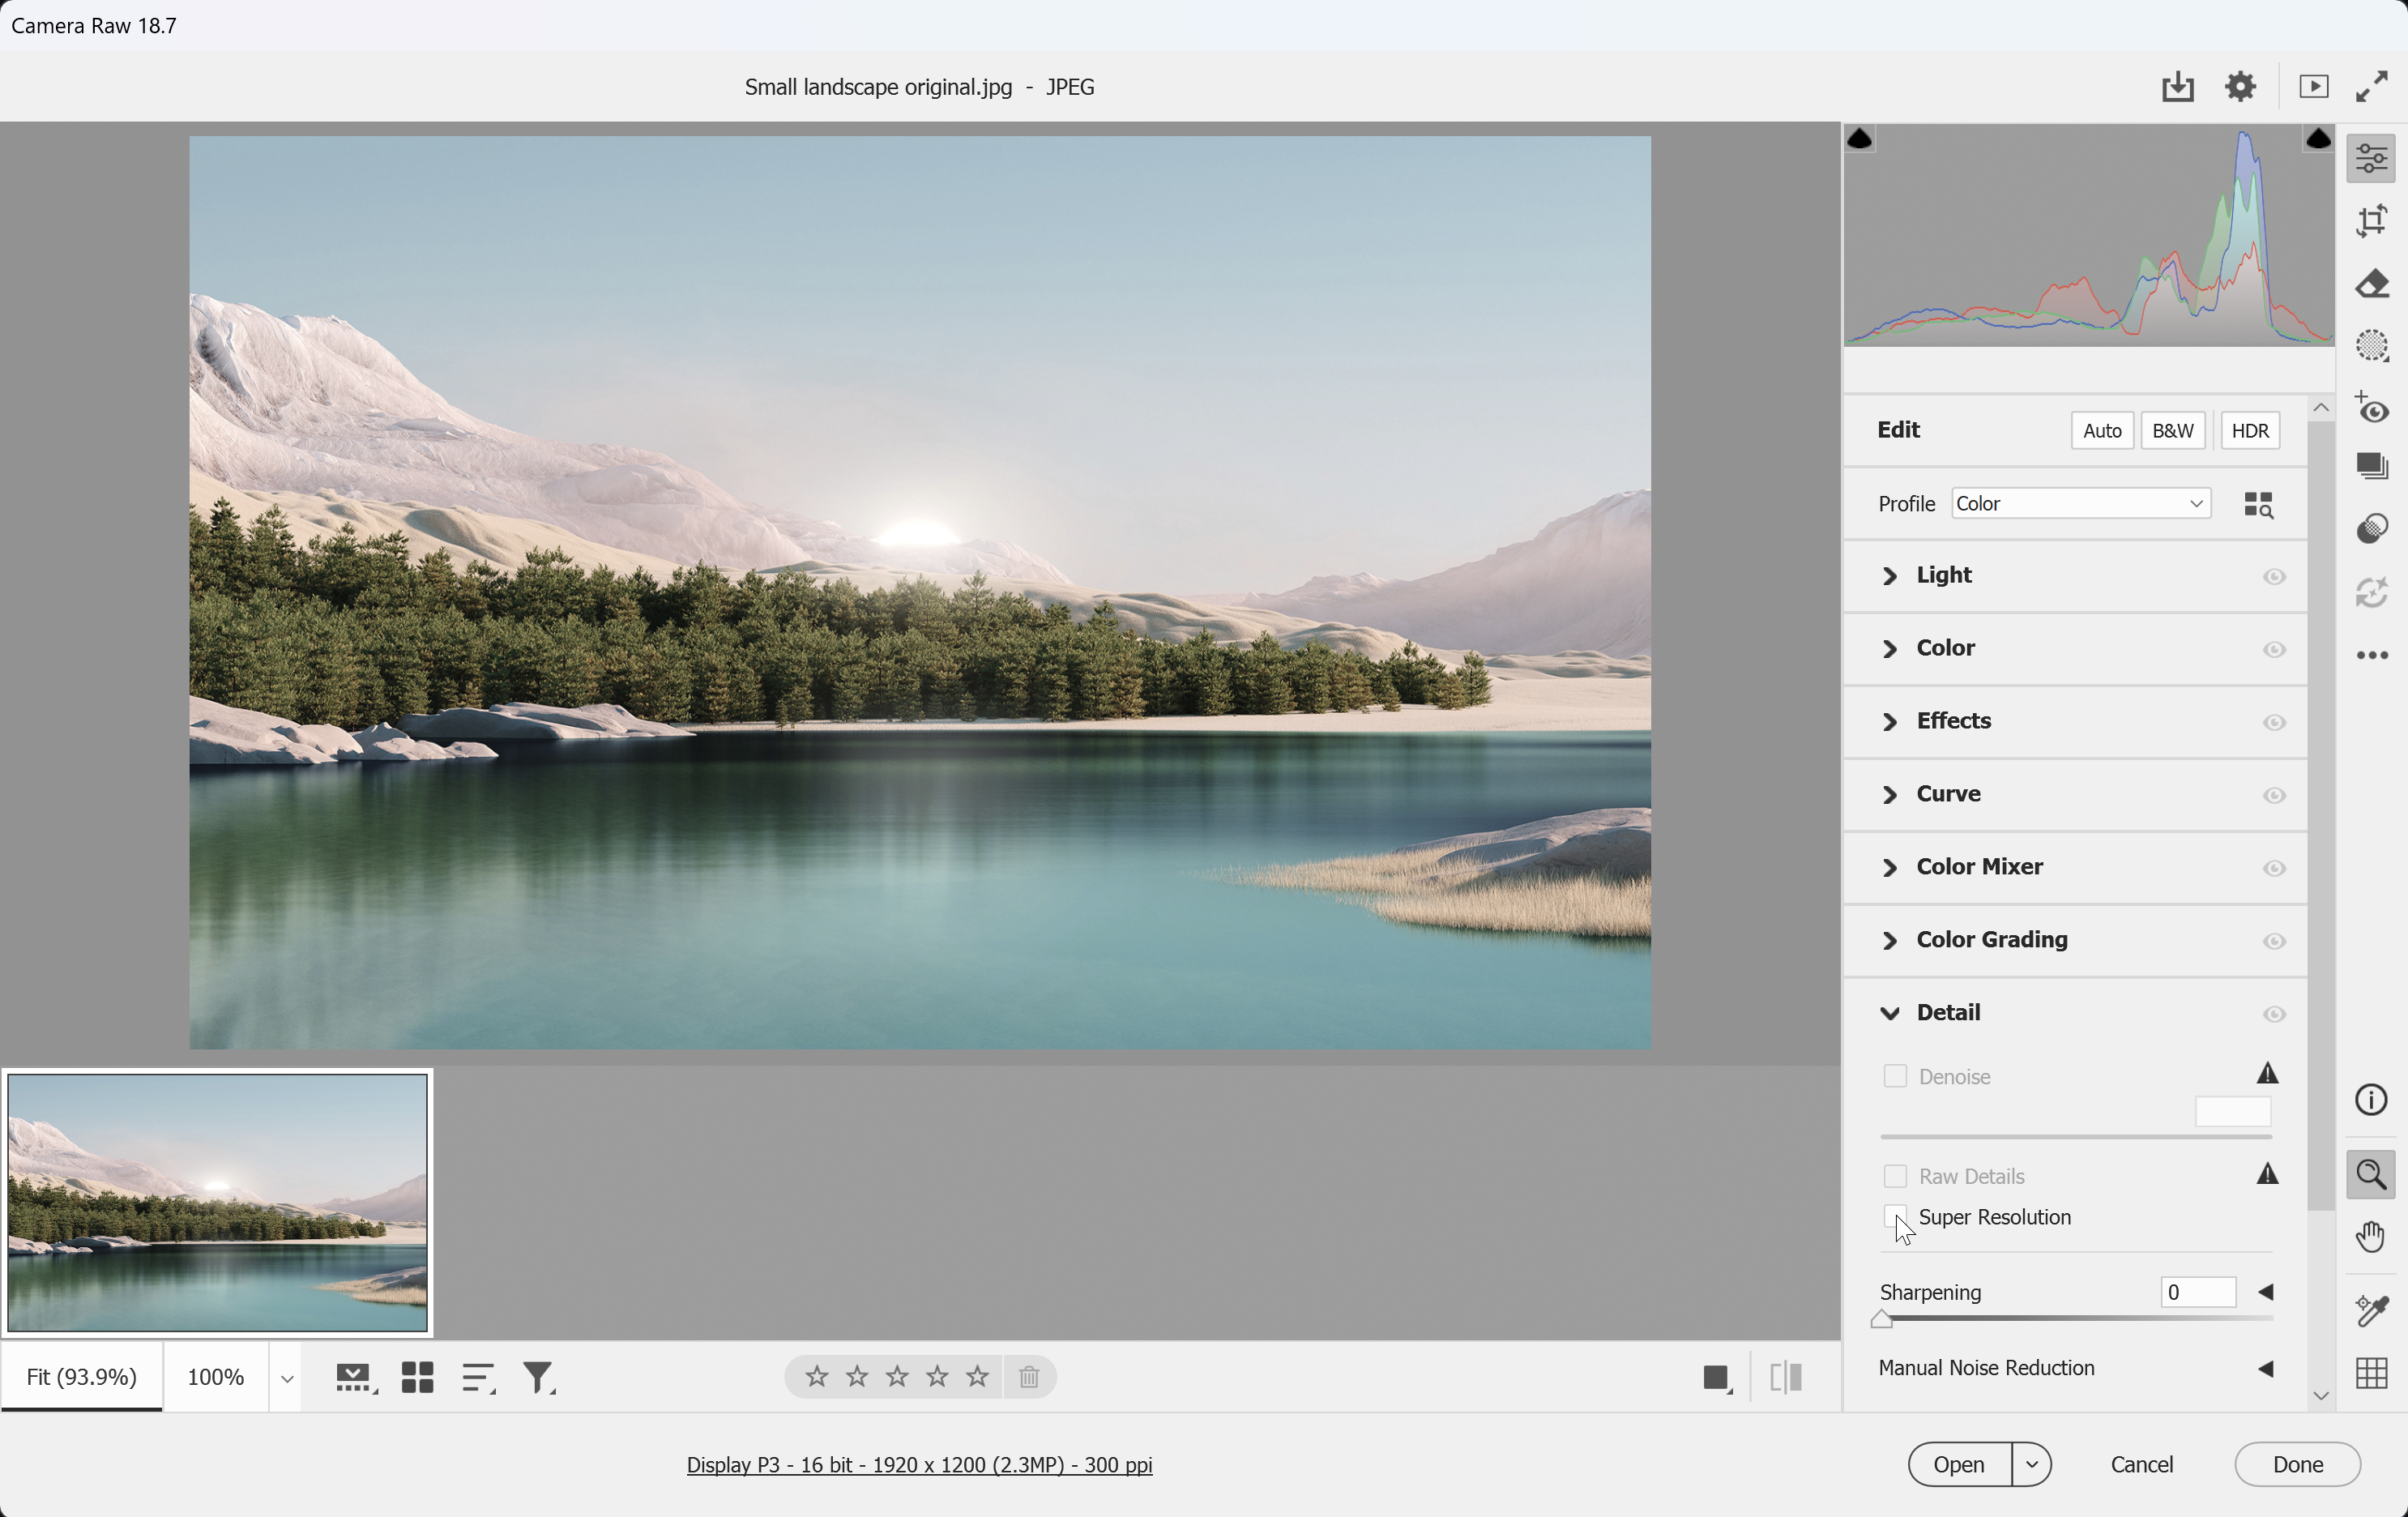
5. Double the width and height with Super Resolution. In the Detail panel, tick Super Resolution and wait a few seconds while it processes. The image size shown under the preview doubles: twice the width and twice the height of the original, which is four times the pixels.
Note: In older versions of Camera Raw, Super Resolution is under Enhance when you right-click the image in the filmstrip, and it saves a new DNG file instead. Restore your original JPEG or TIFF opening preference after finishing.
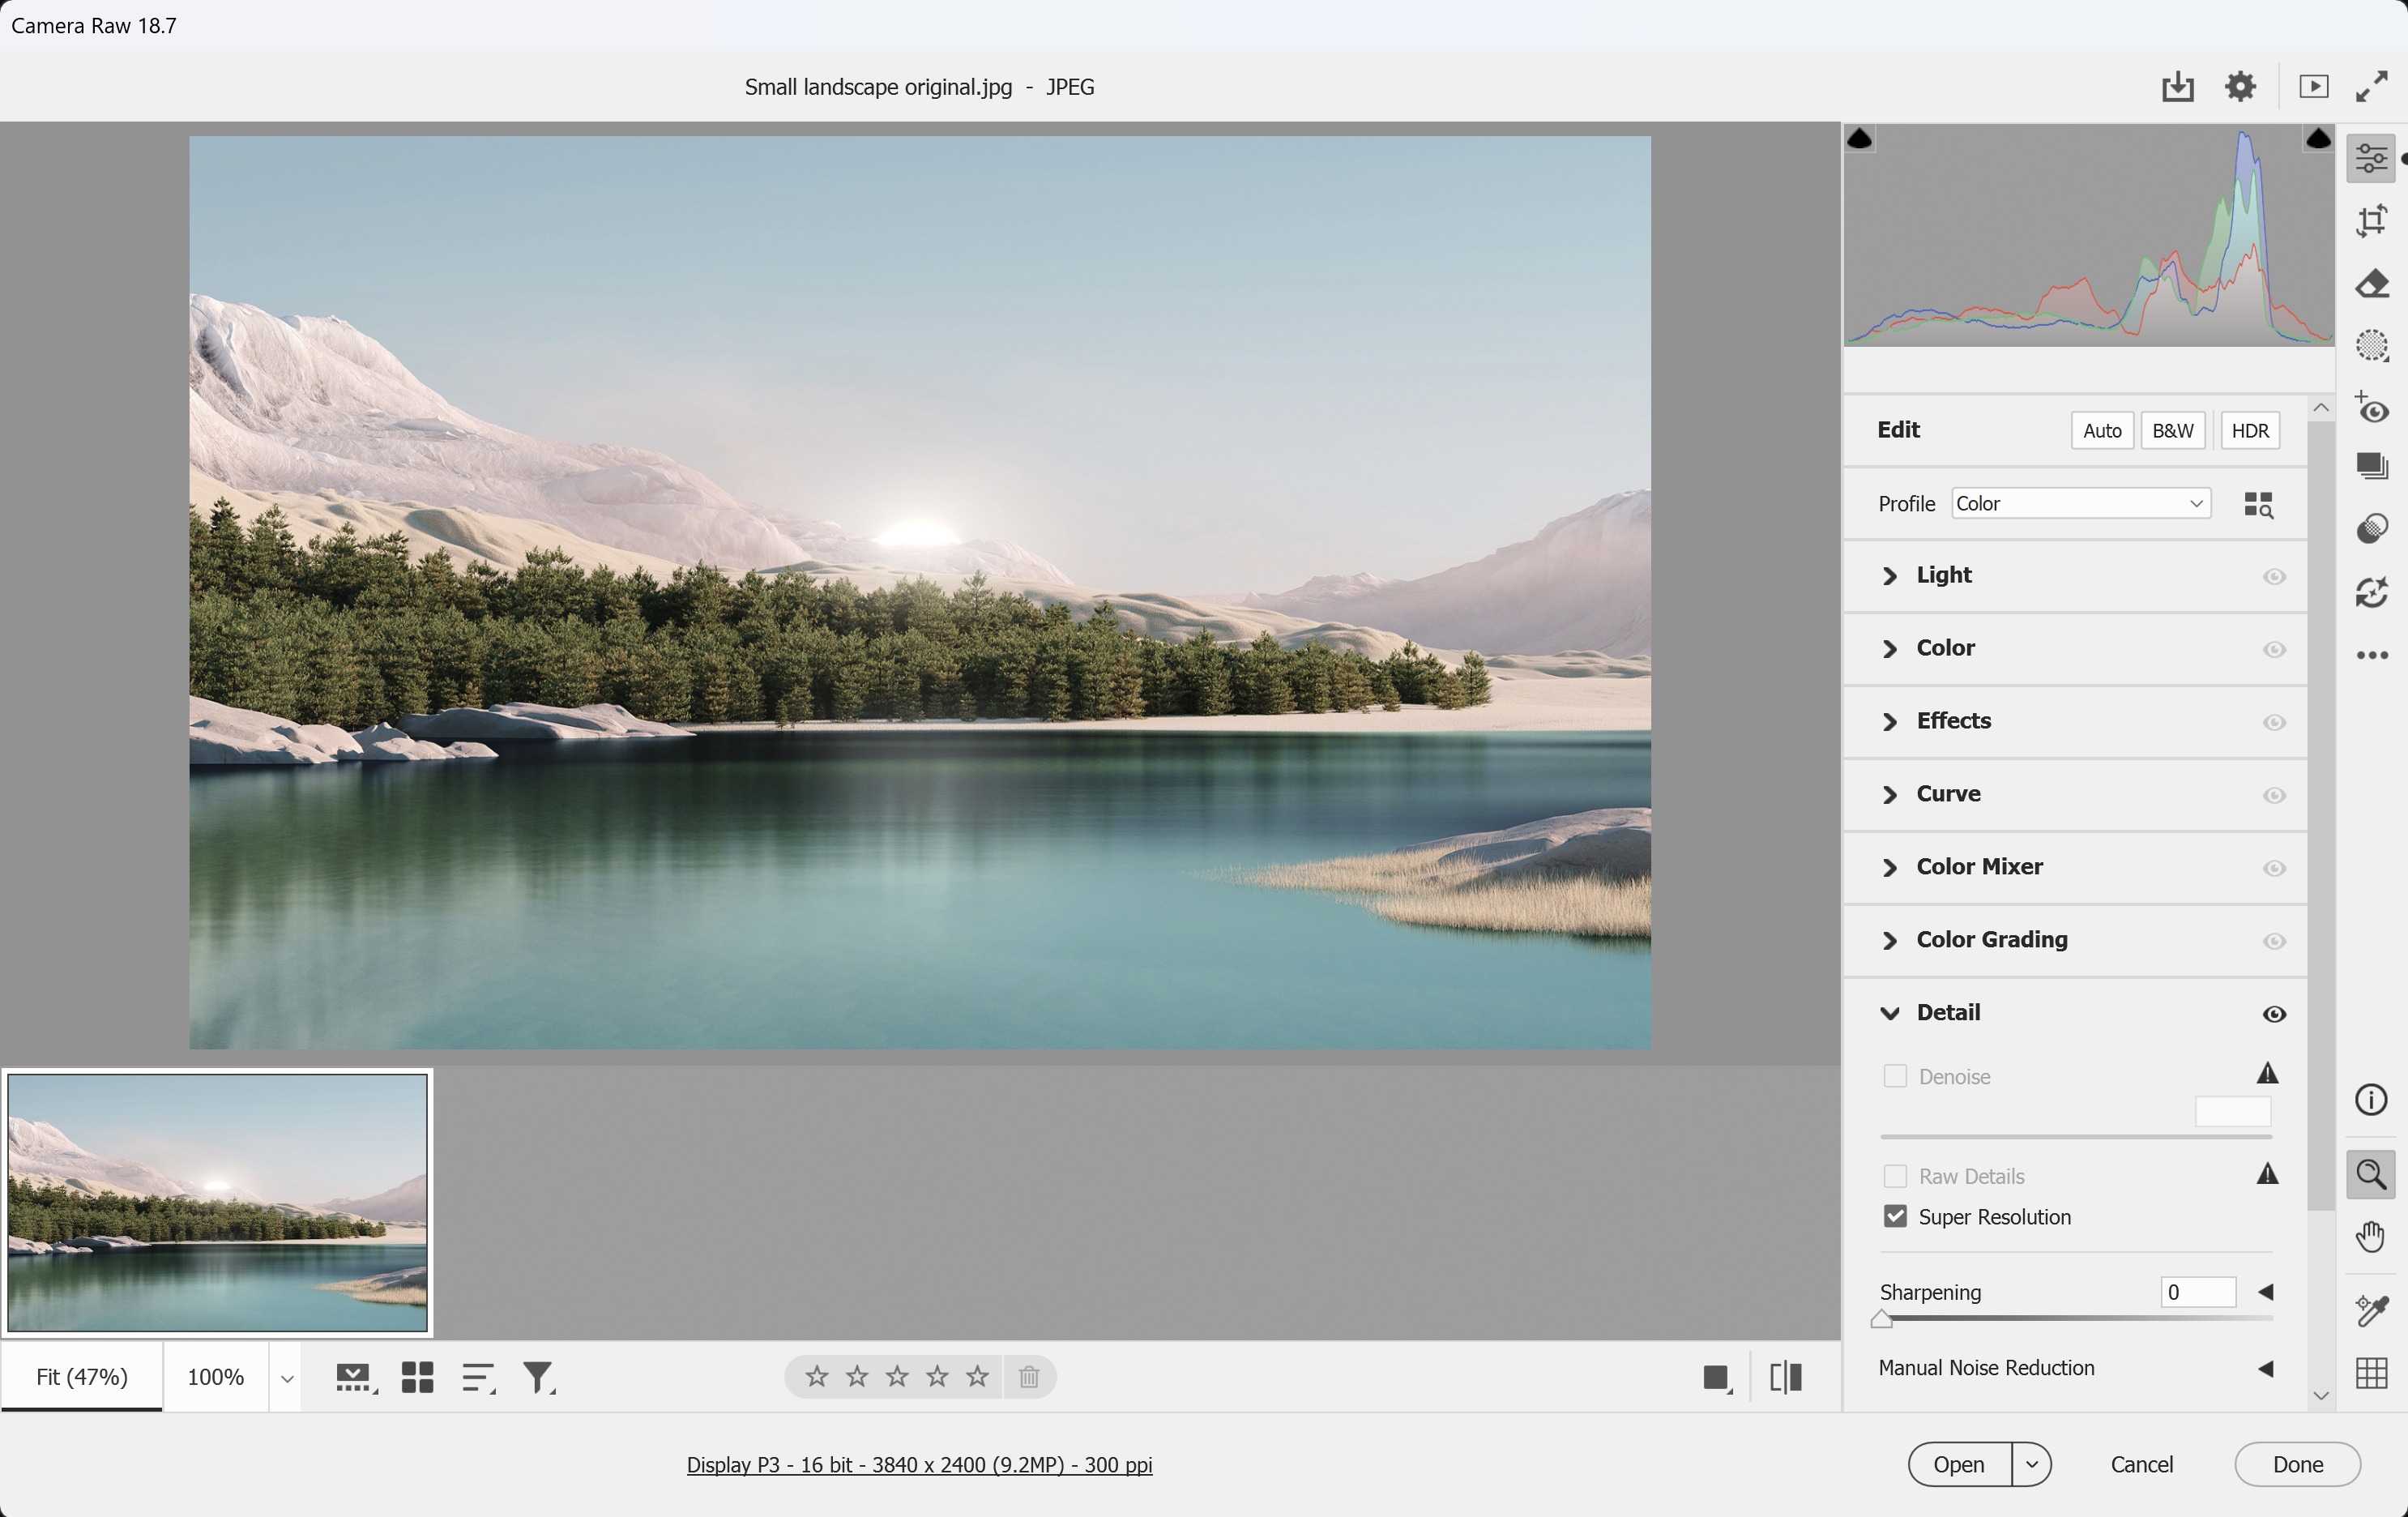
6. Open the enlarged image in Photoshop. Click Open. Then, in the main menu, go to Image > Image Size and check how large it prints now, as in step 1.
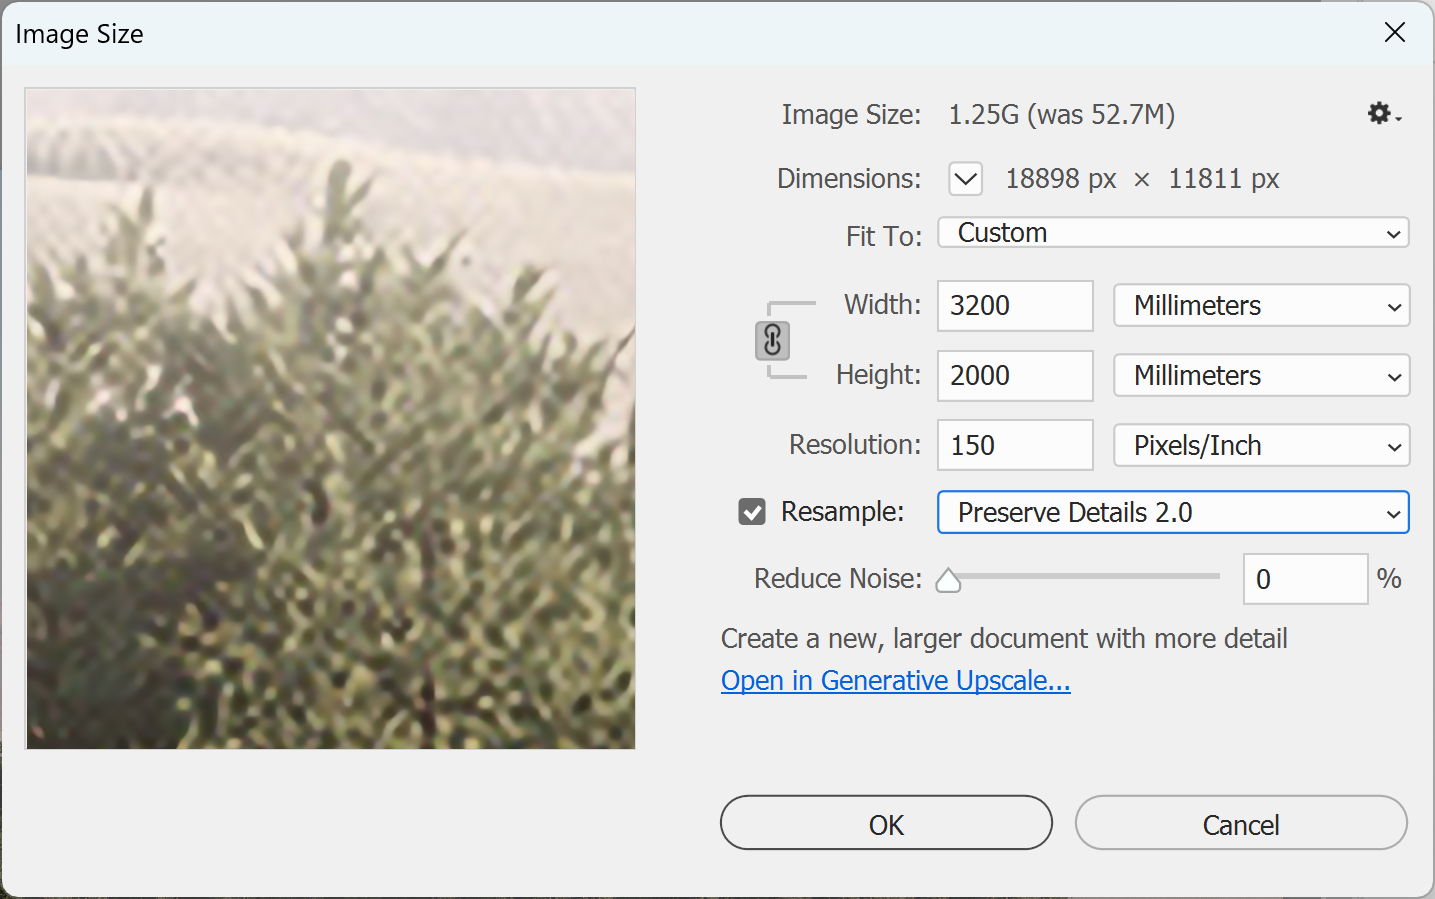
7. If it's still short of 150ppi, make one final size adjustment. In the Image Size dialog box, check Resample and choose Preserve Details 2.0 from the Resample menu. Set the Width or Height to your finished size and the Resolution to 150. Adjust the Reduce Noise slider while you watch the preview, then click OK.
IMPORTANT: Super Resolution adds pixels. Avoid repeated resizing; 150ppi alone doesn't guarantee sharpness.
8. Zoom in to 100% and check the edges and fine detail. Upscaled images tend to soften, so look closely at faces, text and straight lines. If they break up, the image needs a bigger original or a smaller place in your layout.
9. Finally, place the image in your artwork and check the file against our artwork specifications before you send it. A printed A3 proof ($45 ex-GST) is worth ordering for an upscaled photo, and our artwork preflighting service ($45 ex-GST per job) checks the whole file before anything prints. Then email it to sales@displays2go.com.au, as set out on sending artwork, and you're done!
Need some help?
We're here for you
If you're needing some advice or just a helping hand, please get in touch with our team, by clicking this button. Complete the enquiry form and one of our specialists will call you back as soon as we can.