

YOUR CART IS CURRENTLY EMPTY
How to reduce Illustrator file size?
Why is my Illustrator file so big?
Large format artwork is big to begin with, and Illustrator files can grow far beyond what the artwork needs. Most of the extra weight is stored inside the file where you can't see it on the artboard: photos embedded at full size, and a PDF copy of the whole document that Illustrator saves inside the .ai file.
Wide-format files can be slow to upload, and if a file is too big to email it can bounce back before it reaches us.
Do I need to send an Illustrator file at all?
A high-resolution PDF is our preferred format, because it's the least likely to cause a problem. We do accept Illustrator files, but a $75 conversion fee (ex GST) applies to print-ready artwork that isn't a PDF. If you're sending a PDF, follow our guide How to make a PDF file smaller? for the export settings.
Use the steps below when you need to send the .ai file itself, or when your working file has become too big to handle.
Steps to reduce your Illustrator file size
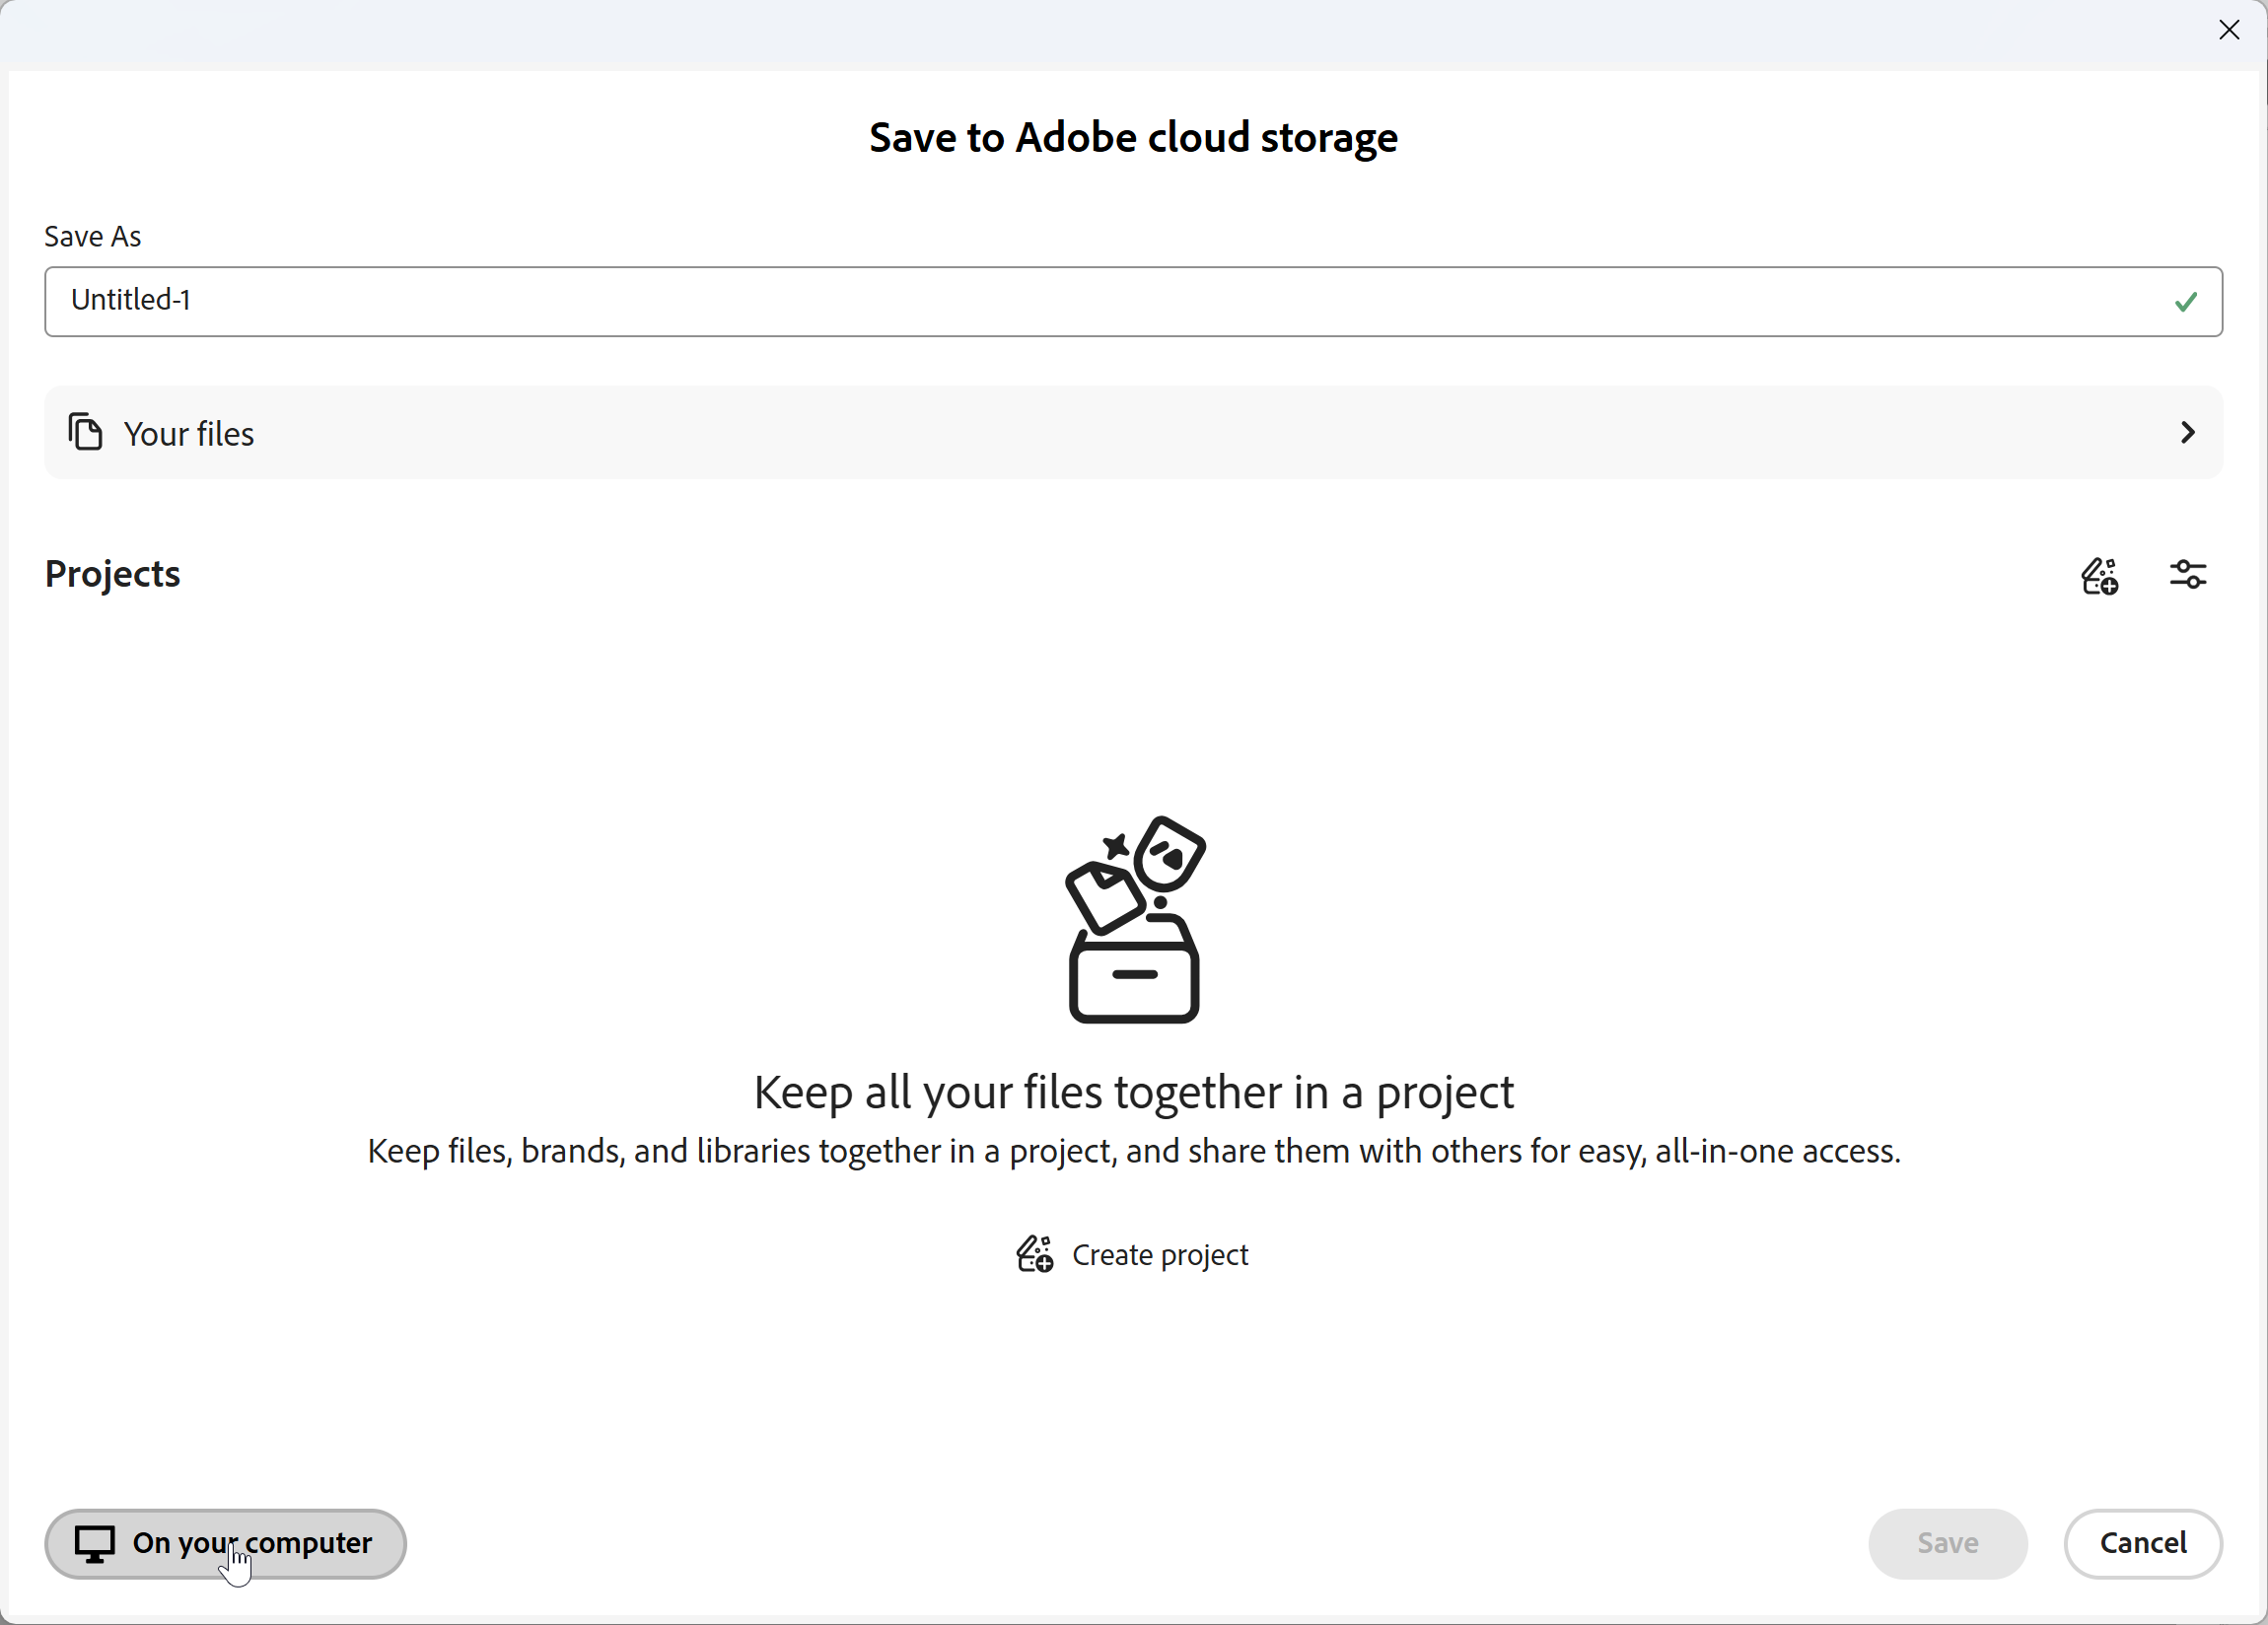
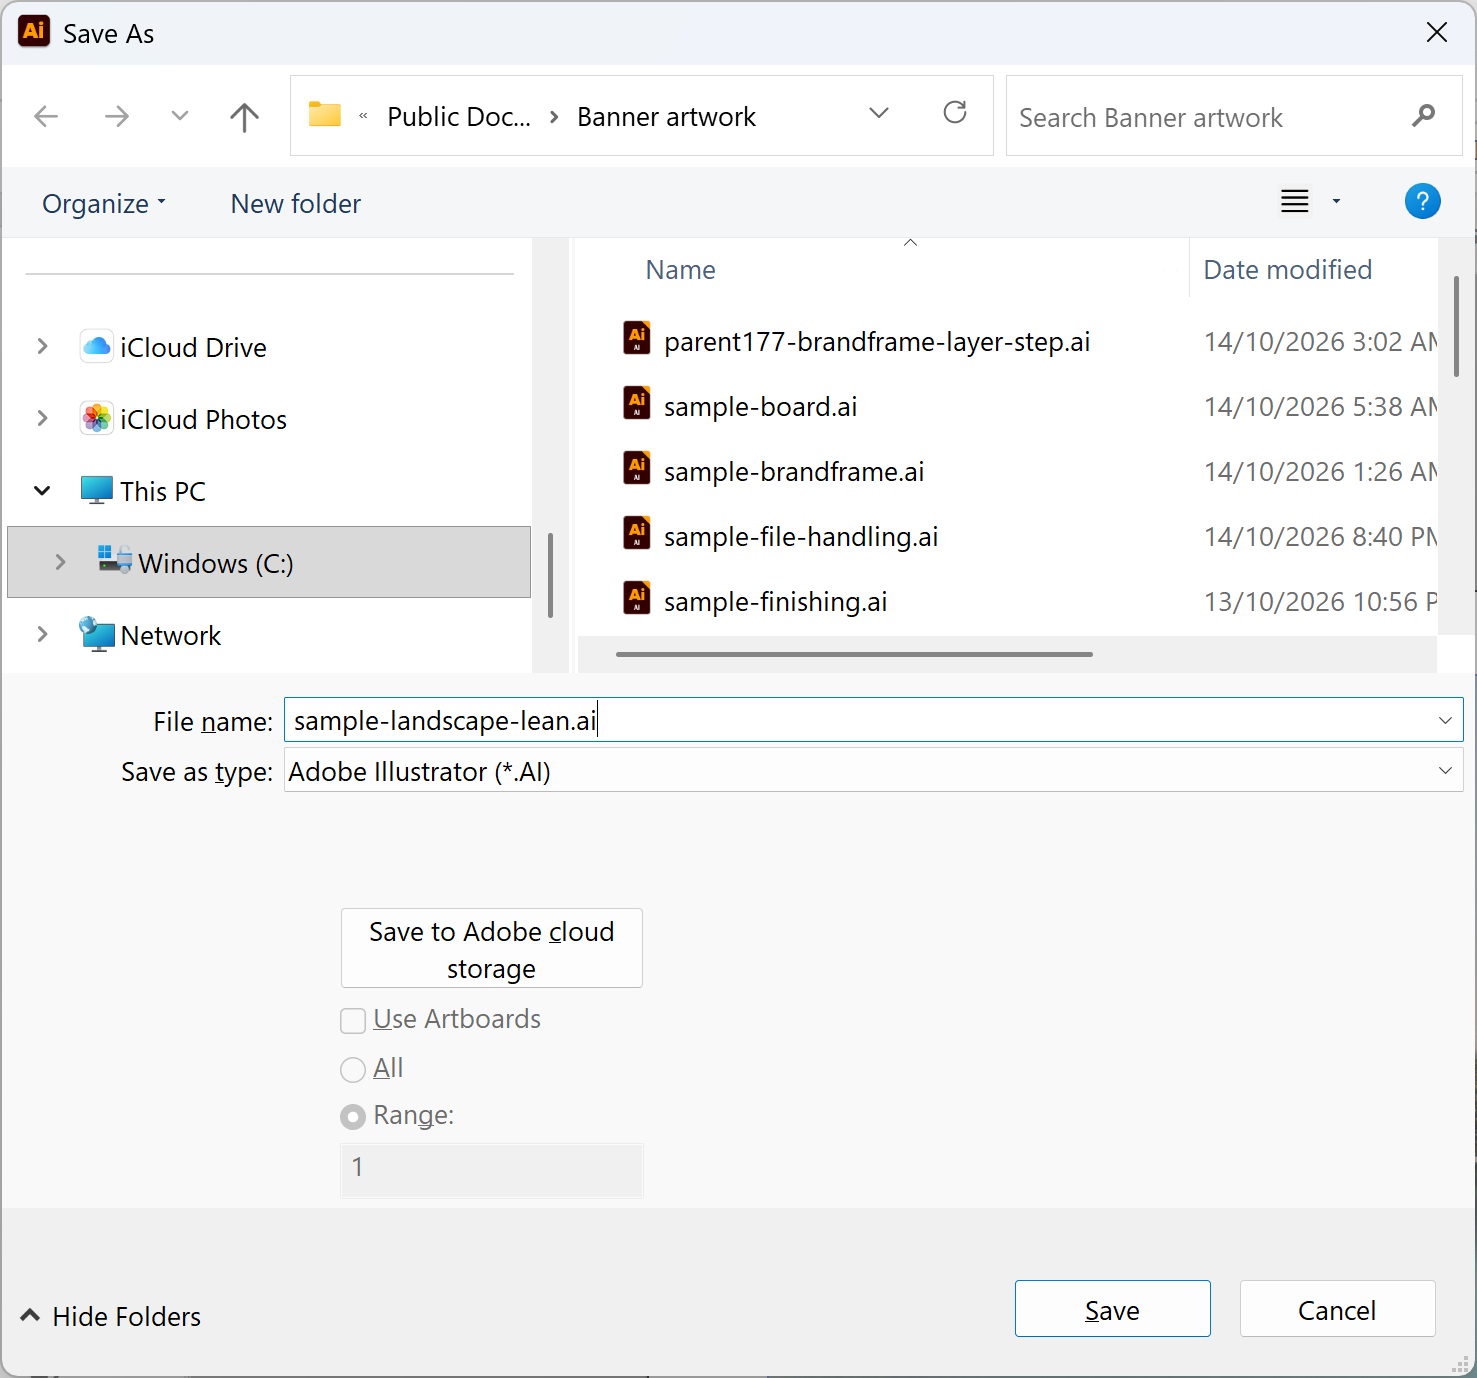
1. Work on a copy, so your original stays untouched. In the main menu, go to File > Save As and give the file a new name.
Note: If the Save to Adobe cloud storage dialog box appears, select On your computer.
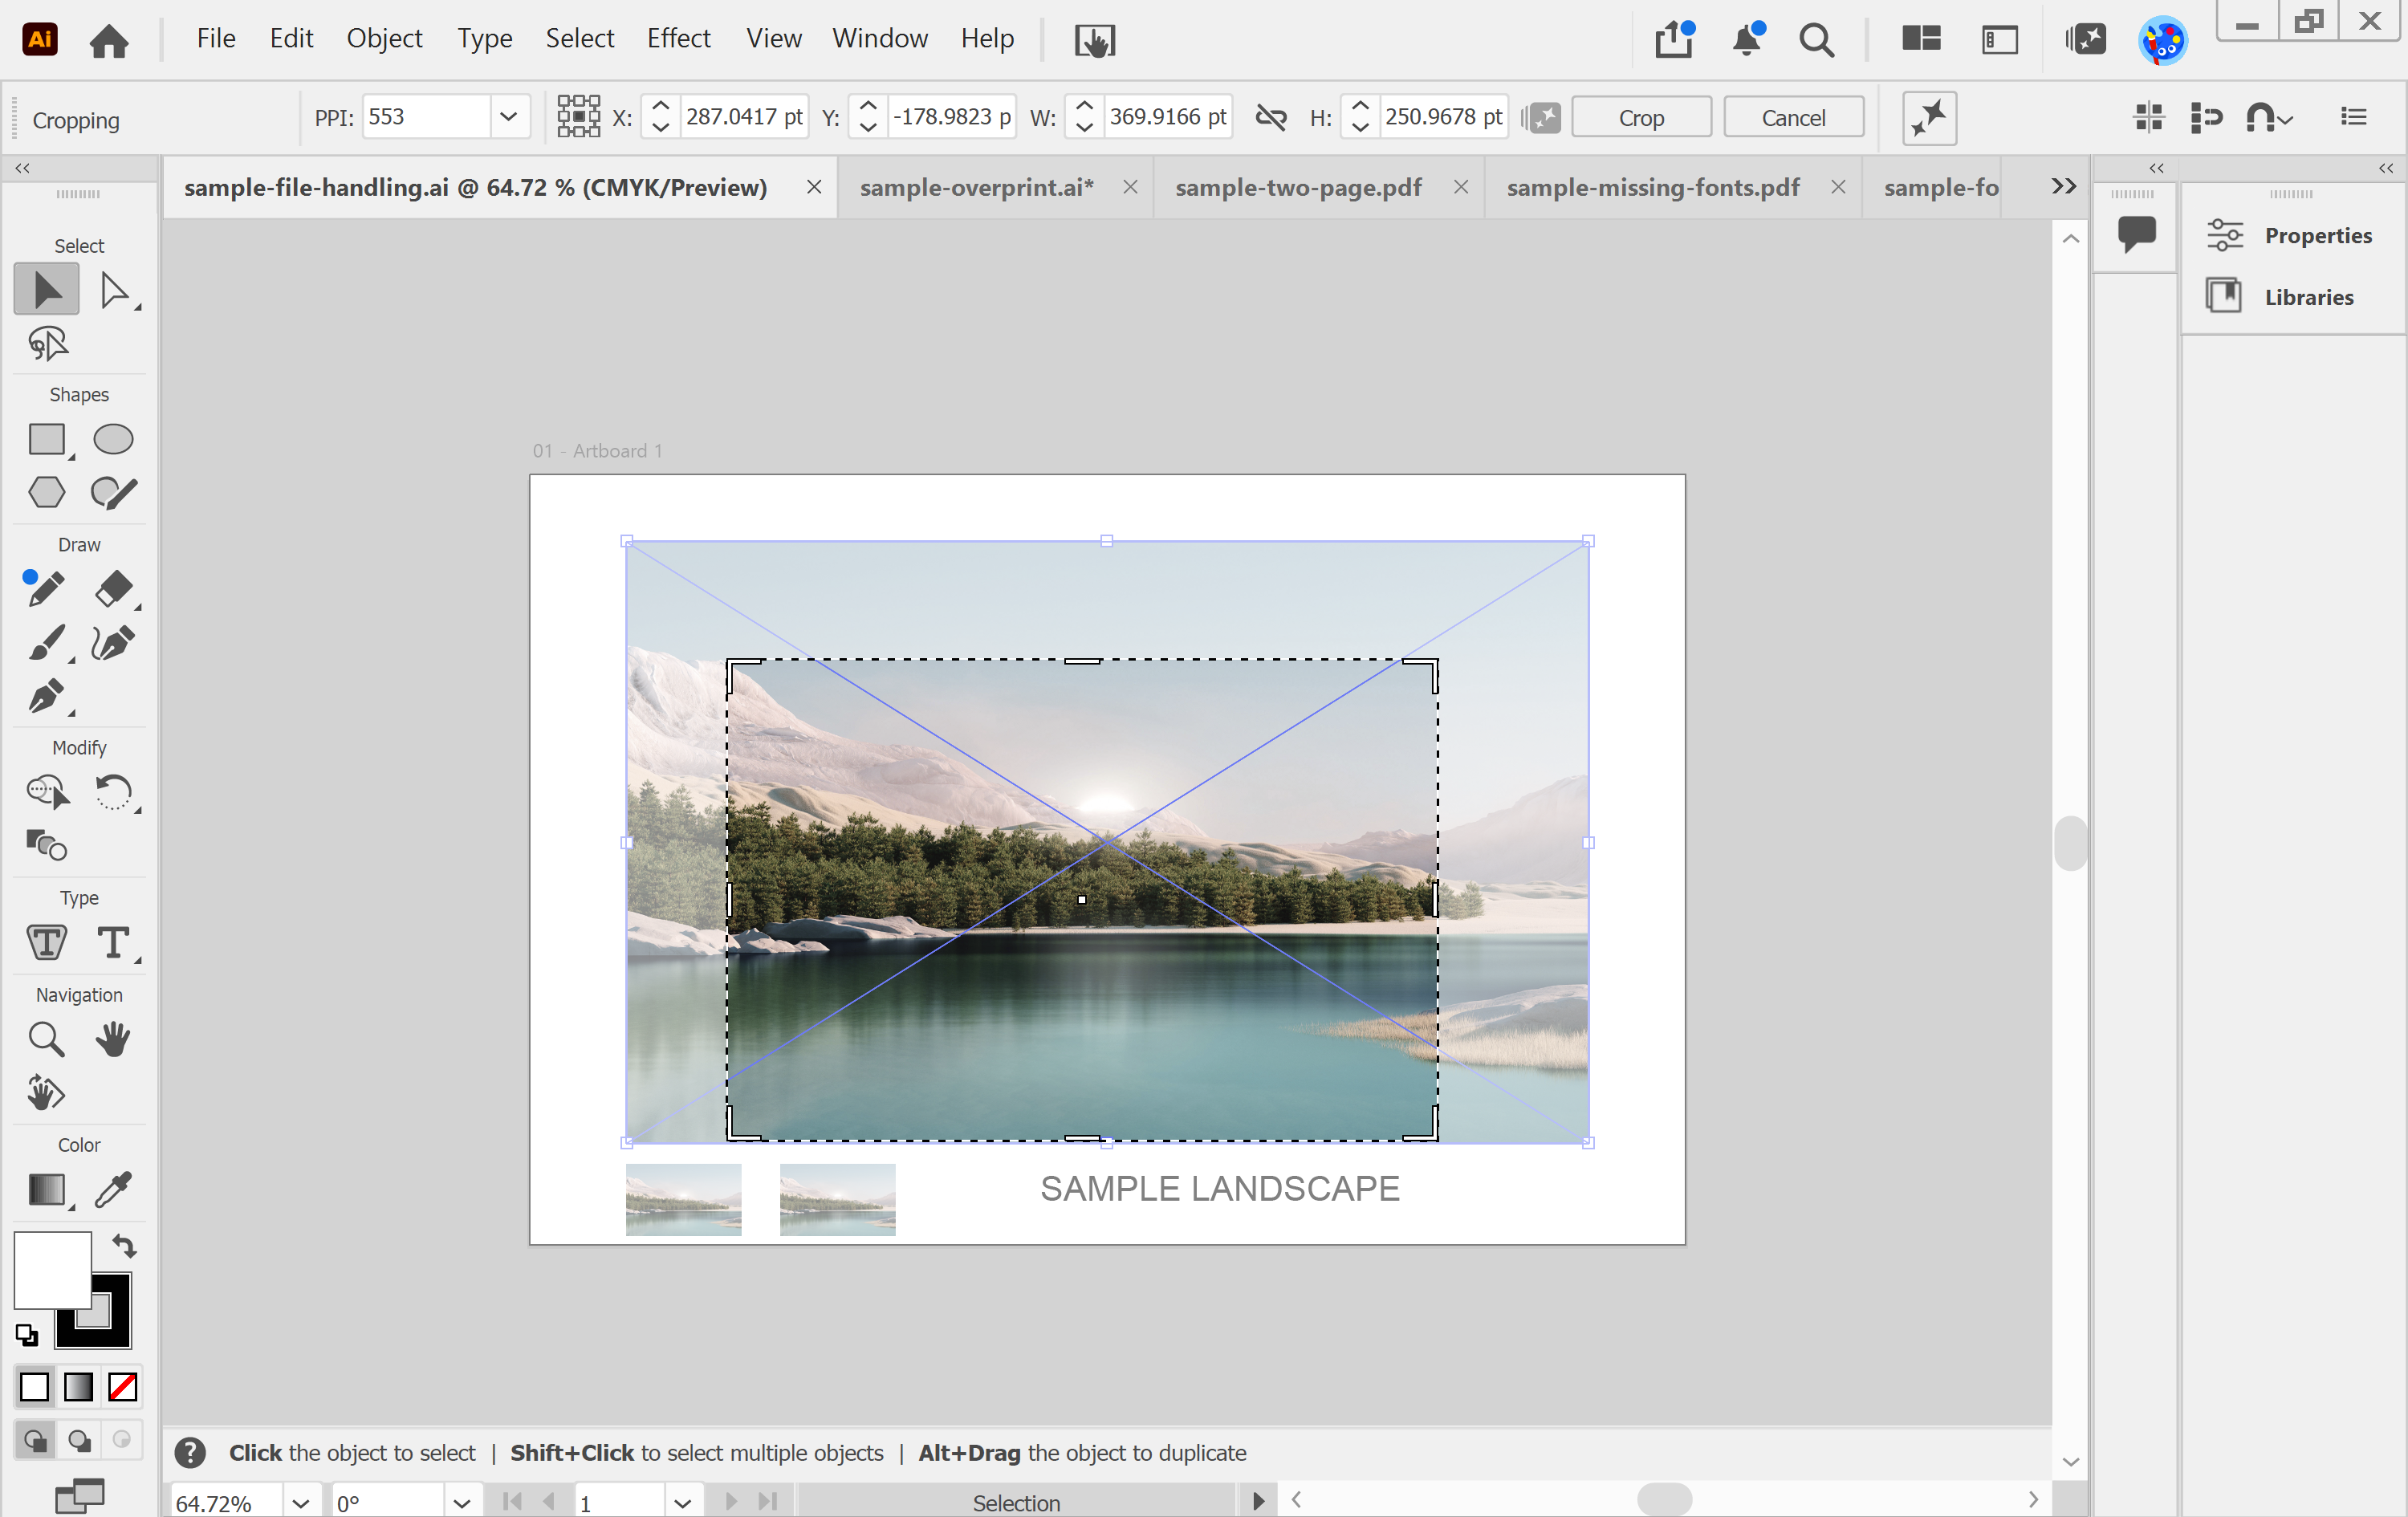
2. Crop photos down to the part that shows. Select the image with the Selection tool, then in the main menu go to Object > Crop Image. Drag the corner and edge handles to the area you need, then click Crop in the Control panel (or Apply in the Properties panel).
If an image has far more resolution than it needs, you can also lower it in the PPI field while cropping. Illustrator can only reduce resolution here, so for best results keep at least 150ppi at 100% of finished size (75ppi is the lowest we can accept). If you work at a smaller scale, multiply it up: at 10% scale, an image needs 1,500ppi for 150ppi at full size.
IMPORTANT: The cropped part of the image is discarded and can't be recovered, and a linked image becomes embedded once you crop it.
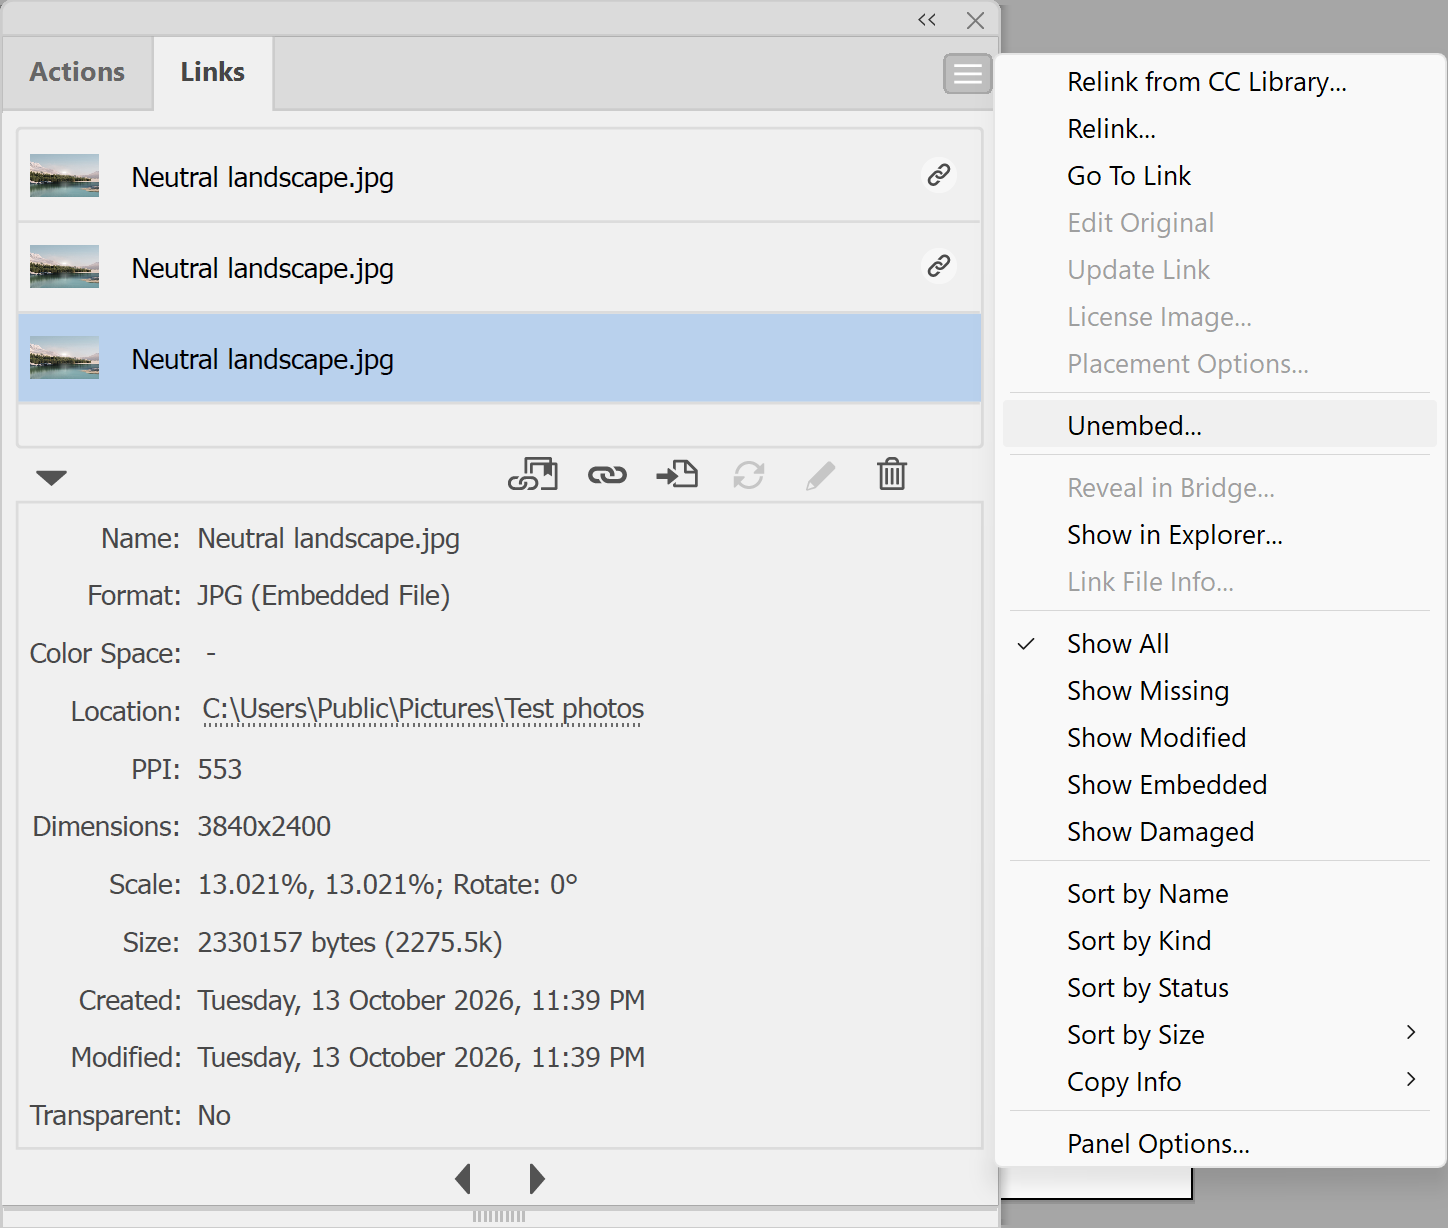
3. Check which images are embedded. In the main menu, go to Window > Links. Embedded files increase the size of your Illustrator document, because the artwork is stored inside it.
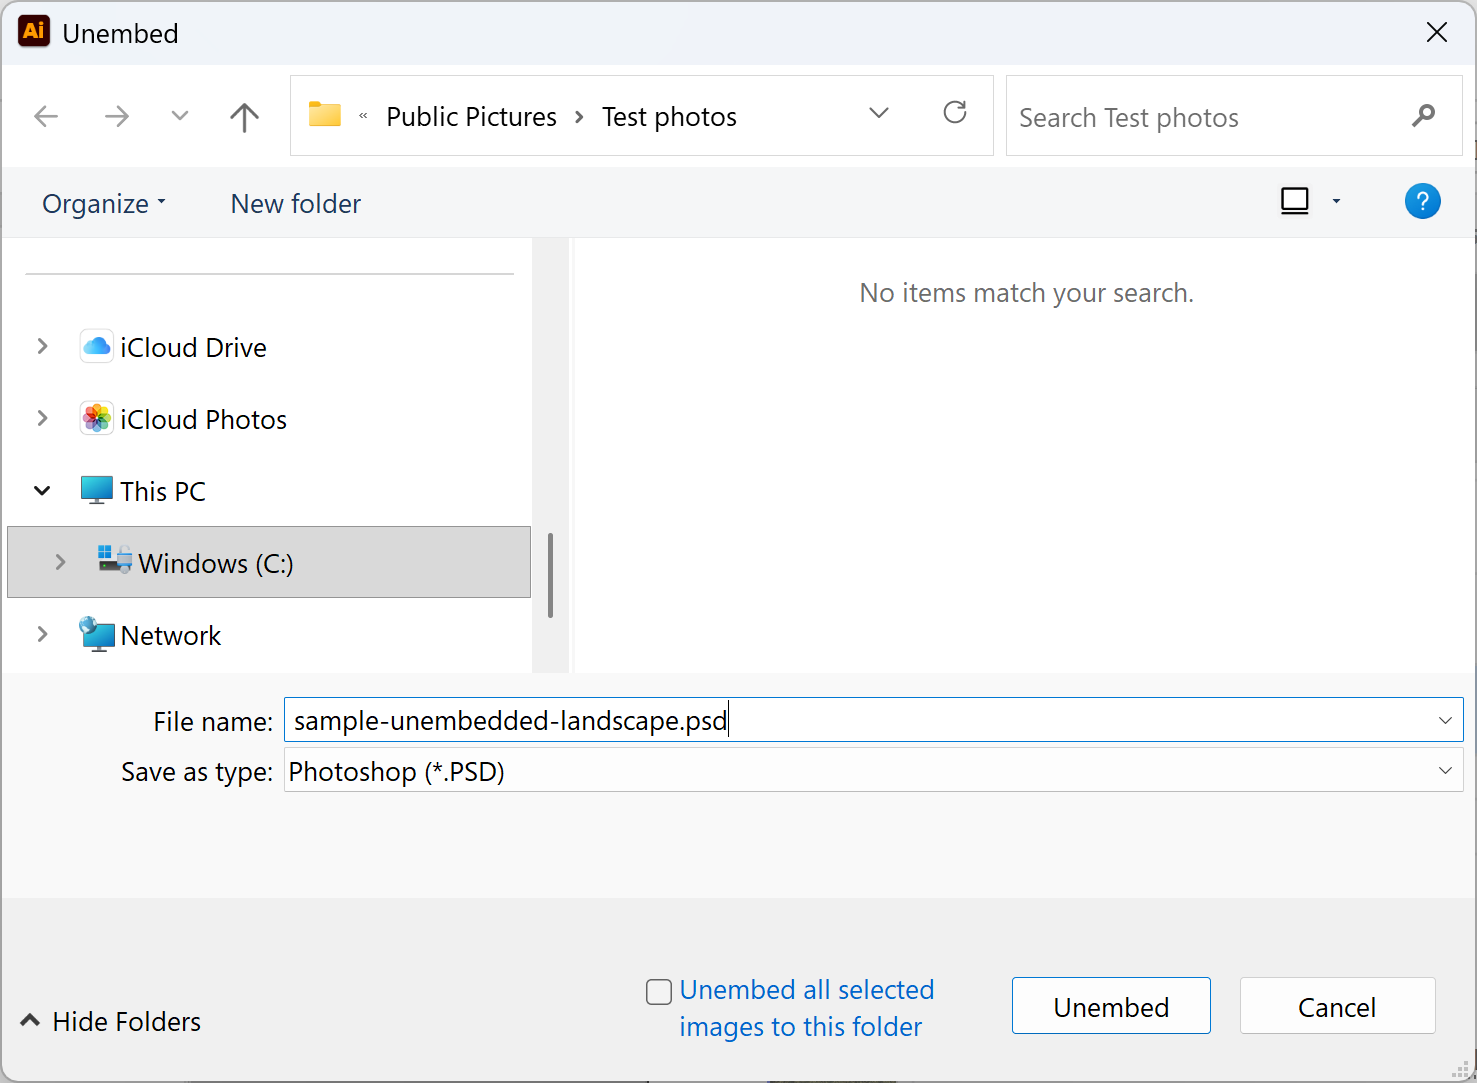
To take an image out of the file, select it in the Links panel, then choose Unembed from the Links panel menu. Choose a name and location and click Unembed. Illustrator saves the image as a separate PSD or TIFF file and links to it.
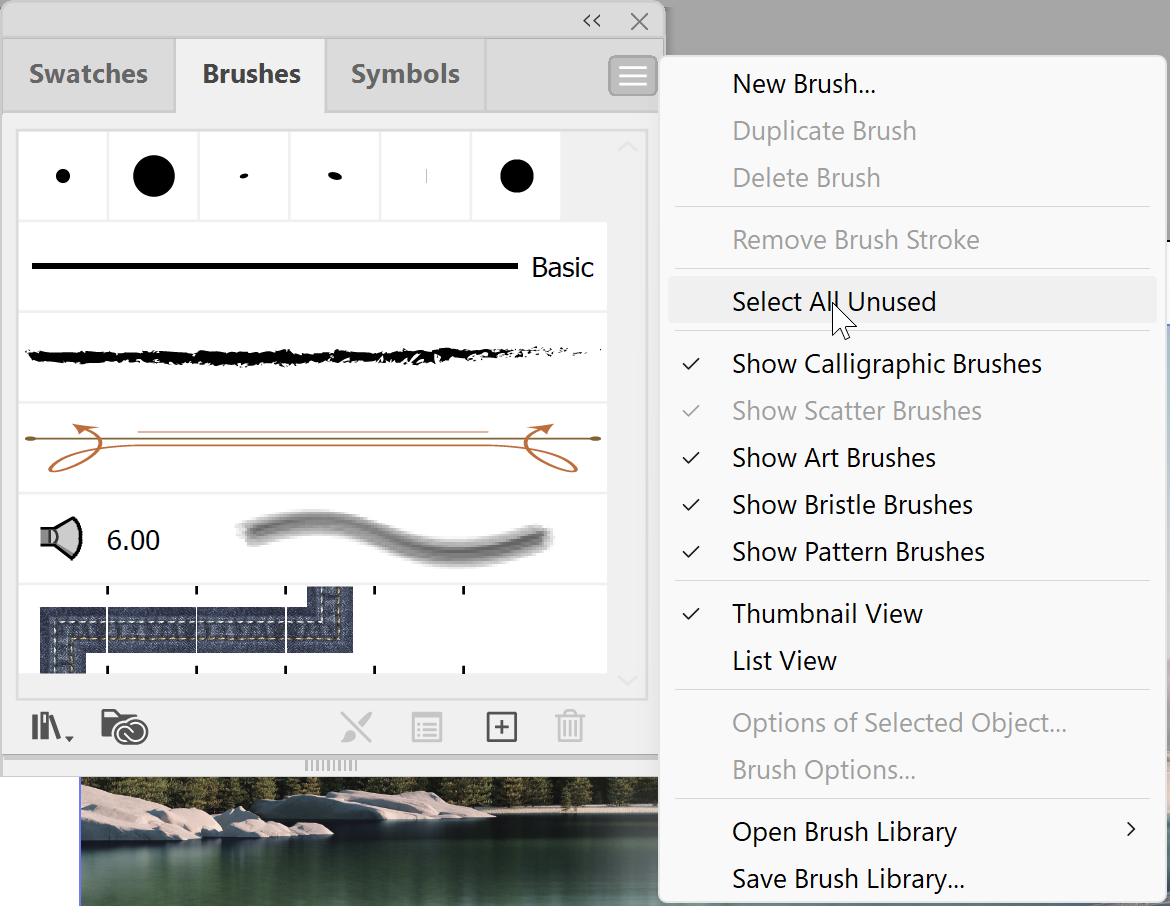
4. Optional: tidy up leftovers from templates. Adobe suggests removing unnecessary brushes, symbols and graphic styles from templates to keep new documents smaller. In the main menu, go to Window > Brushes. From the Brushes panel menu choose Select All Unused, then choose Delete Brush. Do the same in Window > Symbols (Delete Symbol) and Window > Graphic Styles (Delete Graphic Style).
5. Save a leaner .ai file. In the main menu, go to File > Save As, choose Adobe Illustrator (*.AI) as the format and click Save.
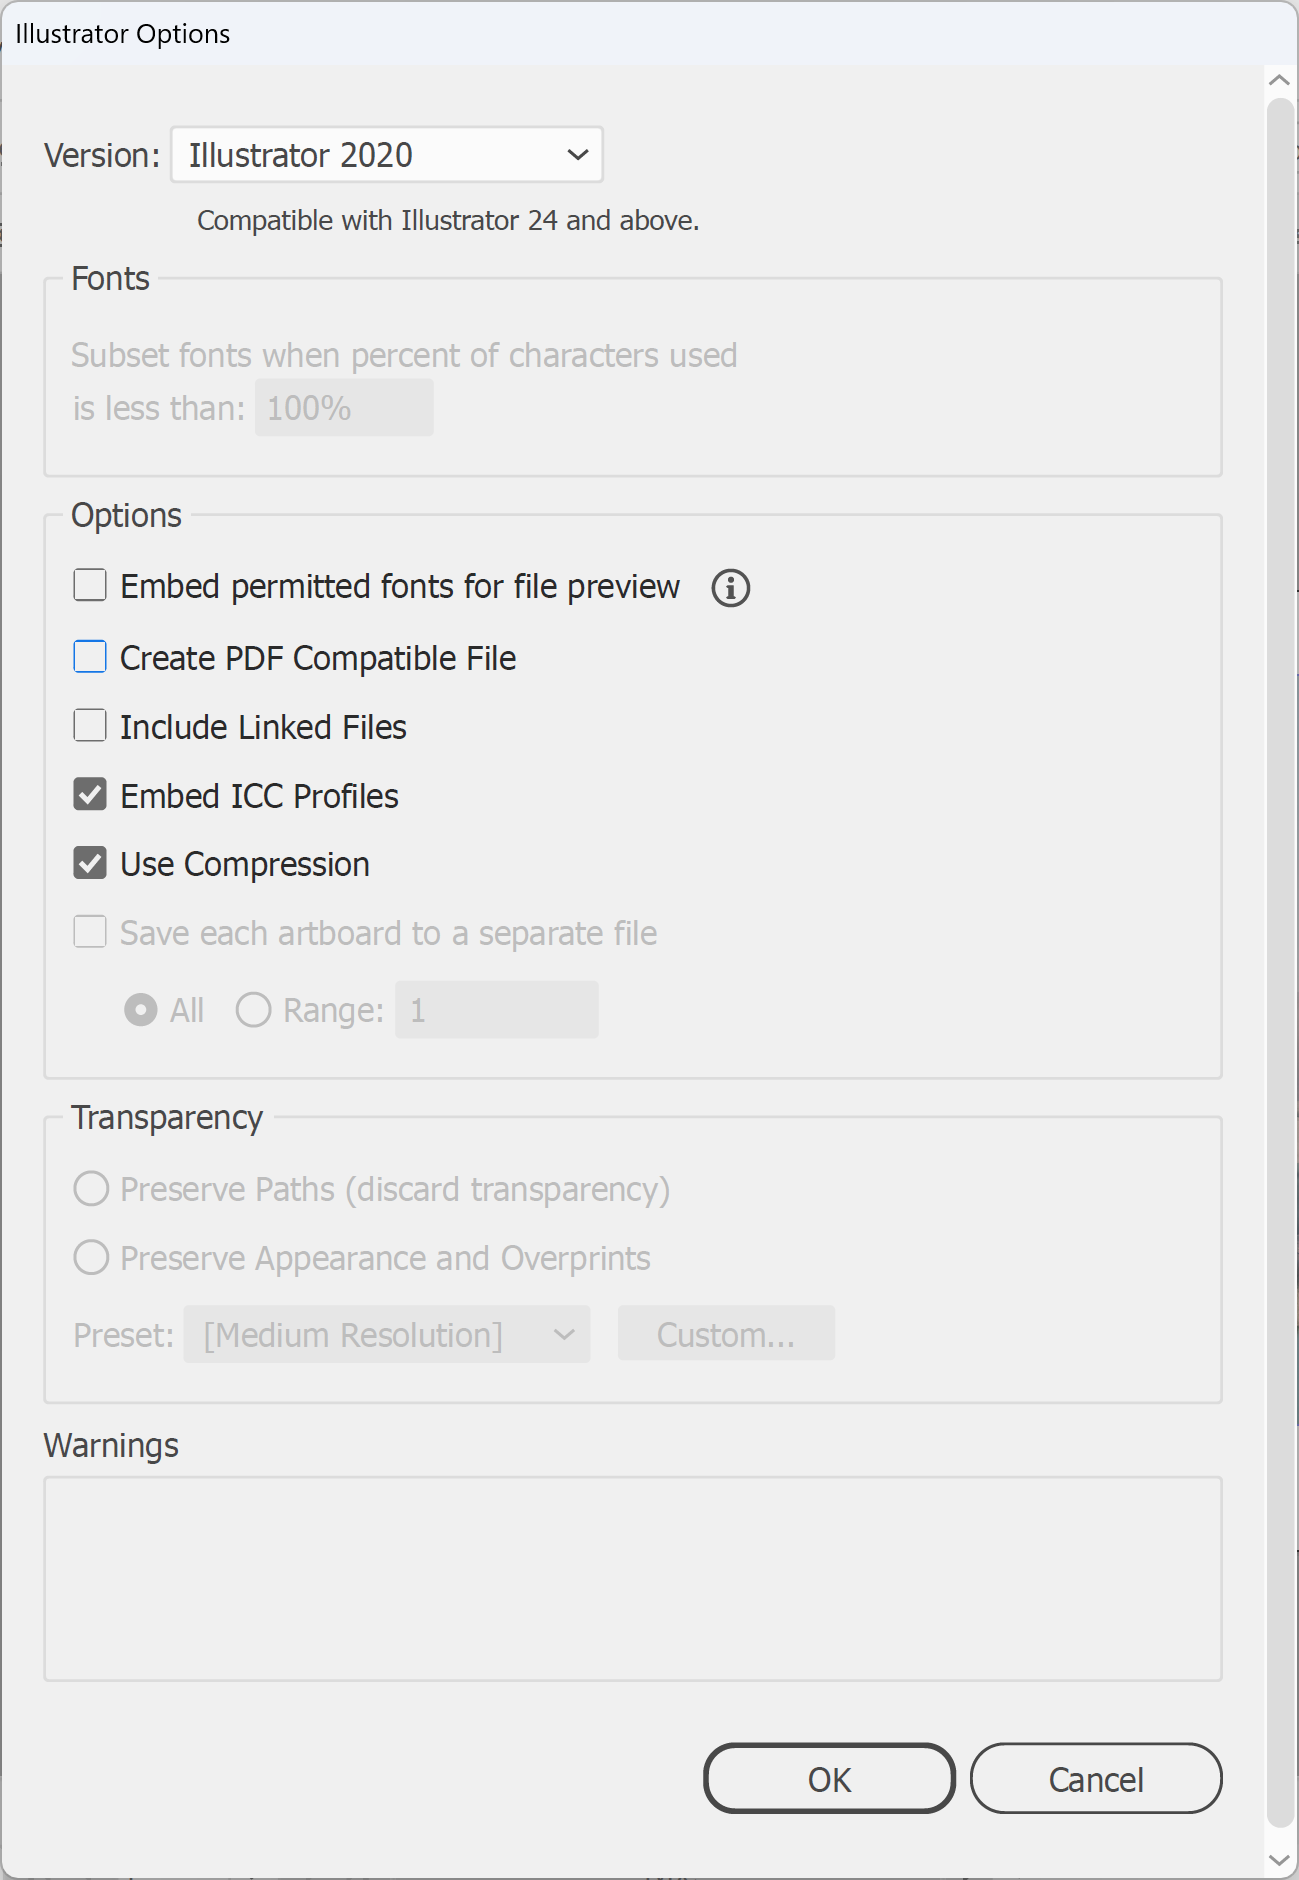
In the Illustrator Options dialog box:
- Uncheck Create PDF Compatible File. This is the key setting! With it on, Illustrator saves two formats inside the one file, and it embeds every linked file, whatever the Include Linked Files setting.
- Uncheck Include Linked Files.
- Leave Use Compression checked.
Click OK.
Note: Create PDF Compatible File keeps the .ai file compatible with other Adobe apps, so keep a copy with it switched on if your team needs that. With Include Linked Files off, your linked images are no longer inside the .ai file, so never send it on its own: package it with its links in the next step.
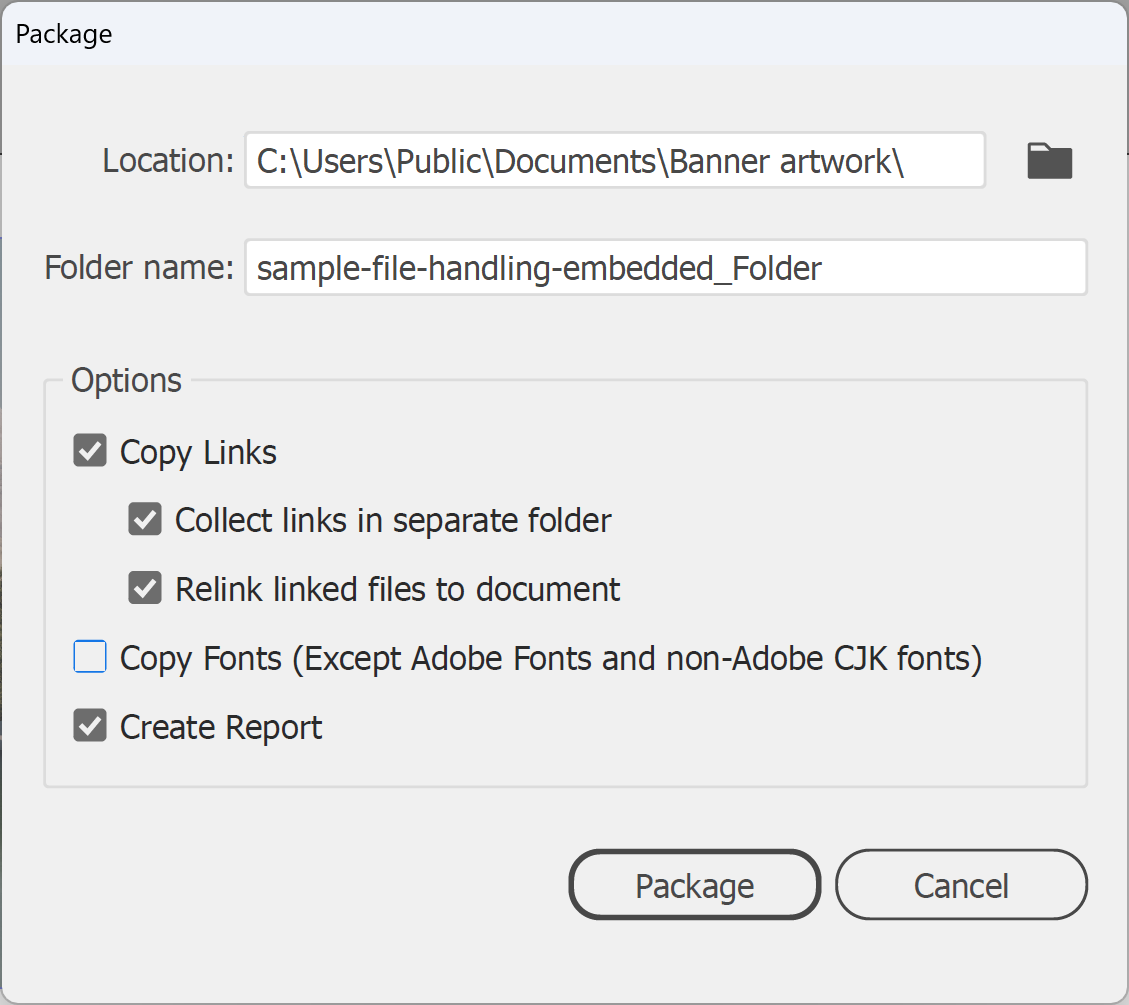
6. Package the file so your linked images travel with it. In the main menu, go to File > Package. Choose a Location and Folder Name, then check Copy Links, Collect links in separate folder, Relink linked files to document and Create Report. Click Package. Zip the package folder before you send it.
Note: Copy Fonts (Except Adobe Fonts and non-Adobe CJK fonts) copies your fonts too, but check your font licence allows it. We need all text outlined or fonts embedded. With Create PDF Compatible File off, the .ai file doesn't embed your fonts (the Fonts options grey out), so outline all text before you package it. Our guide to outlining text shows how.
7. Finally, check your file against our artwork specifications and email it to sales@displays2go.com.au, with your order or job number in the subject line if you have one. If it's still too big to email, get in touch and we'll arrange another way to get it across. See sending artwork for the details, and you're done!
Need some help?
We're here for you
If you're needing some advice or just a helping hand, please get in touch with our team, by clicking this button. Complete the enquiry form and one of our specialists will call you back as soon as we can.