

YOUR CART IS CURRENTLY EMPTY
How do I flatten a PDF for printing in Acrobat?
What does flattening a PDF mean?
"Flatten" covers three different jobs in Acrobat, and a print file can need any of them:
- Layers. Flattening turns all visible layer content into a single, permanent page layer.
- Transparency. Anything not set at 100% opacity, such as shadows, glows and feathering, is converted into vector and rasterised areas.
- Form fields. Fillable fields become fixed content on the page.
Flattening is best done in Acrobat Pro, even when the artwork was created in InDesign, Illustrator or Photoshop. Our guide on how to flatten a transparency explains transparency in more detail. The steps below cover the whole PDF: layers, transparency and form fields, using the menu names in the current version of Acrobat Pro.
Why do I need to flatten a PDF?
Unflattened files may not print the way they look on screen. When transparent objects overlap, or an RGB image sits under CMYK graphics, some printing software may read the file differently than intended and produce unexpected results. Layers can also hold content you can't see: when layers are flattened, only the content that was visible at the time stays in the file.
That's why our artwork specifications ask you to flatten any gradients, layers or transparencies before you send your artwork.
Use the following steps to flatten a PDF in Acrobat Pro
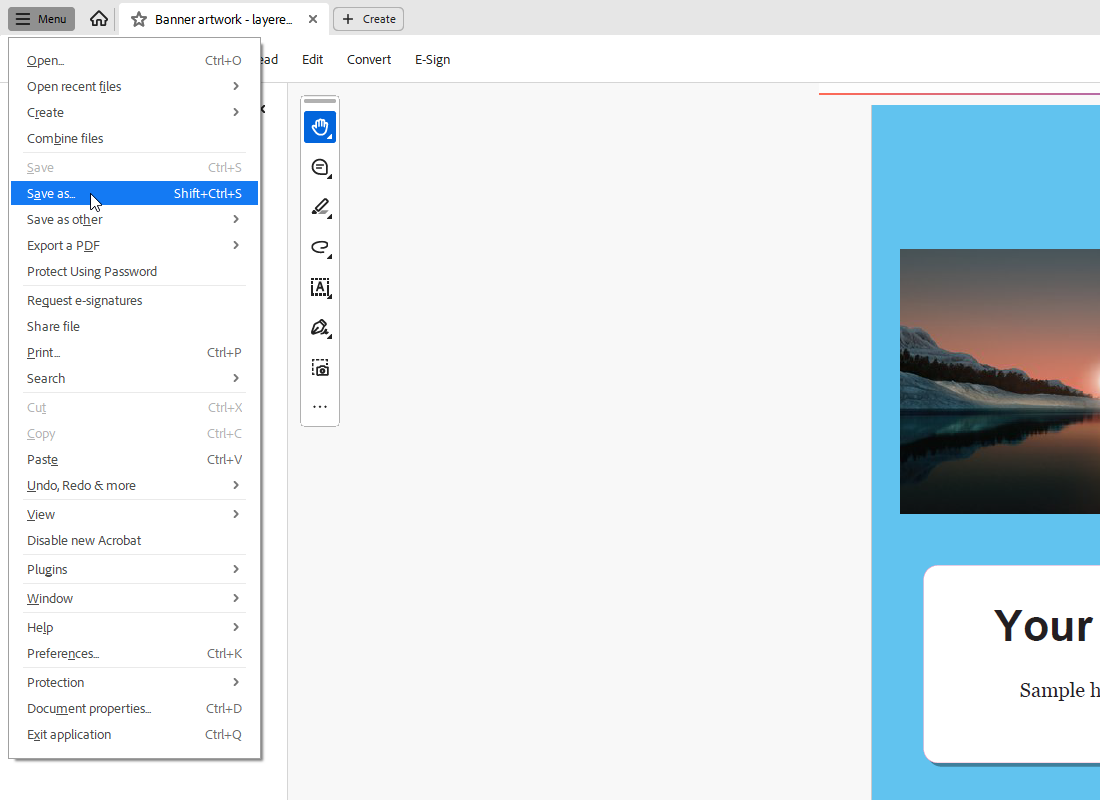
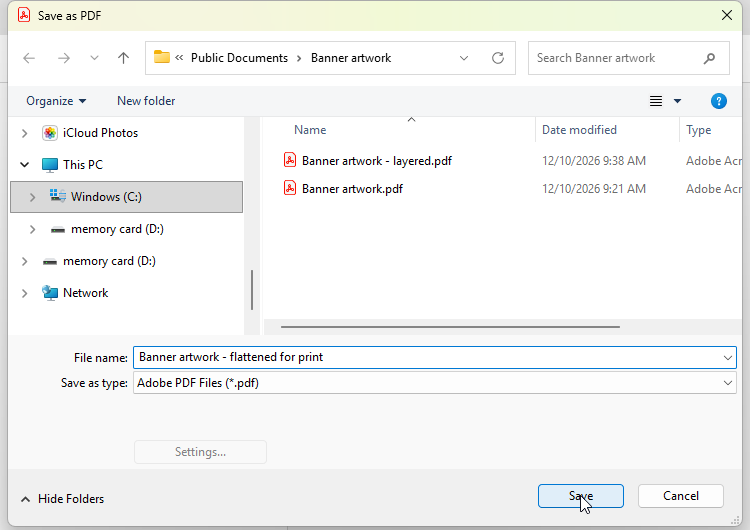
1. Save a copy first. Flattening can't be undone once the file is saved, so keep the original. In the main menu, go to Menu > Save As (File > Save As on macOS) and give the copy a new name.
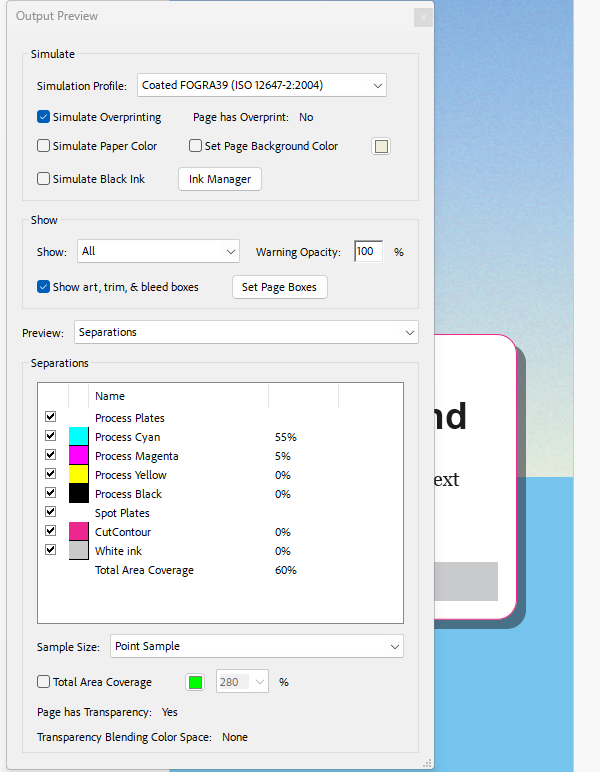
2. Check for spot colours. Go to All tools > Use print production > Output preview, then choose Separations from the Preview menu and look at the list of inks. If you find spot colours, check with us before converting an intentional White ink or cut line; convert ordinary colour artwork to CMYK. Our guide on how to convert spot colours to CMYK shows you how.
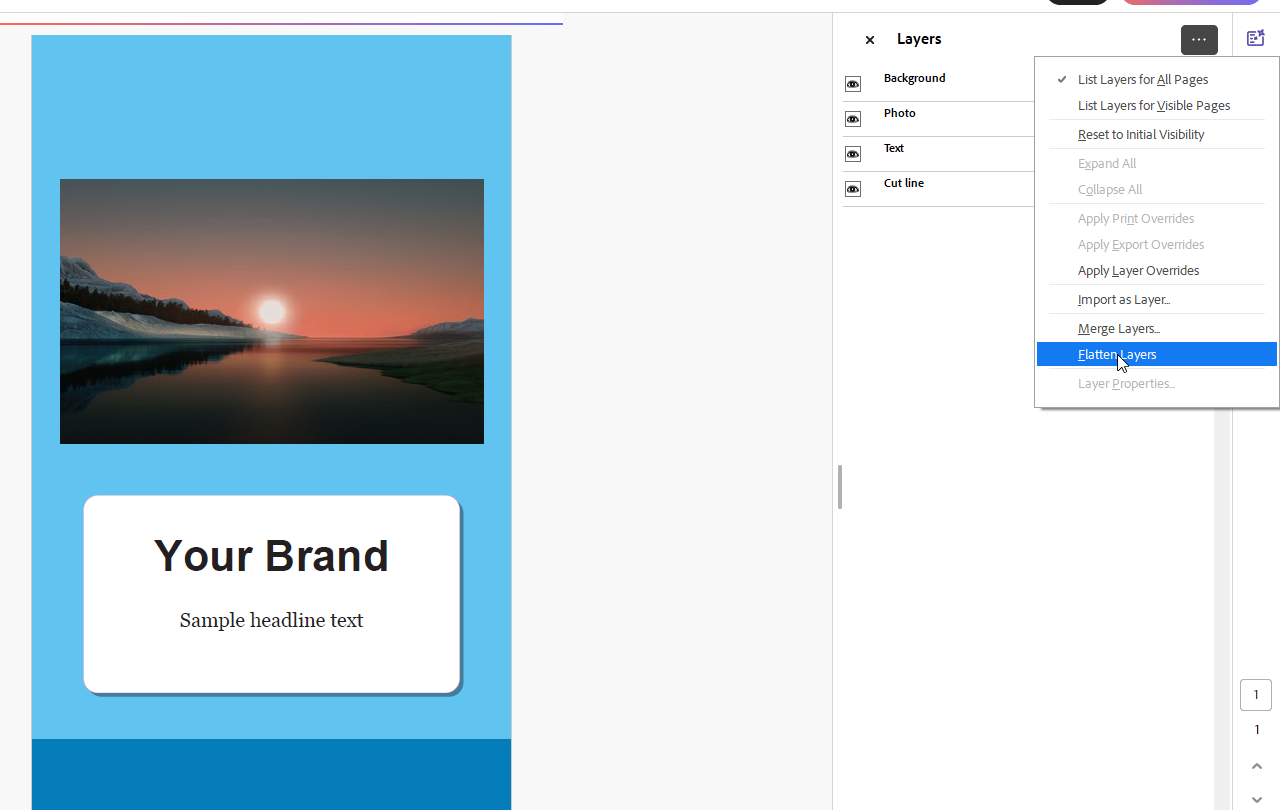
3. Flatten the layers. Select Layers from the right-side panel to open the Layers panel, then select Options and choose Flatten Layers.
Note: If Layers isn't visible, select Menu > View > Show/Hide > Side panels > Layers.
IMPORTANT: Hidden layer content is permanently discarded. Turn on every layer that should print before you flatten.
4. Open the Flattener Preview. Go to All tools > Use print production > Flattener preview.
5. From the Highlight menu, choose Transparent Objects, then select Refresh. Transparent content is highlighted in red and the rest of the artwork appears in greyscale, so you can see exactly what will change.
Note: The Flattener Preview isn't meant for precise previewing of spot colours, overprints and blending modes. Adobe points you to Overprint Preview for those.
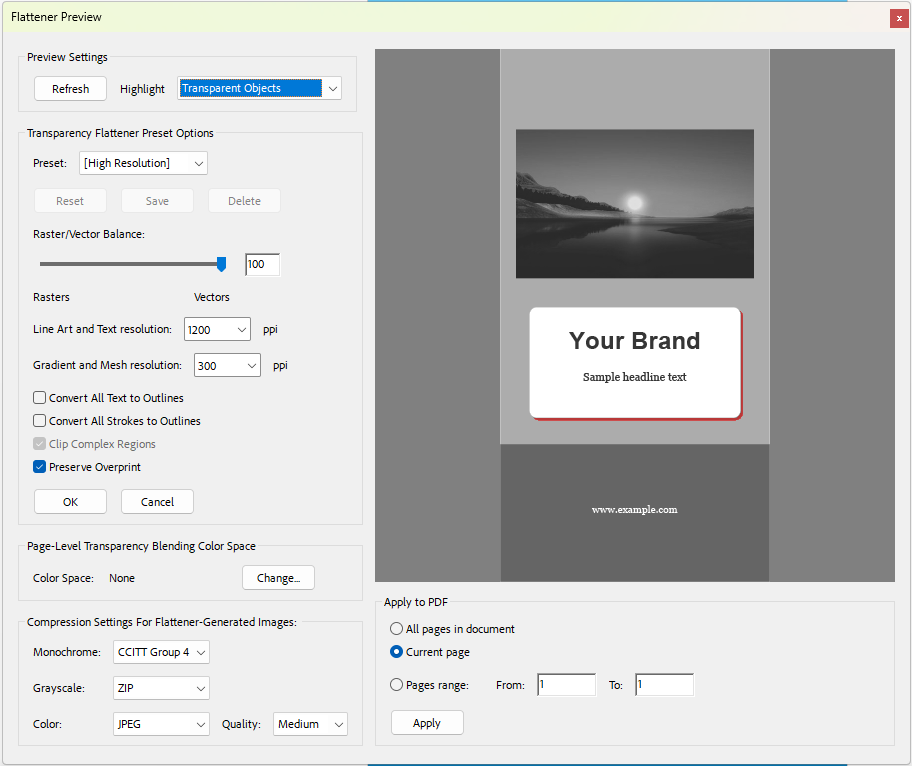
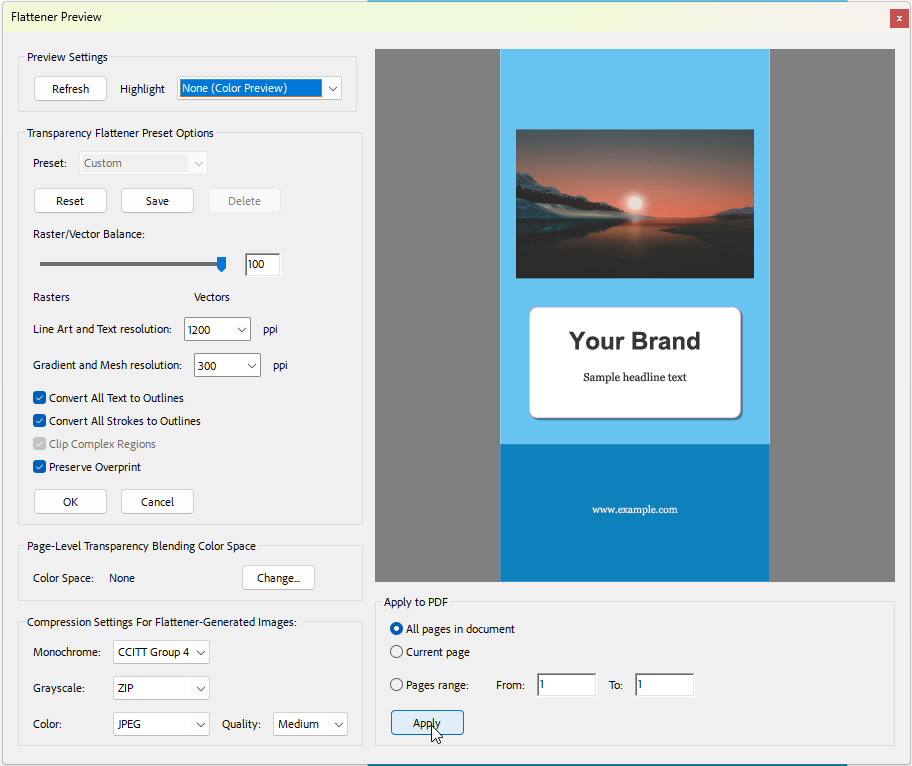
6. Set the flattening options. These are the settings our print team uses: Raster/Vector Balance 100, Line Art And Text Resolution 1200ppi, Gradient And Mesh Resolution 300ppi, with Convert All Text To Outlines, Convert All Strokes To Outlines and Preserve Overprint ticked. Under Apply to PDF, choose All pages in document, then select Apply.
Note: Adobe suggests 600 to 1200ppi for line art and text, and 150 to 300ppi for gradients and mesh. Gradients, drop shadows and feathers don't improve above that, but printing time and file size do. If you'd rather use a preset, choose High Resolution, which Adobe describes as for final press output.
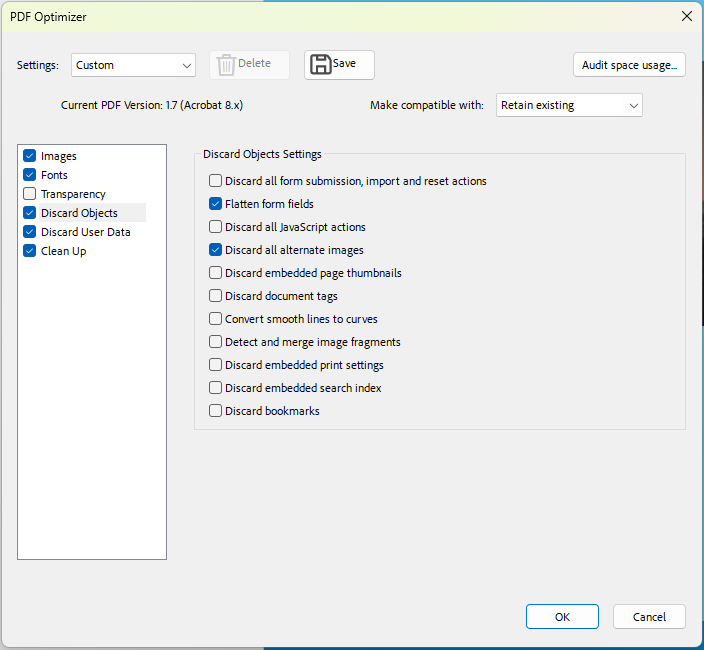
7. If the PDF has fillable form fields, flatten them too. Go to Menu > Save as Other > Optimized PDF (File > Save as Other > Optimized PDF on macOS), select the Discard Objects panel and tick Flatten form fields, then select OK and save.
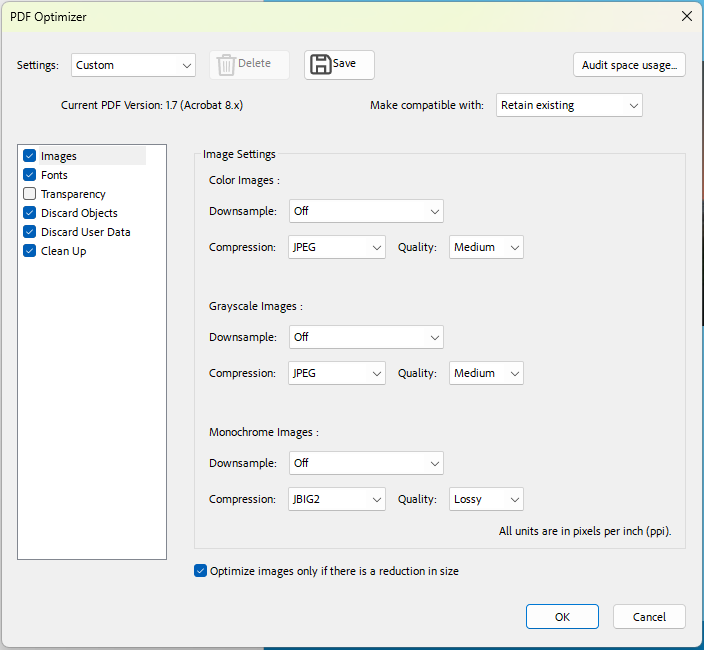
IMPORTANT: The Optimized PDF dialog can also downsample and compress images. Before you select OK, open the Images panel and check the Downsample settings, so your photos stay at 150ppi or more at finished size.
8. Finally, check every page at full size for anything that dropped out or changed in the flattening. Look closely at very thin strokes and very small text, which can appear slightly different once they're converted to outlines, and at the edges of shadows and glows. Then save. Send it through with our sending artwork steps and you're done!
Need some help?
We're here for you
If you're needing some advice or just a helping hand, please get in touch with our team, by clicking this button. Complete the enquiry form and one of our specialists will call you back as soon as we can.