

YOUR CART IS CURRENTLY EMPTY
How do I set up artwork for corflute signs and rigid boards?
What is corflute?
Corflute is a lightweight, hollow-core polypropylene board, often used for short-term campaigns and directional signs. Like other rigid boards, it's printed and then cut to size, so the artwork is set up the same way for any rigid sign. That includes the printed graphic boards we make to sit on our portable display panels.
Why do rigid signs need careful set-up?
A rigid board is cut to size after printing, and it often sits in a frame or gets fixed to a fence, wall or post. If the artwork doesn't allow for the cut, the frame and the fixings, you can get a white sliver along an edge, lose part of a logo under a frame or put a fixing hole through a phone number.
Use the following steps to set up corflute and rigid board artwork in Illustrator
1. Check for a template. If the board sits in a frame or on a product, get the template first. Ours are listed on the product pages, or ask us for the one that suits your product. A template shows where a frame sits over the edge, and a product template always overrides our standard bleed. If someone else is making the sign, ask them for their template and bleed.
2. If there's no template, create the document at the finished size. In the main menu, go to File > New. In the Preset Details pane, choose Millimeters from the units menu, enter the Width and Height of the finished board, set the Bleed to 10mm on every side and, under Advanced Options, choose CMYK Color as the Color Mode. Click Create.
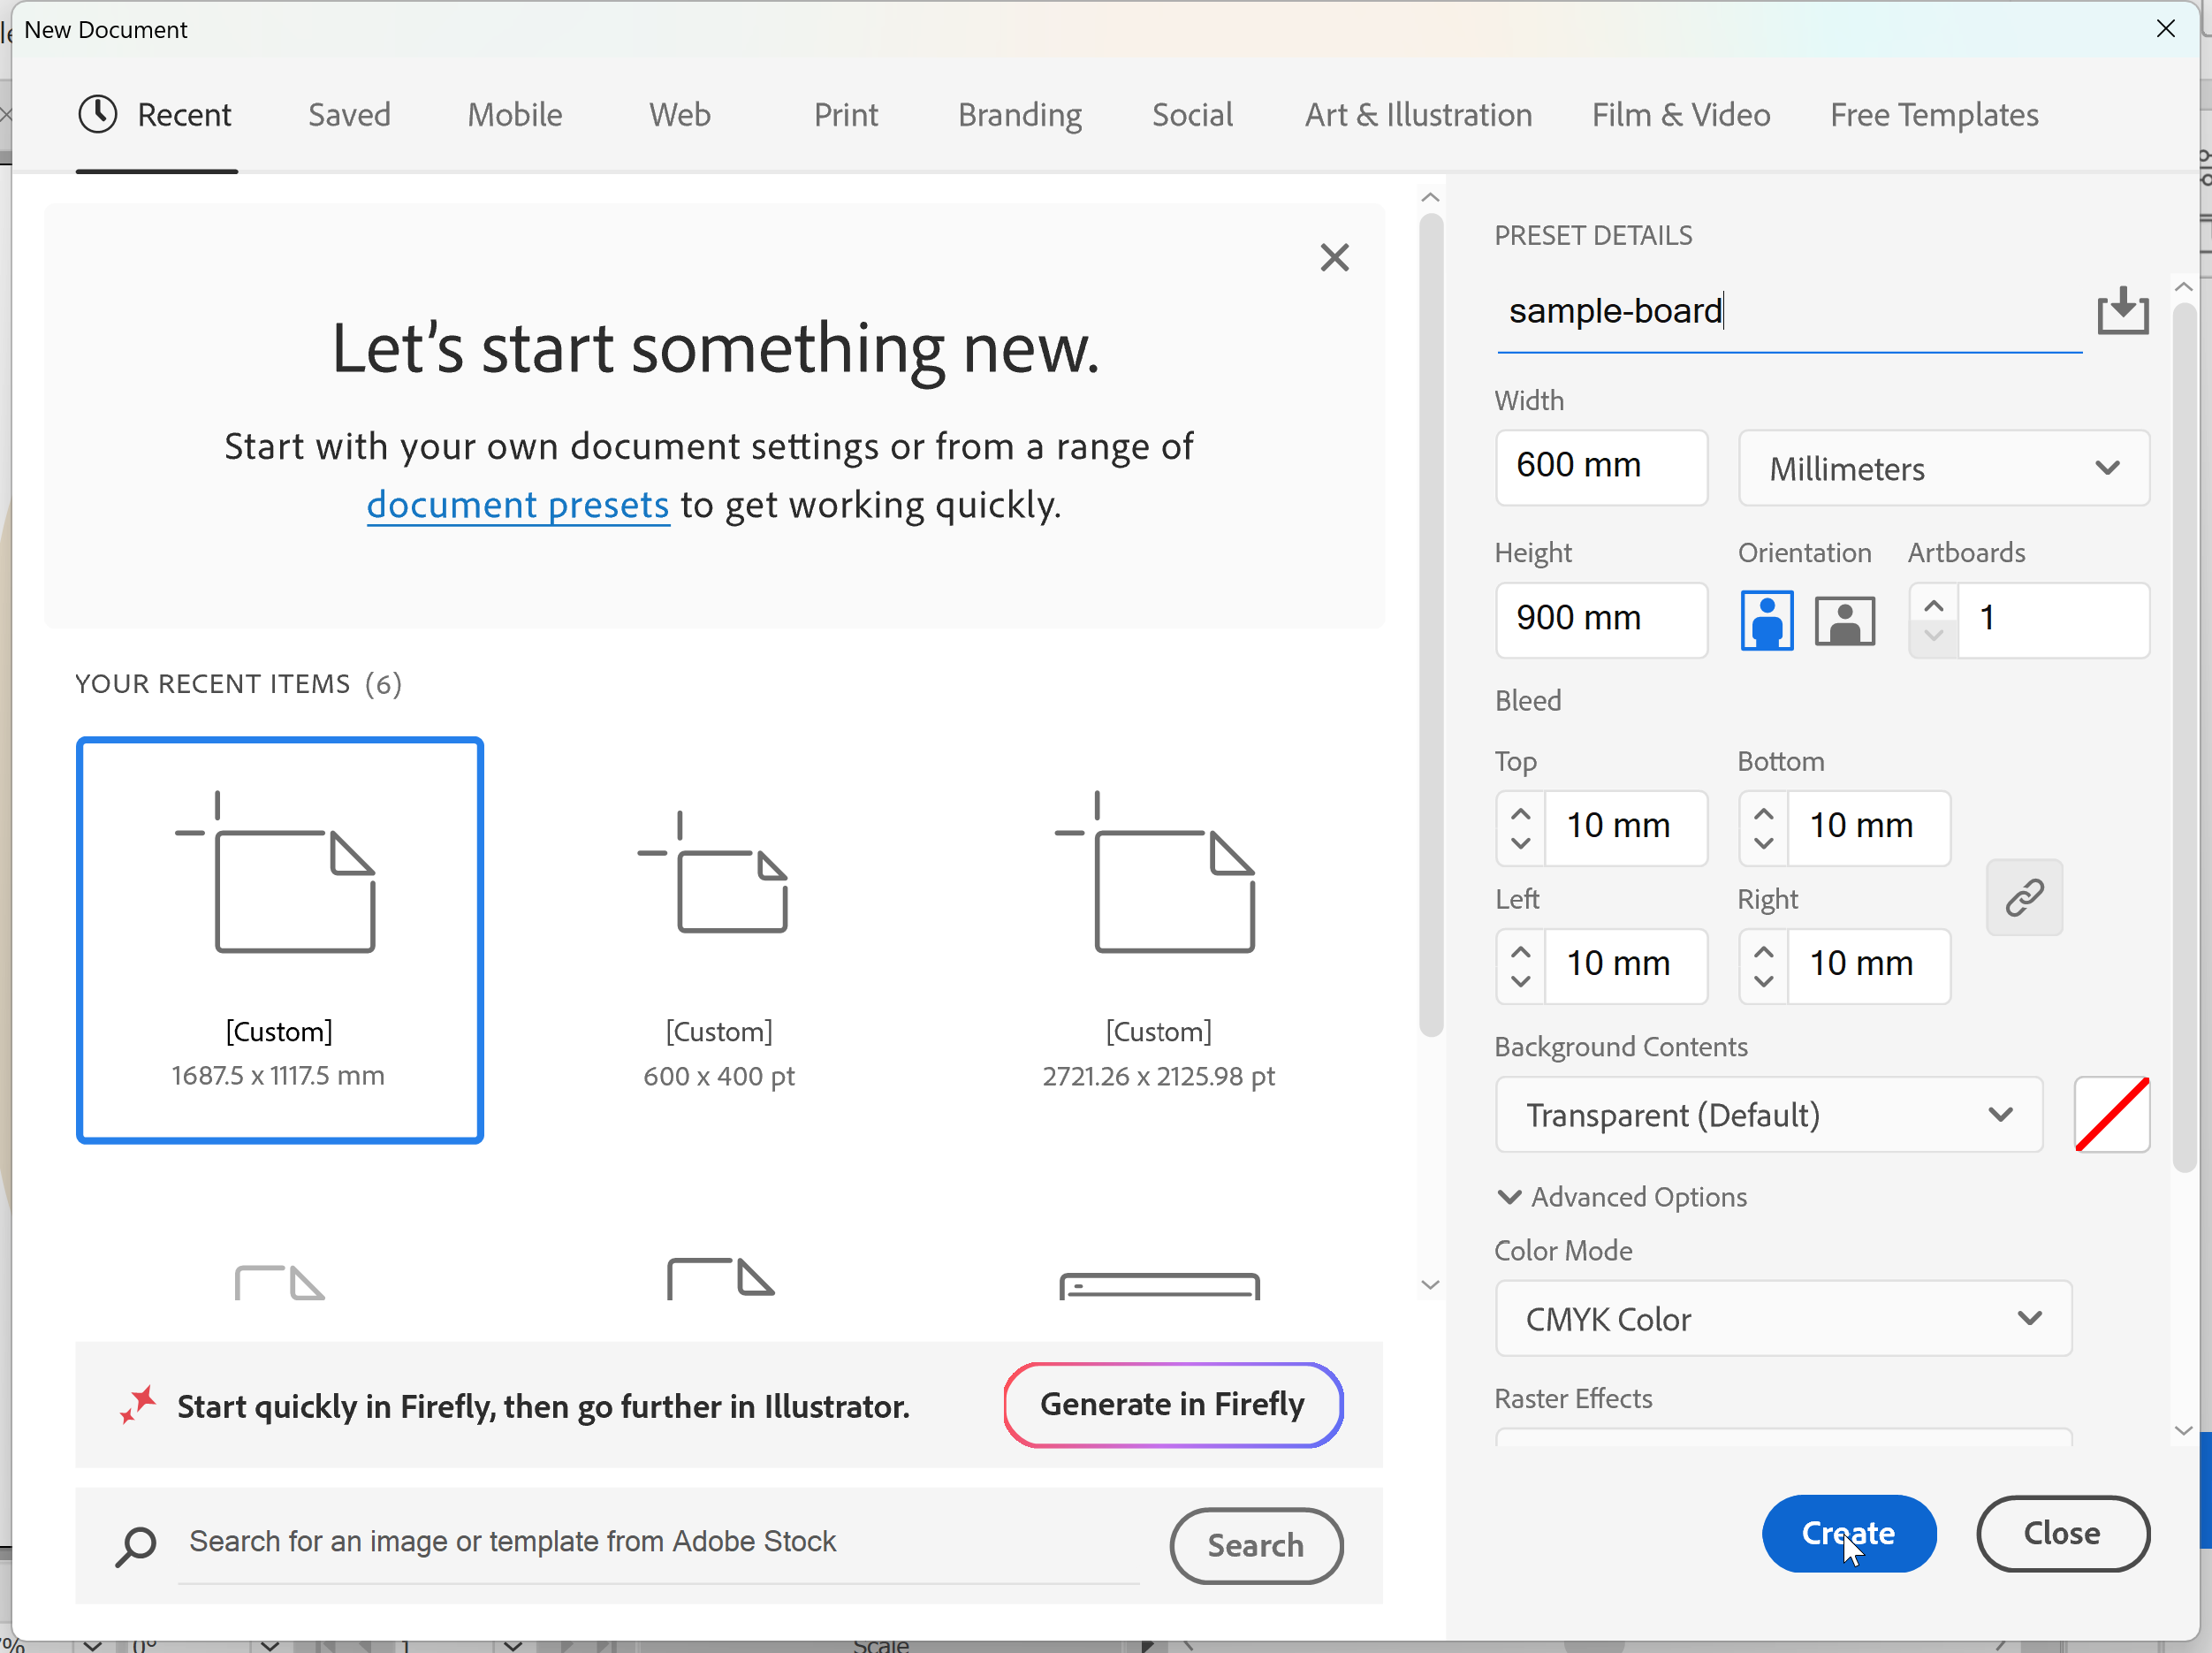
Note: Very large boards can be set up in proportion instead. Remember that bleed and resolution scale too. At 50%, use 5mm bleed, and images need at least 300ppi in the file to give 150ppi at full size (150 x 2 = 300).
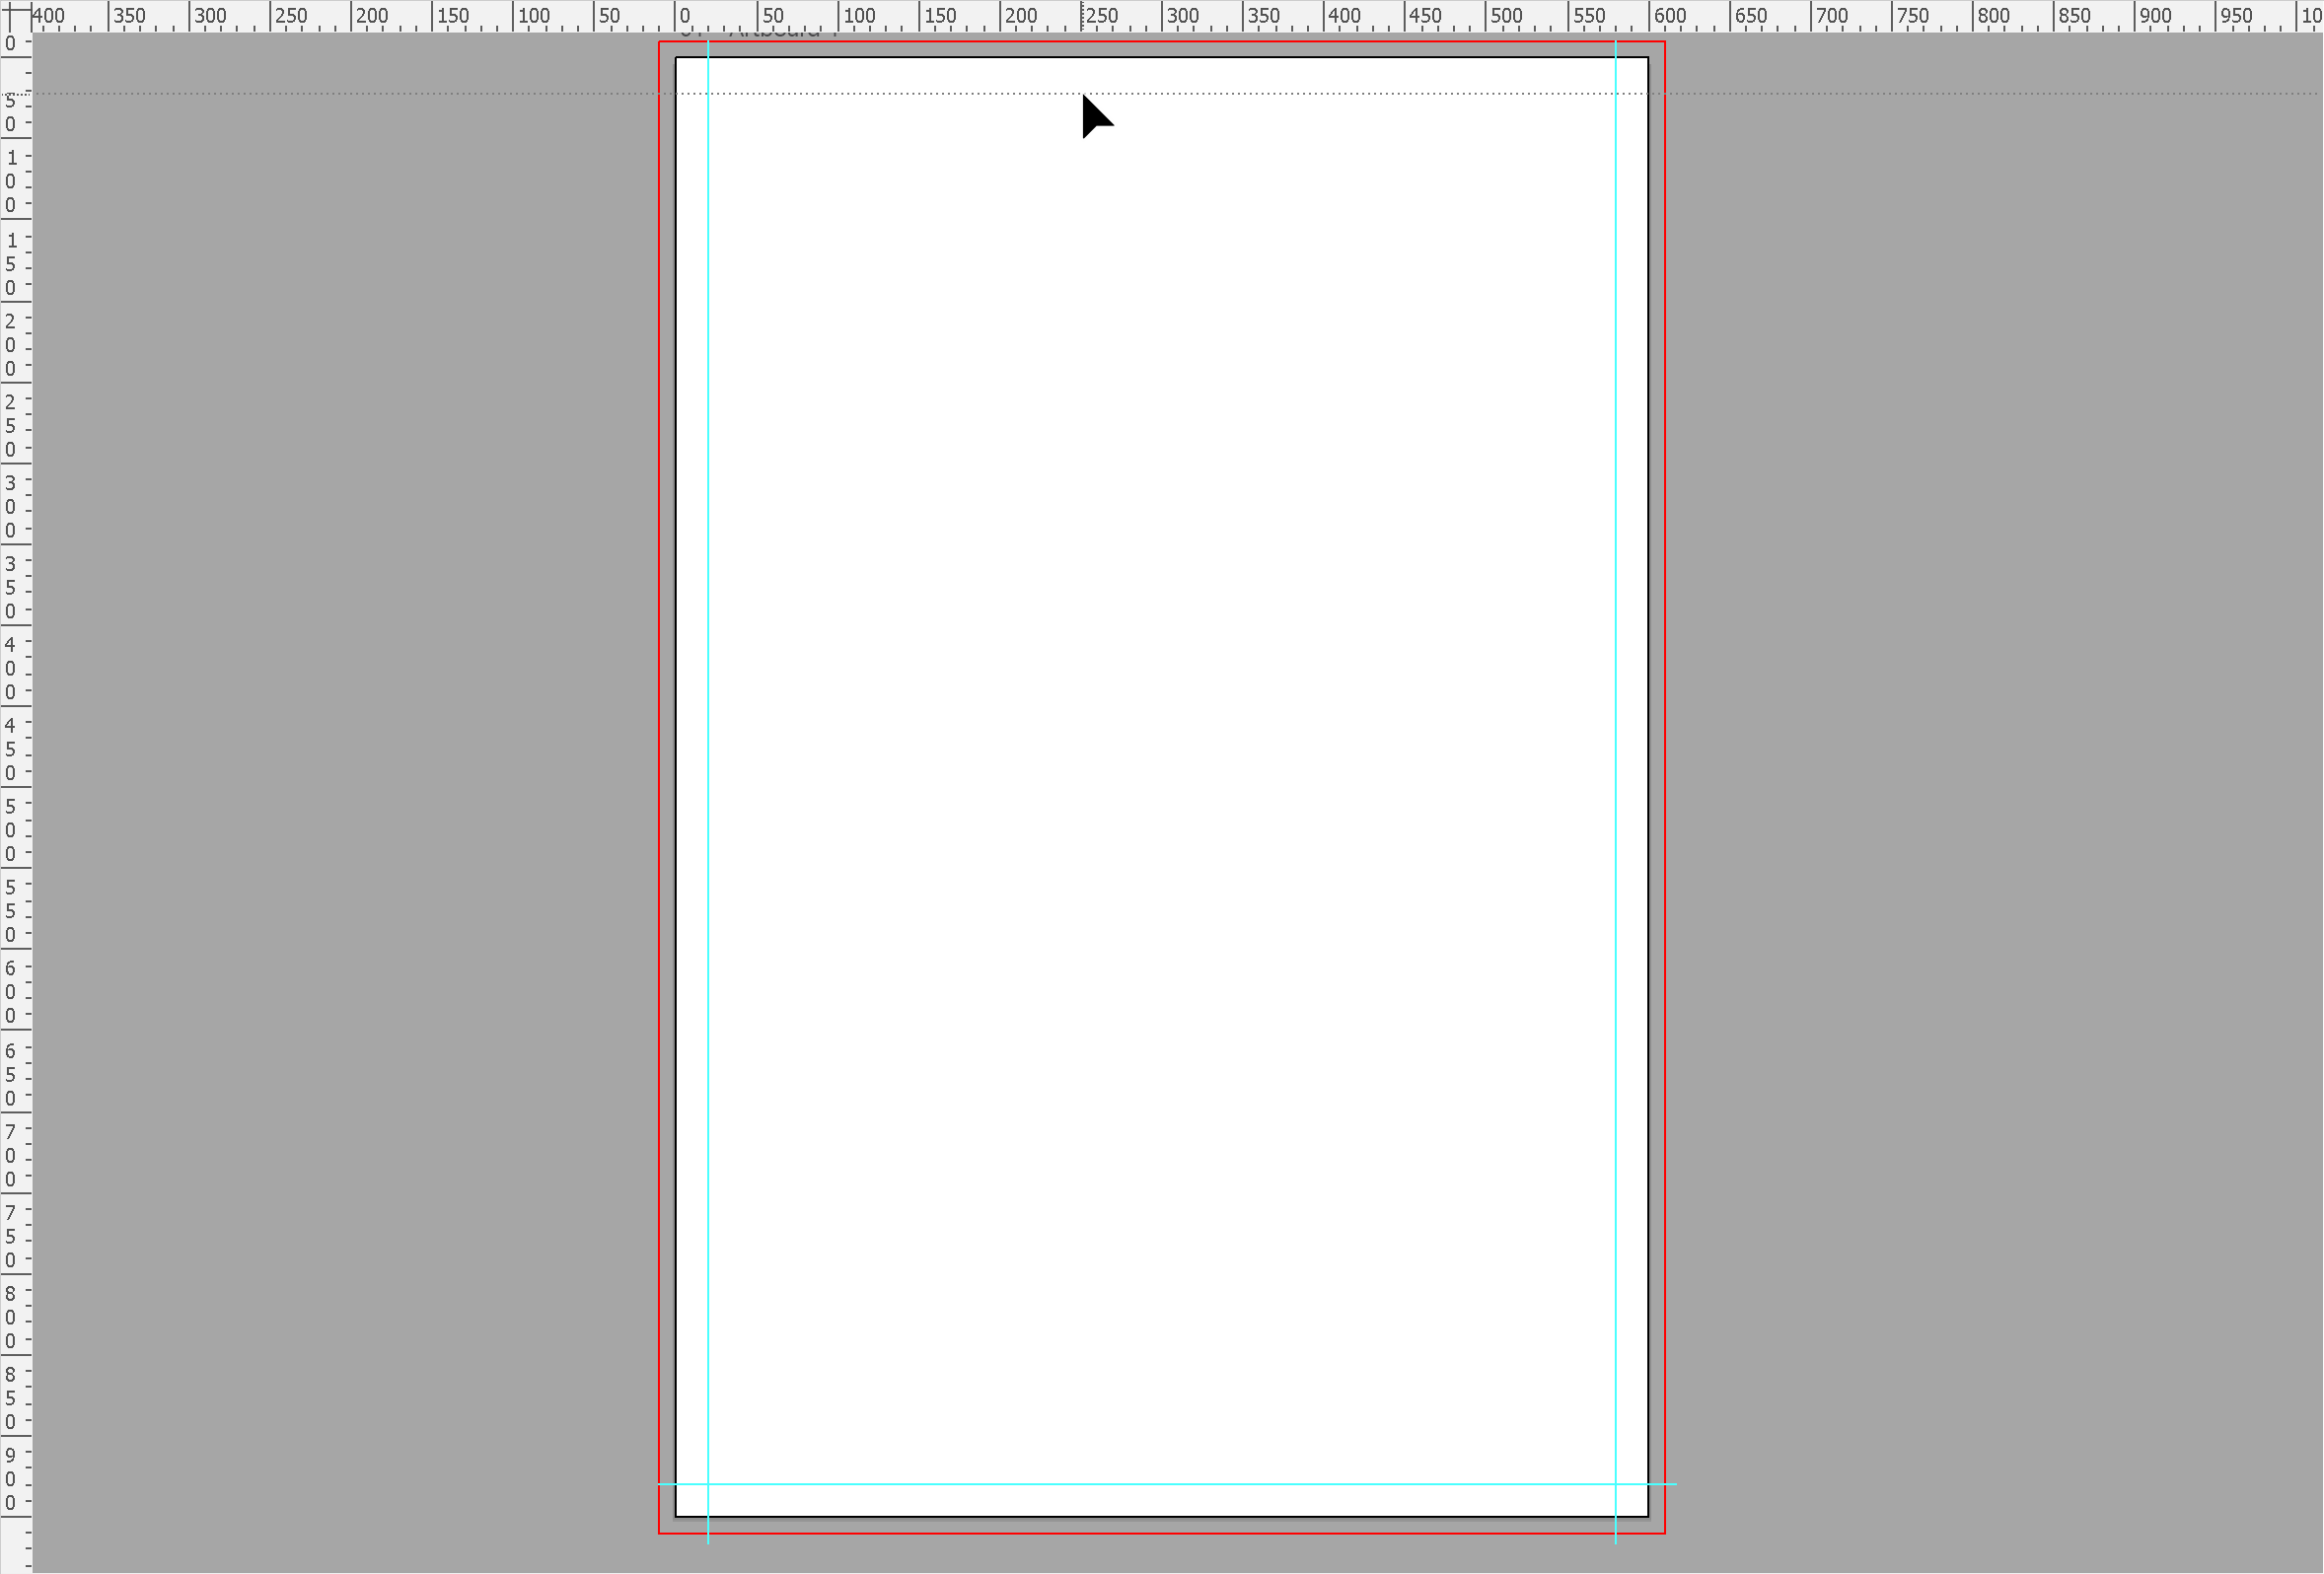
3. Mark a safe area with guides. In the main menu, go to View > Rulers > Show Rulers. Drag two guides from the top ruler and two from the left ruler, so one sits inside each edge of the artboard. Keep logos, text and phone numbers inside these guides.
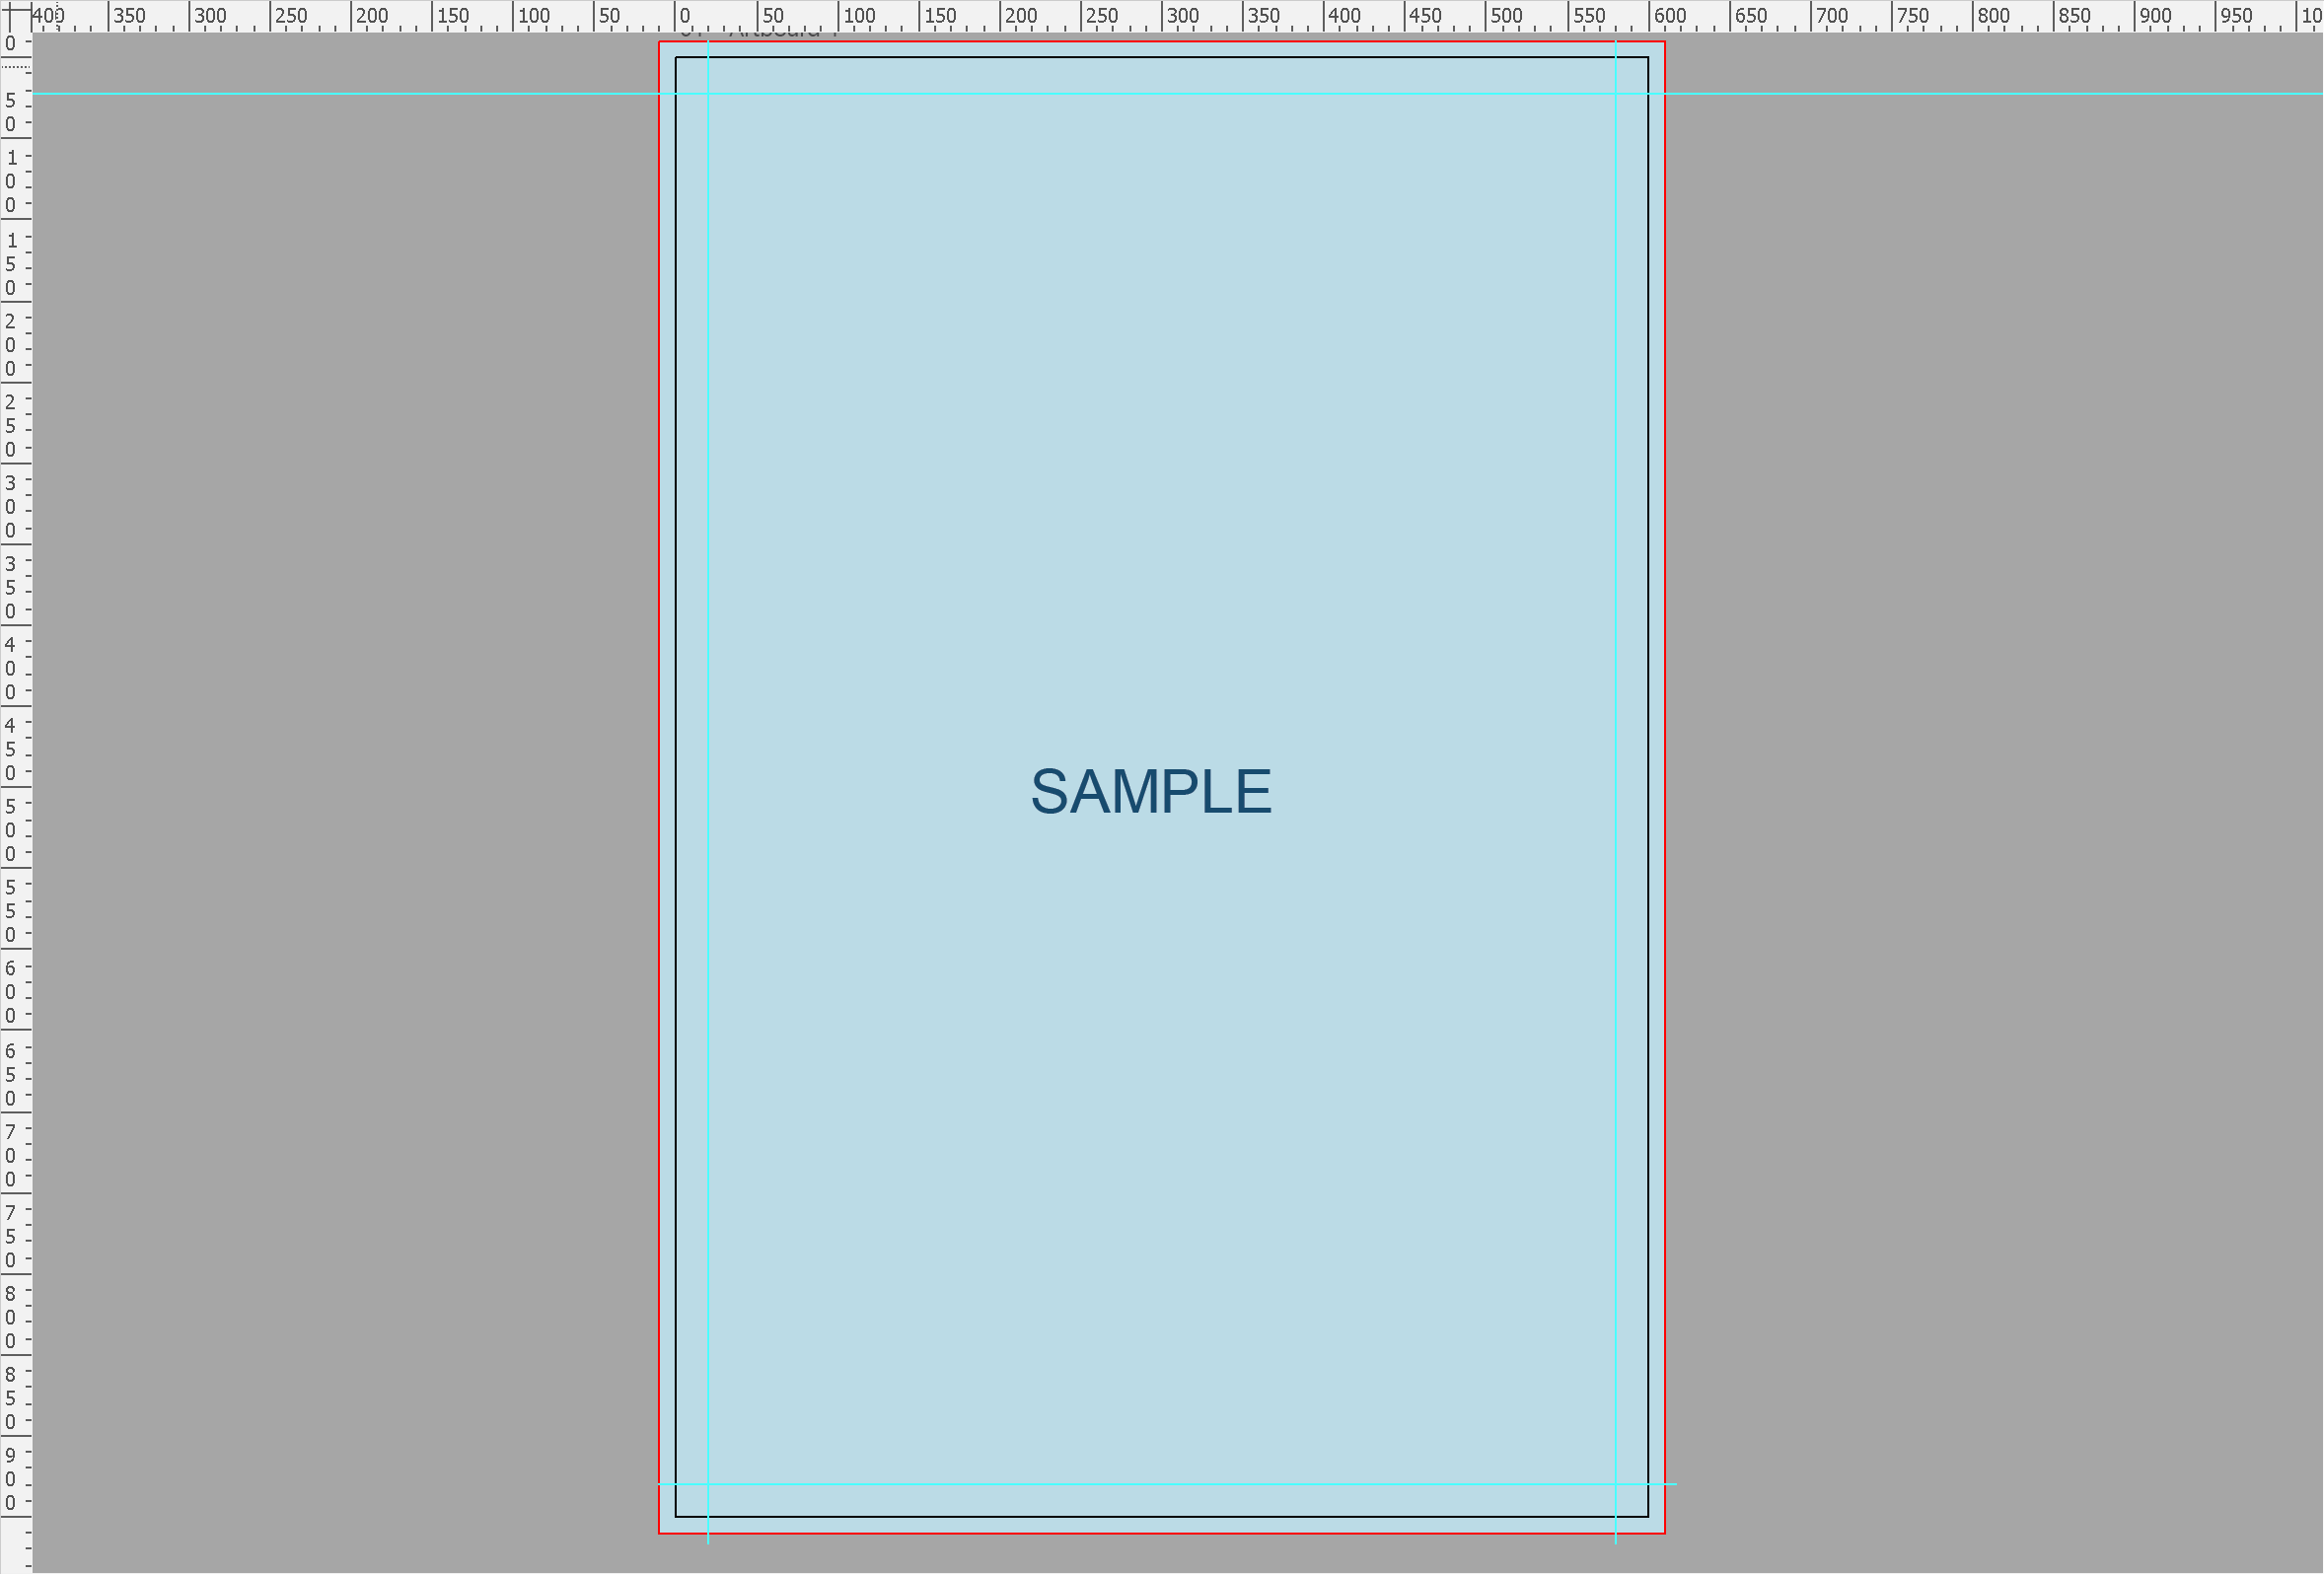
4. Run the background into the bleed. Extend background colours and photos past the artboard to the red bleed line, so there's no white sliver along the edge after cutting.
5. Plan around the fixings. If the sign will be fixed to a fence, wall or post, decide where the fixing points go and keep text and logos clear of them.
6. Add a cut line if the board is shaped. Anything that isn't a plain rectangle needs a cut line on its own layer, set to a spot colour with Overprint Stroke turned on. Our guide on how to create a dieline shows how.
7. Outline your fonts and flatten any transparency. Our guides on how to outline text and how to flatten transparency walk you through it.
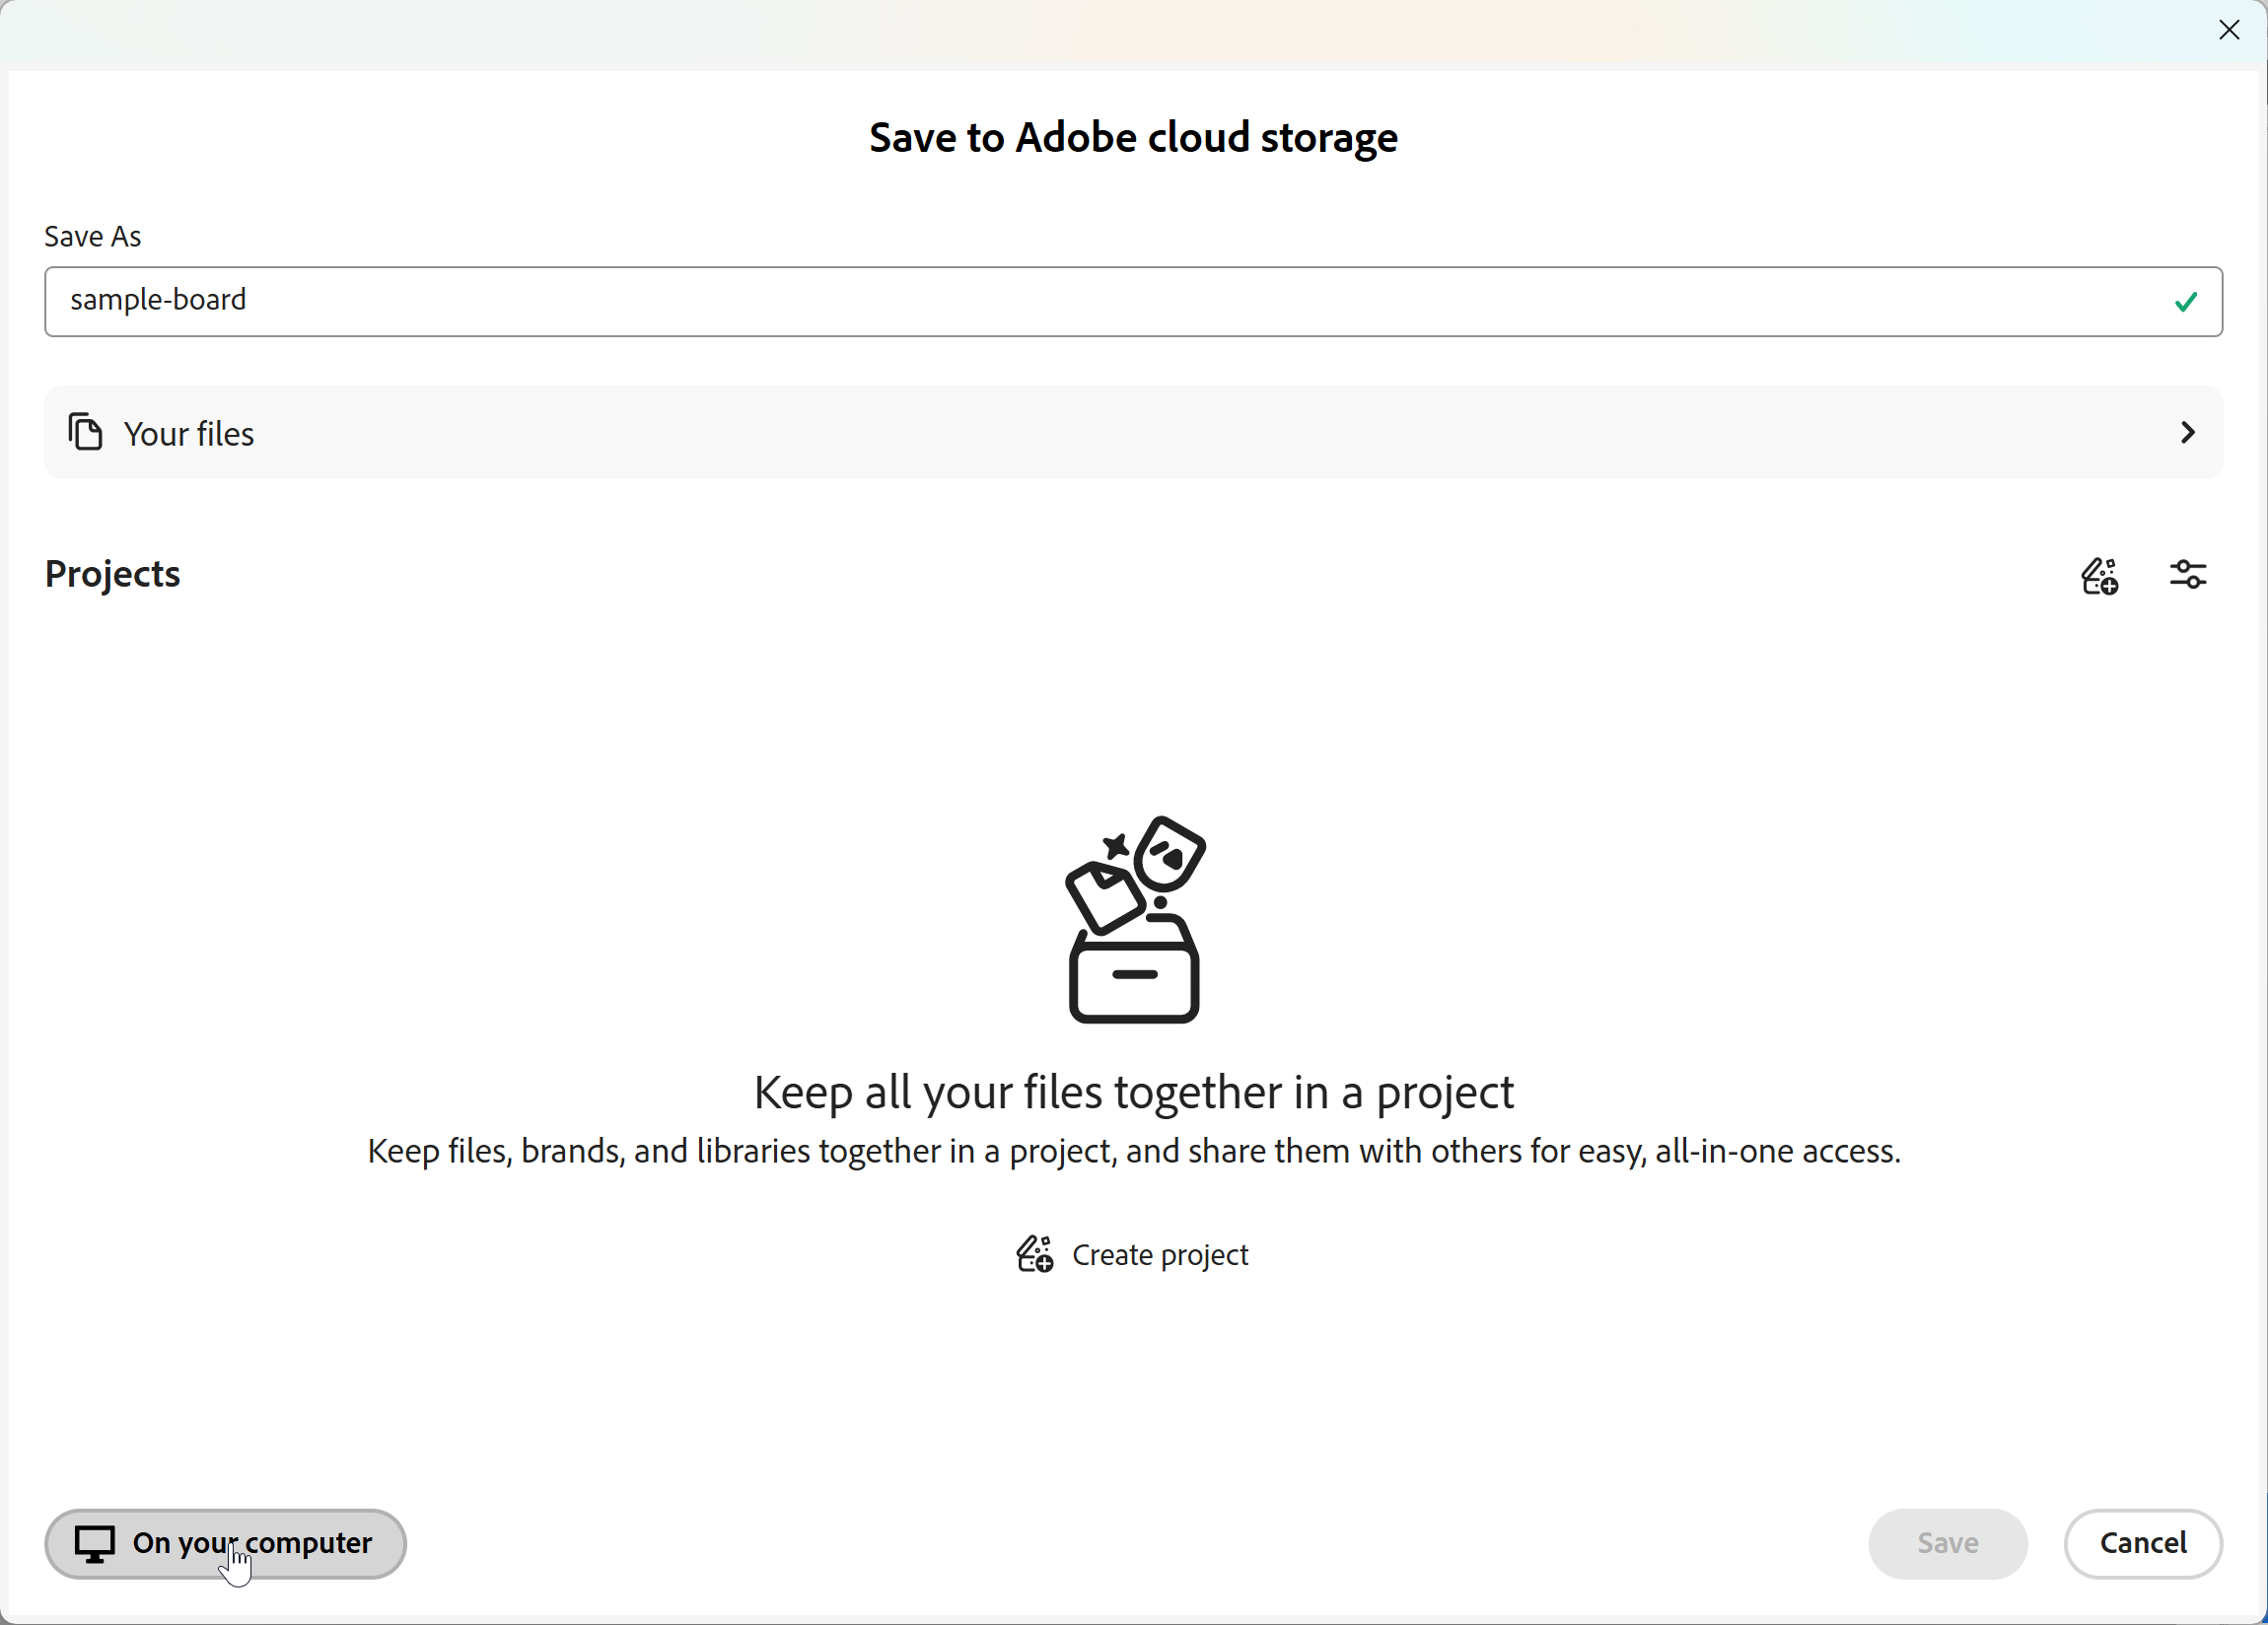
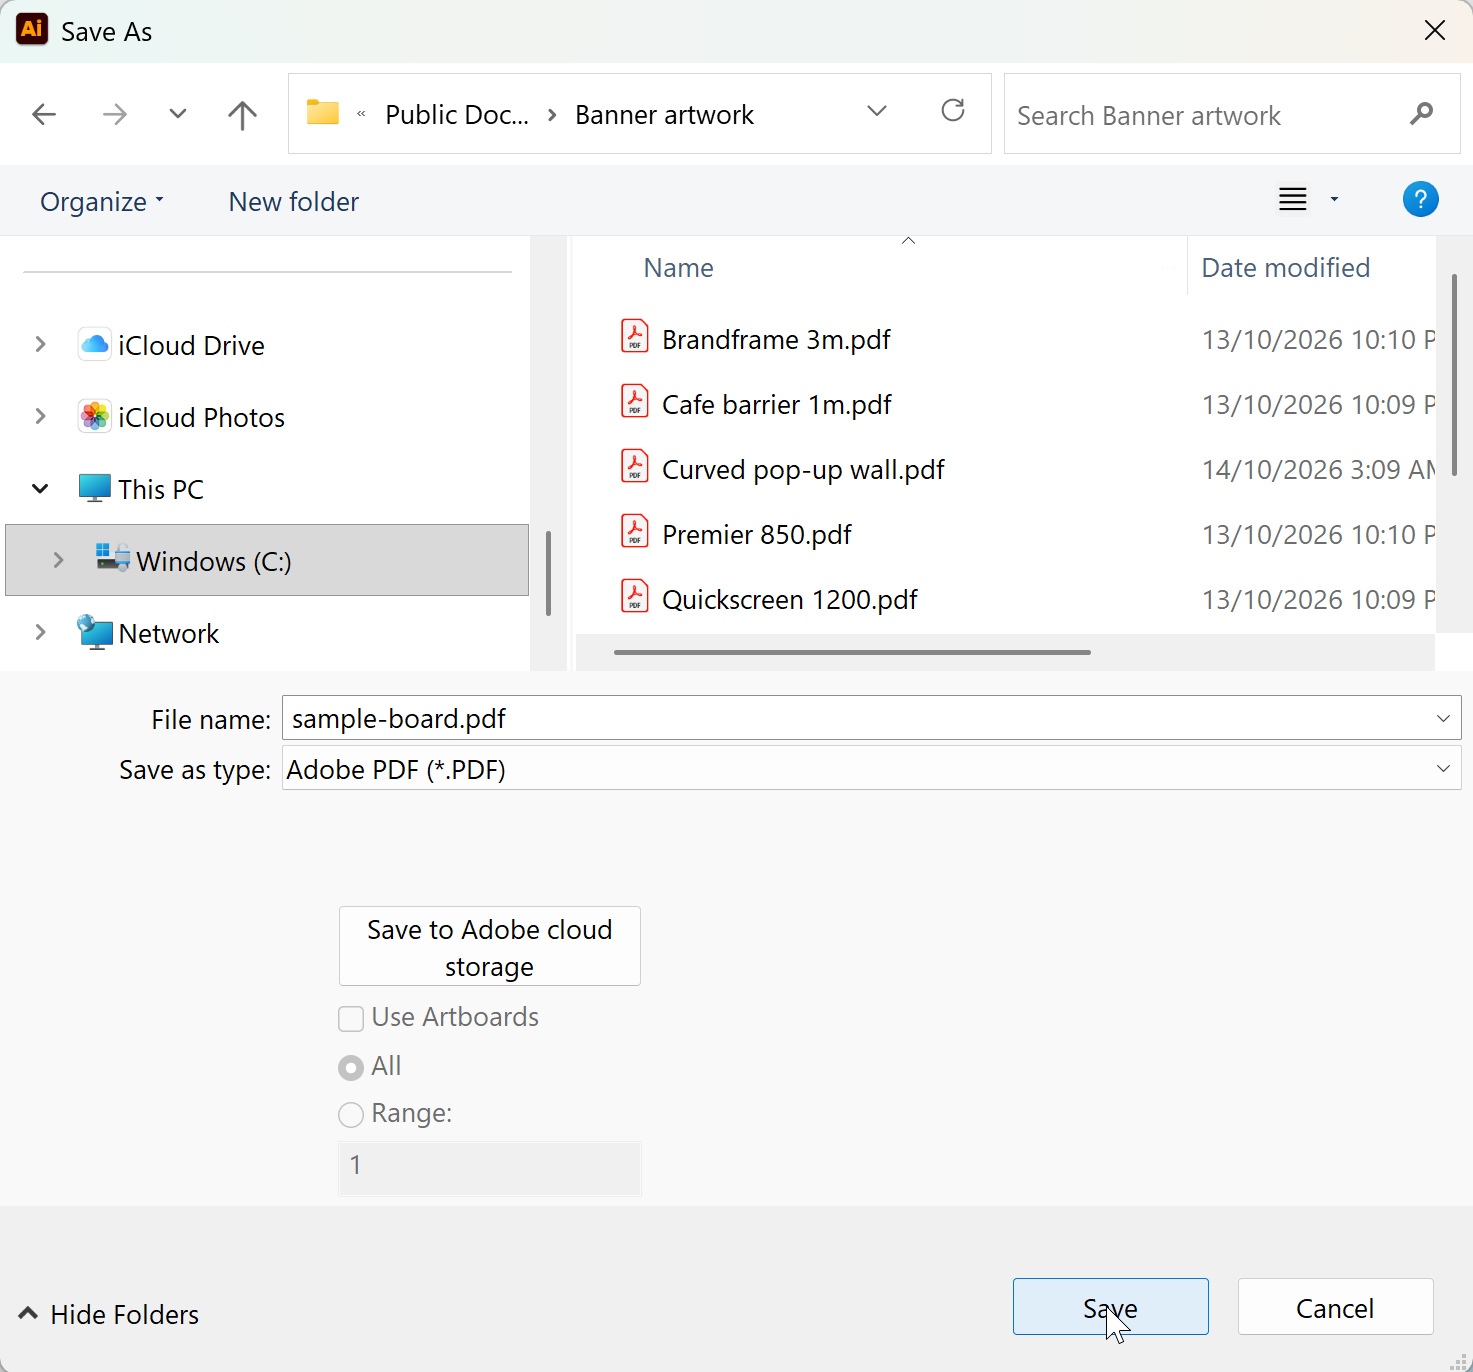
8. Start the PDF save. In the main menu, go to File > Save As. If the Save to Adobe cloud storage dialog box appears, select On your computer.
9. Choose PDF. In the Save As dialog box, select Adobe PDF (*.PDF) in the Save as type drop-down, then click Save.
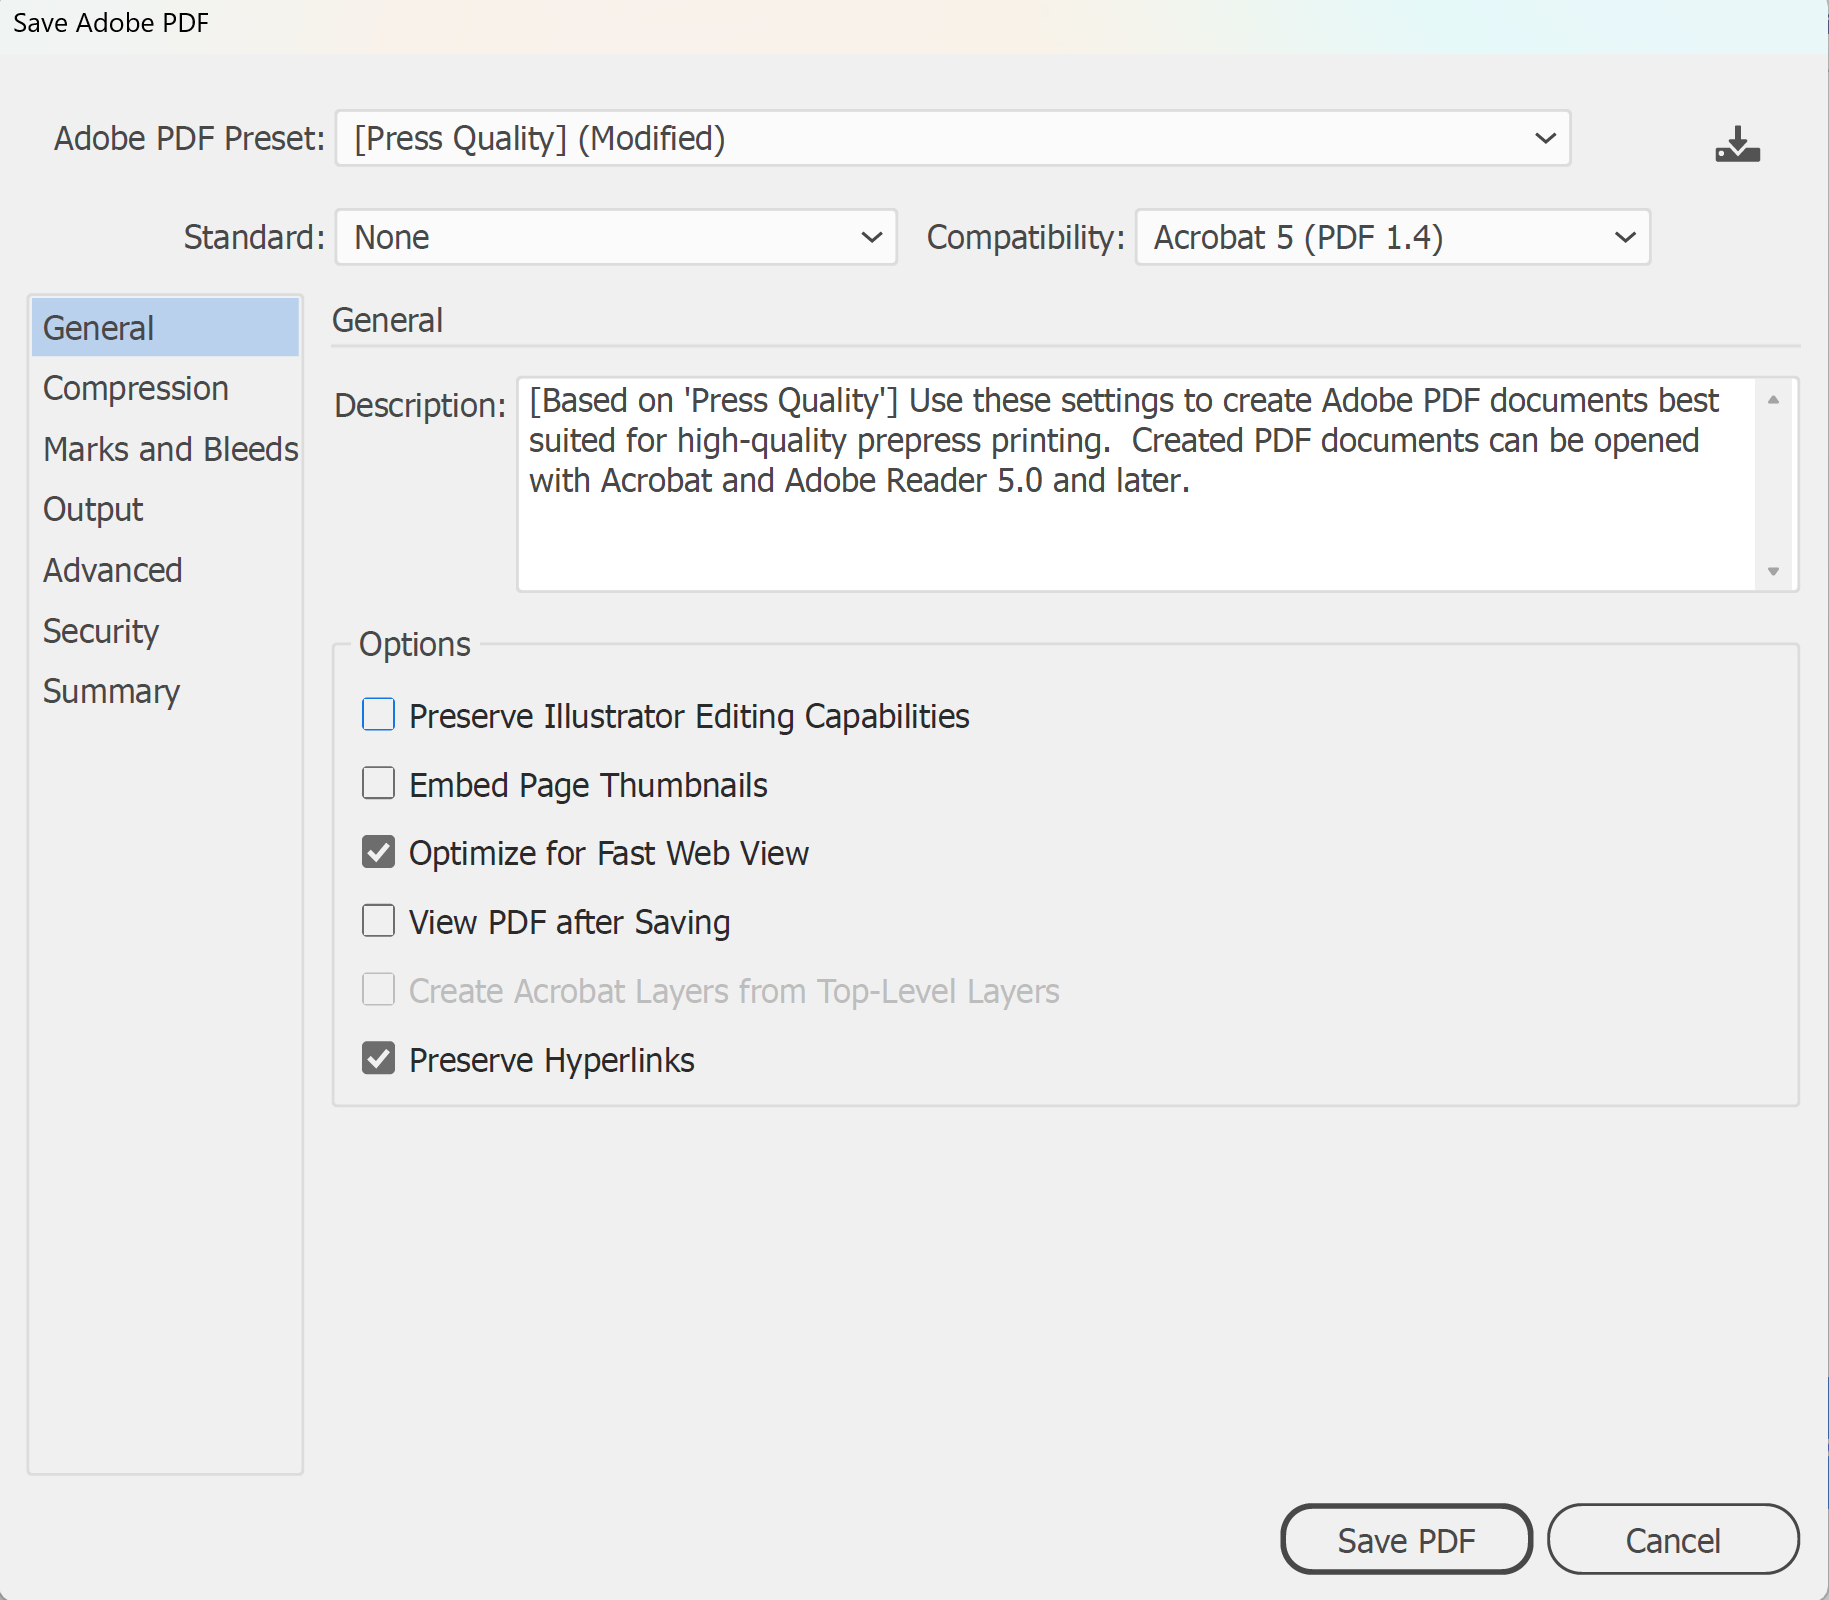
10. Choose the preset. In the Save Adobe PDF dialog box, choose [Press Quality] from the Adobe PDF Preset menu. In the General panel, untick Preserve Illustrator Editing Capabilities to keep the file size down. The preset then shows as [Press Quality] (Modified).
11. Include the bleed. Select Marks and Bleeds on the left, tick Use Document Bleed Settings and leave all the printer's marks unticked. Click Save PDF.
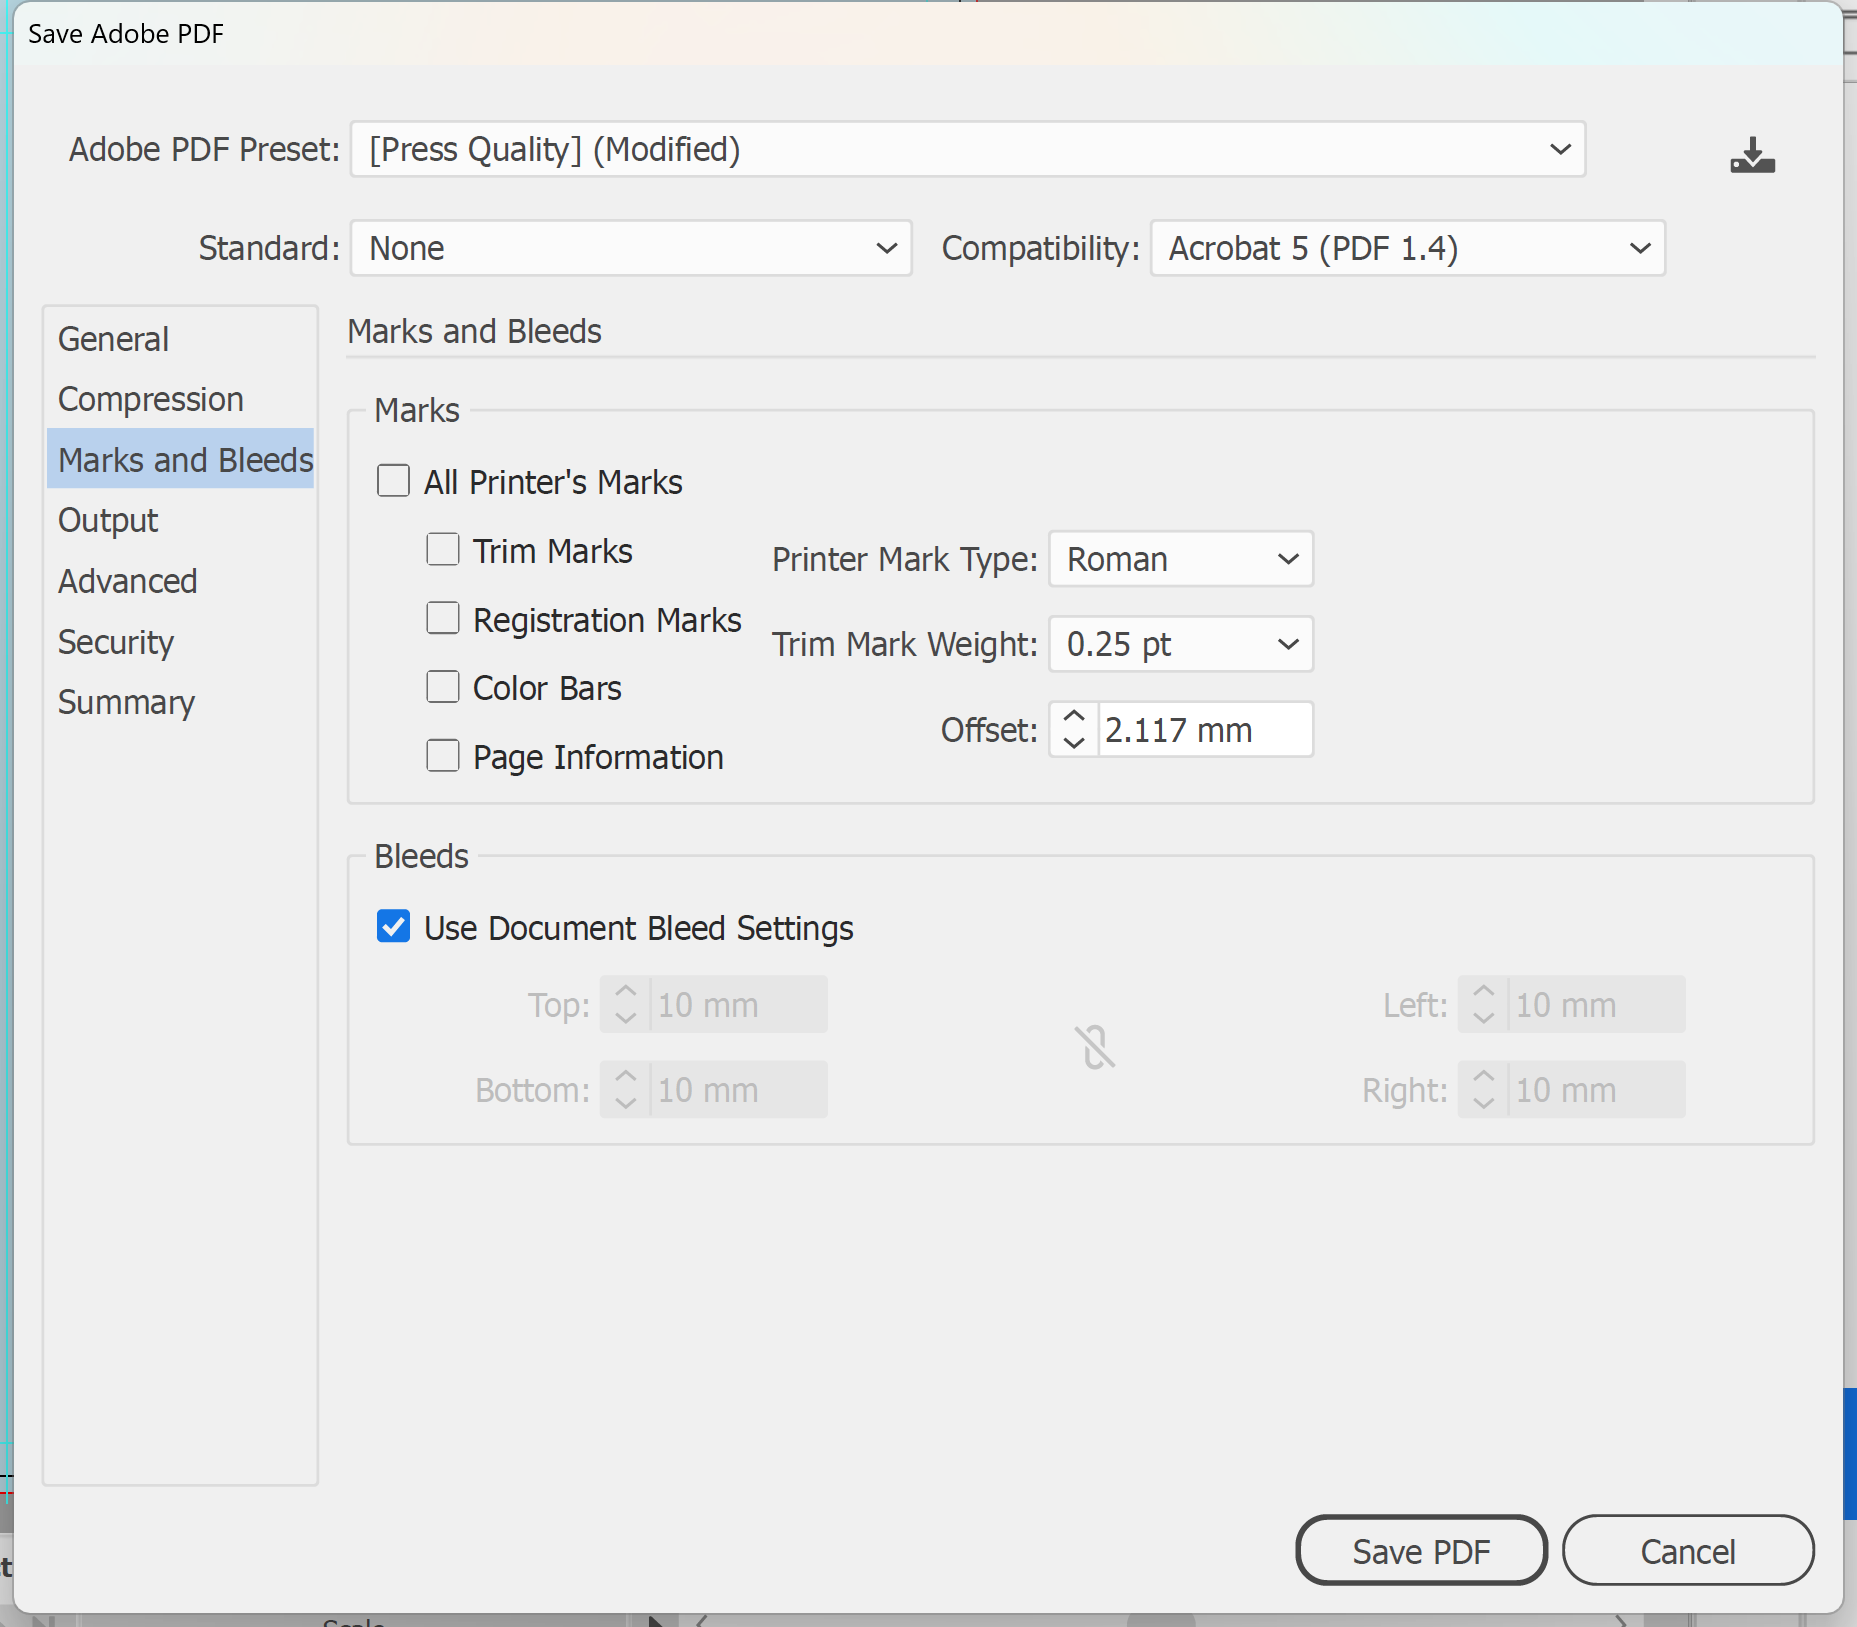
Note: Working in one of our templates instead? The bleed is already inside the page, so leave Marks and Bleeds at the default settings, as our guide to making a PDF file smaller explains.
12. Finally, check the PDF against the printer's specifications. For rigid graphic boards for our display panels, check it against our artwork specifications and email it to sales@displays2go.com.au with your order or job number in the subject line, if you have one, and you're done!
Need some help?
We're here for you
If you're needing some advice or just a helping hand, please get in touch with our team, by clicking this button. Complete the enquiry form and one of our specialists will call you back as soon as we can.