

YOUR CART IS CURRENTLY EMPTY
How do I create a cut line in Illustrator for shaped graphics?
What is a cut line?
A cut line is a path in your artwork that shows exactly where a printed graphic is to be cut to shape. Shaped floor graphics, profile-cut decals and cut-outs all need one. Our adhesive floor vinyl, for example, can be cut to the shape you need.
The cut line is placed in the print file as a separate layer, so it sits in exactly the right spot relative to the artwork.
Why does the cut line need a spot colour?
So it can be kept off the print. A spot colour puts the cut line on its own separation, apart from your CMYK artwork, so it goes to the cutter rather than the printer, and we can see straight away which path is the cut and which is part of the design.
If your job also has folds, such as a box or a folding display, our guide How do I create a dieline in Adobe Illustrator, InDesign or Photoshop? covers full cut and fold lines together.
Steps to create a cut line in Illustrator
1. Set the document up at 100% of the finished size, or in proportion, with all artwork in CMYK (the cut line's spot colour, added in step 6, is the one exception). Our guide on how to convert spot colours to CMYK shows how to check.
2. Outline any text that forms part of the shape. Our guide to outlining text shows how.
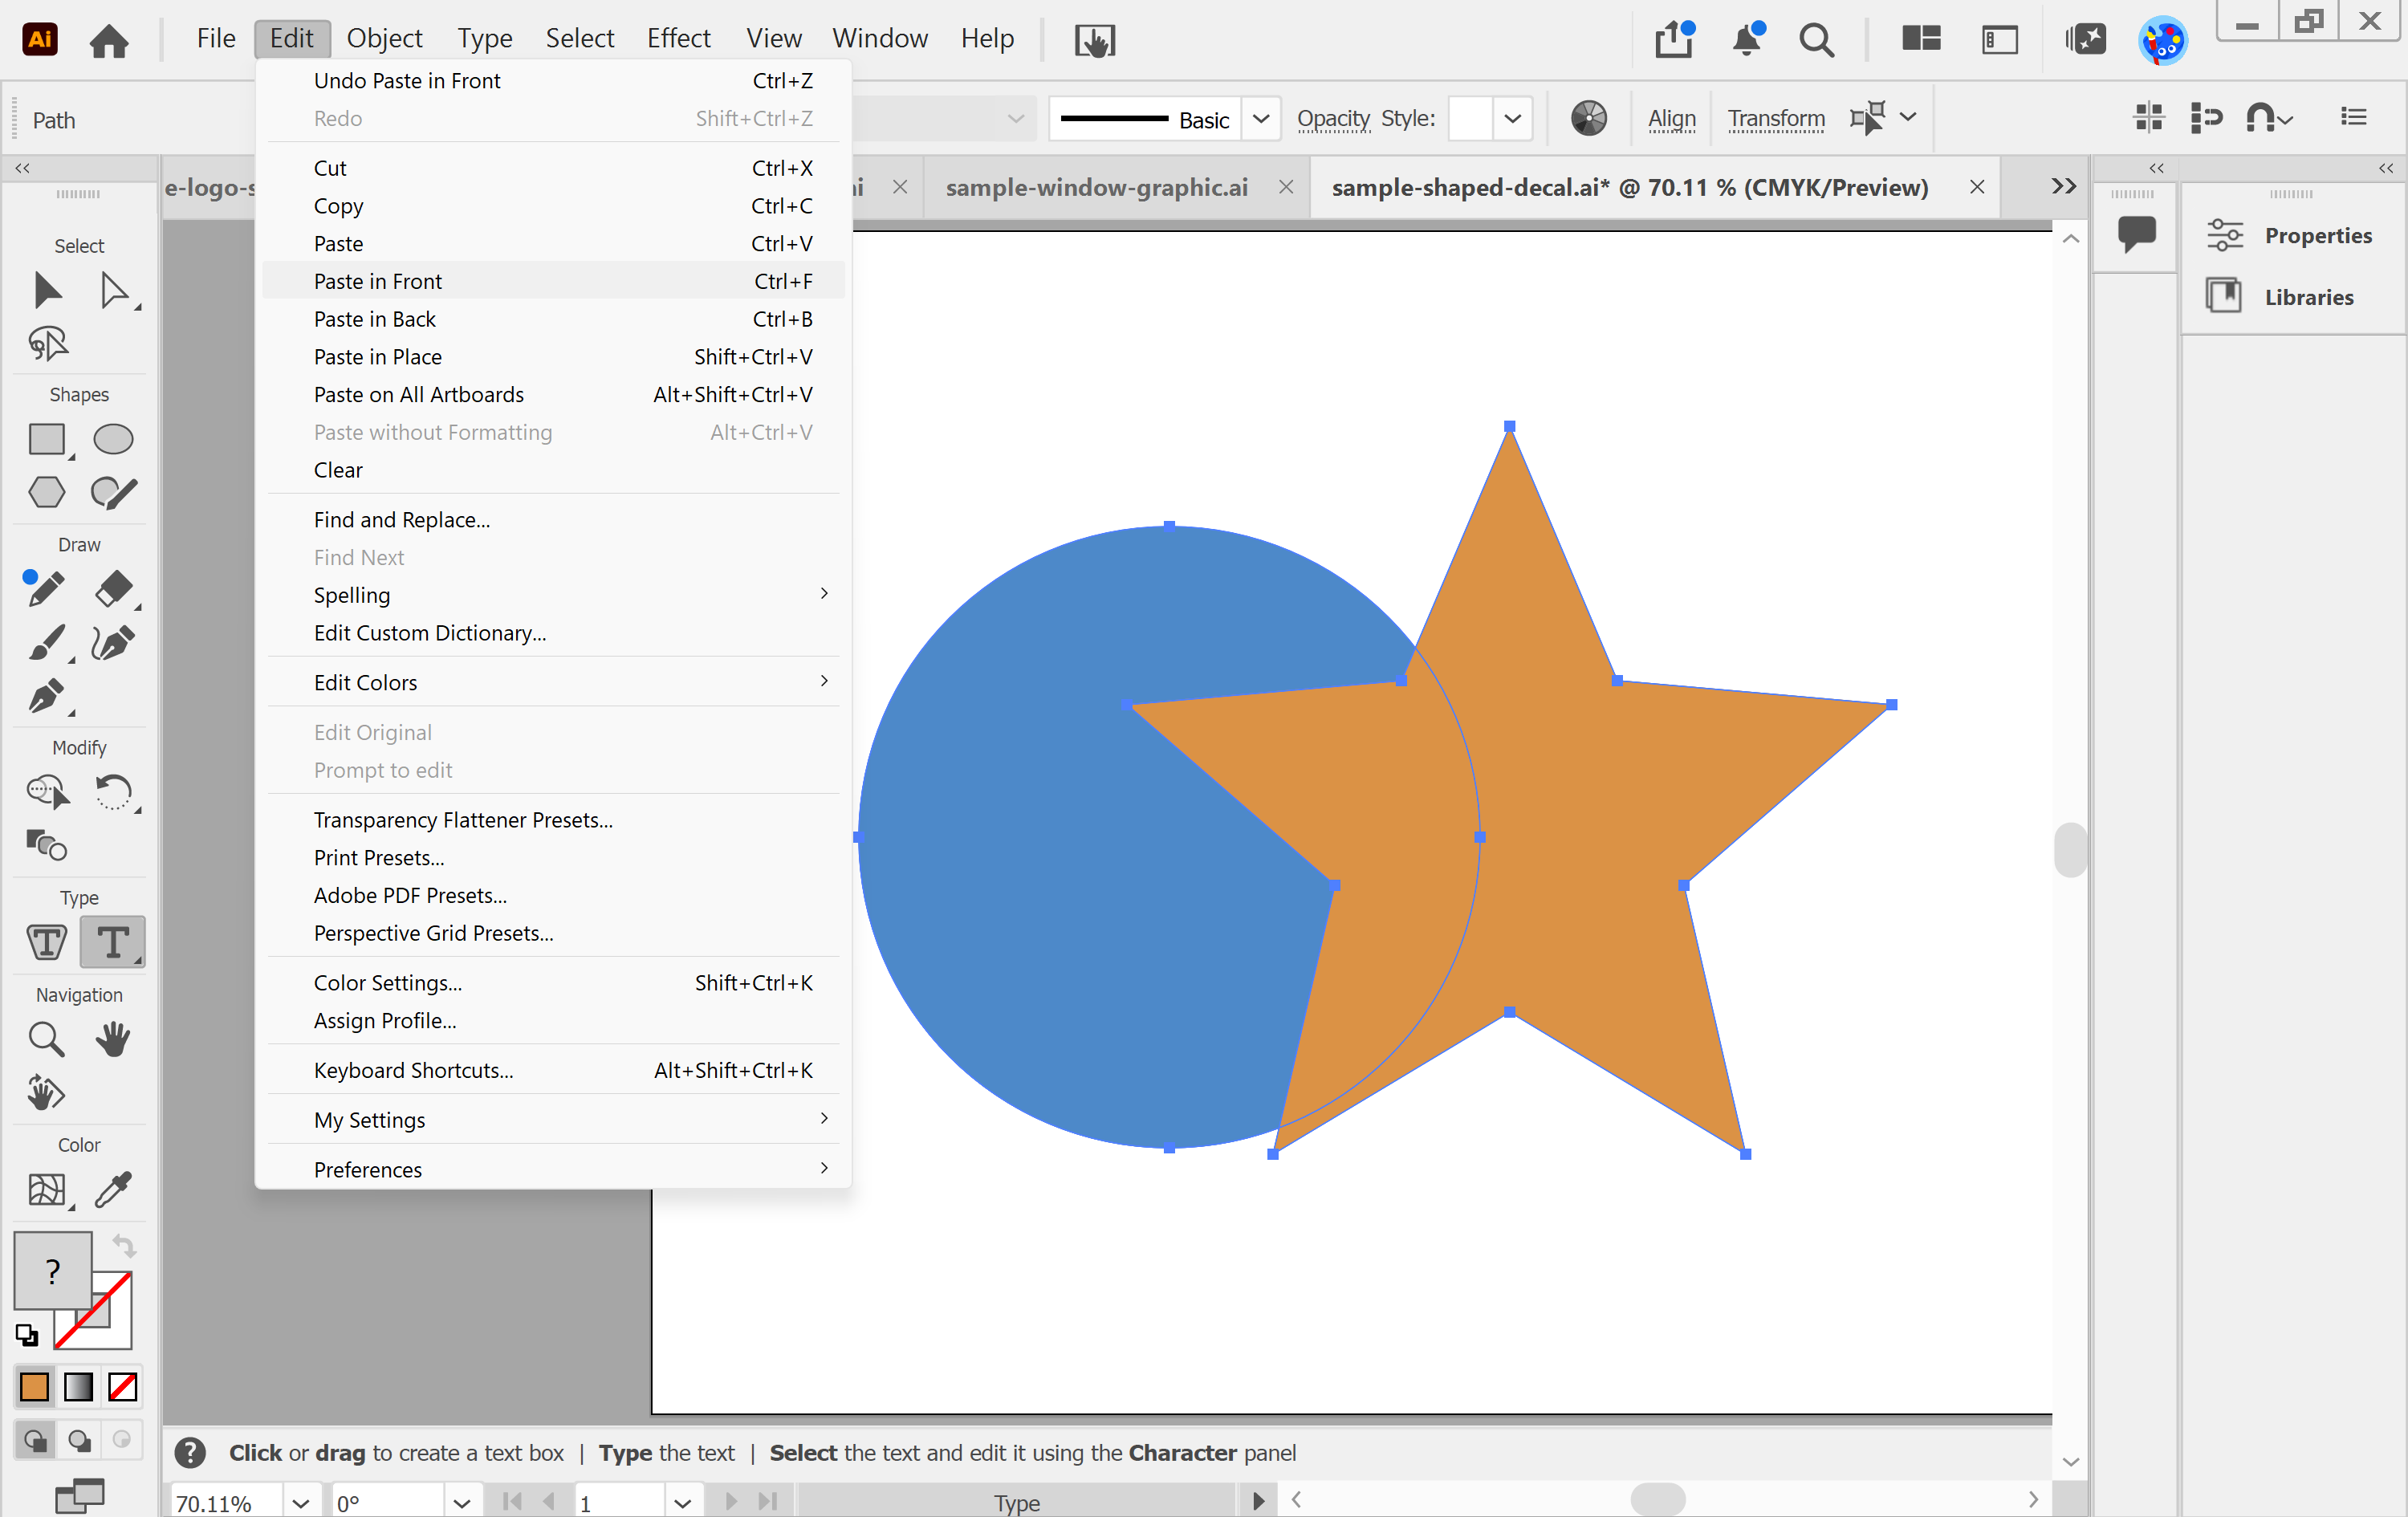
3. Select the shapes that make the outline of your graphic and copy them (Edit > Copy). Then in the main menu, go to Edit > Paste in Front, so the copy sits exactly on top of the artwork.
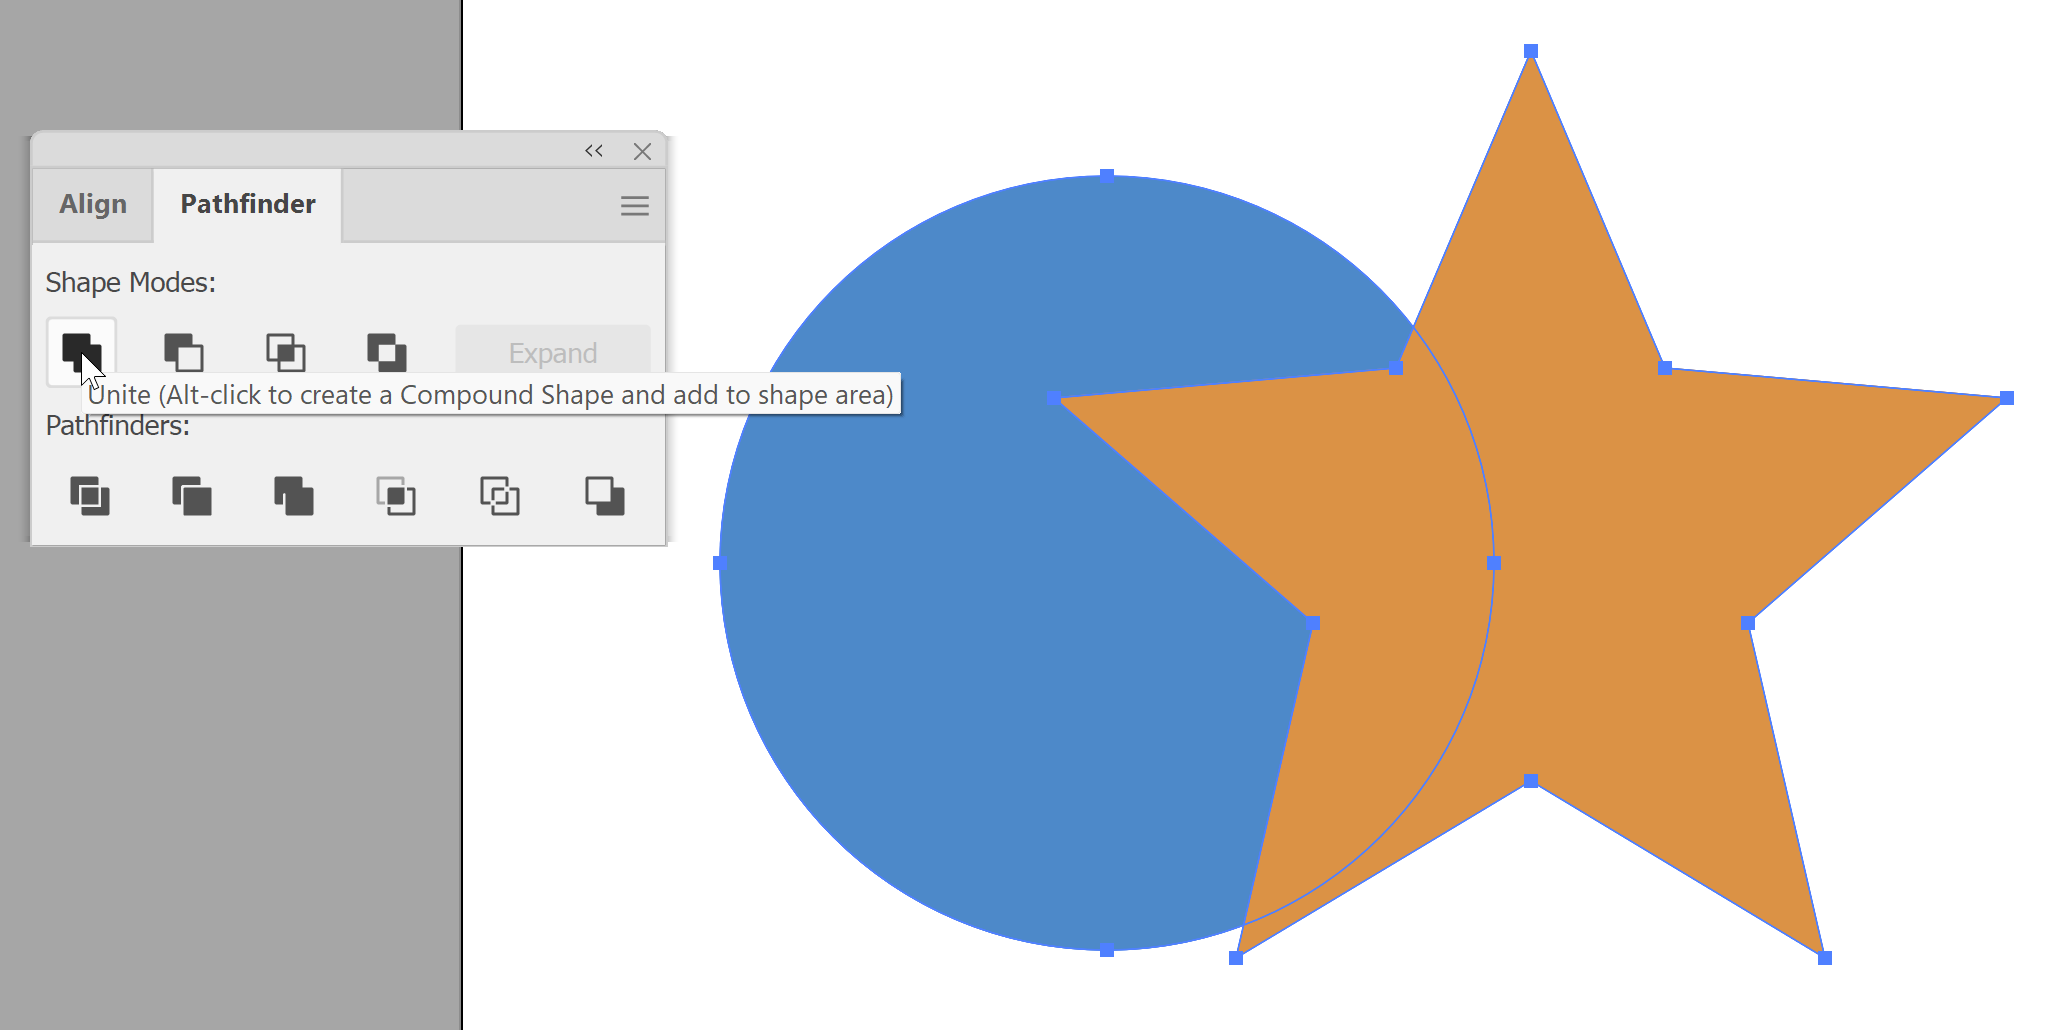
4. Merge the copies into one outline. In the main menu, go to Window > Pathfinder, then click Unite in the Shape Modes section.
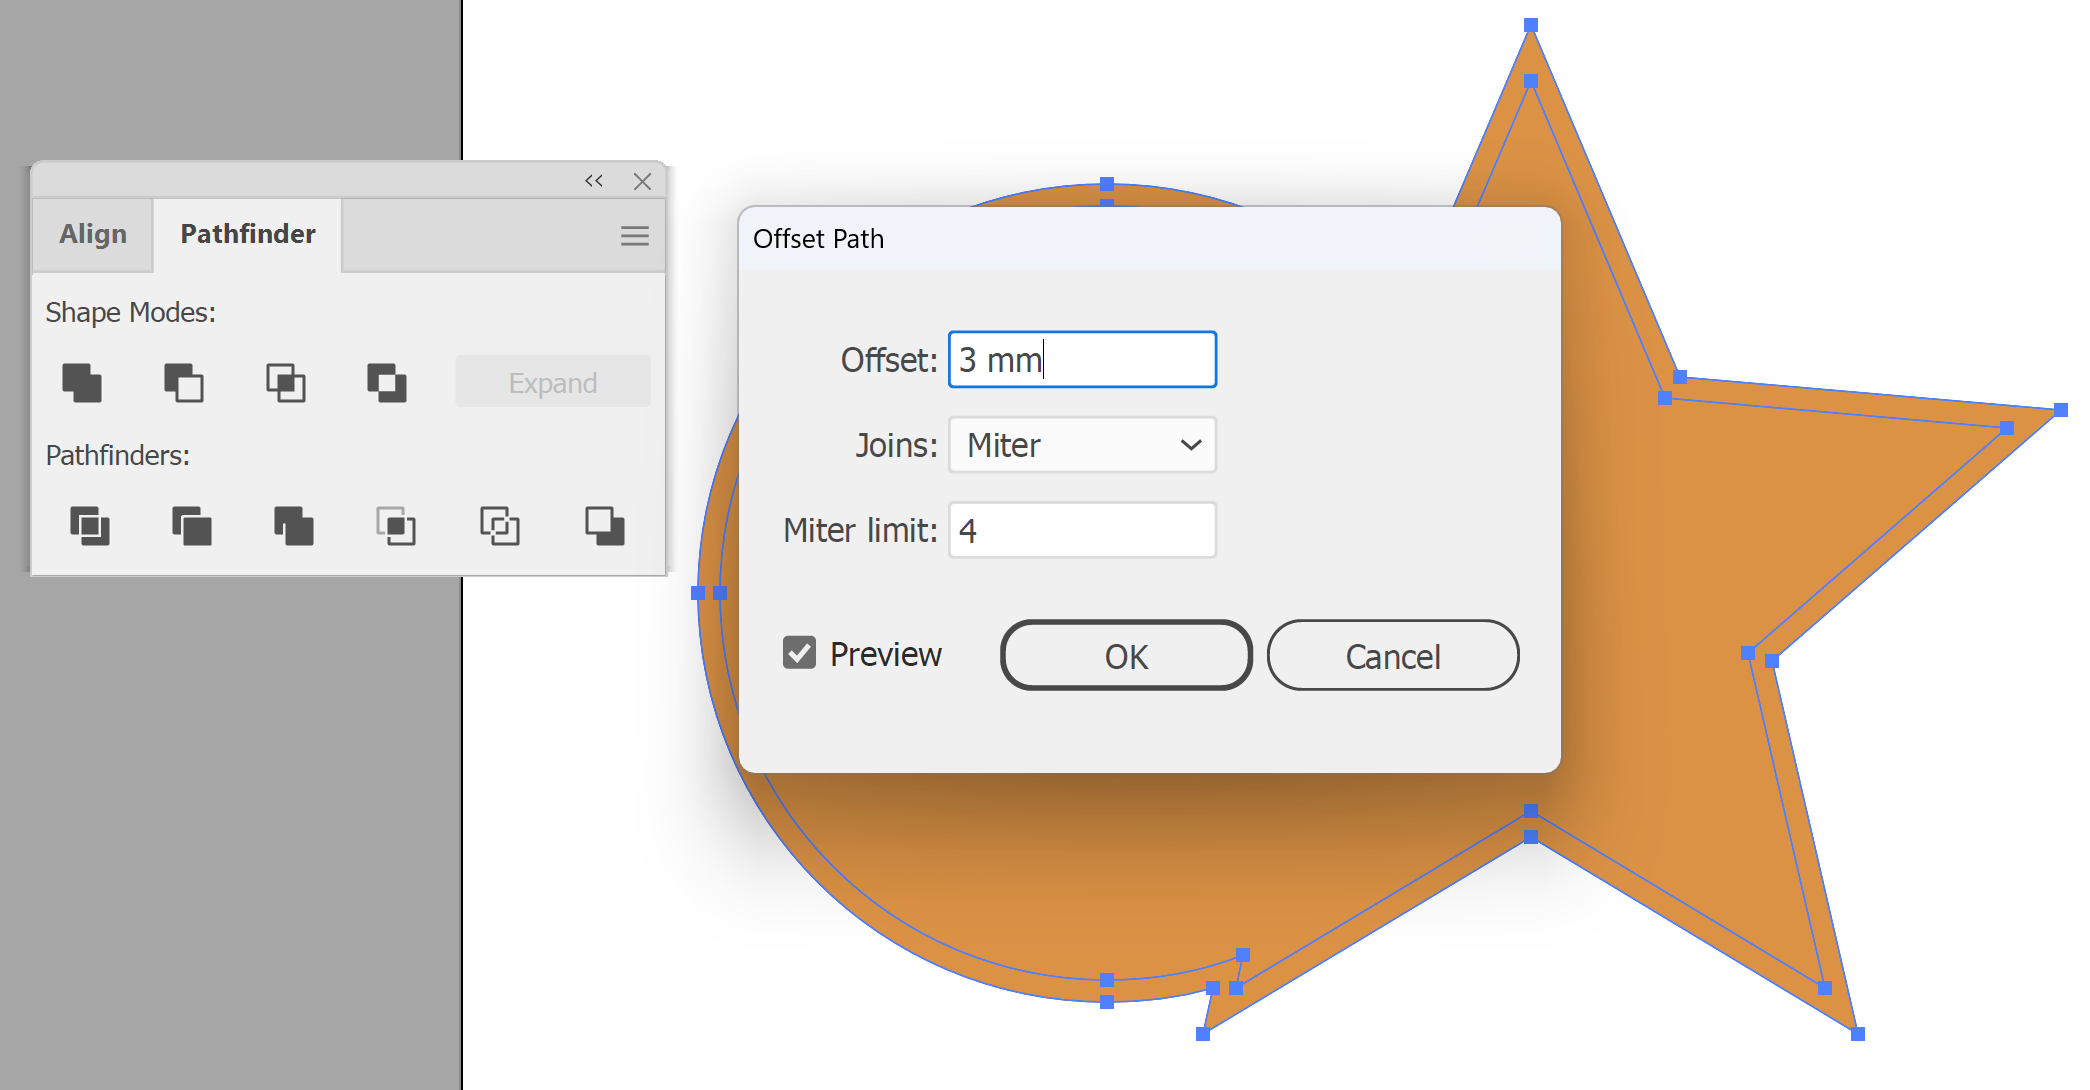
5. Move the cut line out from the artwork. With the united shape selected, go to Object > Path > Offset Path. In the Offset Path dialog box, enter a positive Offset value (3mm in our example) to place the new path outside the artwork, then click OK. Delete the united shape inside it, so only the new offset path remains.
Note: Offset Path makes a duplicate, which is why the united shape needs deleting. If you want the cut to follow the artwork's edge exactly, skip this step and use the united shape as the cut line.
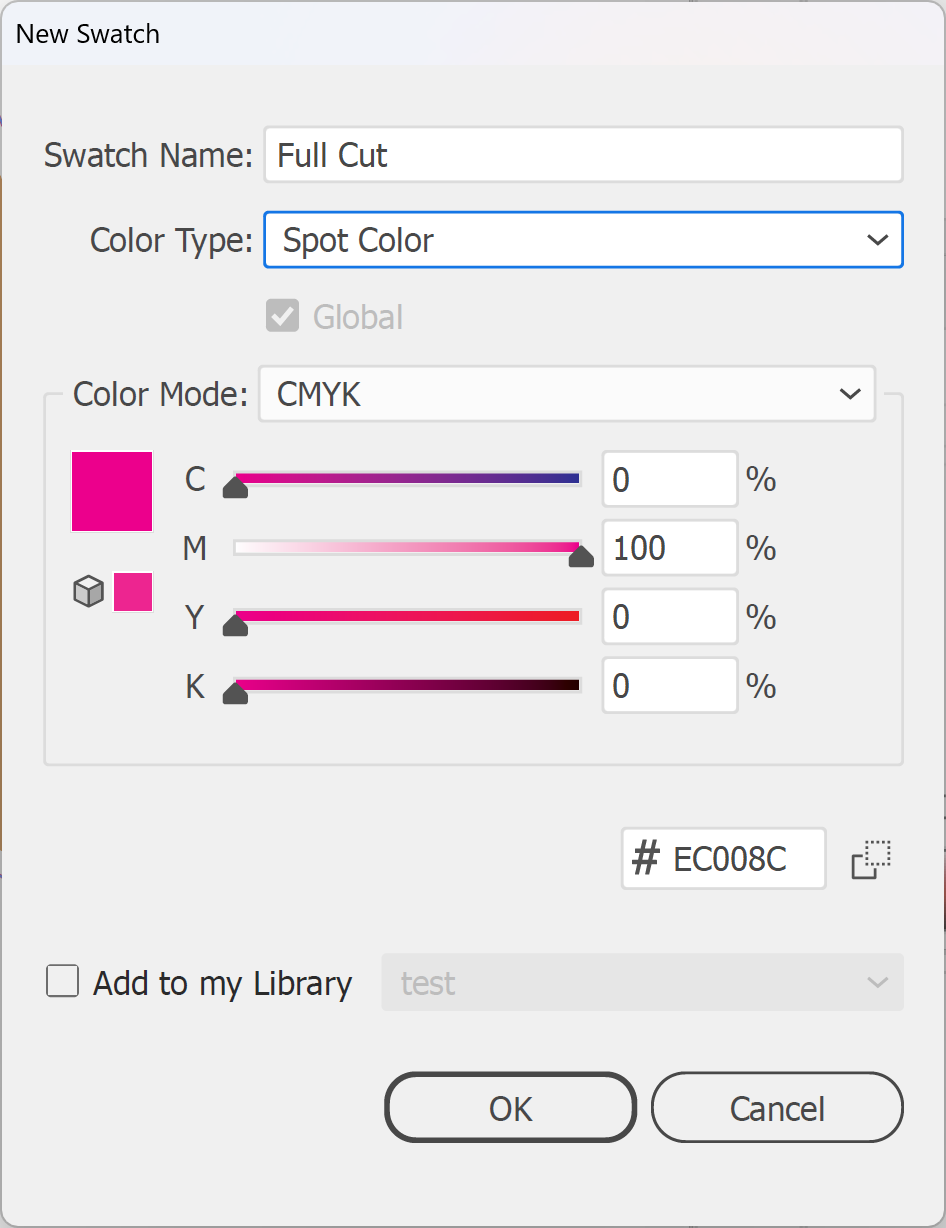
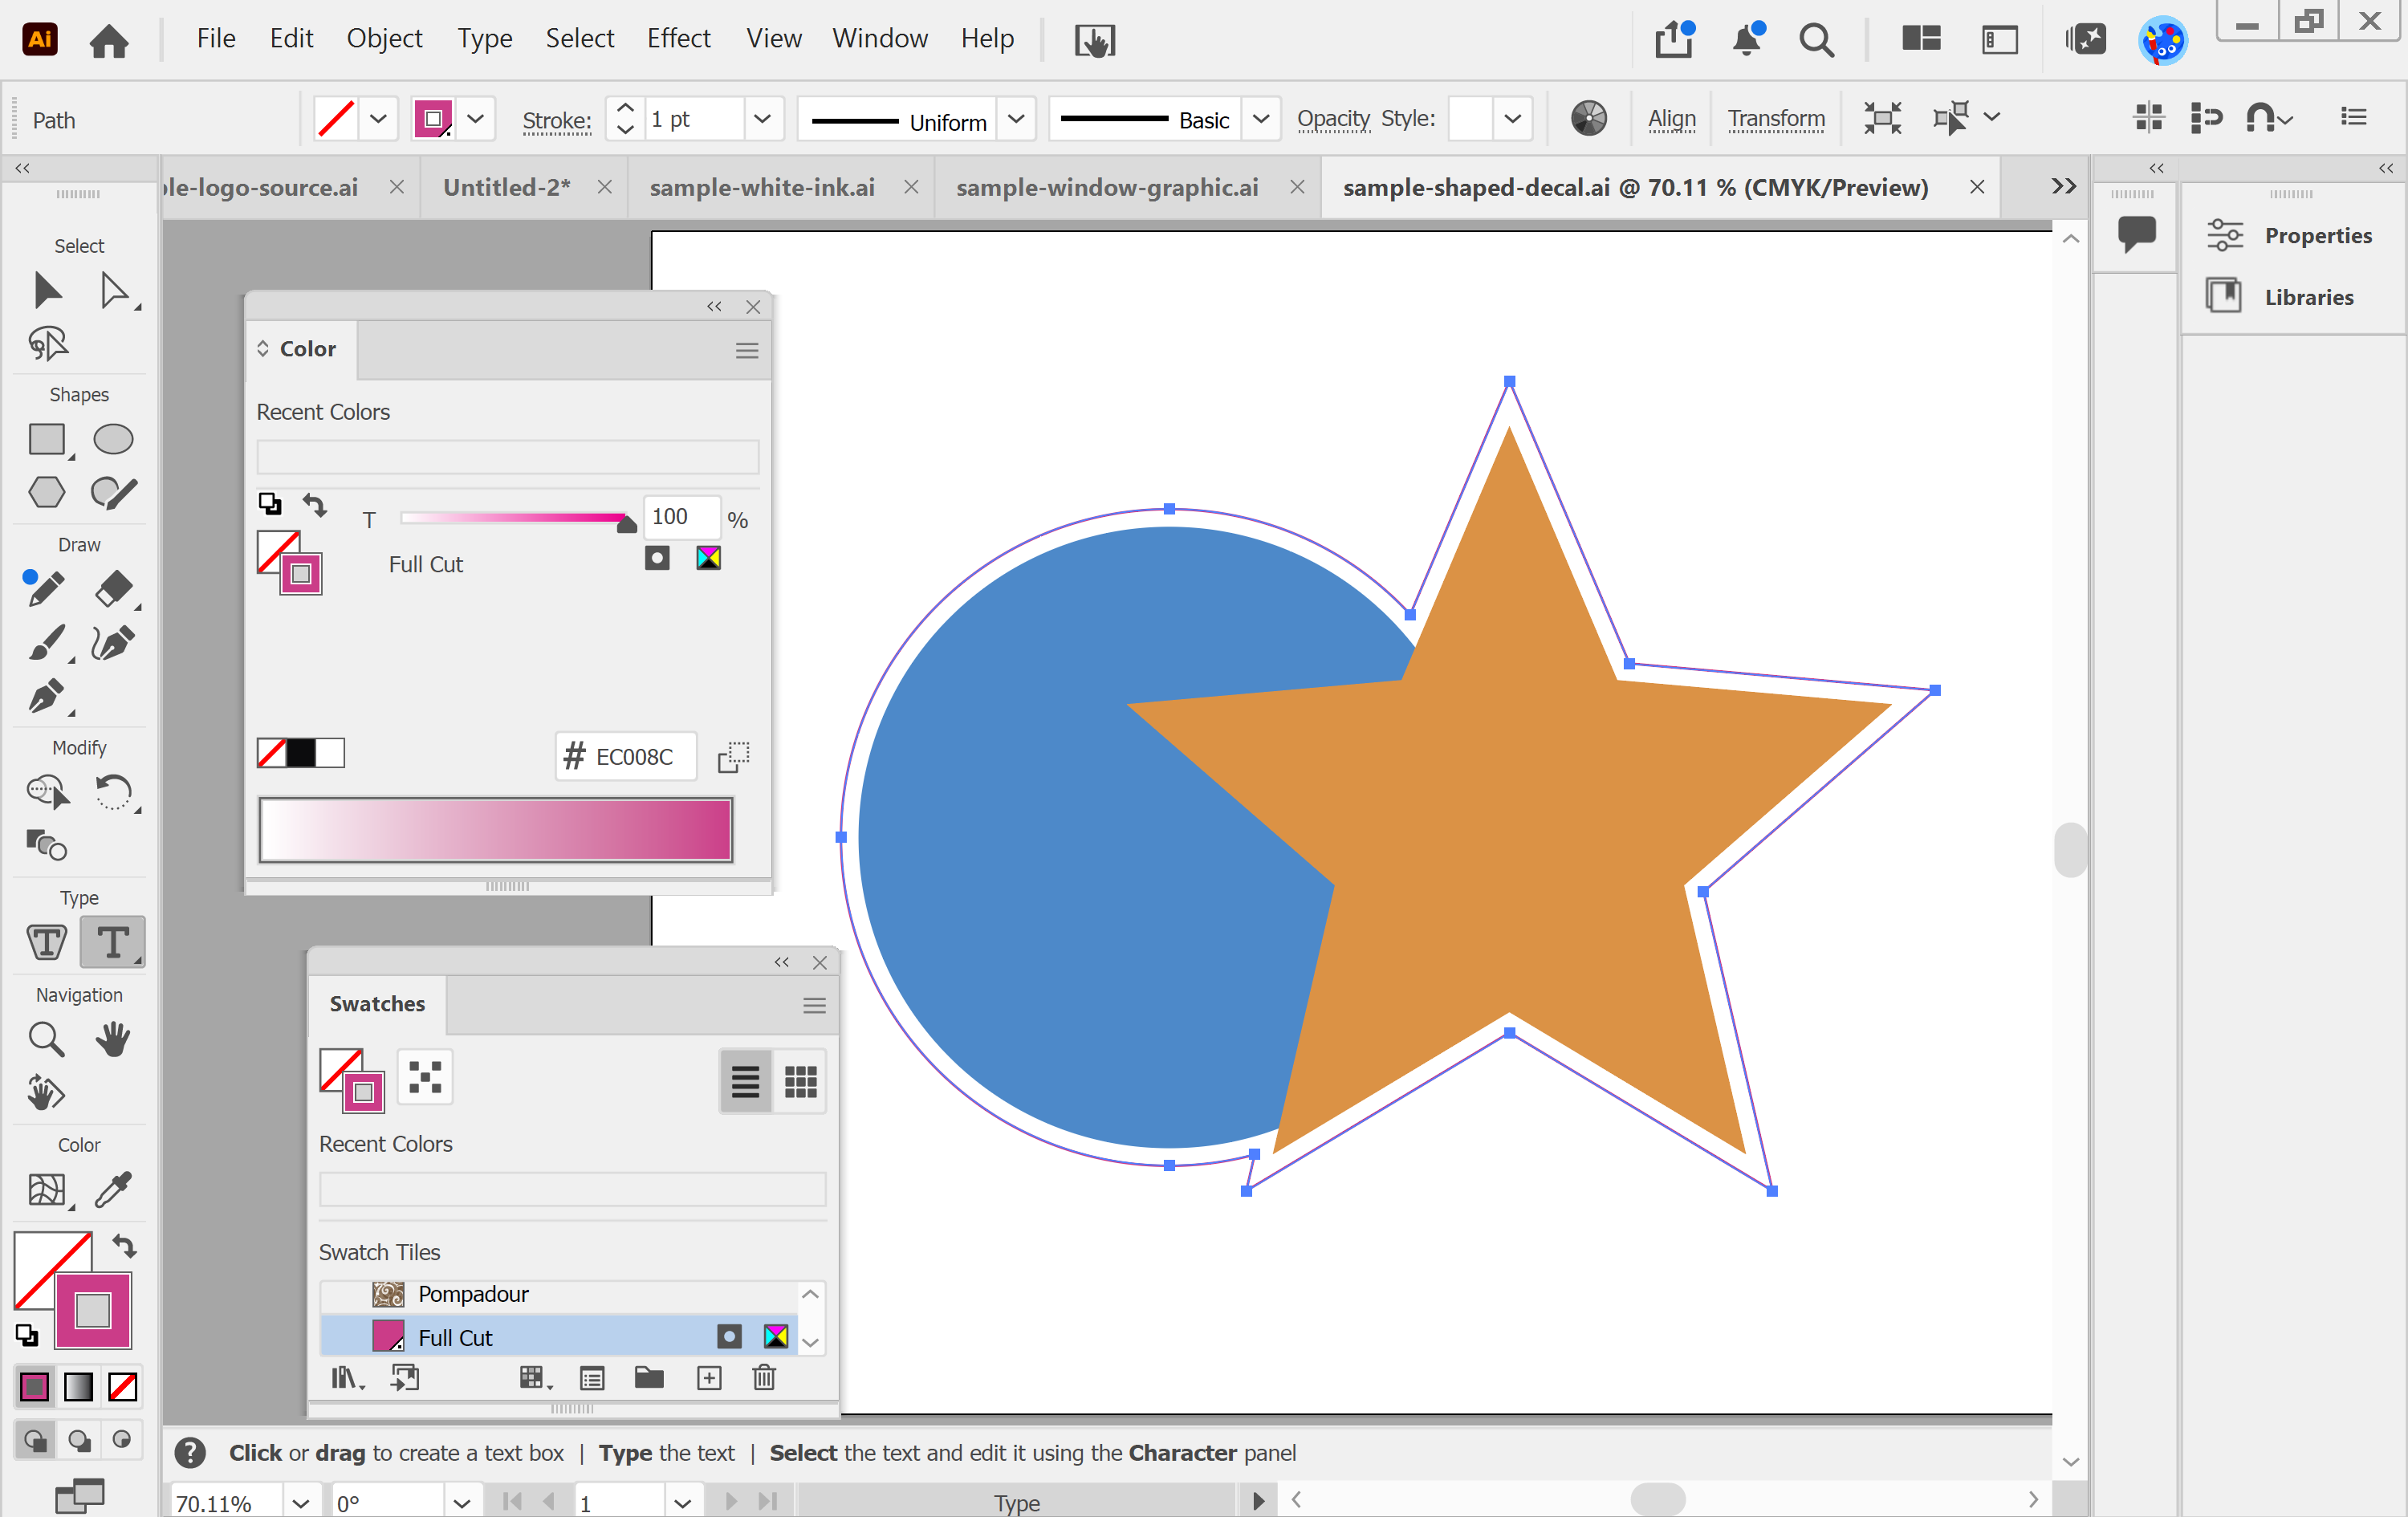
6. Create a spot colour swatch for the cut line. In the main menu, go to Window > Swatches and click the New Swatch icon. In the New Swatch dialog box, name the swatch Full Cut, choose Spot Color from the Color Type dropdown, and click OK.
7. Apply the swatch to the offset path as a stroke, with no fill. Select the path, make the Stroke box active in the Tools panel and click the Full Cut swatch, then set the Fill to None.
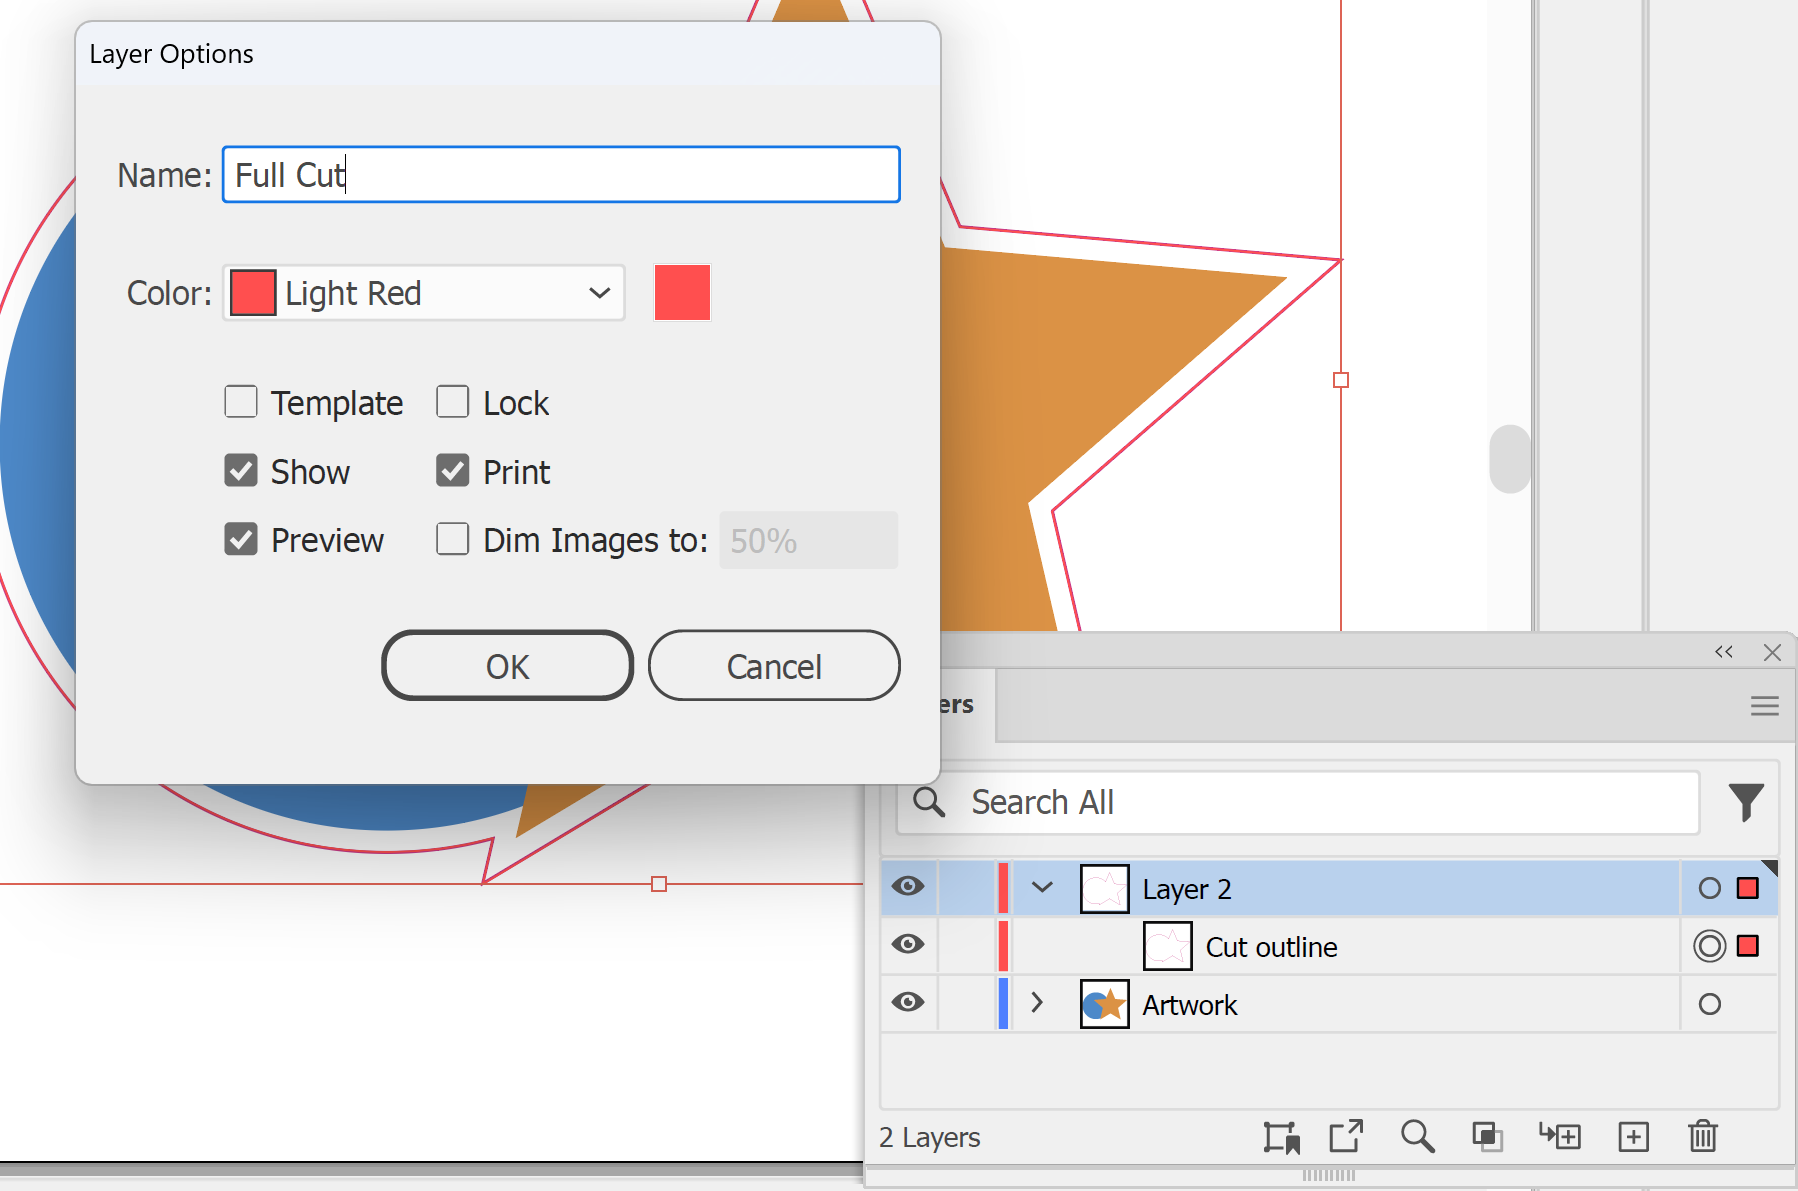
8. Put the cut line on its own layer. In the main menu, go to Window > Layers. Click the Create New Layer button at the bottom of the Layers panel. Double-click the new layer's thumbnail and, in the Layer Options dialog box, enter Full Cut as the Name. Then, with the offset path still selected, drag the small coloured square (the selected-art indicator) at the right of its layer's row onto the Full Cut layer.
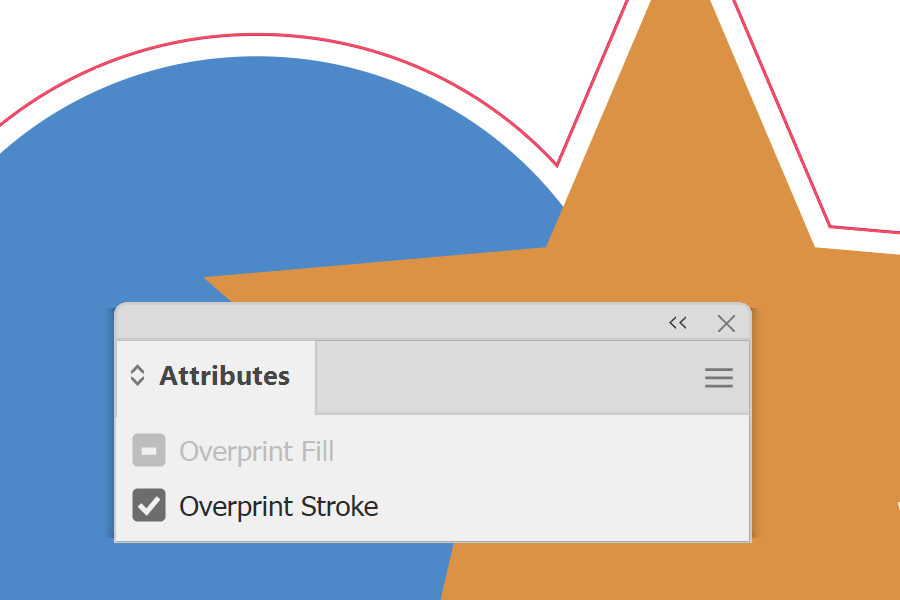
9. Set the stroke to overprint. With the cut line selected, go to Window > Attributes and check Overprint Stroke.
IMPORTANT: By default, a colour printed on top knocks out the area underneath it. Overprint stops the cut line from knocking a thin gap out of your artwork.
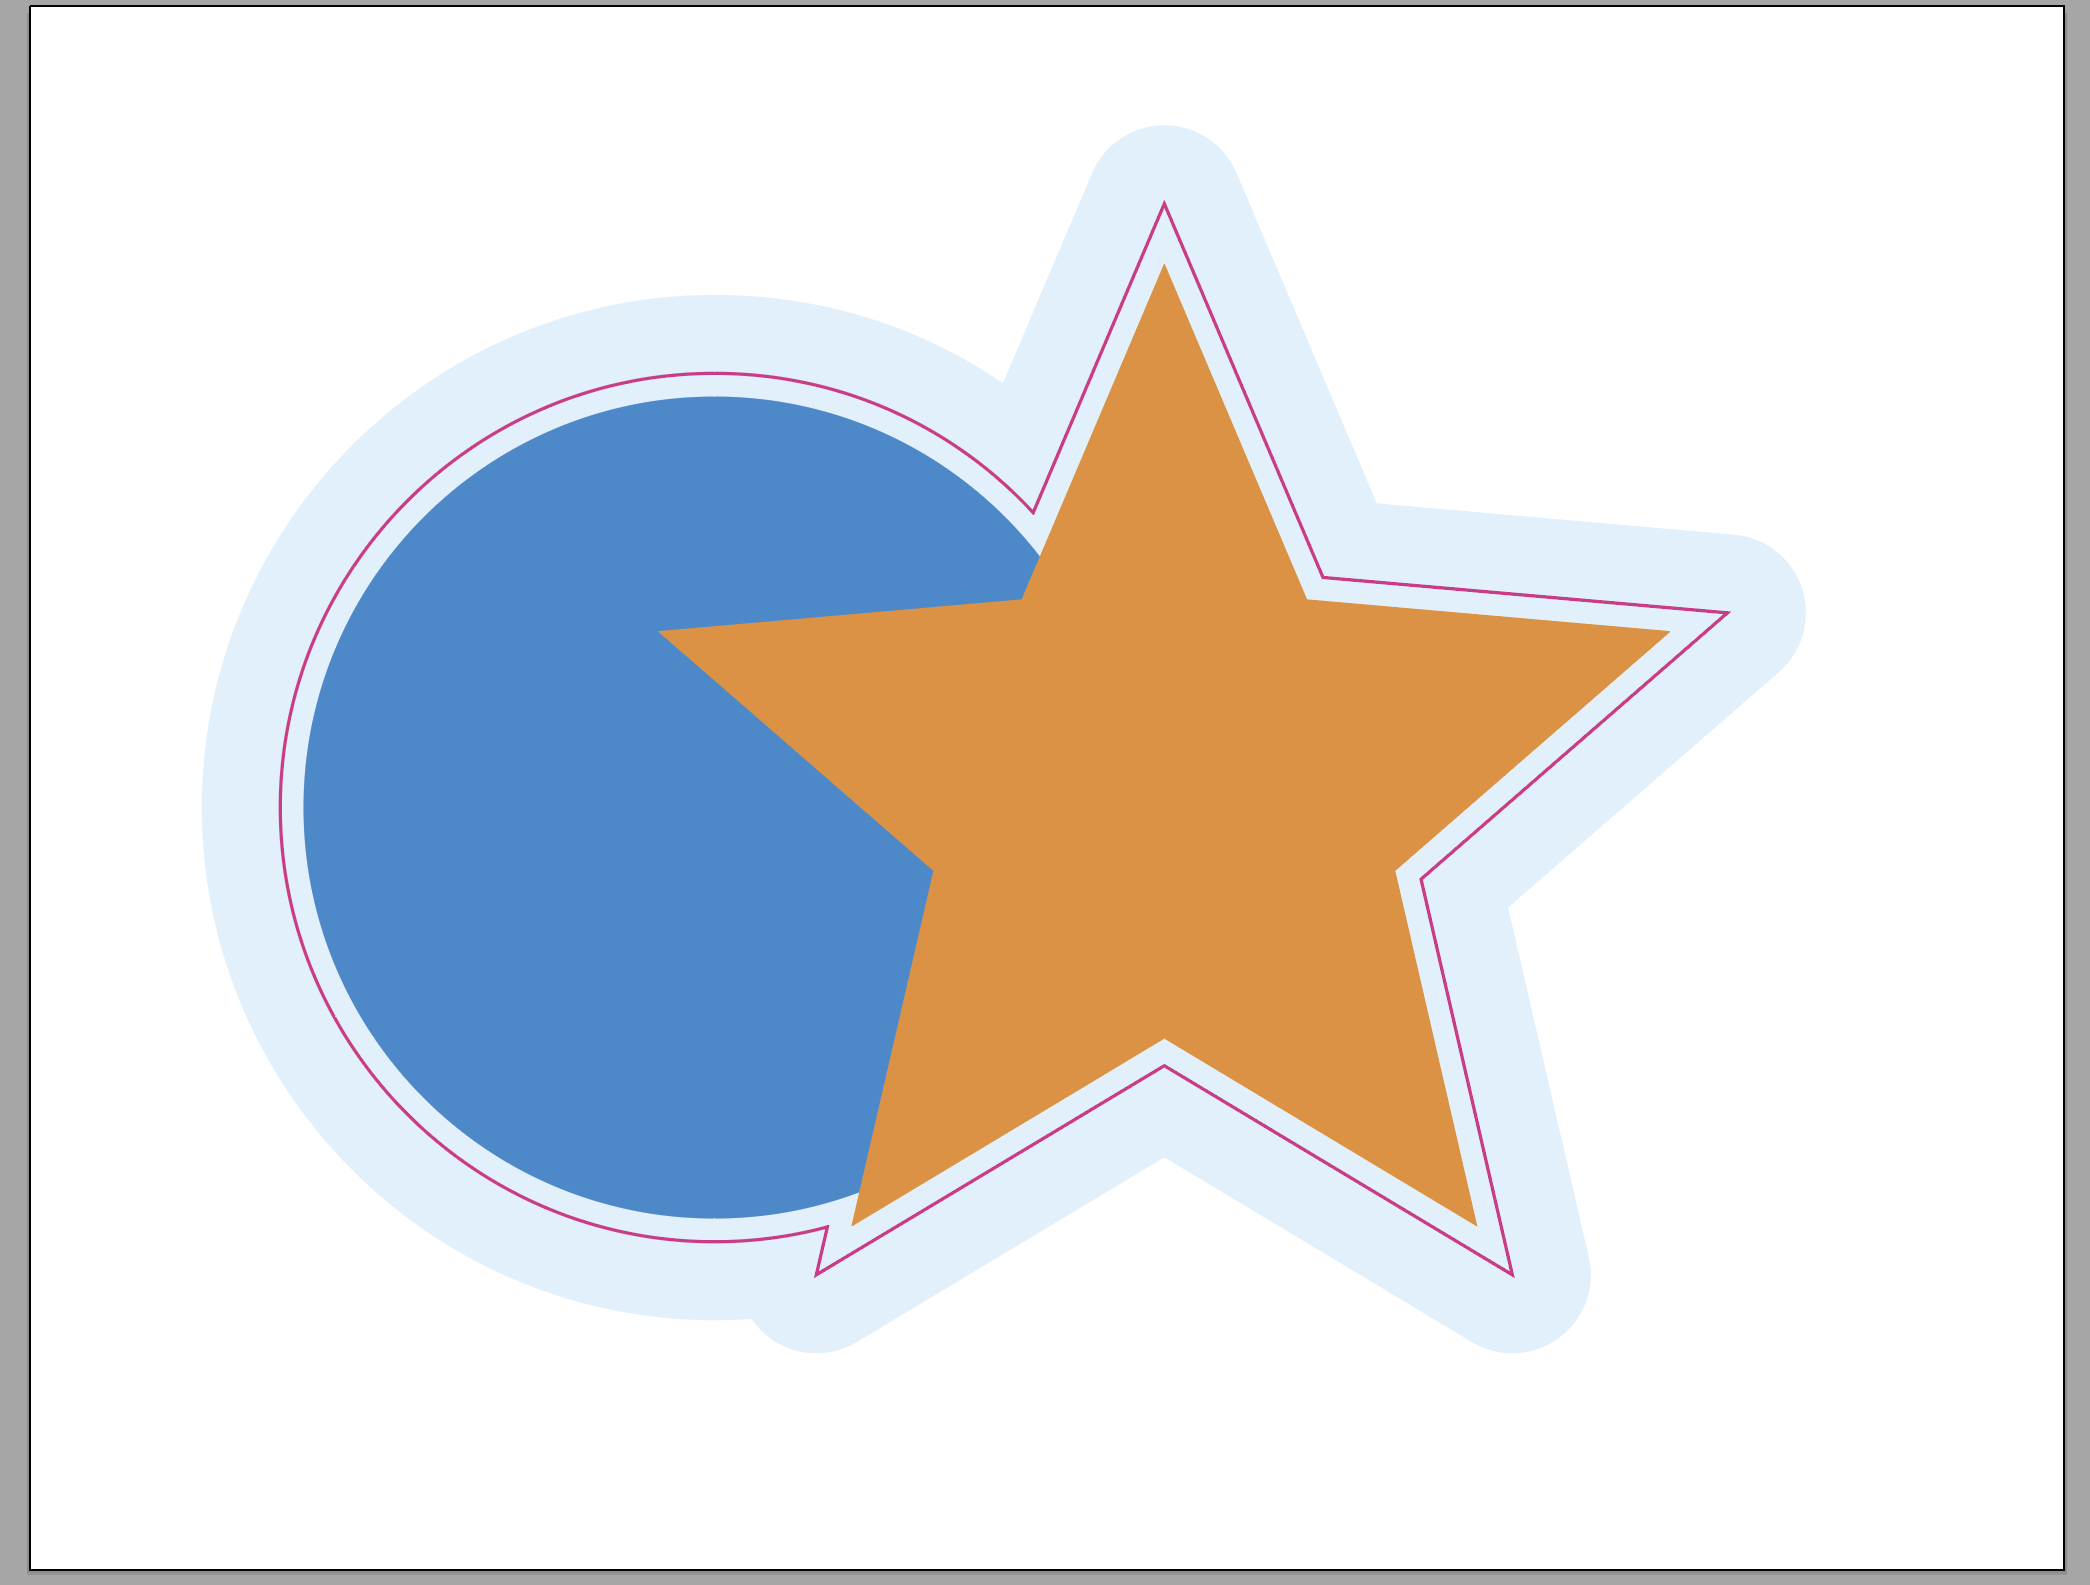
10. Extend the artwork past the cut line. Bleed is the extra image that runs past the trim, so there's no white sliver after cutting. Unless a product template says otherwise, allow 10mm beyond the cut line all the way around.
11. Finally, save your artwork, with the cut line in it, as a high-resolution PDF, check it against our artwork specifications and email it to sales@displays2go.com.au, and you're done!
Need some help?
We're here for you
If you're needing some advice or just a helping hand, please get in touch with our team, by clicking this button. Complete the enquiry form and one of our specialists will call you back as soon as we can.